1. Introduction
This manual provides essential information for the safe and effective operation of your ZENTALITY Mini Projector A10 PLUS. Please read this manual thoroughly before using the product and retain it for future reference.
Product Overview
The ZENTALITY Mini Projector A10 PLUS is a smart projector featuring Android 13, designed for versatile home and outdoor entertainment. It supports 4K and 1080P HD content, offers electric focus, auto vertical keystone correction, and includes dual-band WiFi 6 and Bluetooth 5.1 connectivity. Its compact design and multiple input options make it suitable for various applications.
What's in the Box
- ZENTALITY Mini Projector A10 PLUS
- HDMI Cable
- Power Adapter
- Remote Control
- User Manual (this document)
2. Safety Information
Please observe the following safety precautions to prevent damage to the projector and ensure user safety:
- Do not block the ventilation openings. Ensure adequate airflow around the projector to prevent overheating.
- Avoid direct exposure to the projector lens light. The bright light can cause eye strain or damage.
- Use only the provided power adapter. Using an incompatible adapter may cause fire, electric shock, or damage.
- Keep the projector away from water or other liquids. Do not operate in damp environments.
- Do not attempt to disassemble or repair the projector yourself. Refer all servicing to qualified personnel.
- Place the projector on a stable, level surface to prevent it from falling.
- Keep out of reach of children.
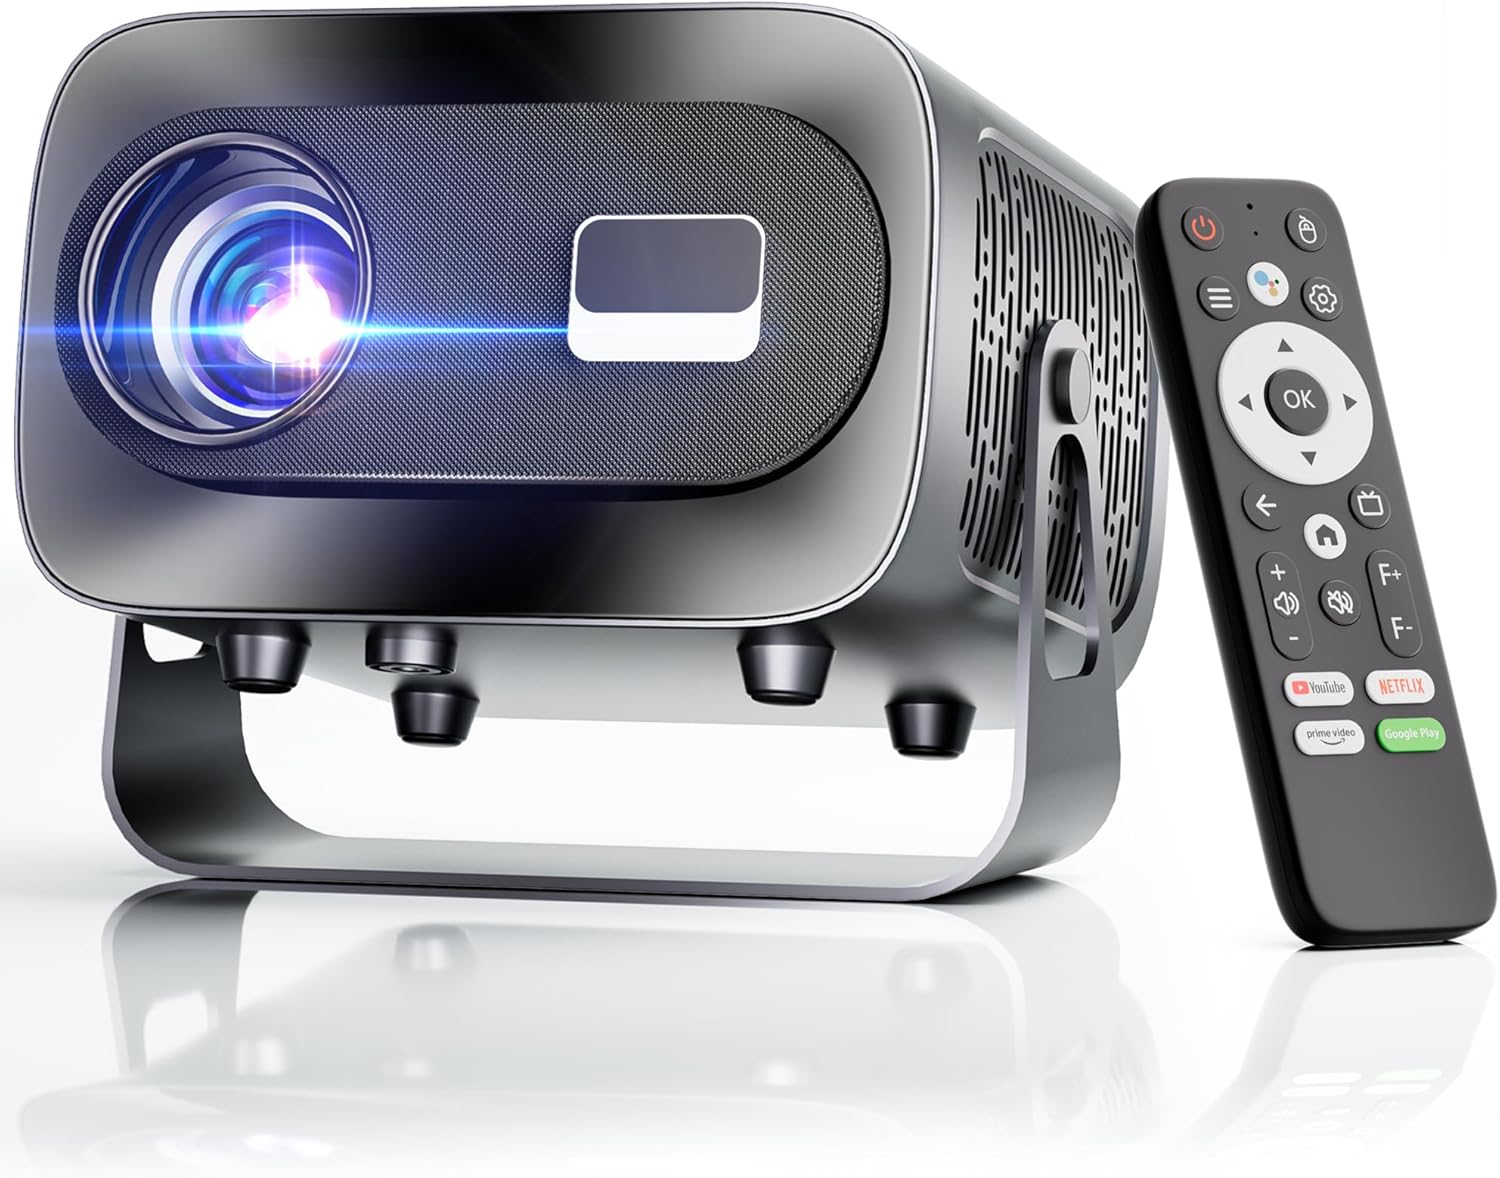
3. Product Components and Ports
Familiarize yourself with the projector's physical features and connectivity options.

Available Ports:
- USB (x2): For connecting USB drives, external storage, or other USB-compatible devices.
- HDMI: For connecting devices such as laptops, gaming consoles, or TV sticks.
- Audio Out (3.5mm Jack): For connecting external speakers or headphones.
- Power Input: For connecting the power adapter.
4. Initial Setup
4.1 Power Connection
- Connect the power adapter to the projector's power input port.
- Plug the power adapter into a wall outlet.
- Press the power button on the projector or remote control to turn it on.
4.2 Remote Control Pairing
Important: The remote control must be paired via Bluetooth before it can operate smoothly within 1-3 meters.
- Ensure the projector is powered on.
- Navigate to the projector's Bluetooth settings (usually found in the 'Settings' menu).
- Select 'Pair new device' or similar option.
- On the remote control, press and hold the designated pairing button (refer to the remote's specific instructions if available, often a combination of 'OK' and 'Volume Down' or a dedicated Bluetooth button).
- Once the remote appears in the projector's Bluetooth device list, select it to complete pairing.

4.3 Placement and Screen Adjustment
The projector offers automatic and electric adjustments for optimal image clarity and alignment.
- Electric Focus: The projector features electric focus for instant clarity. Use the 'F+' and 'F-' buttons on the remote control to fine-tune the image sharpness.
- Auto Vertical Keystone Correction: The projector automatically corrects vertical image distortion up to ±15°. This ensures a rectangular image even if the projector is not perfectly perpendicular to the screen.
- Zoom Function: Adjust the image size from 50% to 100% without moving the projector. This is useful for fitting the projection to your screen size.


5. Operating Instructions
5.1 Android 13 Interface and App Access
The projector runs on Android 13, providing access to a wide range of streaming applications.
- Upon startup, the home screen will display pre-installed applications like Netflix, Prime Video, and YouTube.
- Navigate using the remote control's directional pad and 'OK' button.
- Access the built-in app store (e.g., Google Play Store) to download additional applications.
- Use the voice assistant feature on the remote control for quick app launching or content search.

5.2 WiFi Connectivity
The projector supports dual-band 5G/2.4G WiFi 6 for stable internet access and screen mirroring.
- Go to 'Settings' on the home screen.
- Select 'Network & Internet'.
- Turn on Wi-Fi and select your desired network from the list.
- Enter the password if prompted and connect.
Note: WiFi is required for the first setup or online apps. If you prefer not to connect to WiFi, you can use the projector offline by connecting external devices via the included HDMI cable or the USB port.
5.3 Bluetooth Connectivity
The projector features Bluetooth 5.1 for audio streaming.
- Go to 'Settings' on the home screen.
- Select 'Connected Devices' or 'Bluetooth'.
- Turn on Bluetooth and search for available devices.
- Select your Bluetooth speaker, headphones, or soundbar from the list to pair.
Note: Bluetooth supports audio output only, not video transmission.
5.4 Connecting External Devices
The projector supports various external devices via its HDMI and USB ports.
- HDMI: Connect your laptop, gaming console, or TV stick using an HDMI cable. The projector will automatically detect the input or you may need to select the HDMI source from the input menu.
- USB: Insert a USB drive to play media files directly. The projector's media player will typically launch automatically or can be accessed from the home screen.
5.5 Projection Modes
The projector can be used in various orientations:
- Desktop Projection: Place the projector on a flat surface in front of the screen.
- Ceiling Projection: Mount the projector upside down on the ceiling. Adjust the projection settings in the menu to flip the image.
- Tripod Mounting: Use the 1/4'' screw hole at the bottom to mount the projector on a tripod for flexible positioning.

6. Maintenance
6.1 Cleaning
- Lens: Use a soft, lint-free cloth specifically designed for optical lenses. Do not use abrasive cleaners or cloths.
- Exterior: Wipe the projector's exterior with a soft, dry cloth. For stubborn dirt, a slightly damp cloth can be used, followed by a dry wipe.
- Ventilation Openings: Periodically check and gently clean the ventilation openings to ensure they are free from dust and debris. Use a soft brush or compressed air.
6.2 Cooling System
The projector features an advanced dual-fan cooling system designed for low noise and efficient heat dissipation. To ensure its longevity and stable performance:
- Always ensure the projector has adequate space around its ventilation openings.
- Avoid placing the projector on soft surfaces (e.g., blankets, carpets) that might block airflow.
- Operating the projector in extremely hot or humid environments may affect its performance and lifespan.
7. Troubleshooting
If you encounter issues with your projector, refer to the following common problems and solutions:
| Problem | Possible Cause | Solution |
|---|---|---|
| No power/Projector won't turn on | Power cable not connected; Power outlet faulty | Check power cable connection; Try a different outlet |
| No image/Blank screen | Incorrect input source; Device not connected properly | Select correct input source (HDMI, USB); Reconnect external device |
| Image blurry/Out of focus | Focus not adjusted | Use the 'F+' and 'F-' buttons on the remote for electric focus adjustment |
| Image distorted/Trapezoid shape | Keystone not corrected | The projector has auto vertical keystone correction. Ensure it's on or manually adjust if needed. |
| Remote control not working | Not paired via Bluetooth; Low battery | Pair the remote control via Bluetooth (Section 4.2); Replace remote batteries |
| No sound | Volume too low; Incorrect audio output; Bluetooth not connected | Increase volume; Check audio output settings; Ensure Bluetooth speaker is paired |
| WiFi connection issues | Incorrect password; Router issues; Out of range | Verify WiFi password; Restart router; Move projector closer to router |
8. Specifications
Detailed technical specifications for the ZENTALITY Mini Projector A10 PLUS:
- Brand: ZENTALITY
- Model Number: A10 PLUS
- Item Weight: 3.1 pounds
- Product Dimensions: 7.4 x 6.22 x 4.8 inches
- Operating System: Android 13
- Display Resolution: 1920 x 1080 (Native 1080P Full HD)
- 4K Support: Yes
- Brightness: 350 ANSI Lumens
- Contrast Ratio: 10,000:1
- Connectivity Technology: 3.5mm Jack, Bluetooth 5.1, HDMI, USB (x2), Wi-Fi 6 (2.4G/5G)
- Special Features: Built-In Media Player, Built-In Speaker, Electric Focus, Portable, Wi-Fi Ready, Auto Vertical Keystone Correction
- Recommended Uses: Business, Education, Gaming, Home Cinema
- Lamp Lifespan: Up to 100,000 hours

9. Warranty and Support
ZENTALITY is committed to providing quality products and customer satisfaction.
- Quality Guarantee: 360-Day Quality Guarantee.
- Returns: 180-Day Free Returns.
- Technical Support: Lifetime Technical Support.
- Customer Service: 24/7 Fast Customer Service.
For support inquiries, please refer to the contact information provided on the ZENTALITY official website or your purchase platform.


