1. Introduction
Thank you for choosing the SHELIKI D60S Robot Vacuum and Mop Combo. This device is designed to provide efficient and intelligent cleaning for your home, combining powerful vacuuming with effective mopping. Featuring advanced LiDAR navigation, smart app control, and multiple cleaning modes, the D60S ensures a thorough and customized cleaning experience. Please read this manual carefully before use to ensure proper operation and maintenance.

Image 1.1: The SHELIKI D60S Robot Vacuum and Mop Combo.
2. Important Safety Instructions
To reduce the risk of injury or damage, read these safety instructions carefully and keep them for future reference.
- This appliance can be used by children aged 8 years and above and persons with reduced physical, sensory or mental capabilities or lack of experience and knowledge if they have been given supervision or instruction concerning use of the appliance in a safe way and understand the hazards involved.
- Children should be supervised to ensure they do not play with the appliance.
- Cleaning and user maintenance shall not be made by children without supervision.
- Use only the original power adapter provided by the manufacturer.
- Do not use the appliance in wet environments or near water.
- Before cleaning, remove any loose items, power cords, small objects, or fragile items from the floor.
- Do not operate the robot on elevated surfaces without physical barriers.
- Ensure the charging station is placed against a wall on a level surface.
- Do not use the robot to pick up large debris, liquids, burning or smoking objects.
3. Package Contents
Verify that all components are present and in good condition upon unpacking.

Image 3.1: Visual representation of items included in the SHELIKI D60S package.
- Robot Vacuum
- Charging Station
- 2-in-1 Dust & Water Bin
- User Manual
- Mop Board & Cloth
- Side Brush (4x)
- HEPA Filter (2x)
- Cleaning Brush
4. Product Overview
4.1 Robot Components
Familiarize yourself with the main parts of your SHELIKI D60S.
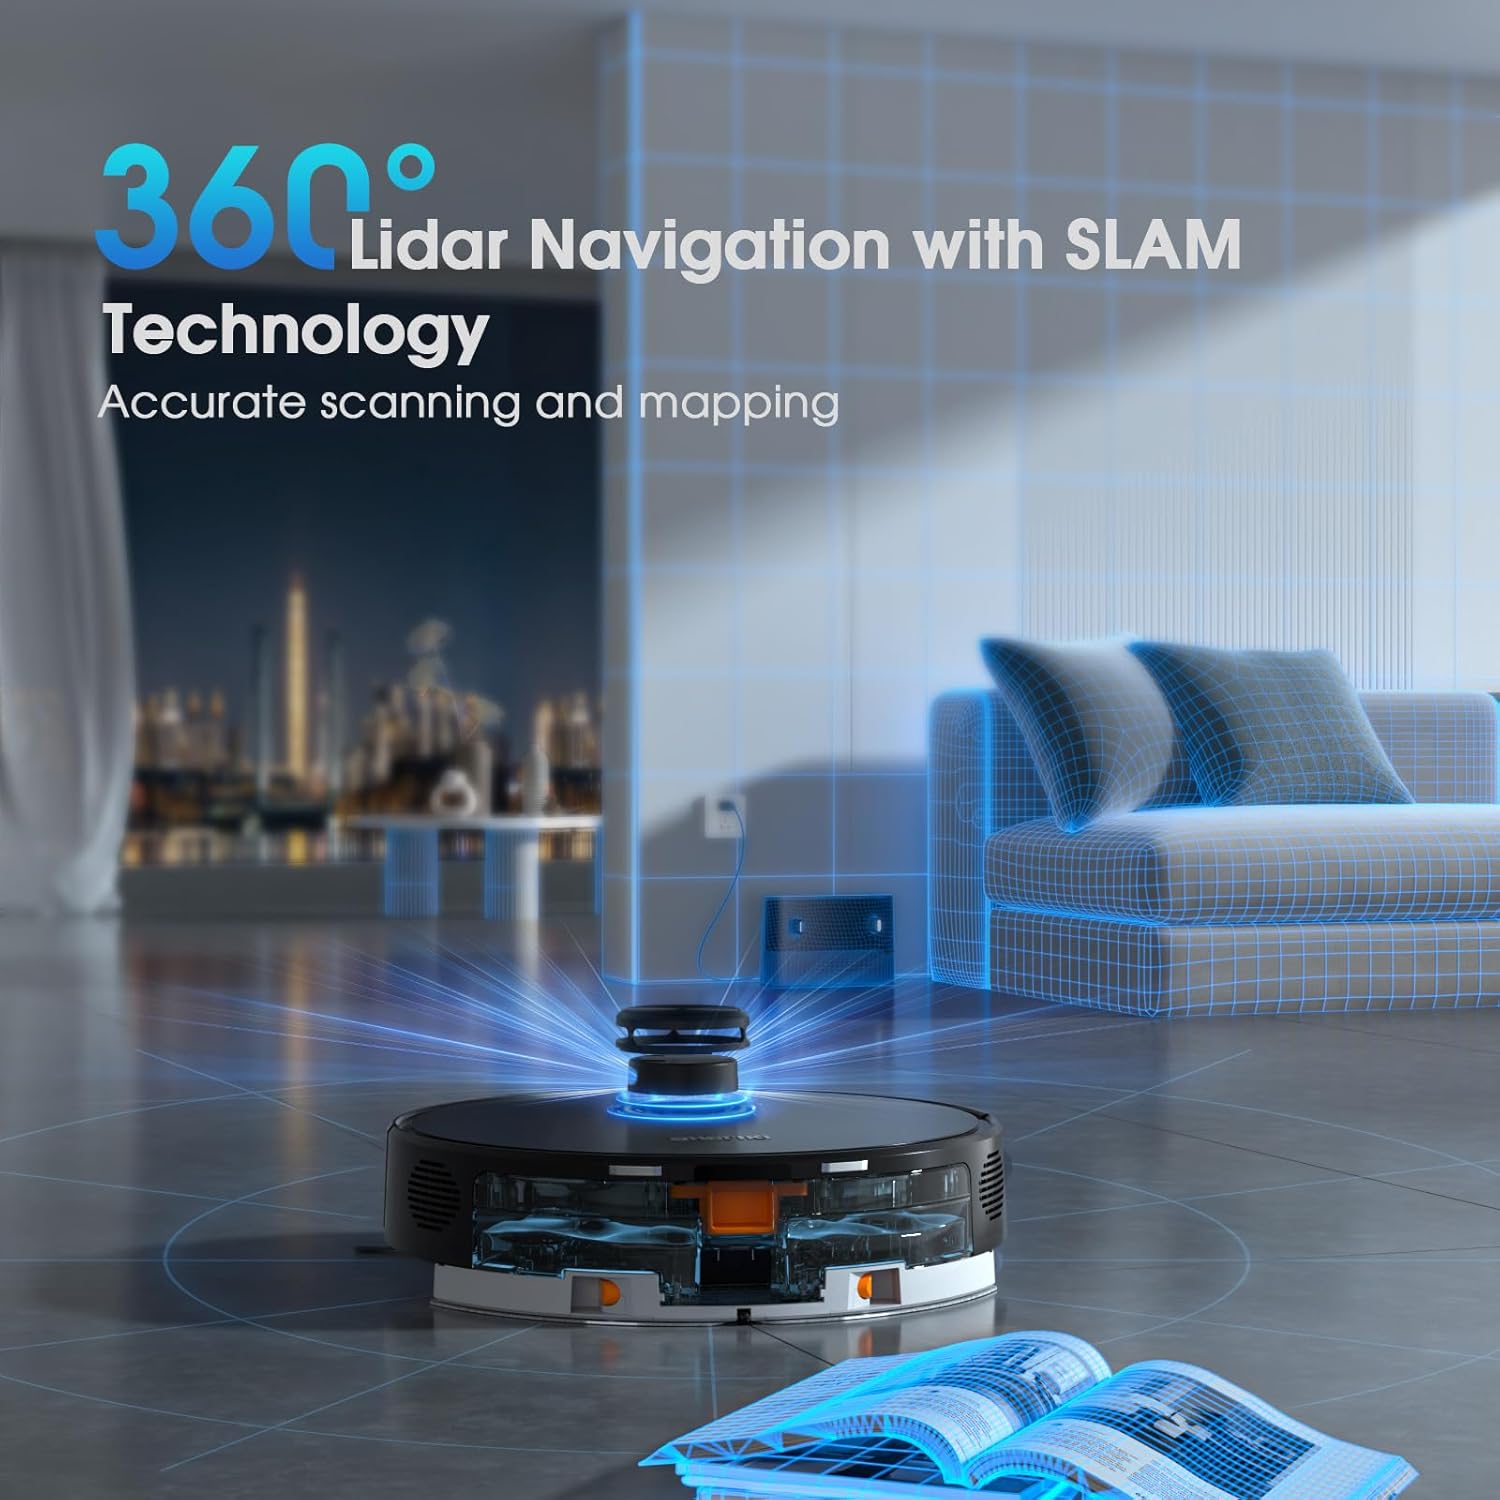
Image 4.1: Top view of the robot, highlighting the LiDAR navigation sensor.
- LiDAR Sensor: For 360° real-time mapping and navigation.
- Control Buttons: Power/Clean and Recharge.
- Bumper: Detects obstacles and walls.
- Charging Contacts: Connects to the charging station.
- Dust & Water Bin: Collects debris and holds water for mopping.
- Main Brush: For deep cleaning carpets and hard floors.
- Side Brushes: Sweeps debris from edges and corners.
- Sensors: Anti-drop, anti-collision, and wall-following sensors.
5. Setup Guide
5.1 Preparing the Robot
- Remove all protective films and packaging materials from the robot and charging station.
- Attach the side brushes by pressing them onto the posts until they click into place.
- Ensure the 2-in-1 dust & water bin is correctly inserted.
5.2 Placing the Charging Station
Select an appropriate location for the charging station to ensure optimal performance.
- Place the charging station against a wall in an open area.
- Ensure there is at least 0.5 meters (1.6 feet) of clear space on both sides and 1.5 meters (4.9 feet) in front of the charging station.
- Connect the power adapter to the charging station and plug it into a wall outlet.
5.3 Initial Charging
For first-time use, fully charge the robot.
- Place the robot onto the charging station, ensuring the charging contacts align.
- The indicator light on the robot will show charging status. Allow approximately 4-5 hours for a full charge.

Image 5.1: The robot automatically returns to its charging station when battery is low and resumes cleaning when charged.
5.4 App Connection (Tuya Smart App)
To unlock full features and control, download and connect the Tuya Smart App.
- Download the 'Tuya Smart' app from your mobile app store.
- Register or log in to your account.
- Ensure your phone is connected to a 2.4GHz Wi-Fi network. (5GHz Wi-Fi is not supported).
- Follow the in-app instructions to add your SHELIKI D60S device. This typically involves pressing and holding the robot's power button until a voice prompt indicates pairing mode.

Image 5.2: The Tuya Smart App interface for controlling the robot vacuum.
6. Operating Instructions
6.1 Power On/Off
- Power On: Press and hold the Power button for a few seconds until the indicator light turns on.
- Power Off: Press and hold the Power button for a few seconds until the indicator light turns off.
6.2 Cleaning Modes
The D60S offers 6 specialized cleaning modes, accessible via the Tuya Smart App.
- Zigzag Mode: Standard cleaning pattern for general coverage.
- Auto Mode: Robot intelligently plans its route for comprehensive cleaning.
- Edge Mode: Cleans along walls and furniture edges.
- Spot Mode: Concentrates cleaning on a specific small area.
- Scheduled Mode: Set specific cleaning times and days.
- Manual Mode: Control the robot's movement directly via the app.

Image 6.1: The app allows for multi-floor mapping, setting no-go zones, and scheduled cleanups.
6.3 Suction Power and Water Flow Adjustment
Adjust cleaning intensity through the app.
- Suction Levels: Quiet (1300Pa), Standard (2500Pa), Max (4000Pa).
- Water Flow: Three adjustable levels for mopping intensity.
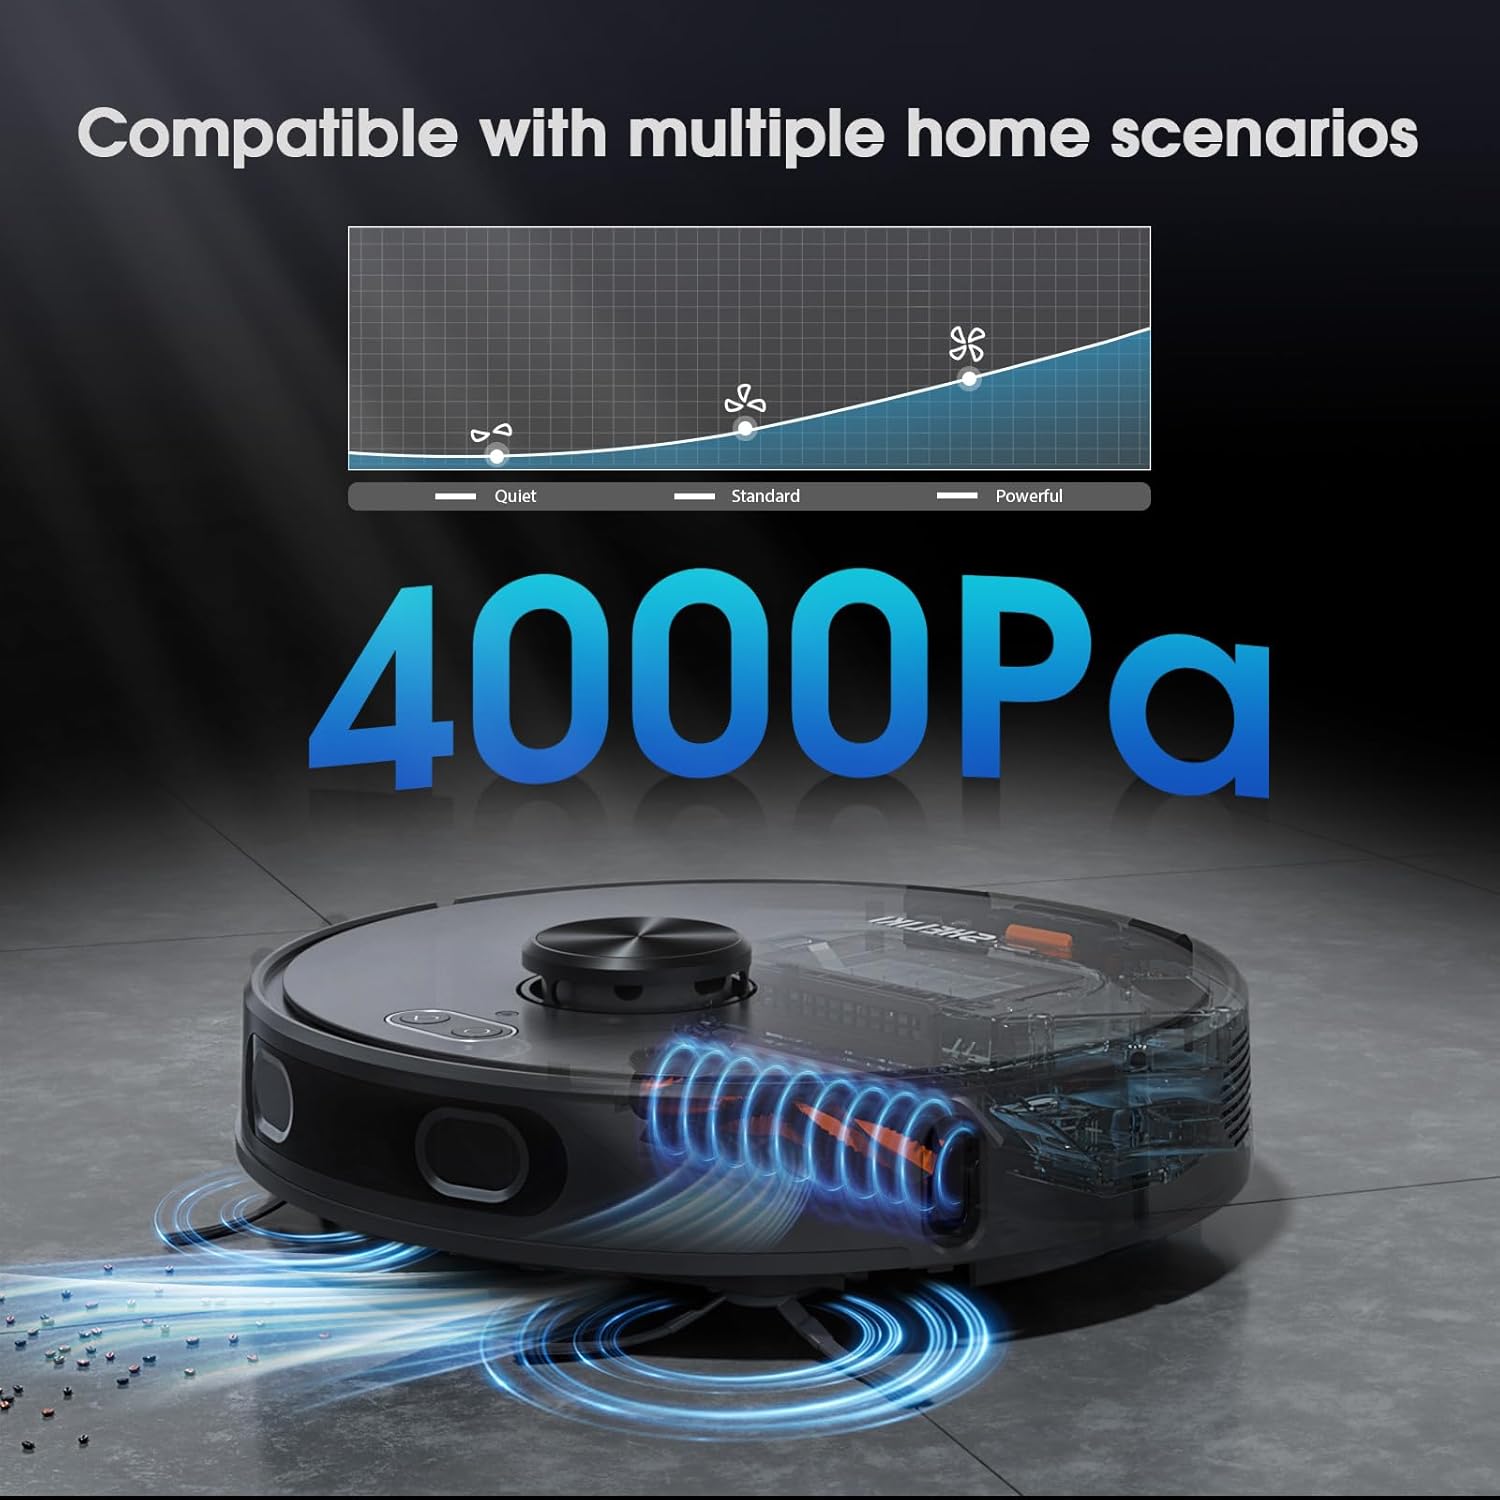
Image 6.2: The robot features up to 4000Pa suction power with adjustable levels.
6.4 Mopping Function
To use the mopping function:
- Fill the water tank portion of the 2-in-1 bin with clean water.
- Attach the mop cloth to the mop board and then attach the mop board to the robot.
- Select a mopping mode or a combined vacuum and mop mode via the app.

Image 6.3: The D60S performs sweeping, vacuuming, and mopping functions simultaneously.
6.5 Voice Control
The D60S is compatible with Amazon Alexa and Google Assistant for convenient voice commands.
- Link your Tuya Smart account to your Alexa or Google Home app.
- Use commands such as "Alexa, turn on the robot" or "Hey Google, start cleaning with [robot name]".
7. Maintenance
Regular maintenance ensures optimal performance and extends the lifespan of your robot vacuum.
7.1 Dust & Water Bin and Filter
- Press the release button to remove the 2-in-1 bin.
- Open the bin cover and empty the dust.
- Remove the filter and tap it gently to remove dust. Rinse the filter under running water if necessary, ensuring it is completely dry before reinstallation.
- Rinse the water tank portion of the bin.
- Reinstall the dry filter and close the bin. Insert the bin back into the robot.
Frequency: Empty dustbin after each use. Clean filter weekly, replace every 3-6 months.
7.2 Main Brush
- Flip the robot over and press the tabs to remove the main brush cover.
- Lift out the main brush.
- Use the provided cleaning tool to remove hair and debris tangled around the brush.
- Reinstall the main brush and cover.
Frequency: Clean weekly.
7.3 Side Brushes
- Gently pull the side brushes upwards to remove them.
- Remove any tangled hair or debris.
- Reinstall the side brushes, ensuring they click into place.
Frequency: Clean monthly, replace every 3-6 months.
7.4 Sensors and Charging Contacts
Wipe all sensors and charging contacts with a clean, dry cloth.
- Anti-drop sensors (bottom of robot)
- Wall-following sensor (side of robot)
- Charging contacts (bottom of robot and on charging station)
Frequency: Clean monthly.
8. Troubleshooting
If you encounter issues with your SHELIKI D60S, refer to the following common problems and solutions.
| Problem | Possible Cause | Solution |
|---|---|---|
| Robot does not power on. | Low battery; Power button not pressed correctly. | Charge the robot; Press and hold the Power button for 3 seconds. |
| Robot cannot charge. | Charging contacts are dirty; Charging station is not powered. | Clean charging contacts on both robot and station; Ensure charging station is plugged in. |
| Robot gets stuck frequently. | Too many obstacles; Sensors are dirty. | Clear the cleaning area; Clean all sensors. |
| Poor cleaning performance. | Dustbin full; Brushes tangled; Filter clogged. | Empty dustbin; Clean main and side brushes; Clean or replace filter. |
| App connection failed. | Incorrect Wi-Fi band (not 2.4GHz); Incorrect password; Robot not in pairing mode. | Ensure 2.4GHz Wi-Fi; Verify password; Re-enter pairing mode as per app instructions. |
| Robot makes unusual noise. | Main brush or side brushes tangled with debris. | Inspect and clean main brush and side brushes. |
9. Specifications
Technical details of the SHELIKI D60S Robot Vacuum and Mop Combo.
| Feature | Detail |
|---|---|
| Brand | SHELIKI |
| Model Name | D60S |
| Special Feature | 360-Degree Swivel |
| Color | Gray |
| Product Dimensions | 13"L x 17.5"W x 5.11"H |
| Included Components | Battery |
| Filter Type | Cartridge |
| Battery Life | 150 minutes |
| Power Source | Battery Powered |
| Batteries Included | Yes (1 C battery required, included) |
| Control Method | App, Voice |
| Form Factor | Round |
| Item Weight | 10.58 pounds |
| Item Model Number | D60S-Laser Style |
10. Warranty and Support
SHELIKI products are manufactured to the highest quality standards. For information regarding warranty coverage, technical support, or service inquiries, please refer to the warranty card included in your package or visit the official SHELIKI website. You may also contact customer support through the Tuya Smart App or the retailer where the product was purchased.
For the latest information and support, please visit the SHELIKI Brand Store.


