YUGY86145
Generic E99 Pro Drone User Manual
Model: YUGY86145
1. Introduction
This manual provides essential instructions for the safe operation and maintenance of your Generic E99 Pro Drone. Please read this manual thoroughly before operating the drone to ensure proper usage and to prevent damage or injury. Retain this manual for future reference.
2. Safety Guidelines
Adherence to these safety guidelines is crucial for safe drone operation:
- Operate the drone in open areas, away from people, animals, buildings, and obstacles.
- Maintain a safe distance from the drone during flight.
- Do not operate in strong winds, rain, or other adverse weather conditions.
- Ensure batteries are fully charged and properly installed before each flight.
- Regularly inspect the drone for any damage to propellers, motors, or the body.
- Keep fingers and loose clothing away from rotating propellers.
- Do not modify the drone or its components.
- Always follow local regulations and laws regarding drone operation.
3. Package Contents
Verify that all items are present in your package:
- E99 Pro Drone (Foldable)
- Screen Controller
- Rechargeable Drone Battery (1 included)
- USB Charging Cable
- Spare Propellers
- Screwdriver
- Black Outdoor Carrying Case
- User Manual (this document)

Image: Contents of the E99 Pro Drone package, including the drone, screen controller, battery, charging cable, spare propellers, screwdriver, and carrying case.
4. Product Overview
4.1 Drone Components
Familiarize yourself with the main parts of the E99 Pro Drone:
- Foldable Arms: For compact storage and transport.
- Propellers: Four main propellers for lift and movement.
- 4K HD Camera: Located at the front for aerial photography and video.
- Obstacle Avoidance Sensors: Three-sided sensors for detecting obstacles.
- Battery Compartment: Located at the rear for the modular battery.
- LED Lights: Indicate drone status and orientation.
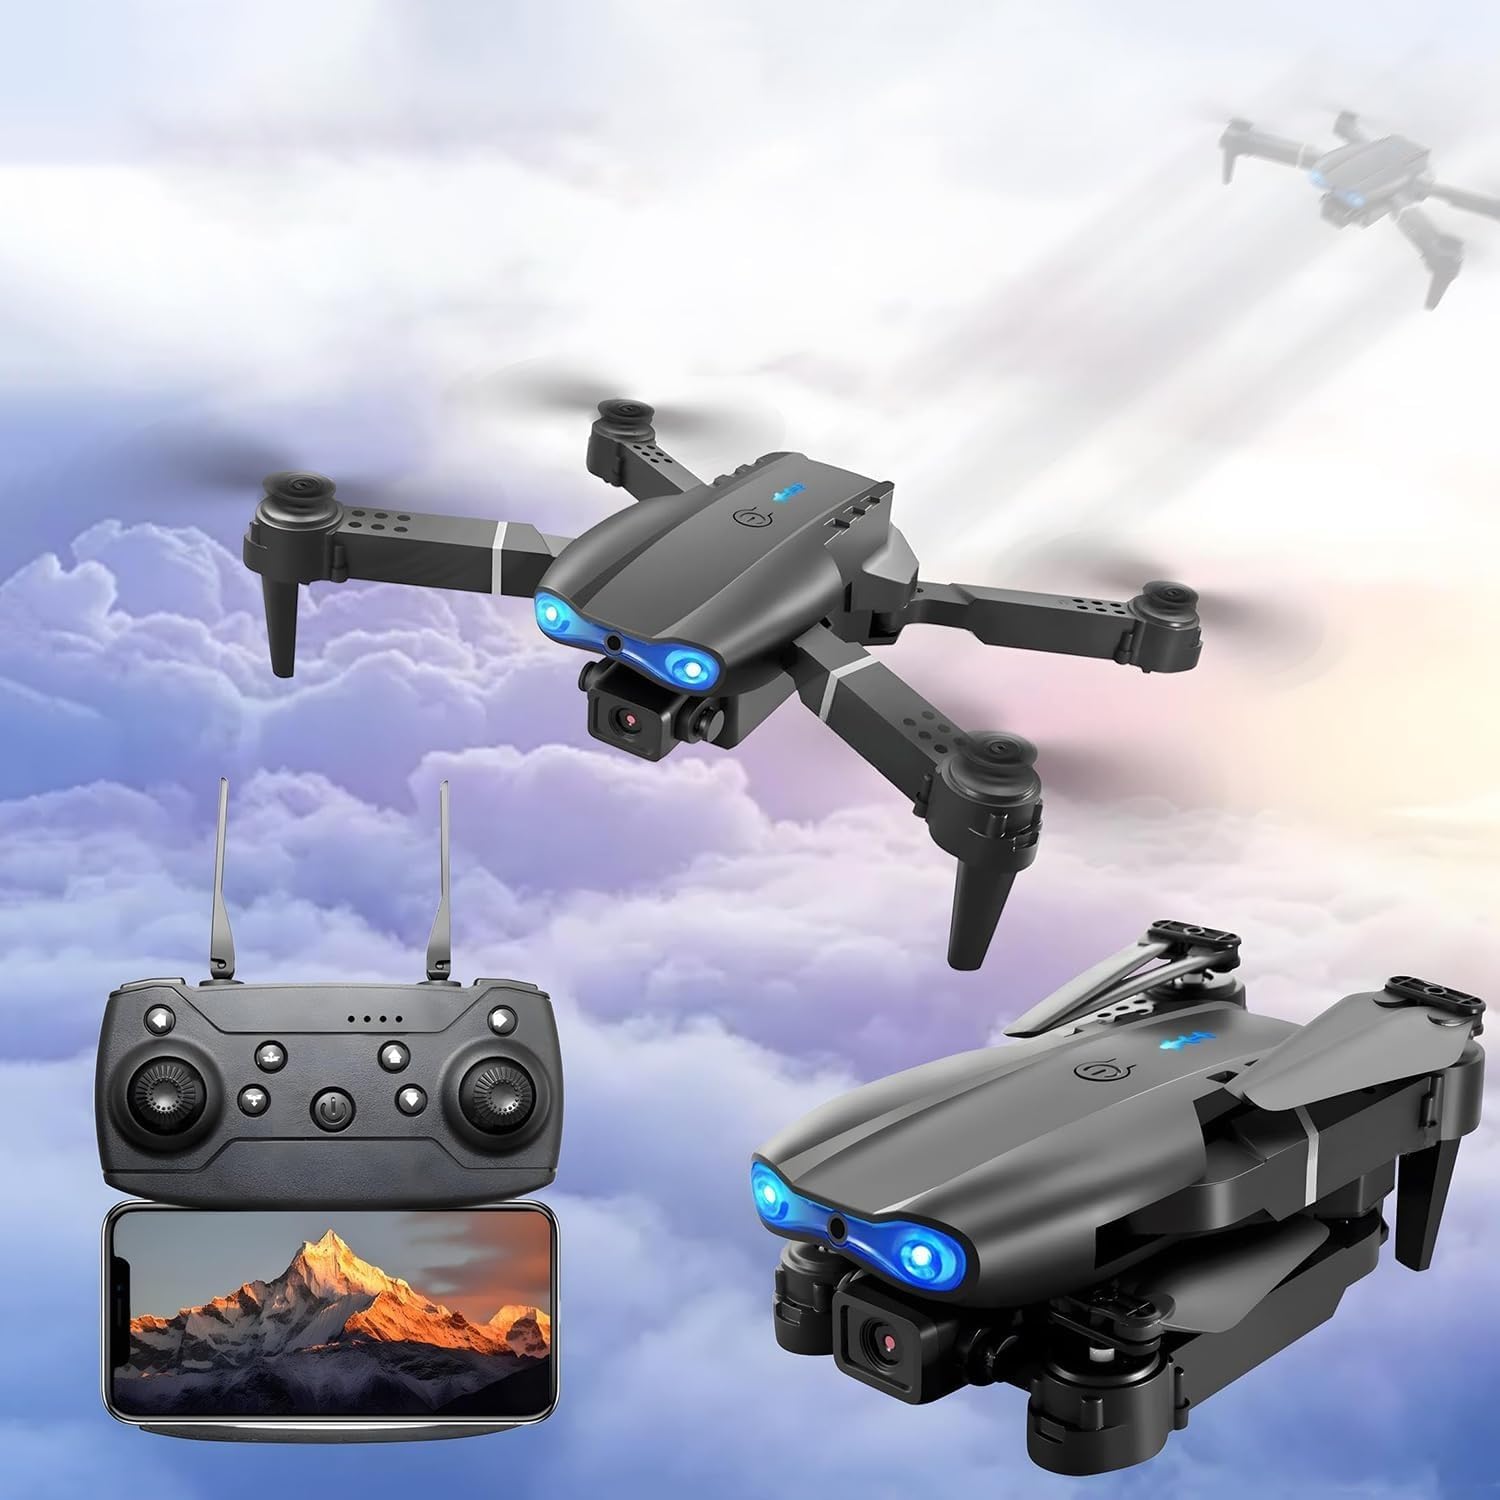
Image: The E99 Pro Drone shown both in its unfolded flight configuration and its compact, folded state, alongside the screen controller.
4.2 Screen Controller
The screen controller provides intuitive control and live video feedback:
- Control Sticks: Left stick for throttle/yaw, right stick for pitch/roll.
- Integrated Screen: Displays live video feed and flight data.
- One-Key Buttons: For take-off, landing, and return functions.
- Photo/Video Buttons: To capture media.
- Antennas: For stable signal transmission.
5. Setup
5.1 Charging the Drone Battery
- Remove the modular battery from the drone.
- Connect the USB charging cable to the battery and a suitable USB power adapter (not included).
- The indicator light on the battery will show charging status (refer to battery specific indicators).
- Charging typically takes approximately 60-90 minutes. Do not overcharge.

Image: The E99 Pro Drone with its modular battery being inserted, illustrating the battery's design and placement.
5.2 Installing Drone Battery
- Ensure the drone is powered off.
- Carefully slide the fully charged battery into the battery compartment at the rear of the drone until it clicks into place.
5.3 Preparing the Drone for Flight
- Unfold the drone arms until they are fully extended and locked.
- Ensure propellers are securely attached and free from obstruction.
5.4 Controller Battery Installation
The controller requires 3x AA batteries (not included). Open the battery compartment on the back of the controller and insert the batteries, observing polarity.
5.5 Pairing the Drone and Controller
- Place the drone on a flat, level surface.
- Power on the drone by pressing and holding the power button. The drone's LED lights will flash.
- Power on the controller.
- Push the left control stick (throttle) all the way up, then all the way down. The drone's LED lights will stop flashing and remain solid, indicating successful pairing.
6. Operating Instructions
6.1 Basic Flight Controls
- Take-off: Press the One-Key Take-Off button, or slowly push the left stick up.
- Landing: Press the One-Key Landing button, or slowly pull the left stick down.
- Altitude Hold: The drone will automatically maintain its current altitude when the left stick is released.
- Forward/Backward: Push the right stick up/down.
- Left/Right (Roll): Push the right stick left/right.
- Turn Left/Right (Yaw): Push the left stick left/right.

Image: The E99 Pro Drone demonstrating its one-key takeoff, landing, and return functions, highlighting the simplicity of its control system.
6.2 Advanced Features
- 360° Flip: Press the 360° Flip button, then push the right stick in the desired direction to perform a flip.
- Headless Mode: Press the Headless Mode button. In this mode, the drone's orientation is relative to the pilot, regardless of the drone's front direction.
- Obstacle Avoidance: The drone is equipped with three-sided obstacle avoidance sensors. These sensors help prevent collisions by detecting nearby objects. Fly cautiously, as these sensors may have limitations in certain environments or with specific object types.

Image: The E99 Pro Drone performing a 360-degree roll, illustrating its aerial stunt capability.

Image: Visual representation of the E99 Pro Drone's key features: 360° flip, altitude hold, and headless mode, designed for easier control.
6.3 Camera Operation (4K HD)
The integrated 4K HD camera allows for high-quality aerial photography and video recording. The live feed is displayed on the screen controller.
- Taking Photos: Press the Photo button on the controller.
- Recording Video: Press the Video button on the controller to start recording. Press again to stop.
- Captured media is typically stored on a microSD card (not included) inserted into the drone, or directly on the controller's internal storage/connected device. Refer to the controller's specific instructions for media management.
7. Maintenance
- Cleaning: Use a soft, dry cloth to clean the drone and controller. Avoid water or harsh chemicals.
- Propeller Replacement: If propellers are damaged, replace them with spare parts using the provided screwdriver. Ensure correct propeller (A or B) is installed on the corresponding motor.
- Battery Care: Store batteries in a cool, dry place. Do not fully discharge or overcharge. If storing for extended periods, charge to approximately 50%.
- Storage: Fold the drone arms and store it in the carrying case to protect it from dust and damage.
8. Troubleshooting
| Problem | Possible Cause | Solution |
|---|---|---|
| Drone does not respond to controller. | Not paired; low battery (drone or controller); out of range. | Re-pair drone and controller; charge batteries; operate within range. |
| Drone drifts during flight. | Not calibrated; uneven surface at takeoff; strong wind. | Calibrate gyroscope (refer to controller instructions); take off from a level surface; avoid flying in strong winds. |
| Camera not recording/taking photos. | No microSD card; card full; card error. | Insert a formatted microSD card; delete files; format card. |
| Short flight time. | Battery not fully charged; old battery; aggressive flying. | Ensure full charge; consider replacing battery; fly more conservatively. |
9. Specifications
| Feature | Detail |
|---|---|
| Model Number | YUGY86145 |
| Brand | Generic |
| Camera | 4K HD |
| Connectivity | 2.4G |
| Obstacle Avoidance | Three-sided active sensors |
| Flight Time | Up to 20 minutes (with 1 battery) |
| Battery Type | Lithium Ion |
| Drone Weight | 420 Grams (approx. 14.8 ounces) |
| Product Dimensions (Folded) | Approx. 4"L x 3"W x 3"H (10cm L x 7.6cm W x 7.6cm H) |
| Product Dimensions (Unfolded) | Approx. 11.4"L x 8.85"W (29cm L x 22.5cm W) |

Image: Detailed product dimensions of the E99 Pro Drone in both folded and unfolded states, along with a visual representation of included accessories.
10. Warranty and Support
This product is manufactured by Generic. For any warranty claims, technical support, or inquiries, please contact the seller or retailer from whom you purchased the product. Please retain your proof of purchase.
no relevant documents
Ask a question about this manual
Ask about setup, troubleshooting, compatibility, parts, safety, or missing instructions. Manuals+ will review the question and use this page’s manual context to help answer it.