Introduction
Thank you for choosing the Benass Walk-in Greenhouse. This manual provides essential information for the proper assembly, operation, maintenance, and troubleshooting of your greenhouse. Designed for versatility and durability, this greenhouse offers an ideal environment for seed germination, plant propagation, and year-round gardening success.
Key features include:
- Easy Setup: Detachable design for quick installation and takedown without tools.
- Durable Cover: Thick PE cover reinforced with high-tensile grid fabric for waterproof and UV protection.
- Spacious Shelving: 8-tier shelf options with 17.5-inch spacing, suitable for various pots and trays.
- Stable Frame: E-coat + powder-coated steel tubes with sturdy connectors for enhanced anti-rust and chip resistance. Includes ground stakes and ropes for stability.
- Versatile Use: Ideal for gardens, patios, balconies, or decks.
Safety Information
Please read and understand all safety warnings before assembly and use.
- Always assemble and disassemble the greenhouse with care due to potentially heavy and sharp components.
- Anchor the greenhouse securely to the ground using the provided stakes and ropes to prevent tipping, especially in windy conditions.
- Keep pets and children away from the greenhouse during assembly and use to prevent accidents.
- Do not expose the greenhouse to direct sunlight for extended periods without proper ventilation to prevent excessive heat buildup.
- Always follow manufacturer's instructions for proper use and maintenance.
Components List
Before beginning assembly, ensure all parts are present and undamaged. Refer to the diagram below for component identification.

Image: Overview of Benass Walk-in Greenhouse components, including frame, cover, and shelves.
- Powder Coated Steel Poles (various lengths)
- Premium Connectors
- PE Cover (Green)
- Wire Shelves (8 units)
- Ground Stakes
- Guy Ropes
- Bonus Thermometer and Hygrometer
- Bonus Clips for Shelf Fixation
Setup Instructions
Assembly of the Benass Walk-in Greenhouse is designed to be straightforward and tool-free. It is recommended that two people assemble the greenhouse for ease and safety.
- Assemble the Frame: Connect the steel poles using the premium connectors. Ensure all connections are secure. The frame should form a stable, rectangular base with vertical supports and a peaked roof structure.
- Install Shelves: Place the wire shelves onto the designated support bars within the frame. Use the bonus clips to secure the shelves, ensuring they are stable and can bear weight up to 25 lbs per shelf.
- Drape the PE Cover: Carefully drape the green PE cover over the assembled frame. Ensure the cover is aligned correctly, with the zippered door facing the desired entrance.
- Secure the Cover: Fasten the cover to the frame using any integrated ties or straps. Ensure the cover is taut to prevent flapping in the wind.
- Anchor the Greenhouse: For outdoor use, position the greenhouse in your desired location. Use the provided ground stakes and guy ropes to firmly anchor the greenhouse to the ground. This is crucial for stability against wind and adverse weather.

Image: Close-up of the greenhouse interior showing shelves and bonus clips for securing them.

Image: Shows reinforced plastic connectors, reinforced D-ring with stakes and guy ropes, a visible temperature and humidity monitor, and a double-sided zipper for access.
Operating Instructions
To maximize the benefits of your Benass Walk-in Greenhouse, follow these operating guidelines:
- Plant Placement: Utilize the 8 spacious shelves to organize your plants, seedlings, and gardening trays. The 17.5-inch spacing between layers accommodates various plant sizes.
- Access and Ventilation: The zippered roll-up door provides easy access to your plants. During warmer periods or to reduce humidity, roll up the door and secure it with the integrated ties to allow for natural ventilation and airflow. This helps prevent overheating and promotes healthy plant growth.
- Environmental Monitoring: Use the included thermometer and hygrometer to monitor the temperature and humidity levels inside your greenhouse. Adjust ventilation as needed to maintain optimal conditions for your specific plants.
- UV and Weather Protection: The PE cover provides reliable waterproof and UV protection, shielding your plants from harsh weather conditions and excessive sun exposure.
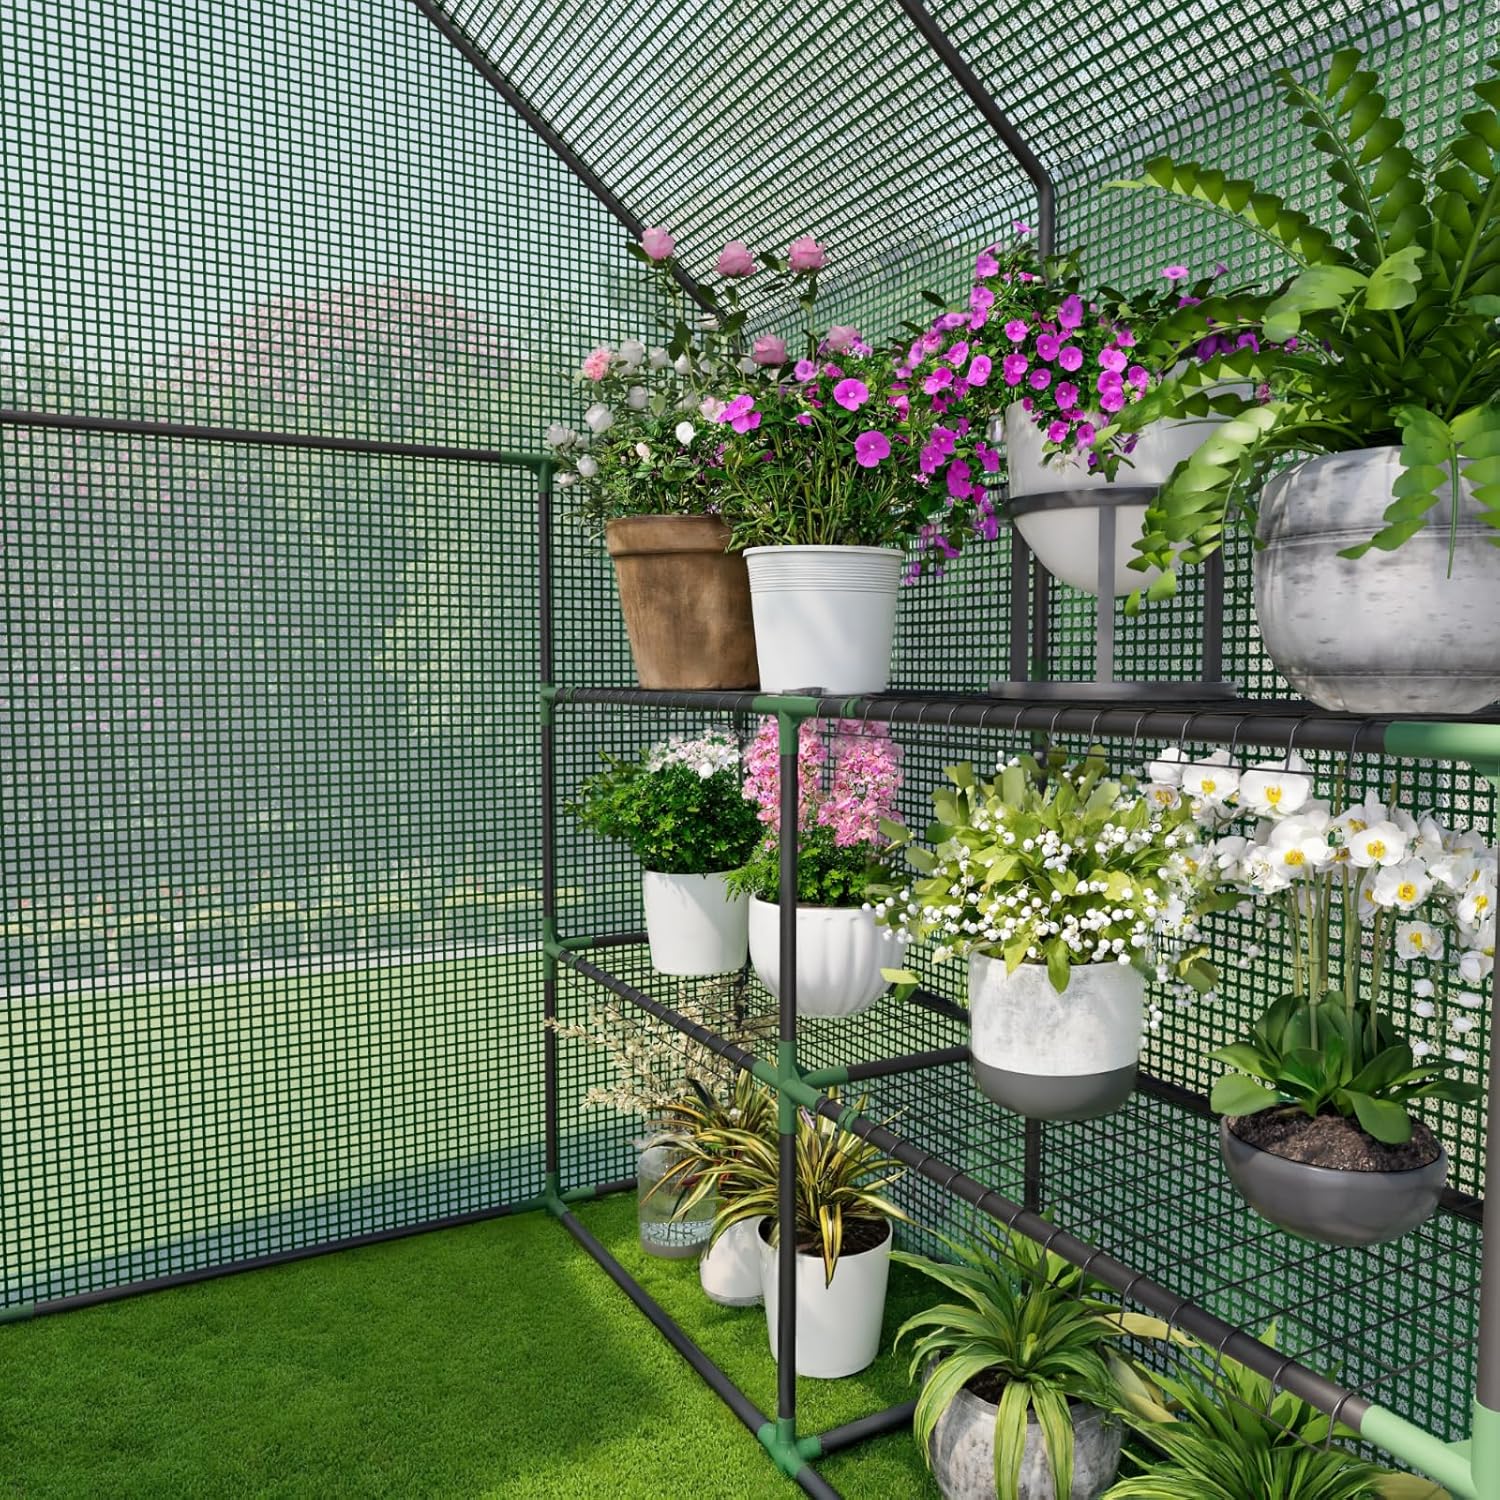
Image: Interior view of the greenhouse showcasing multiple tiers of shelves filled with potted plants.

Image: Illustrates airflow through the single-door ventilation and highlights the sealed environment for pest protection.

Image: Split image demonstrating the UV protection and waterproof capabilities of the greenhouse cover.
Maintenance
Regular maintenance will extend the lifespan and effectiveness of your greenhouse:
- Cleaning the Cover: Periodically clean the PE cover with mild soap and water to remove dirt, dust, and debris. Avoid abrasive cleaners or brushes that could damage the material.
- Inspect Frame and Connectors: Regularly check all frame connections and poles for tightness and signs of wear or corrosion. Tighten any loose connections.
- Check Anchoring: Ensure ground stakes and ropes remain securely fastened, especially after strong winds or heavy rain. Re-anchor if necessary.
- Seasonal Storage: The detachable design allows for easy takedown and storage. Clean and dry all components thoroughly before storing in a cool, dry place to prevent mold or damage.
Troubleshooting
Here are solutions to common issues you might encounter:
- Greenhouse Instability: If the greenhouse feels unstable, ensure all frame connections are fully engaged and tightened. Verify that the ground stakes are driven deep into the soil and the guy ropes are taut. Consider adding additional weights to the base in extremely windy areas.
- Cover Damage: Small tears in the PE cover can be repaired with specialized greenhouse repair tape. For significant damage, a replacement cover may be necessary.
- Excessive Heat/Humidity: If temperatures or humidity levels are too high, open the zippered door to increase ventilation. Ensure the greenhouse is not in direct, prolonged sunlight without adequate airflow.
- Insufficient Heat/Humidity: Ensure the door is fully closed and sealed. In colder climates, consider adding a small, safe heat source (designed for greenhouses) or additional insulation.
Specifications
Detailed specifications for your Benass Walk-in Greenhouse:
| Feature | Specification |
|---|---|
| Brand | Benass |
| Model | 3 Tiers 8 Shelves |
| Color | Green |
| Cover Material | Polyethylene (PE) |
| Frame Material | Metal (E-coat + Powder-coated steel) |
| Item Weight | 9.87 Kilograms |
| Shelf Load Capacity | Max 25 LB per shelf |

Image: Diagram showing the overall dimensions of the Benass Walk-in Greenhouse.
Warranty and Support
For warranty information or product support, please contact Benass customer service directly. Refer to your purchase documentation for specific warranty terms and contact details.