MAHANCRIS FTBK60E01
MAHANCRIS 40-50 Gallon Fish Tank Stand with Power Outlet
Model: FTBK60E01
Instruction Manual
1. Introduction
This manual provides detailed instructions for the assembly, operation, and maintenance of your MAHANCRIS 40-50 Gallon Fish Tank Stand (Model: FTBK60E01). Please read this manual thoroughly before assembly and use to ensure proper setup and safe operation. Retain this manual for future reference.
The MAHANCRIS fish tank stand is designed to securely support 40-50 gallon aquariums, terrariums, or reptile cages. It features a robust construction, multi-tiered storage shelves, and an integrated power outlet for convenient management of aquatic equipment.

Image 1.1: MAHANCRIS 40-50 Gallon Fish Tank Stand supporting an aquarium.
Video 1.1: Overview of the MAHANCRIS 40-50 Gallon Fish Tank Stand, highlighting its features and design.
2. Safety Information
- Always ensure the stand is placed on a flat, level, and stable surface to prevent tipping.
- Do not exceed the maximum weight capacity of 500 lbs (226 kg) for the top surface.
- Keep all electrical connections dry and away from water.
- Ensure all screws and fasteners are securely tightened during assembly and periodically check for tightness.
- Keep small parts and packaging materials away from children and pets.
- Do not climb on or allow children to play on the stand.
- Use caution when moving the stand, especially with an aquarium in place. It is recommended to empty the aquarium before moving.
3. Parts List
Before beginning assembly, verify that all components listed below are present and undamaged. If any parts are missing or damaged, please contact customer support.

Image 3.1: Key components including quality board, steel tubes, wire shelf, and cable holes.
Hardware (Example, actual list may vary):
- Screws (various sizes)
- Dowel pins
- Cam locks and cam bolts
- Allen wrench
- Power strip with cable
Structural Components (Example, actual list may vary):
- Top Panel
- Bottom Panel
- Side Panels (Left, Right)
- Vertical Dividers
- Horizontal Shelves
- Steel Support Tubes
- Wire Shelf
- Back Panels
4. Assembly Instructions
Assembly typically requires two people. Follow these steps carefully. A Phillips head screwdriver (not included) may be required in addition to the provided Allen wrench.
- Prepare the Area: Clear a spacious, clean, and level area for assembly. Lay out all parts and hardware.
- Attach Cam Bolts and Dowels: Insert cam bolts and wooden dowels into the designated holes on the side panels and vertical dividers. Ensure they are fully seated.
- Assemble Base Structure: Connect the bottom panel to the side panels and vertical dividers using cam locks. Tighten cam locks by turning them clockwise until secure.
- Install Shelves: Insert the horizontal shelves into their respective positions, securing them with cam locks and dowels as appropriate. For the wire shelf, ensure it is properly seated on its supports.
- Attach Steel Support Tubes: Secure the steel support tubes to the designated panels using the provided screws and Allen wrench. These tubes provide additional stability.
- Install Power Outlet: Carefully insert the integrated power strip into its cutout on one of the panels. Secure it with the provided screws. Route the power cord through the designated cable hole.
- Attach Top Panel: Place the top panel onto the assembled structure, aligning the cam bolts and dowels. Secure it by tightening the cam locks.
- Install Back Panels: Attach the back panels to the rear of the stand using small nails or screws (as provided). Ensure they are flush and square.
- Final Check: Verify that all connections are tight and the stand is stable. Gently shake the stand to confirm stability.
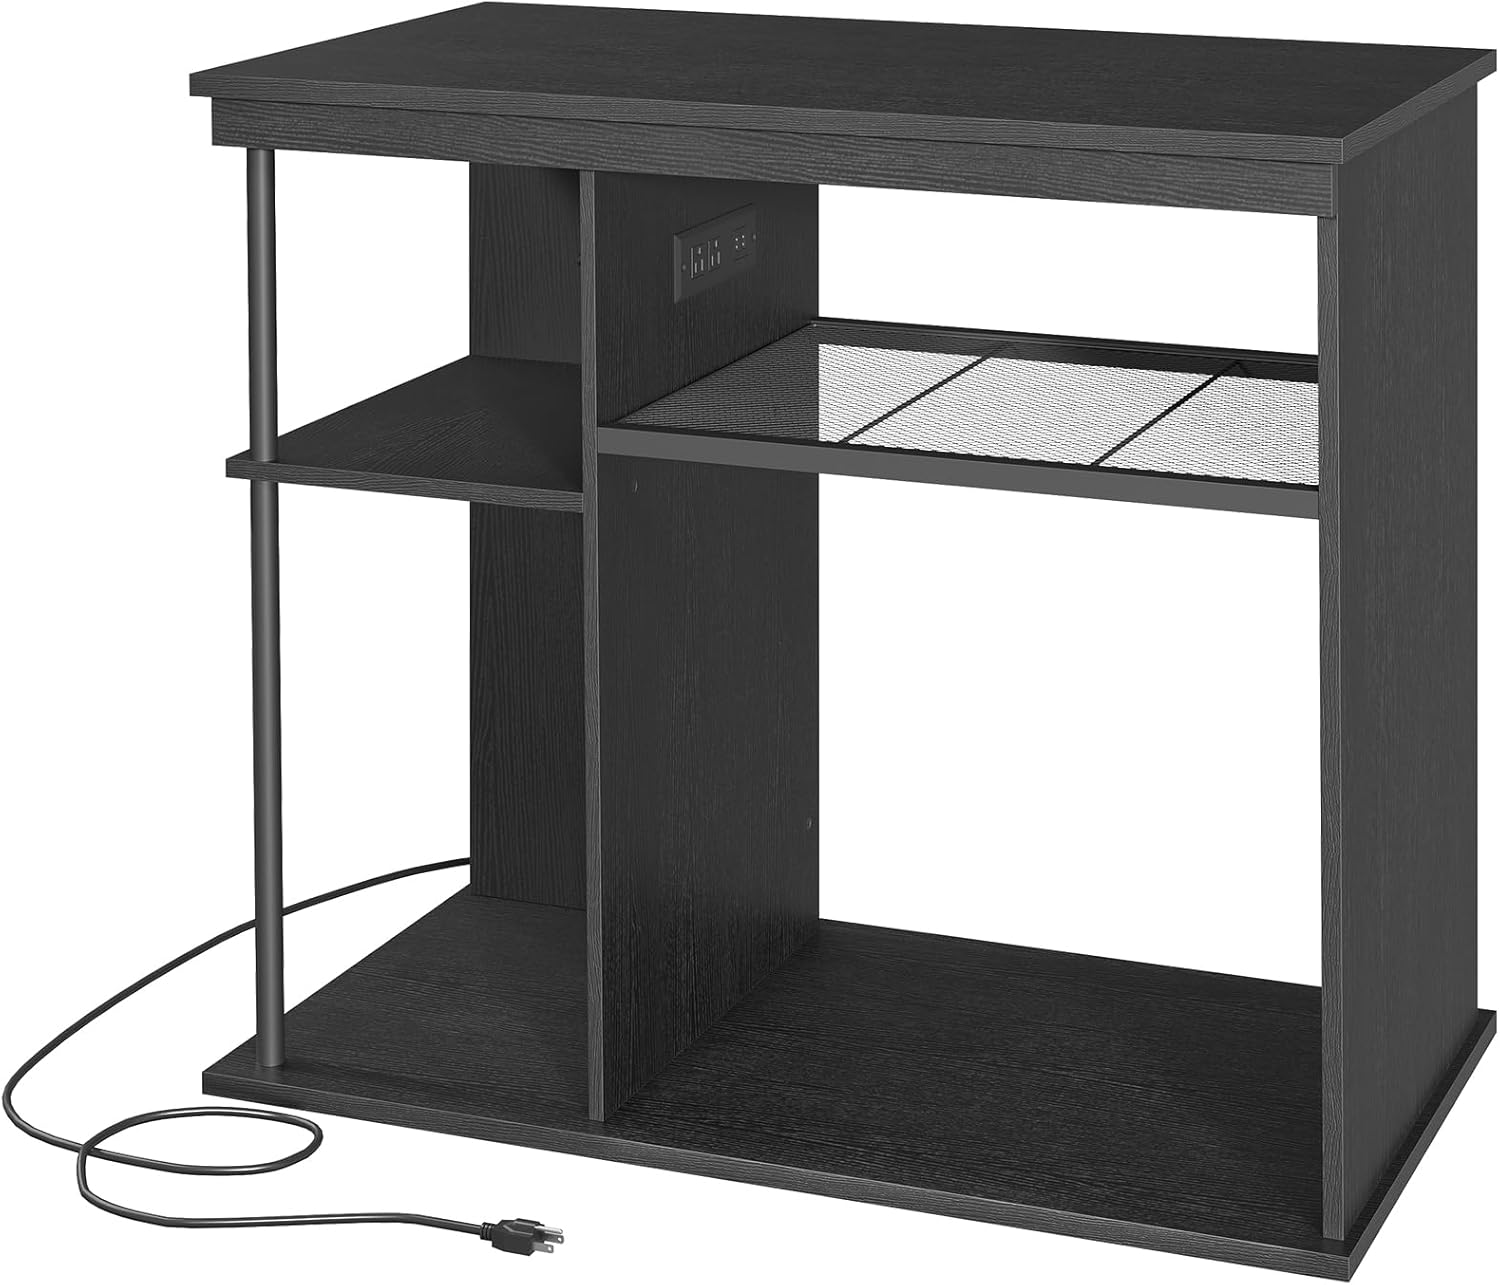
Image 4.1: Assembled stand showcasing storage and power outlet.
5. Operating Instructions
5.1 Placing Your Aquarium
- Ensure the stand is on a level surface.
- Carefully place your 40-50 gallon aquarium on the top surface of the stand. Ensure it is centered and stable.
- The bottom shelves can accommodate a 10-20 gallon reptile terrarium or other aquatic supplies.
5.2 Using the Integrated Power Outlet
The stand includes a built-in power strip with 2 AC outlets and 2 USB ports, designed to power your aquarium accessories and reduce cable clutter.

Image 5.1: Integrated power outlet with AC and USB ports.
- Plug the stand's power cord into a grounded wall outlet.
- Connect your aquarium filter, air pump, heater, LED lights, or other devices to the AC outlets.
- Use the USB ports to charge compatible devices.
- Utilize the cable holes to route power cords neatly, minimizing clutter and enhancing safety.
6. Maintenance
6.1 Cleaning
- Wipe the stand surfaces with a soft, damp cloth. Avoid abrasive cleaners or harsh chemicals that could damage the finish.
- Ensure no water or cleaning solutions come into contact with the power outlet.
- Regularly dust the shelves and surfaces to prevent buildup.

Image 6.1: Cleaning the stand surface.
6.2 Structural Integrity
- Periodically check all screws and fasteners to ensure they remain tight. Re-tighten if necessary.
- Inspect the stand for any signs of wear, damage, or instability. Address any issues promptly.
7. Troubleshooting
| Problem | Possible Cause | Solution |
|---|---|---|
| Stand feels unstable or wobbly. | Uneven floor surface; loose fasteners. | Move stand to a level surface. Check and tighten all screws and cam locks. |
| Power outlet not working. | Power cord not plugged in; tripped circuit breaker; faulty device. | Ensure power cord is securely plugged into a working wall outlet. Check your home's circuit breaker. Test devices in another outlet. |
| Difficulty during assembly. | Incorrect part orientation; missing hardware. | Review assembly steps and diagrams carefully. Ensure parts are oriented correctly. Contact customer support if hardware is missing. |
8. Specifications

Image 8.1: Product dimensions and weight capacity.
| Feature | Detail |
|---|---|
| Model | FTBK60E01 |
| Dimensions (L x W x H) | 36.2" x 19.7" x 31.7" (92 x 50 x 80.5 cm) |
| Weight Capacity (Top) | 500 lbs (226 kg) |
| Material | Engineered Wood, Metal |
| Color | Black |
| Power Outlet | 2 AC Outlets, 2 USB Ports |
| Item Weight | 41.6 lbs (18.8 kg) |
| Tank Compatibility | 40-50 Gallon (top), 10-20 Gallon (bottom shelf) |
9. Warranty and Support
For warranty information or technical support, please refer to the product packaging or contact MAHANCRIS customer service directly. Please have your model number (FTBK60E01) and purchase date available when contacting support.
Contact Information:
- Website: MAHANCRIS Official Store
- Email: Refer to product packaging or official website.
- Phone: Refer to product packaging or official website.
Related Documents - FTBK60E01
 |
MAHANCRIS 3-Tier Mobile Printer Stand Assembly Instructions (Model PTH2201) Detailed assembly instructions for the MAHANCRIS 3-Tier Mobile Printer Stand with Storage Bag (Model PTH2201). Includes general guidelines, warnings, notes, parts list, hardware list, and step-by-step guidance for building your printer cart. |
 |
MAHANCRIS FT2001/FT3001 Assembly Instructions and User Guide Comprehensive assembly instructions and safety guidelines for the MAHANCRIS FT2001/FT3001 furniture stand. Learn how to safely build and mount your product. |
 |
MAHANCRIS 3-Tier Mobile Printer Stand Assembly Instructions Detailed assembly instructions for the MAHANCRIS 3-tier mobile printer stand. This rolling cart features integrated power outlets and USB ports, providing a functional and organized workspace solution. |
 |
MAHANCRIS User Manual: Introduction, Notes, and Safety Warnings This user manual for the MAHANCRIS product provides essential information on its introduction, important usage notes, and critical safety warnings to ensure proper installation and operation. |
 |
MAHANCRIS KBWT8601 Kids Bookshelf and Toy Storage Assembly Instructions Comprehensive assembly instructions for the MAHANCRIS KBWT8601 Kids Bookshelf and Toy Storage Organizer. Includes parts list, hardware list, and step-by-step assembly guide. |
 |
HB3601 Headboard Assembly Instructions Comprehensive assembly instructions for the HB3601 headboard, including parts list, hardware list, and step-by-step guidance for safe and proper installation. |