1. Introduction
Thank you for choosing the PUMPLUXS TJ-998 Self-Defense Device. This product is designed to provide personal protection through its integrated stun gun, LED flashlight, and alarm functions. Please read this manual thoroughly before operating the device to ensure safe and effective use. Keep this manual for future reference.
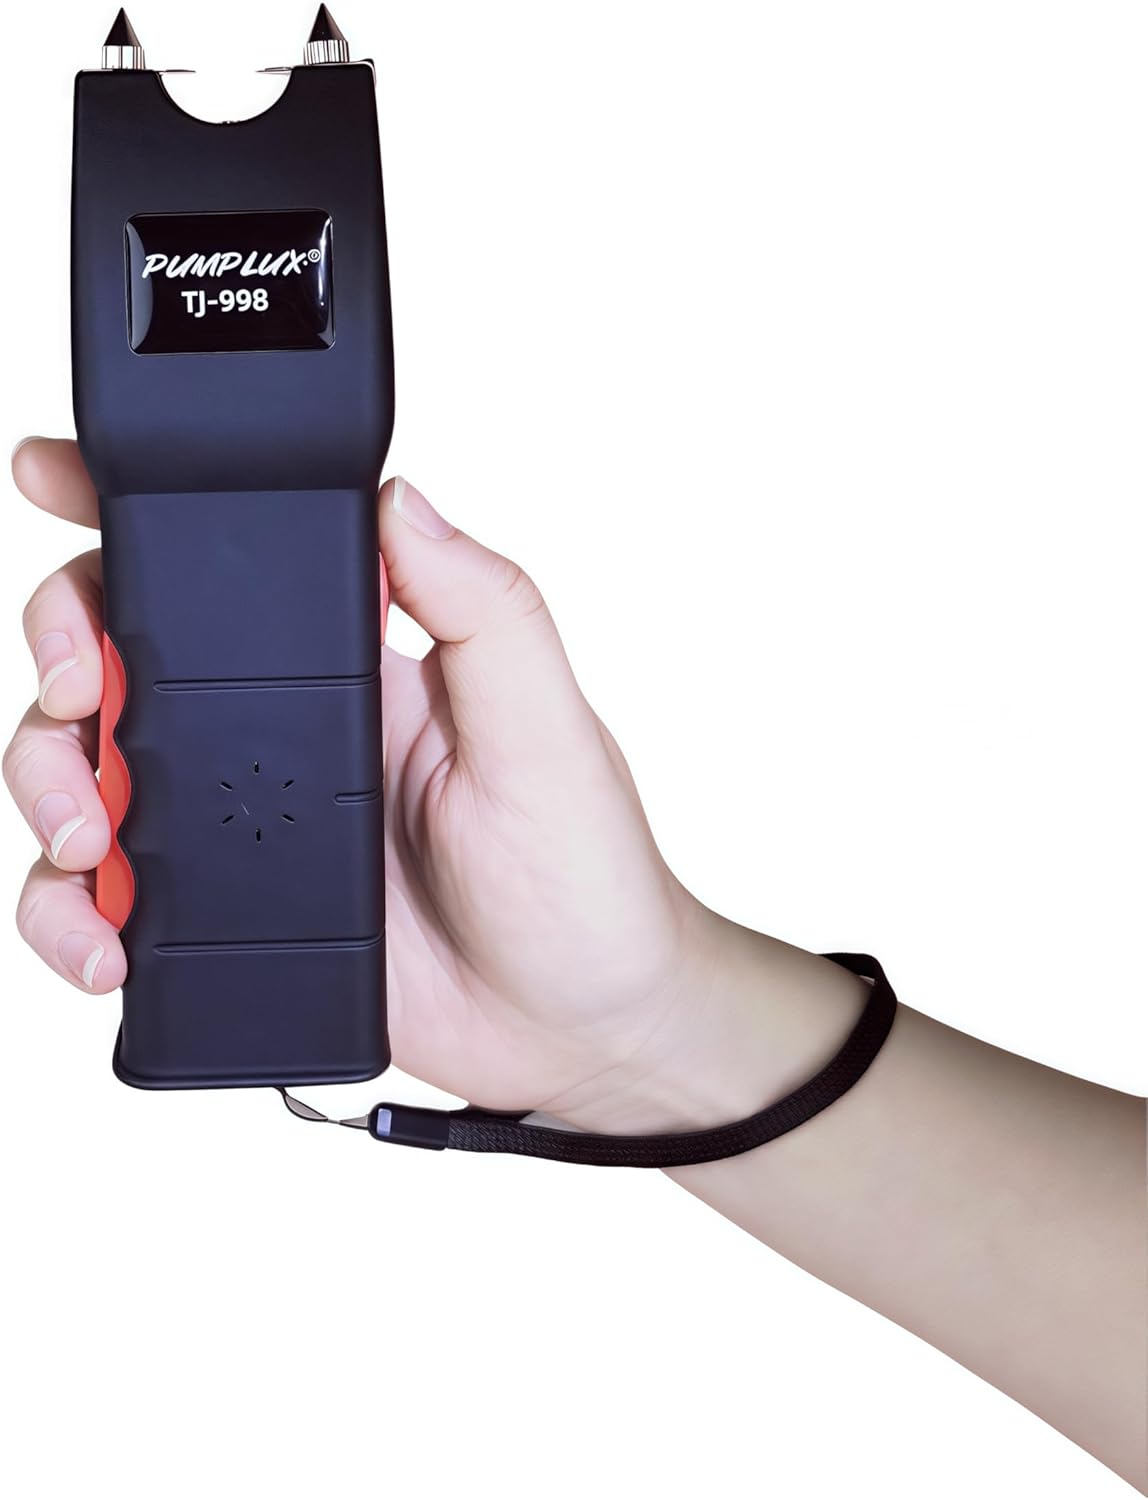
Figure 1: PUMPLUXS TJ-998 device in hand, showing its compact design.
2. Safety Information
WARNING: This device is intended for self-defense purposes only. Misuse may result in serious injury or legal consequences. It is the user's responsibility to understand and comply with all local, state, and federal laws regarding the possession and use of self-defense devices.
- Keep out of reach of children.
- Do not use on individuals with heart conditions, pacemakers, or pregnant women.
- Do not use on animals.
- Avoid contact with water or extreme temperatures.
- Do not open or attempt to repair the device. This will void the warranty and may cause electric shock.
- Ensure the safety switch is in the 'OFF' position when not in use.
- Use only the provided charging cable.
3. Product Overview and Components
The PUMPLUXS TJ-998 combines three essential functions into one compact device:
- Stun Gun: Delivers a 1.60 µC (Microcoulombs) charge for self-defense.
- LED Flashlight: A 120 Lumen flashlight for illumination.
- Alarm: An integrated alarm horn for attracting attention.
Included Components:
- PUMPLUXS TJ-998 Self-Defense Device
- Protective Cover
- USB Charging Cable
- Instruction Manual (this document)

Figure 2: Key components of the PUMPLUXS TJ-998. 1. LED Flashlight, 2. Safety Gear Adjustment, 3. Alarm Horn, 4. Grip Switch.
4. Setup
4.1 Initial Charging
- Locate the charging port on the device (refer to Figure 2, typically near the base).
- Connect the small end of the provided USB charging cable to the device's charging port.
- Connect the larger end of the USB cable to a standard USB power adapter (not included) or a computer's USB port.
- Allow the device to charge fully before first use. The charging indicator light (if present) will typically change color or turn off when charging is complete.
4.2 Attaching Protective Cover and Wrist Strap
The device comes with a protective cover and a wrist strap for convenient and safe carrying.
- Slide the device into the protective cover for secure transport.
- Attach the wrist strap to the designated loop at the base of the device. This helps prevent accidental drops and can be used to retain the device during use.

Figure 3: The protective cover provided with the device.
5. Operating Instructions
Familiarize yourself with the controls before attempting to use the device in a real situation.
5.1 Safety Switch
The device features a safety gear adjustment switch (refer to Figure 2, item 2) to prevent accidental activation. Always ensure this switch is in the 'OFF' position when not in use.
5.2 LED Flashlight Operation
- Move the safety switch to the 'ON' position.
- Press the dedicated flashlight button (often integrated with the safety switch or a separate button, refer to Figure 2).
- To turn off the flashlight, press the button again or move the safety switch to 'OFF'.
5.3 Alarm Operation
- Move the safety switch to the 'ON' position.
- Press the alarm button (refer to Figure 2, item 3, labeled as 'Alarm horn').
- To stop the alarm, press the button again or move the safety switch to 'OFF'.
5.4 Stun Gun Operation
CAUTION: Use the stun gun function only in self-defense situations and in accordance with applicable laws.
- Move the safety switch to the 'ON' position.
- Ensure the stun prongs are clear of any obstructions.
- Press and hold the grip switch (refer to Figure 2, item 4, labeled as 'Grip switch') while simultaneously pressing the stun activation button (often a separate button or a further push of the safety switch).
- Briefly touch the stun prongs to an attacker's body. A short burst (1-2 seconds) is usually sufficient.
- Immediately move the safety switch to 'OFF' after use.
6. Maintenance
6.1 Cleaning
- Ensure the device is turned off and disconnected from any power source before cleaning.
- Wipe the exterior of the device with a soft, dry cloth.
- Do not use abrasive cleaners, solvents, or immerse the device in water.
6.2 Battery Care and Storage
- Recharge the device regularly, even if not used, to maintain battery health. Avoid letting the battery fully discharge for extended periods.
- Store the device in a cool, dry place, away from direct sunlight and extreme temperatures.
- Keep the device in its protective cover when not in use.
7. Troubleshooting
7.1 Device Not Turning On/Not Charging
- Ensure the USB charging cable is securely connected to both the device and the power source.
- Verify the power source (USB adapter, computer port) is functional.
- Check if the charging indicator light is active. If not, try a different USB cable or power source.
- Allow sufficient time for charging.
7.2 Stun Gun Not Activating
- Ensure the safety switch is fully in the 'ON' position.
- Confirm the device is adequately charged.
- Ensure both the grip switch and the stun activation button are pressed simultaneously and correctly.
7.3 Flashlight or Alarm Not Working
- Verify the safety switch is in the 'ON' position.
- Ensure the device has sufficient battery charge.
- Press the respective function button firmly.
If problems persist after attempting these troubleshooting steps, please refer to the Warranty and Support section.
8. Specifications
| Feature | Specification |
|---|---|
| Model Name | TJ-998 |
| Brand | PUMPLUXS (Manufacturer: PUMPLUX) |
| Stun Charge | 1.60 µC (Microcoulombs) |
| LED Flashlight Output | 120 Lumens |
| Material | Acrylonitrile Butadiene Styrene (ABS) |
| Color | Black |
| Power Source | Built-in Rechargeable Battery |
| Charging | USB Charging Cable (Included) |
| Item Package Dimensions | 7.87 x 3.94 x 1.97 inches |
| Package Weight | 200 Grams |

Figure 4: Device dimensions: approximately 17cm (6.6in) in length and 5cm (2in) in width.
9. Warranty
The PUMPLUXS TJ-998 Self-Defense Device comes with a Limited Lifetime Warranty. This warranty covers manufacturing defects under normal use. It does not cover damage caused by misuse, abuse, unauthorized modification, or improper storage. Please retain your proof of purchase for warranty claims.
For specific warranty terms and conditions, please refer to the documentation provided at the time of purchase or contact customer support.
10. Support
If you have any questions, require technical assistance, or need to make a warranty claim, please contact the retailer or manufacturer directly. Ensure you have your product model number (TJ-998) and proof of purchase available when seeking support.