1. Introduction and Overview
Thank you for choosing the TROPOW Portable Countertop Dishwasher. This compact and versatile appliance is designed to provide efficient and thorough cleaning for your dishes, ideal for small households, apartments, RVs, or any space where a full-sized dishwasher is not feasible. With its innovative dual water inlet modes and powerful cleaning features, maintaining a clean kitchen has never been easier.
Key features include a 5-liter built-in water tank, 6 specialized wash modes, 162°F high-temperature washing for sanitation, and an air-dry function for spotless results. Its space-smart design ensures it fits comfortably on most kitchen countertops.
2. What's in the Box
Carefully unpack all components and ensure you have received the following items:
- TROPOW Portable Countertop Dishwasher Unit
- Cutlery Basket
- Basket (main dish rack)
- Pipe Hoop (clamp)
- Inlet Hose
- Drain Hose
- Water Pitcher (for manual water filling)
- Cover (for top inlet when using faucet mode)
- User Manual
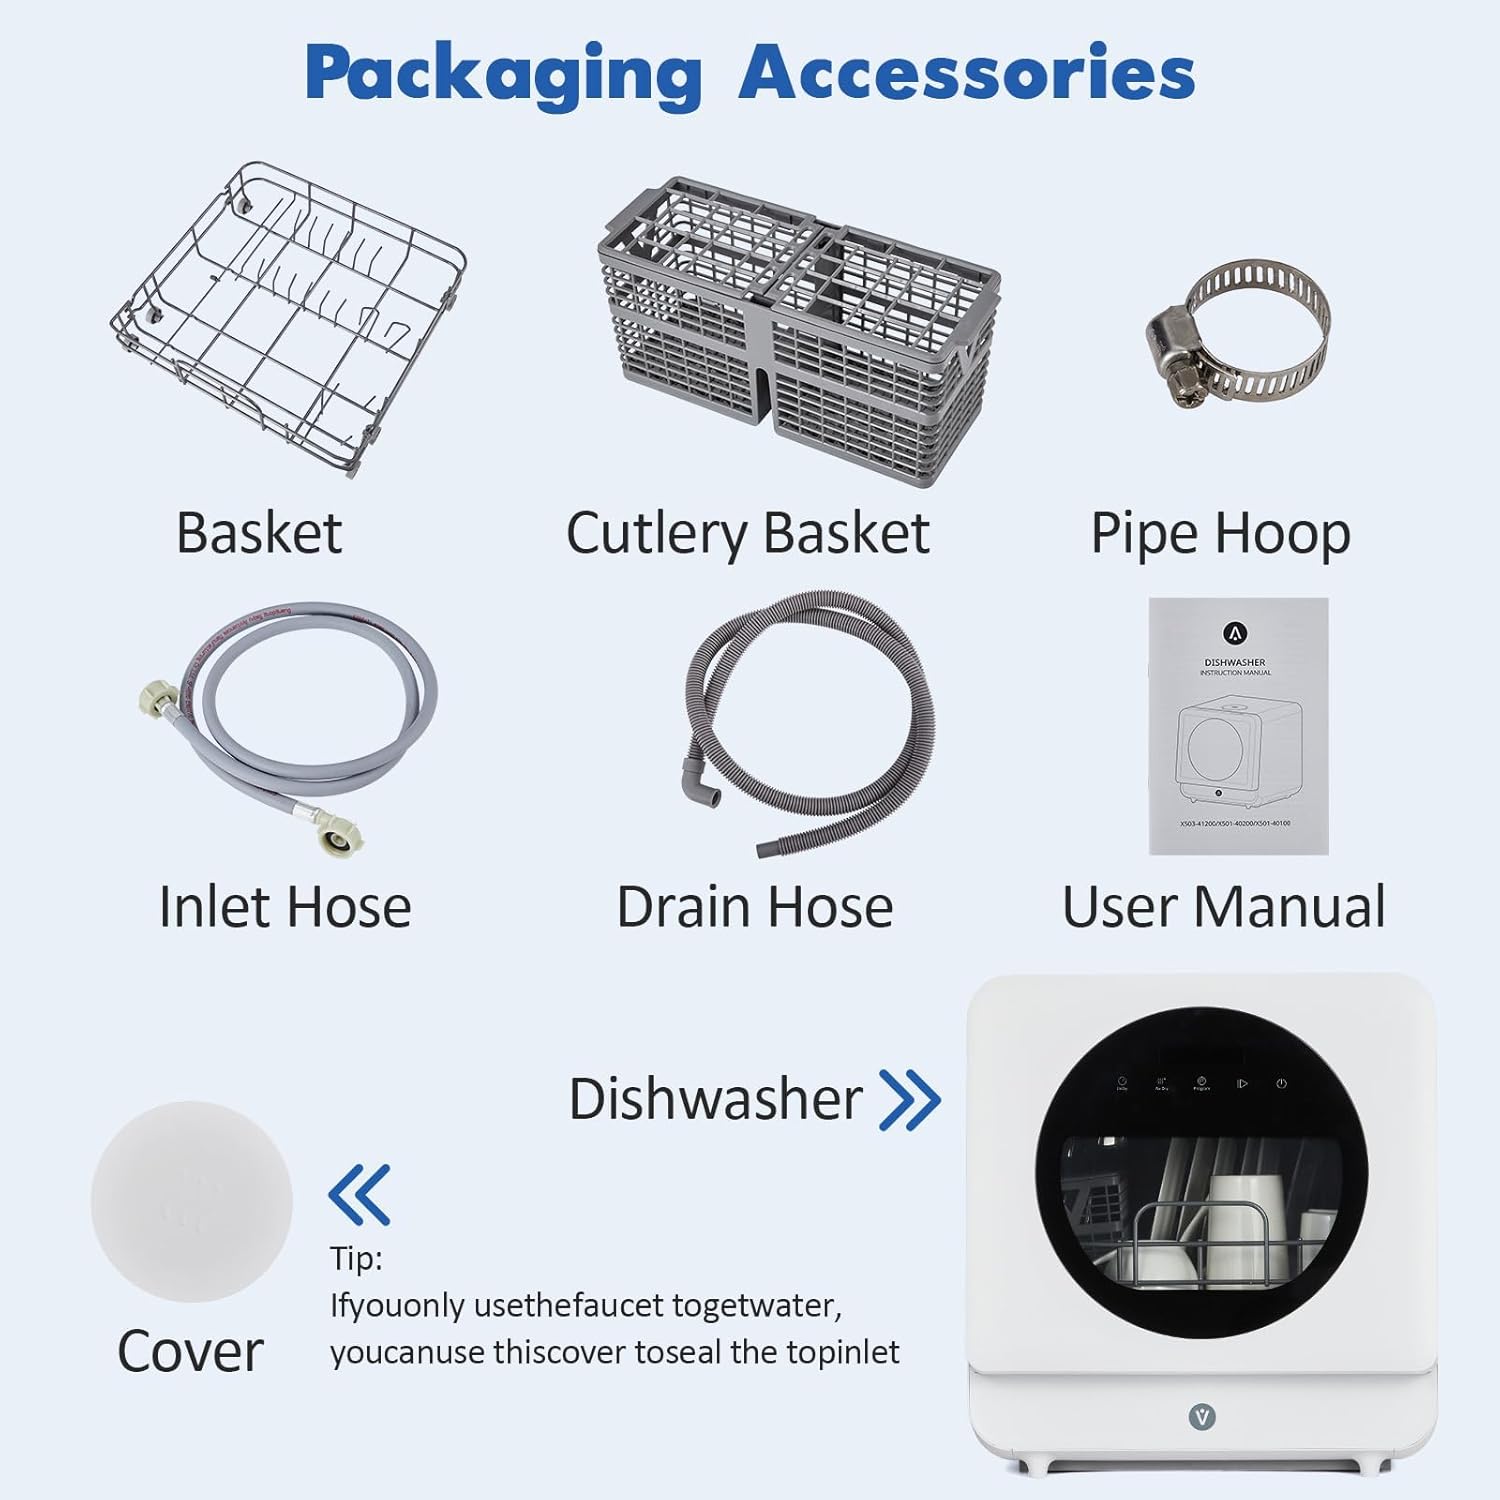
Figure 2.1: Included Accessories
This image displays the complete set of accessories that come with your dishwasher. It includes the main unit, a basket for dishes, a separate cutlery basket, an inlet hose, a drain hose, a pipe hoop for securing the drain hose, a water pitcher for manual filling, a cover for the top water inlet, and the user manual.
3. Setup and Installation
The TROPOW Portable Countertop Dishwasher offers flexible installation options to suit your needs.
3.1 Placement
Place the dishwasher on a stable, level surface such as a kitchen countertop. Ensure there is adequate space around the unit for ventilation and access to the water inlet/outlet ports.

Figure 3.1: Dishwasher Dimensions and Placement
This image illustrates the compact dimensions of the dishwasher, highlighting its suitability for countertop placement. The unit measures approximately 20.16 inches deep, 19.96 inches wide, and 20.79 inches high.
3.2 Water Inlet Modes
Choose one of the following methods for water supply:
Option A: 5L Built-in Water Tank (Manual Fill)
This mode requires no plumbing connections, offering maximum portability.
- Open the water inlet cover on the top of the dishwasher.
- Use the provided water pitcher to slowly pour water into the inlet until the water level indicator on the control panel signals it is full (usually around 5 liters).
- Close the water inlet cover securely.
Option B: Faucet Connection
For continuous water supply, connect the dishwasher directly to your kitchen faucet.
- Attach the inlet hose to the designated water inlet port at the back of the dishwasher.
- Connect the other end of the inlet hose to your kitchen faucet using the appropriate adapter (included).
- Ensure all connections are tight to prevent leaks.
- Open the faucet to allow water flow to the dishwasher.

Figure 3.2: Faucet Water Inlet Mode
This image demonstrates how to connect the dishwasher to a standard kitchen faucet for a direct water supply. The inlet hose is attached to the back of the unit and then to the faucet, providing a continuous water feed for washing cycles.

Figure 3.3: Self-Priming Water Inlet Mode
This image illustrates the self-priming water mode, where the dishwasher draws water from an external container. This is an alternative to the built-in tank or faucet connection, offering flexibility for various setups.
3.3 Drain Hose Setup
Connect the drain hose to the designated outlet port at the back of the dishwasher. Direct the other end of the drain hose into a sink or a bucket to collect the wastewater. Use the provided pipe hoop to secure the drain hose if placing it in a sink.
4. Operating Instructions
Follow these steps to operate your TROPOW Portable Countertop Dishwasher:
4.1 Loading Dishes
Open the dishwasher door and pull out the dish rack. Load dishes, bowls, cups, and cutlery, ensuring they do not block the spray arms or detergent dispenser. Scrape off large food scraps before loading.

Figure 4.1: Loading Dishes
This image provides a visual guide on how to efficiently load various types of dishes into the dishwasher's racks. Plates are placed vertically, bowls are inverted, and cutlery is placed in the dedicated basket, ensuring optimal cleaning coverage.
4.2 Adding Detergent
Add the recommended amount of dishwasher detergent (powder or liquid) to the dispenser located on the inside of the door. Close the dispenser lid securely.
4.3 Selecting a Wash Program
The dishwasher features 6 specialized cleaning modes:
- Normal: For everyday dishware and glassware.
- Rapid: For lightly soiled dishes that need a quick wash.
- Delicate: For fragile items like fine china and crystal.
- Heavy: For heavily soiled pots, pans, and stubborn food residues.
- Heated Dry: An additional drying cycle.
- Fruit: A gentle wash cycle specifically for fruits and vegetables.
Press the 'Mode' button on the control panel to cycle through the available programs. The selected program will be indicated on the display.

Figure 4.2: Control Panel and Wash Modes
This image highlights the intuitive control panel with touch buttons for selecting various wash modes. Each mode is represented by a clear icon, allowing users to easily choose the appropriate cycle for their dishes.
4.4 Starting the Cycle
Once the program is selected, press the 'Start/Pause' button to begin the wash cycle. The display will show the remaining time.
4.5 Air-Dry Function
The dishwasher includes an automatic air-dry function that activates after the wash cycle to prevent odors and ensure dishes are dry. This can also be manually selected.

Figure 4.3: Hot Air Drying & Ventilation
This image visually represents the hot air drying and ventilation system within the dishwasher. It shows how warm air circulates to effectively dry dishes and prevent moisture buildup, contributing to hygiene and odor prevention.
4.6 Child Lock
To activate the child lock, press and hold the 'Lock' button for 3 seconds. This will prevent accidental operation. Repeat to deactivate.
5. Maintenance
Regular maintenance ensures optimal performance and longevity of your dishwasher.
5.1 Cleaning the Filter
The dishwasher has a removable filter at the bottom. Regularly remove and clean it to prevent food particles from clogging the system and affecting cleaning performance.
5.2 General Cleaning
Wipe the exterior and interior of the dishwasher with a damp cloth. Do not use abrasive cleaners or solvents. For best results, run the 'Self-Clean' cycle periodically.
6. Troubleshooting
If you encounter issues with your dishwasher, refer to the following common problems and solutions:
- Dishwasher not starting: Ensure the power cord is securely plugged in and the door is fully closed. Check if the water tank is full or the faucet is open (if using faucet mode).
- Dishes not clean: Ensure dishes are loaded correctly, not blocking spray arms. Use the appropriate amount and type of dishwasher detergent. Clean the filter.
- Water leakage: Check all hose connections for tightness. Ensure the drain hose is properly positioned in the sink or bucket.
- Error codes: Refer to the detailed troubleshooting section in the full user manual for specific error code meanings and resolutions.
7. Specifications
| Model Name | QWNI14I47EX |
| Brand | TROPOW |
| Item Weight | 32.2 Pounds |
| Product Dimensions | 20.16 x 19.96 x 20.79 inches |
| Voltage | 120V |
| Annual Energy Consumption | 1000 Watts |
| Water Consumption | 1.32 Gallons per Hour (approx. 5 Liters per cycle) |
| Capacity | 5 Liters (water tank) |
| Number of Settings | 6 (wash programs) |
| Controls Type | Touch Panel |
| Noise Level | 40 Decibels |
| Special Features | Touch Panel, 162°F High-Temp Wash, Air-Dry Function, Faucet & Self-Priming Water Inlet Modes |
8. Warranty and Support
For warranty information, technical support, or service inquiries, please refer to the official TROPOW website or contact customer support directly. Keep your purchase receipt as proof of purchase for any warranty claims.