1. Introduction
Thank you for purchasing the FYDEE A6 Vinyl Record Player. This vintage-style turntable combines classic aesthetics with modern functionality, allowing you to enjoy your vinyl collection and stream digital music via Bluetooth. Featuring built-in stereo speakers, multiple connectivity options, and a durable design, this player is designed for a rich audio experience. Please read this manual carefully before use to ensure proper operation and longevity of your device.
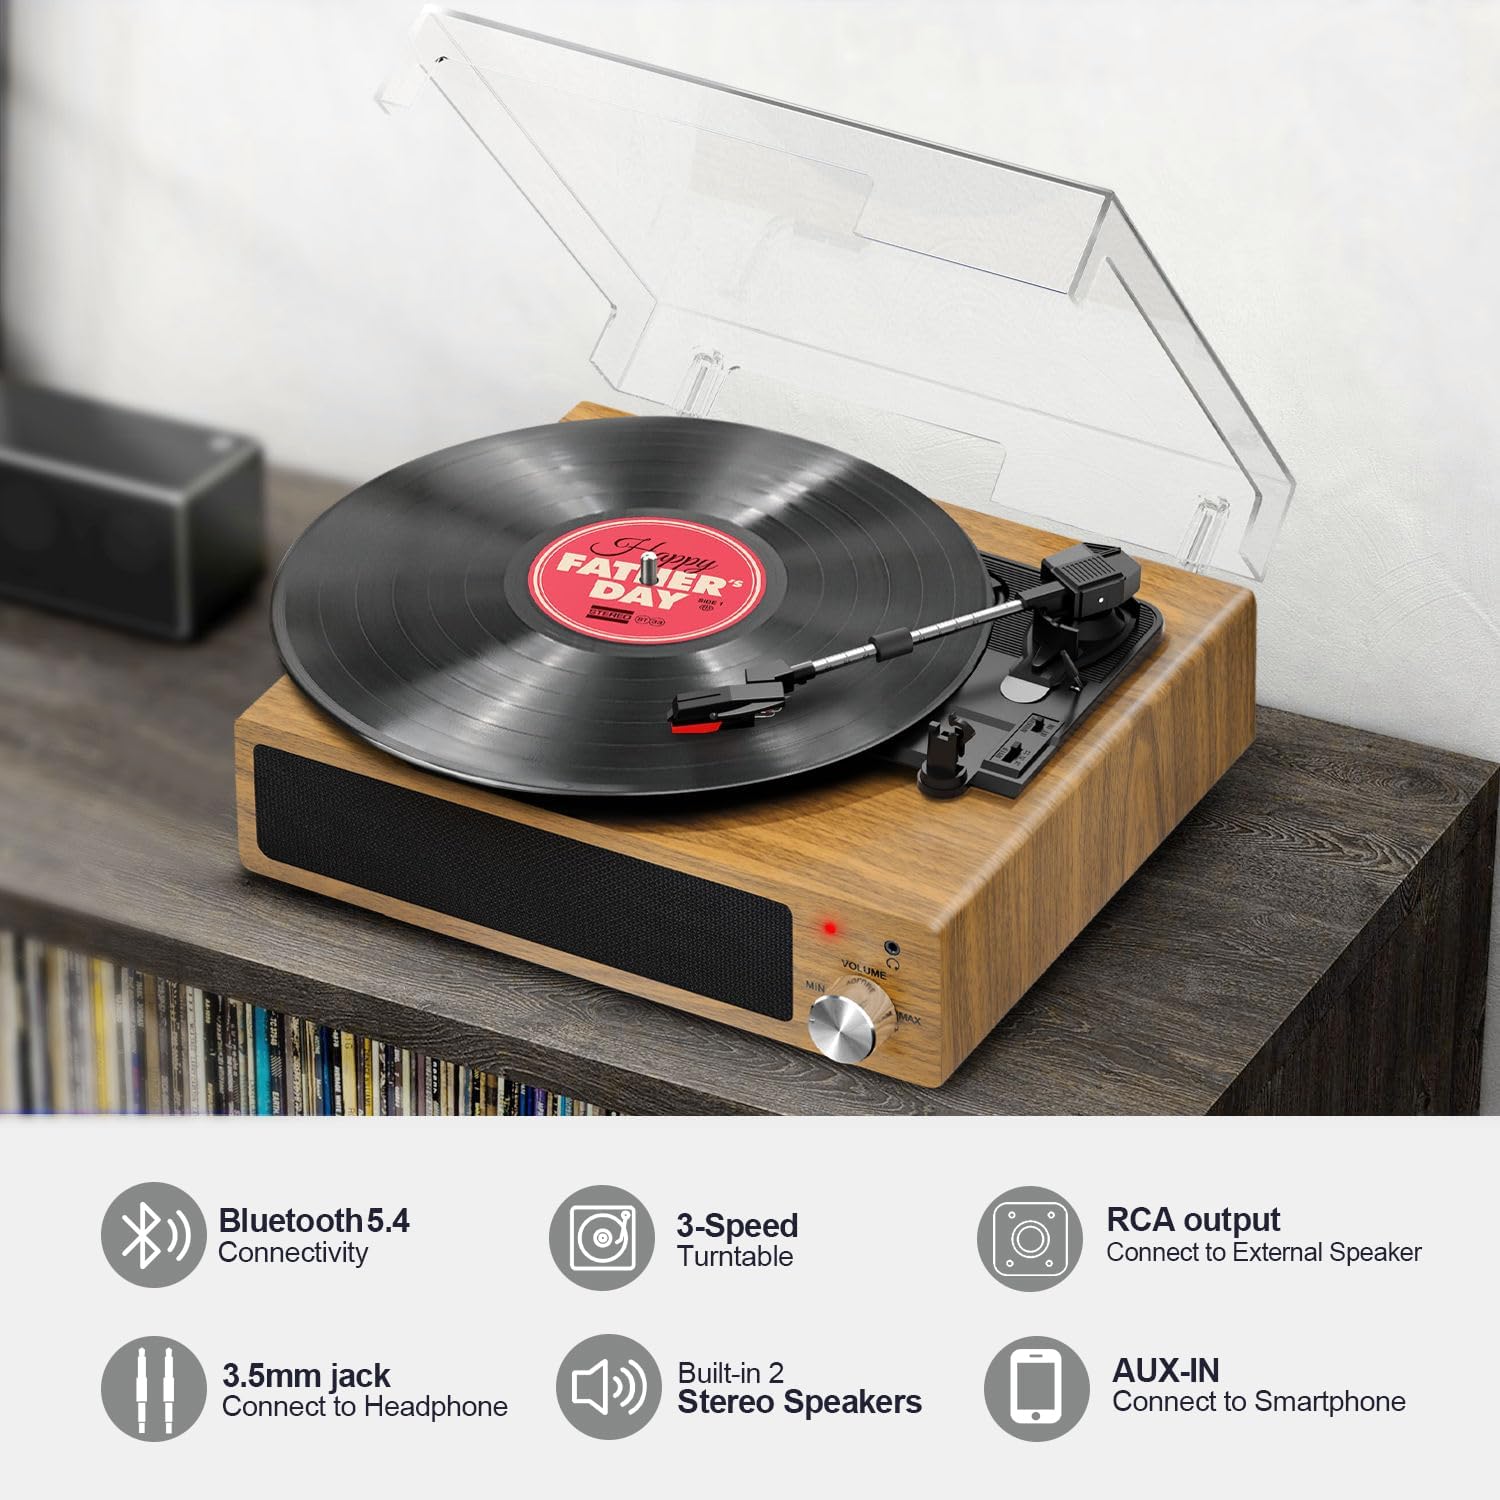
Image 1: FYDEE A6 Vinyl Record Player showcasing its features.
2. Package Contents
Please check the package for the following items:
- 1 x FYDEE A6 Vinyl Record Player
- 1 x Transparent Dust Cover
- 1 x Power Adapter (5V 1A)
- 1 x RCA Cable
- 1 x User Manual
3. Product Overview
Familiarize yourself with the components of your FYDEE A6 Vinyl Record Player:
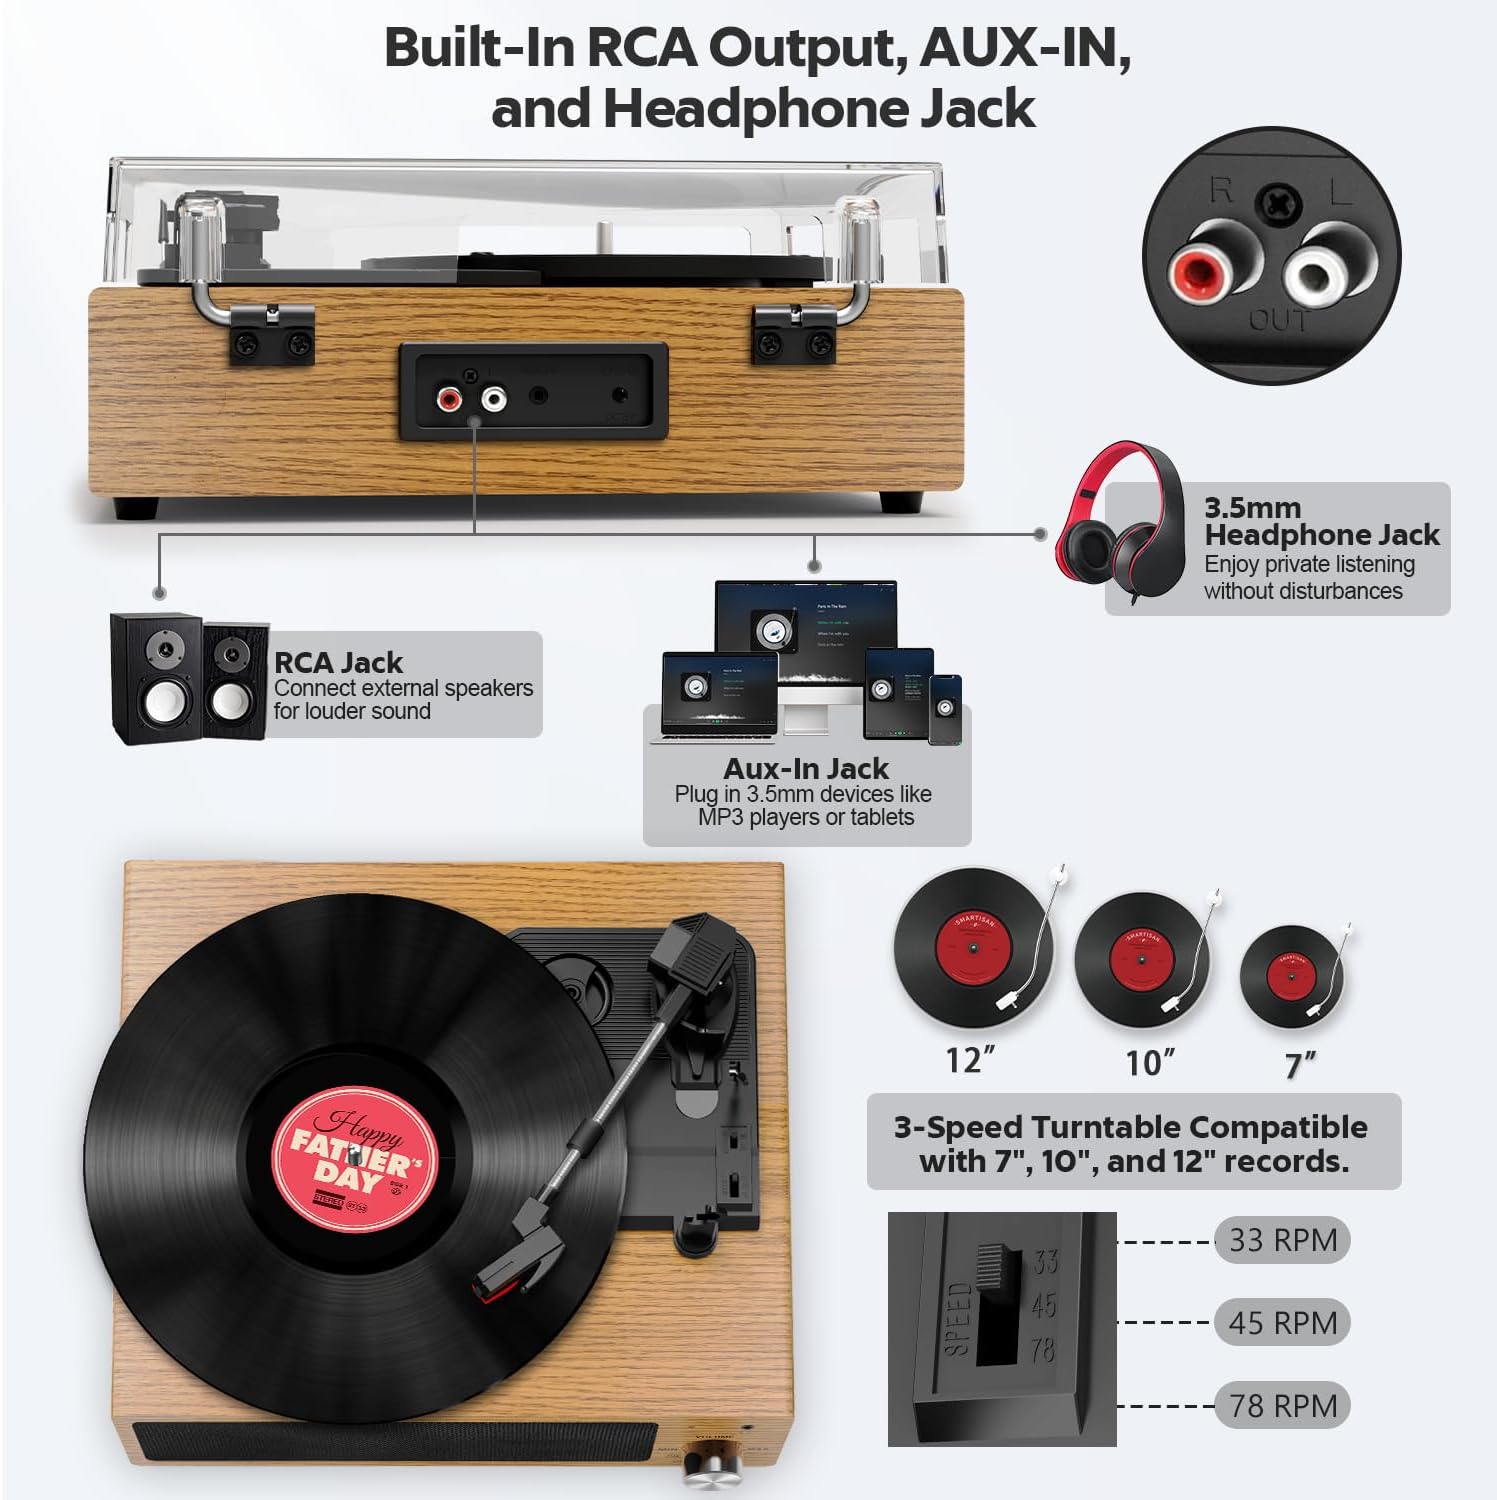
Image 2: Detailed diagram of the FYDEE A6 Vinyl Record Player components.
- Platter: Where the vinyl record rests.
- 45 RPM Adapter: Used for playing 7-inch records with a large center hole.
- Tone Arm: Holds the cartridge and stylus.
- Tone Arm Lifter: Raises and lowers the tone arm gently.
- Auto Stop Switch: Enables or disables the automatic stop function.
- LP Speed Control Switch: Selects playback speed (33, 45, or 78 RPM).
- Counterweight: Balances the tone arm and adjusts tracking force.
- Cartridge with Stylus: Reads the grooves of the record.
- Built-in Stereo Speakers: Provide integrated audio output.
- Power Button and Volume Control: Turns the unit on/off and adjusts volume.
- Built-in Light Indicator: Shows power and Bluetooth status.
- Headphone Jack (3.5mm): For private listening.
- AUX-IN Port (3.5mm): For connecting external audio devices.
- RCA Output Jacks: For connecting to external amplifiers or powered speakers.
- DC 5V Input: For power adapter connection.
4. Setup
4.1 Initial Placement
Place the record player on a stable, level surface away from direct sunlight, heat sources, and excessive dust or vibrations.
4.2 Dust Cover Installation
Carefully align the hinges of the transparent dust cover with the posts on the back of the record player and slide it into place. This protects the platter and stylus from dust when not in use.
4.3 Power Connection
Connect the provided 5V 1A power adapter to the DC 5V input port on the back of the record player, then plug the adapter into a wall outlet.
4.4 Counterweight Adjustment
The counterweight helps control the tracking force of the stylus, reducing skipping and wear on your records. Adjust the counterweight by rotating it until the tone arm is balanced and floats horizontally. Then, rotate the numbered ring to match the recommended tracking force for your stylus (refer to stylus specifications if available, typically 2-3 grams for standard cartridges).

Image 3: Adjusting the tone arm counterweight for optimal tracking.
5. Operating Instructions
5.1 Playing Vinyl Records
- Power On: Rotate the Power/Volume knob clockwise to turn on the unit. The light indicator will illuminate.
- Select Speed: Set the LP Speed Control Switch to the appropriate speed (33, 45, or 78 RPM) for your record. For 7-inch records with a large center hole, place the 45 RPM adapter on the spindle before placing the record.
- Place Record: Carefully place your vinyl record on the platter.
- Remove Stylus Protector: Gently remove the clear plastic protector from the stylus.
- Position Tone Arm: Release the tone arm lock. Use the Tone Arm Lifter to raise the tone arm, then manually move it over the desired starting groove of the record.
- Lower Tone Arm: Gently lower the tone arm using the Tone Arm Lifter. The stylus will make contact with the record, and playback will begin.
- Adjust Volume: Rotate the Power/Volume knob to adjust the sound level.
- Auto-Stop Function: The Auto Stop Switch can be set to ON or OFF. When ON, the platter will automatically stop spinning when the record reaches the end. When OFF, the platter will continue to spin.
- End Playback: When the record finishes, or you wish to stop, use the Tone Arm Lifter to raise the tone arm, return it to its rest, and secure it with the lock. Rotate the Power/Volume knob counter-clockwise to turn off the unit.

Image 4: Detail of the stylus, platter, and auto-stop feature.

Image 5: Overview of connectivity options and record size compatibility.
5.2 Bluetooth Connectivity
The FYDEE A6 can act as a Bluetooth receiver, allowing you to stream audio from your smartphone, tablet, or other Bluetooth-enabled devices through its built-in speakers.
- Enable Bluetooth: Turn on the record player. The light indicator will blink blue, indicating it is in Bluetooth pairing mode.
- Pair Device: On your external device (e.g., smartphone), enable Bluetooth and search for available devices. Select "FYDEE A6" (or similar name) from the list.
- Confirmation: Once paired, the light indicator on the record player will turn solid blue. You can now play audio from your device through the record player's speakers.
- Note: The record player functions as a Bluetooth receiver only. It cannot connect to external Bluetooth speakers or headphones.

Image 6: Connecting your device to the record player via Bluetooth.
5.3 AUX Input
To play audio from a non-Bluetooth device (e.g., MP3 player, CD player), use the 3.5mm AUX-IN port:
- Connect one end of a 3.5mm audio cable (not included) to the AUX-IN port on the record player.
- Connect the other end of the cable to the audio output (headphone jack) of your external device.
- Ensure the record player is powered on. Play audio from your external device.
- Adjust the volume using the record player's volume knob and your external device's volume controls.
5.4 RCA Output
For enhanced sound or to connect to a larger home audio system, use the RCA output jacks:
- Connect the red and white plugs of the RCA cable to the corresponding RCA output jacks on the back of the record player.
- Connect the other end of the RCA cable to the audio input jacks of your external amplifier or powered speakers.
- Ensure both the record player and the external audio system are powered on.
- Play a record or stream via Bluetooth/AUX. Adjust the volume using your external audio system's controls.
5.5 Headphone Listening
For private listening, plug any standard 3.5mm headphones into the headphone jack on the front of the unit. The built-in speakers will automatically mute.
6. Maintenance
Proper maintenance ensures the longevity and performance of your record player:
- Cleaning the Dust Cover: Wipe the dust cover with a soft, damp cloth. Avoid harsh chemicals or abrasive cleaners.
- Cleaning the Stylus: Use a soft brush designed for stylus cleaning, brushing gently from back to front. Avoid touching the stylus with your fingers.
- Cleaning the Cabinet: Wipe the wooden cabinet with a soft, dry cloth. For stubborn marks, a slightly damp cloth can be used, followed by immediate drying.
- Record Care: Keep your records clean and free of dust. Store them vertically in their sleeves to prevent warping.
- Stylus Replacement: The stylus is a consumable part and will wear out over time. Replace it when you notice a decrease in sound quality or increased skipping.
7. Troubleshooting
If you encounter issues with your record player, refer to the following common problems and solutions:
| Problem | Possible Cause | Solution |
|---|---|---|
| No power | Power adapter not connected or faulty outlet. | Ensure power adapter is securely plugged into the unit and a working wall outlet. |
| No sound from speakers | Volume too low; headphones connected; external speakers not connected/powered. | Increase volume. Disconnect headphones. Check external speaker connections and power. |
| Record skipping | Dirty or scratched record; stylus worn or dirty; improper tone arm balance. | Clean record. Clean or replace stylus. Re-adjust counterweight. Ensure player is on a stable surface. |
| Bluetooth not connecting | Record player not in pairing mode; device too far; incorrect device selected. | Ensure record player light is blinking blue. Move device closer. Select "FYDEE A6" from your device's Bluetooth list. |
| Record plays at wrong speed | Incorrect speed selected. | Adjust the LP Speed Control Switch to 33, 45, or 78 RPM as appropriate for the record. |
8. Specifications
- Brand: FYDEE
- Model: A6
- Speeds: 33-1/3, 45, 78 RPM
- Motor Type: Belt-Driven
- Connectivity: Bluetooth (Receiver only), AUX Input (3.5mm), RCA Output, Headphone Jack (3.5mm)
- Speakers: Built-in Dual Stereo Speakers (2 x 3W)
- Material: Wood (Mahogany finish)
- Voltage: 110 Volts (AC)
- Power Source: AC Adapter (5V 1A)
- Included Components: Record Player, Dust Cover, Power Adapter, RCA Cable, User Manual
9. Warranty and Support
For warranty information or technical support, please contact FYDEE customer service:
Email: mwhbpl26mc64@163.com
Please have your model number (A6) and purchase details ready when contacting support.