
1. Product Overview
The KeeKit Wireless Freezer Thermometer (Model MC09-WA181) is designed to accurately monitor indoor and outdoor temperatures and humidity levels. It features a large color display, customizable alarm alerts, and records maximum and minimum values, making it ideal for refrigerators, freezers, kitchens, homes, and restaurants.
This device provides real-time environmental insights to help maintain optimal conditions for food storage and comfort.
2. Package Contents
- 1 x Main Display Unit
- 2 x Remote Sensors
- 1 x USB Cable
- 1 x Instruction Manual
- 1 x Magnetic Mounting Plate
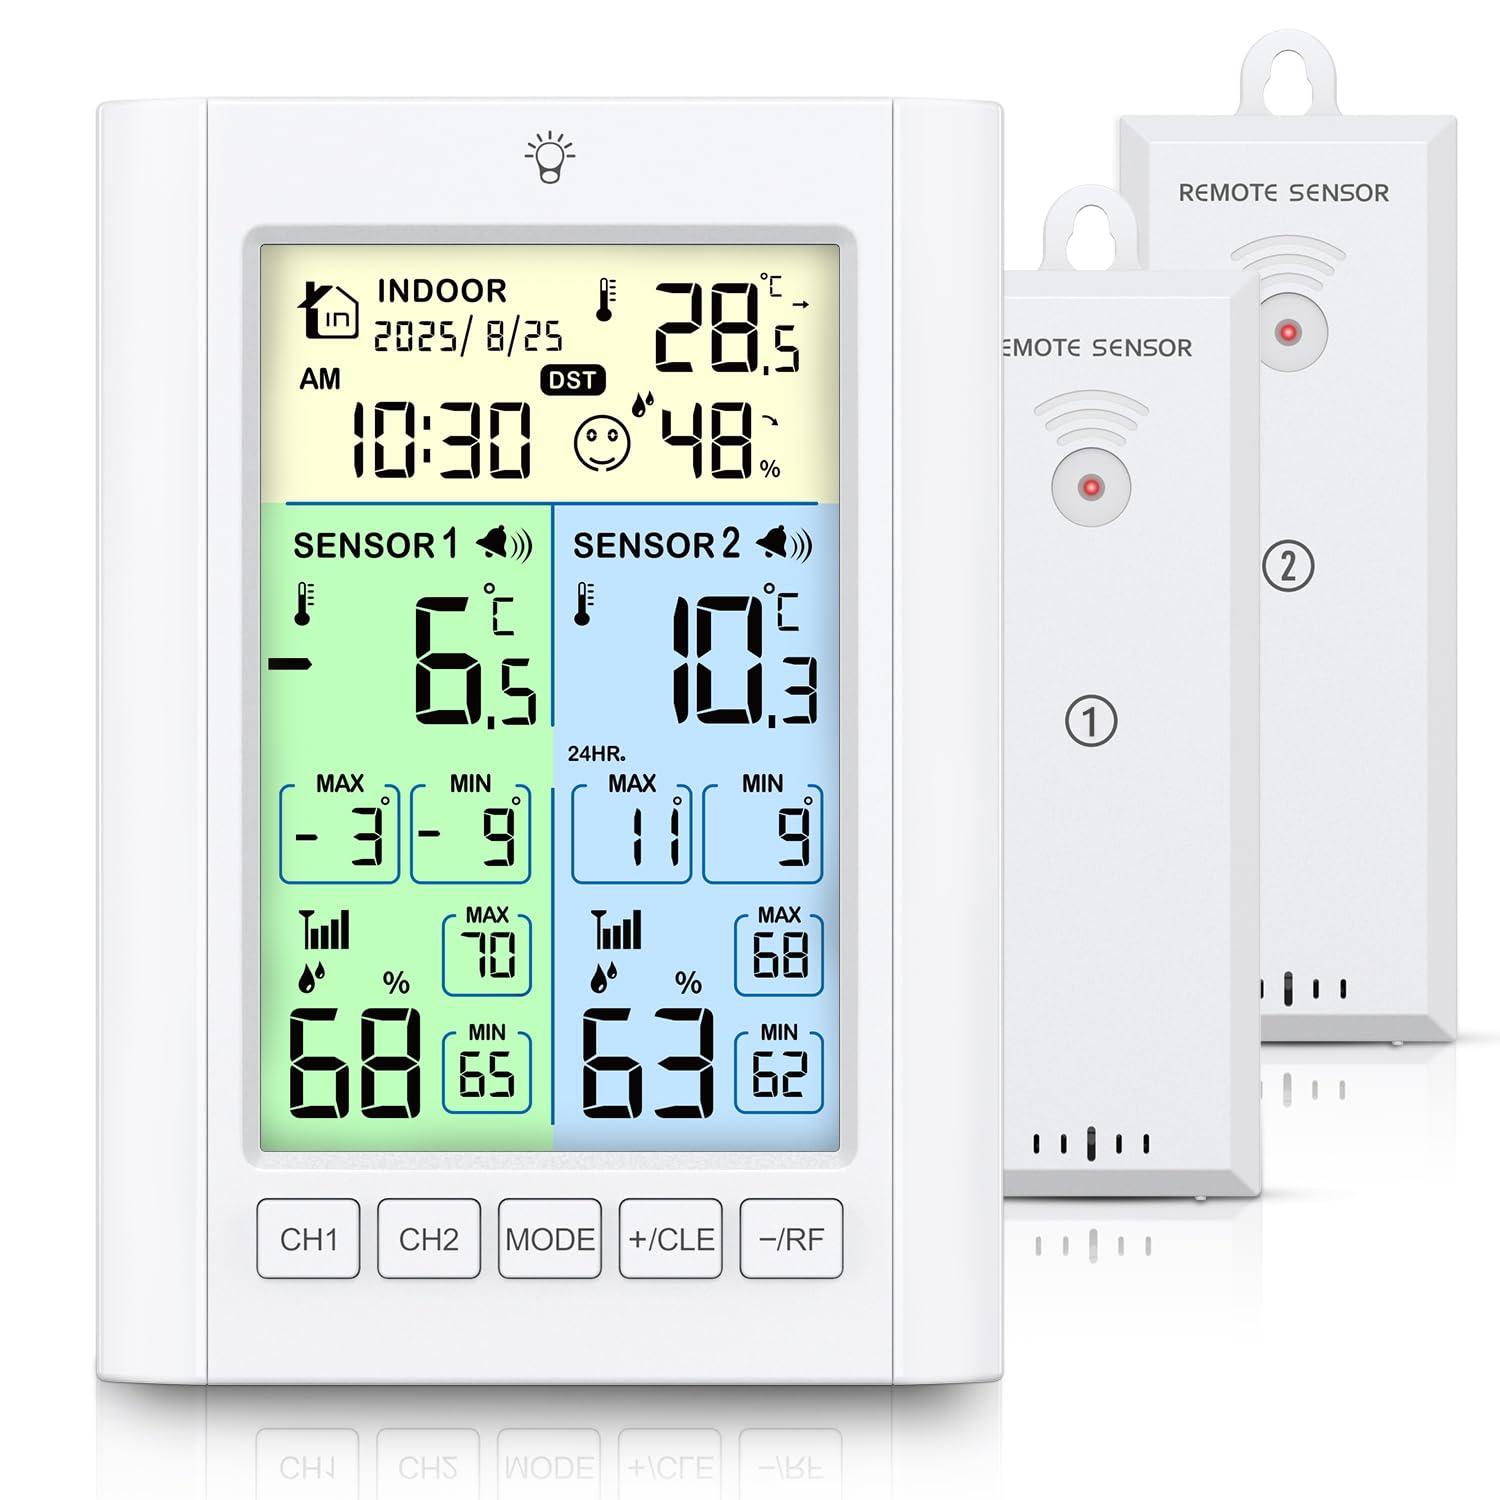
Image: The main display unit, two remote sensors, and accompanying accessories are shown. The main unit features a large digital display, while the remote sensors are compact and white.
3. Setup
3.1 Powering the Main Display Unit
The main display unit can be powered by either AAA batteries (not included) or the included USB cable.
- Battery Mode: Insert 3 AAA batteries (not included) into the battery compartment. The energy-saving backlight automatically turns off after 10 seconds to extend battery life.
- USB Powered Mode: Connect the unit using the provided USB cable. When USB-powered, you can select from three brightness settings (high/low/off) for continuous screen illumination.

Image: A close-up of the main display unit illustrating the battery compartment for AAA batteries and the USB port for external power. Text indicates backlight behavior for each power mode.
3.2 Installing Remote Sensors
Each remote sensor requires 2 AAA batteries (not included). Ensure correct polarity when inserting batteries.

Image: Two remote sensors are displayed next to the main unit, highlighting their compact size and indicating outdoor temperature range, temperature accuracy, and humidity accuracy.
3.3 Pairing Sensors and Unit Selection
The main unit automatically connects to the remote sensors upon power-up. If connection is lost or you wish to re-pair, refer to the full instruction manual. The main unit can display temperatures in either Celsius (°C) or Fahrenheit (°F).
- To switch between °C and °F, locate the °C/°F button on the back of the main unit and press it.
Video: This video provides an introduction to the usage of thermometers and their accessories, including basic setup and functionality. It demonstrates how to prepare the device for first use.
4. Operating Instructions
4.1 Display Overview
The large color display provides comprehensive information at a glance:
- Indoor Conditions: Light yellow zone for indoor temperature and humidity.
- Channel 1: Green zone for remote sensor 1 temperature and humidity.
- Channel 2: Blue zone for remote sensor 2 temperature and humidity.
- Additional Information: Time, calendar, DST, and comfort level indicators.
- Min/Max Records: Track minimum and maximum temperature and humidity values for all channels.

Image: The multi-function display of the thermometer is shown, with labels pointing to calendar, time, indoor temperature & humidity, sensor 1 & 2 temperatures, and min/max humidity records.
4.2 Setting Temperature Alarms
The device features an advanced alarm system to alert you when temperatures exceed or fall below your preset range.
- Alarm Range: Customizable from -40°F to 158°F (-40°C to 70°C) for outdoor channels.
- Alert Mechanism: A two-minute alarm cycle with flashing icons will activate when temperatures go outside the set limits.
- Viewing Preset Alarms: Press the "-/RF" button to view pre-set alarm temperatures.

Image: The thermometer display highlights the temperature alarm feature with visual alarm bell icons and text indicating the alarm duration and how to view preset temperatures.
Video: This video demonstrates the product features of the refrigerator thermometer, including its display, alarm functions, and how to interact with the device for temperature monitoring.
5. Placement Options
The KeeKit thermometer offers versatile placement options for convenience and optimal visibility:
- Hang: Utilize the hang hole on the back of the main unit or the remote sensors for wall mounting.
- Stand: The main unit includes a built-in stand for upright placement on flat surfaces.
- Magnetic Mounting: Attach the unit securely to metal surfaces like refrigerators or freezers using the included magnetic mounting plate.

Image: Three different installation methods are shown: hanging on a wall, standing on a table, and magnetically attached to a refrigerator, demonstrating the product's versatile placement.

Image: A remote sensor is shown inside a refrigerator, illustrating its wireless capability and suitability for monitoring temperatures in cold environments.
6. Maintenance
6.1 Battery Replacement
Replace batteries in the main unit and remote sensors when the low battery indicator appears on the display. Ensure to use new AAA batteries and observe correct polarity.
6.2 Cleaning
Wipe the device and sensors with a soft, dry cloth. Do not use abrasive cleaners or immerse the units in water.
7. Troubleshooting
- No Display/Power: Check battery installation and ensure they are fresh. If using USB, verify the cable and power source.
- No Sensor Reading: Ensure remote sensors are within the transmission range (up to 328ft/100m in open air). Re-insert batteries in sensors and main unit to re-establish connection.
- Inaccurate Readings: Allow sufficient time for the sensors to stabilize, especially after initial setup or significant temperature changes. Ensure sensors are not exposed to direct sunlight or extreme drafts.
- Alarm Not Triggering: Verify that alarm thresholds are correctly set and the alarm function is enabled.
8. Specifications
| Feature | Detail |
|---|---|
| Model Name | Wireless Freezer Thermometer |
| Model Number | MC09-WA181 |
| Brand | KeeKit |
| Indoor Temperature Range | -9.9°C to 50°C (14.2°F to 122°F) |
| Outdoor Temperature Range | -40°C to 70°C (-40°F to 158°F) |
| Humidity Range | 20% to 95% |
| Display Type | Digital, Triple Color-Zoned |
| Power Source (Main Unit) | 3 x AAA Batteries (not included) or USB Cable |
| Power Source (Sensors) | 2 x AAA Batteries (not included) per sensor |
| Connectivity Technology | Wireless (RF) |
| Max Transmission Distance | 328ft / 100m (in open air) |
| Special Features | Alarm Alert, Max/Min Records, DST, Comfort Level |
| Placement Options | Hang, Stand, Magnetic Mounting |
| Outer Material | Metal |
| Parcel Dimensions | 19 x 14.3 x 3.3 cm |
| Item Weight | 350 g |
9. Warranty & Support
KeeKit is committed to providing quality products and excellent customer service. Your Wireless Freezer Thermometer comes with the following:
- 1-Year Warranty: Covers manufacturing defects.
- 30-Day Return Guarantee: For hassle-free returns.
- 90-Day Replacement Guarantee: For product replacements.
- 24/7 Online Customer Support: Assistance available around the clock.
- Lifetime Technical Support Service: Ongoing technical assistance for the product's lifespan.
For any inquiries or support, please refer to the contact information provided in your product packaging or visit the official KeeKit website.