Introduction
This manual provides detailed instructions for the proper use and maintenance of your LOENTIR DV111 8K Video Camera Camcorder. Please read this manual thoroughly before operating the device to ensure optimal performance and longevity.
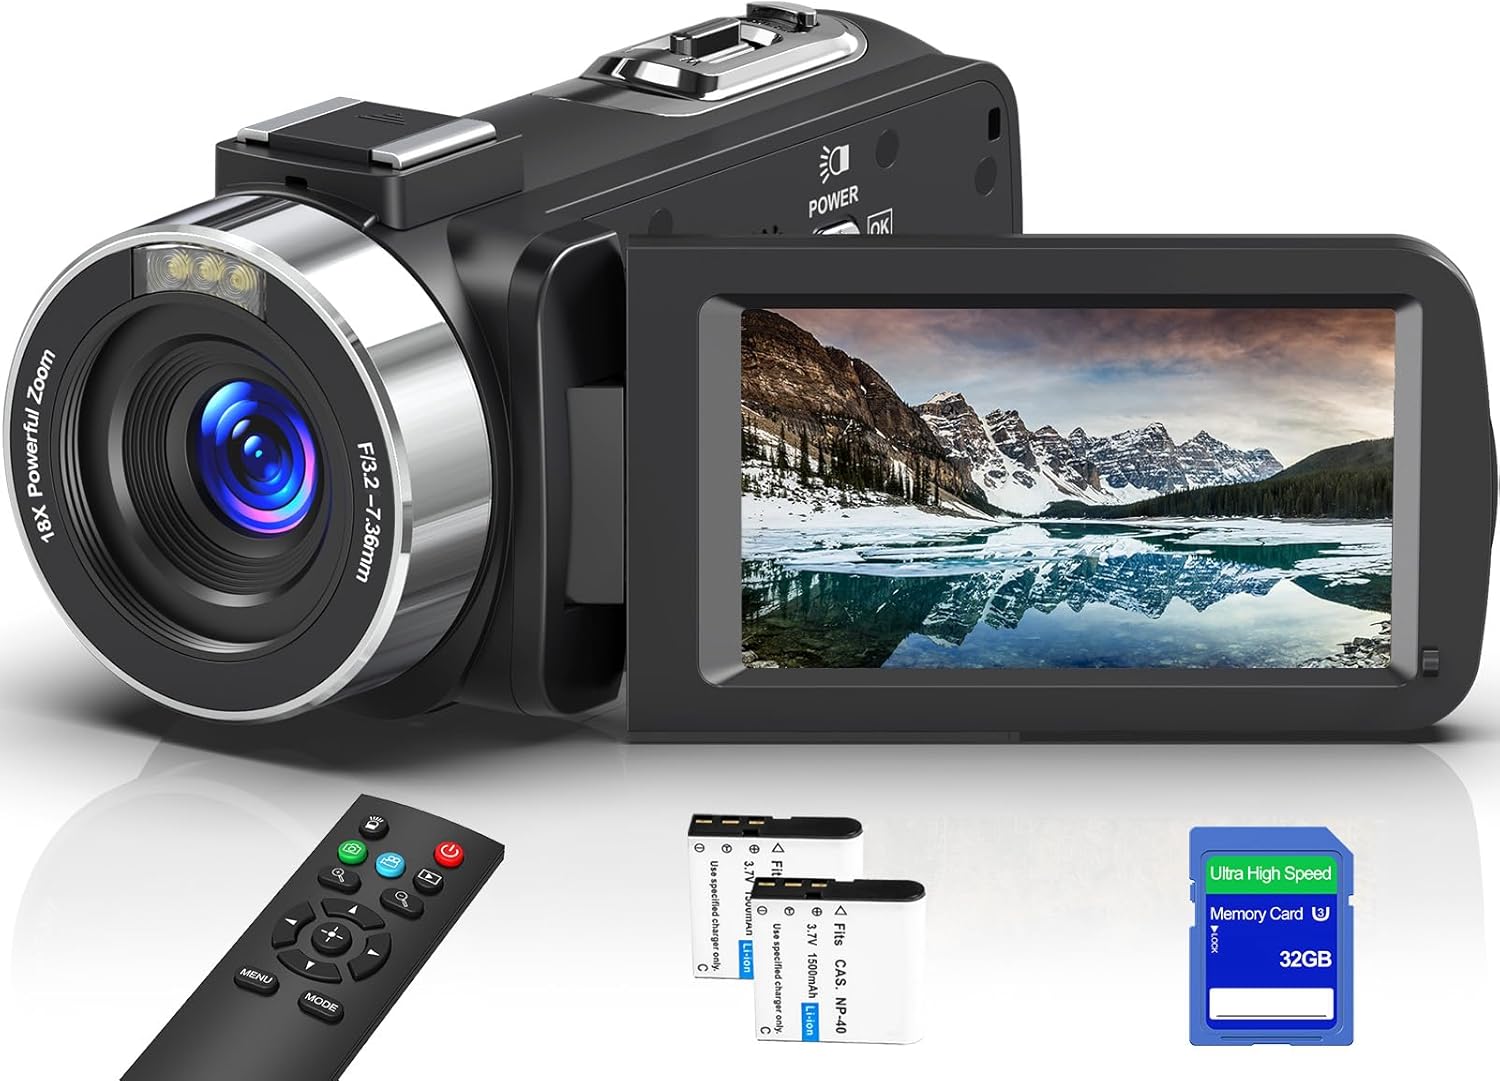
Image: The LOENTIR DV111 8K Video Camera Camcorder, showcasing its compact design, flip-out screen, and included accessories like the remote control, two batteries, and a 32GB SD card.
Setup
1. What's in the Box
- 8K Camcorder x 1
- 32GB SD Card x 1
- 2.4G Remote Control x 1
- NP-40 Lithium Battery x 2
- Type-C Data Cable x 1
- Lens Cover x 1
- DV Bag x 1

Image: An illustration detailing the items included in the product package: the 8K camcorder, USB cable, two batteries, SD card, remote control, lens cover, and DV bag.
2. Battery Installation and Charging
- Open the battery compartment cover located on the bottom of the camcorder.
- Insert an NP-40 Lithium Battery, ensuring the correct polarity.
- Close the battery compartment cover securely.
- Connect the camcorder to a power source using the provided Type-C Data Cable for charging. The charging indicator will illuminate.
3. SD Card Installation
- Locate the SD card slot, typically on the side of the camcorder.
- Insert the 32GB SD Card (or another compatible SD card up to 256GB, Class 10 or above) into the slot until it clicks into place.
- To remove, gently press the card until it springs out.
Operating Instructions
1. Basic Controls

Image: A detailed diagram highlighting the various buttons and ports on the LOENTIR DV111 camcorder, including the power button, menu button, mode button, UP/DOWN buttons, Rec/Stop button, photo shutter, digital zoom, cold shoe, external MIC jack, HDMI output, and Type-C USB interface.
- Power / OK / Light button: Press to power on/off, confirm selections, or activate the fill light.
- Rec/Stop button: Press to start or stop video recording.
- Photo shutter: Press to capture a still image.
- Menu button: Access the camera's settings menu.
- Mode button: Switch between video, photo, and playback modes.
- UP/DOWN buttons: Navigate menu options or adjust settings.
- Digital Zoom in/out: Adjust the 18x digital zoom level.
- 3.0-inch Touch Screen: The screen rotates 270 degrees for flexible viewing and touch control.
2. Recording Video and Photos
- Power on the camcorder.
- Ensure the camcorder is in video mode (indicated on the screen).
- Press the Rec/Stop button to begin recording. Press again to stop.
- To take a photo, switch to photo mode using the Mode button and press the Photo shutter button.

Image: The LOENTIR DV111 camcorder in use, demonstrating its capability to record 8K video and capture 64MP photos, with examples of high-resolution footage.
3. Digital Zoom
The camcorder features an 18x digital zoom. Use the Digital Zoom in/out controls to adjust the magnification. Note that digital zoom may reduce image quality at higher magnifications.

Image: A visual representation of the 18X digital zoom feature, showing a distant object at 8X and 18X magnification, highlighting the camera's ability to capture distant scenery.
4. IR Night Vision and Fill Light
Activate IR Night Vision or the built-in fill light for recording in low-light conditions. IR Night Vision allows for clear black and white footage in complete darkness, while the fill light provides additional illumination for color recording.

Image: A comparison showing the effect of Infrared Night Vision, with a scene captured in normal light and then in IR Night Vision (monochrome).

Image: A visual demonstration of the built-in fill light, showing a subject with the fill light off and then with the fill light on, illustrating improved illumination.
5. Webcam Function
Connect the camcorder to your computer via the Type-C USB cable to use it as a webcam for video calls or live streaming platforms like YouTube, Skype, or TikTok.

Image: The camcorder set up as a webcam, demonstrating its use for live streaming and vlogging with various social media icons.
6. WiFi Connection and Data Transfer
Download the "Hello CAM" app on your mobile phone. Turn on the camera's Wi-Fi signal and connect your phone to the camcorder's Wi-Fi network. This allows you to browse images, download photos/videos, and control the camcorder remotely.

Image: A visual guide demonstrating how to connect the camcorder via WiFi using the "Hello CAM" app, and how to transfer files via USB or by using a card reader.
For app download, scan the QR code: https://qr04.cn/B9lhOx
7. Remote Control
The included 2.4G remote control allows you to operate the camcorder from a distance of up to 49-66 feet in an open environment. This is useful for self-recording or group shots.

Image: The camcorder being operated remotely with the 2.4G remote control, showing a group of people on a beach, ideal for capturing moments from a distance.
8. Special Functions
- Slow Motion: Records video at a higher frame rate to play back slower, emphasizing details.
- Loop Recording: Continuously records, overwriting the oldest footage when the memory card is full. Primarily used for unattended long-term monitoring.
- Time Lapse: Captures images at set intervals and combines them into a video, compressing long processes into short clips.
- Selfie: Utilizes the rotatable screen for easy self-portraits or vlogging.
- Burst Photos: Captures multiple photos in quick succession with a single press, ideal for fast-moving subjects.
- Playback: Review recorded videos and photos directly on the camcorder's screen.
- Video Pause: Pause and resume video recording without creating multiple files.
- Self-Timer: Set a delay (e.g., 2 or 10 seconds) before the camera takes a photo, allowing the user to be in the shot.

Image: A water droplet splash captured in slow motion, illustrating the camera's ability to extend time and break down split-second moments.

Image: Two individuals juggling oranges, representing continuous filming without interruption, as enabled by the loop recording function.

Image: A busy city street scene with blurred movement, illustrating how time-lapse recording compresses long processes to showcase changes and movement.

Image: A sequence of a person running, demonstrating the continuous shooting feature that captures multiple photos in quick succession.

Image: A group of friends on a beach, illustrating the self-timer function which allows for a pre-set delay before capturing a photo.
9. External Microphone Support
The camcorder includes a microphone input interface (MIC input) and a cold shoe mount, allowing for the attachment of an external microphone (not included) for enhanced audio quality.
Maintenance
1. Cleaning
- Lens and Screen: Use a soft, lint-free cloth specifically designed for optical surfaces. For stubborn smudges, a small amount of lens cleaning solution can be applied to the cloth (never directly to the lens or screen).
- Camera Body: Wipe with a dry, soft cloth. Avoid using harsh chemicals or abrasive materials.
2. Battery Care
- Store batteries in a cool, dry place when not in use.
- Do not expose batteries to extreme temperatures.
- If the camcorder will not be used for an extended period, remove the batteries.
3. Storage
Store the camcorder in its protective DV bag in a dry, dust-free environment away from direct sunlight and extreme temperatures.
Troubleshooting
| Problem | Possible Cause | Solution |
|---|---|---|
| Camcorder does not power on. | Battery is depleted or incorrectly inserted. | Charge the battery or reinsert it correctly. Ensure the battery is fully charged. |
| Cannot record video/take photos. | SD card is full, locked, or not inserted. | Insert an SD card, unlock the SD card, or delete unnecessary files to free up space. Ensure the card is Class 10 or above. |
| Poor image/video quality. | Lens is dirty, lighting is insufficient, or digital zoom is too high. | Clean the lens. Use IR Night Vision or fill light in dark environments. Reduce digital zoom. |
| WiFi connection issues. | Incorrect password, camcorder WiFi not enabled, or app not installed. | Ensure correct WiFi password. Enable WiFi on the camcorder. Install the "Hello CAM" app. |
| Remote control not working. | Remote battery depleted, or obstruction between remote and camcorder. | Replace remote battery. Ensure clear line of sight to the camcorder's IR receiver. |
Specifications
- Brand: LOENTIR
- Model Number: DV111
- Video Capture Resolution: 8K, 6K, 4K, 2.7K
- Photo Resolution: 64MP, 48MP
- Digital Zoom: 18x
- Screen: 3.0-inch Touch Screen, 270-degree rotatable
- Storage: Supports SD cards up to 256GB (Class 10 or above)
- Connectivity: WiFi, USB, HDMI Output
- Special Features: IR Night Vision, Built-in Fill Light, Webcam Function, 2.4G Remote Control, External Microphone Support, Slow Motion, Loop Recording, Time-Lapse, Selfie, Burst Photos, Playback, Video Pause
- Battery: NP-40 Lithium Battery (2 included)
- Item Weight: 1.12 pounds
- Package Dimensions: 5.71 x 4.13 x 3.19 inches
- Photo Sensor Technology: CMOS
- Maximum Aperture: 3.2 f
- Video Capture Format: MP4
Warranty and Support
Warranty Information
Please refer to the warranty card included with your product packaging or visit the official LOENTIR website for detailed warranty terms and conditions. Keep your purchase receipt as proof of purchase for warranty claims.
Customer Support
For technical assistance, troubleshooting not covered in this manual, or other inquiries, please contact LOENTIR customer support through the contact information provided on the official website or your product packaging.