1. Product Overview
The TAGVIT Digital Torque Wrench TA-DN1 is a precision instrument designed for accurate torque application in various settings, including automotive repair, bicycle maintenance, and industrial assembly. It features a large color screen, rechargeable battery, and multiple operating modes to enhance efficiency and accuracy.
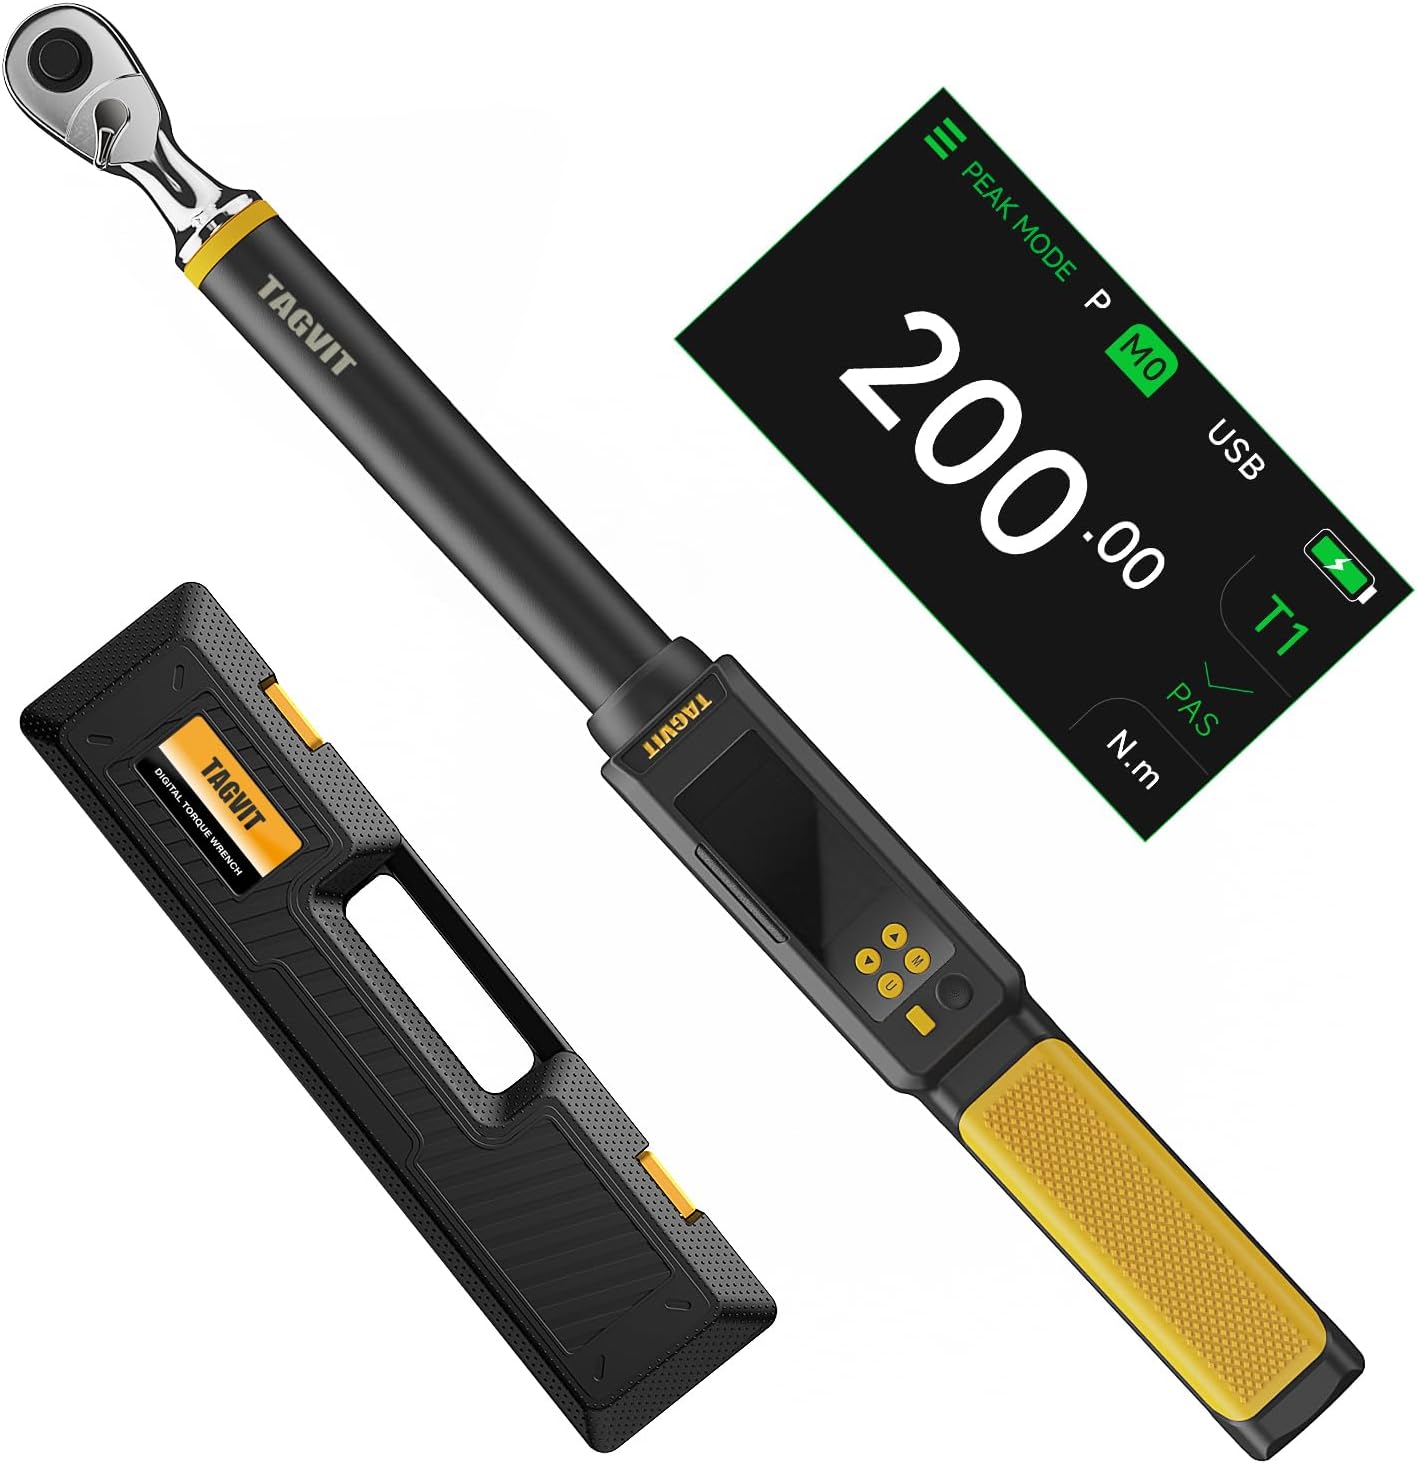
Figure 1.1: TAGVIT Digital Torque Wrench TA-DN1, showing the wrench, its digital display, and a protective carrying case.
2. Safety Information
Please read and understand all safety instructions before operating the TAGVIT Digital Torque Wrench. Failure to follow these instructions may result in injury or damage to the tool or workpiece.
- Always wear appropriate personal protective equipment, such as safety glasses, when using the torque wrench.
- Ensure the workpiece is securely fastened before applying torque.
- Do not exceed the maximum torque capacity of the wrench. Refer to the specifications section.
- Keep the tool clean and dry. Do not expose it to moisture or extreme temperatures.
- Do not use the wrench as a pry bar or hammer.
- Store the wrench in its protective case when not in use to prevent damage.
3. Component Identification
Familiarize yourself with the main components of your digital torque wrench:

Figure 3.1: Key components and button functions of the TAGVIT Digital Torque Wrench.
- Ratchet Head: For attaching sockets. Features a quick-change mechanism and direction switch.
- Digital Display: Large color screen showing torque values, modes, units, and battery status.
- Control Buttons:
- Power/Reset Button (Leftmost): Short press for Reset/Back or Power On. Long press for Power Off.
- Up Arrow Button: Short press to Select/Adjust.
- Down Arrow Button: Short press to Select/Adjust.
- M Button (Mode/Memory): Short press to Switch work group. Long press to Lock button.
- U Button (Unit/Menu): Long press to access Main Menu.
- LED Indicator: Provides visual feedback on torque application (Green for approaching, Red for target reached).
- Buzzer: Provides audible feedback on torque application.
- Handle: Ergonomic grip for comfortable use.
- USB Port: For charging the internal rechargeable battery.
4. Setup
4.1. Charging the Battery
The TAGVIT Digital Torque Wrench is equipped with a rechargeable battery. Before first use, ensure the battery is fully charged.
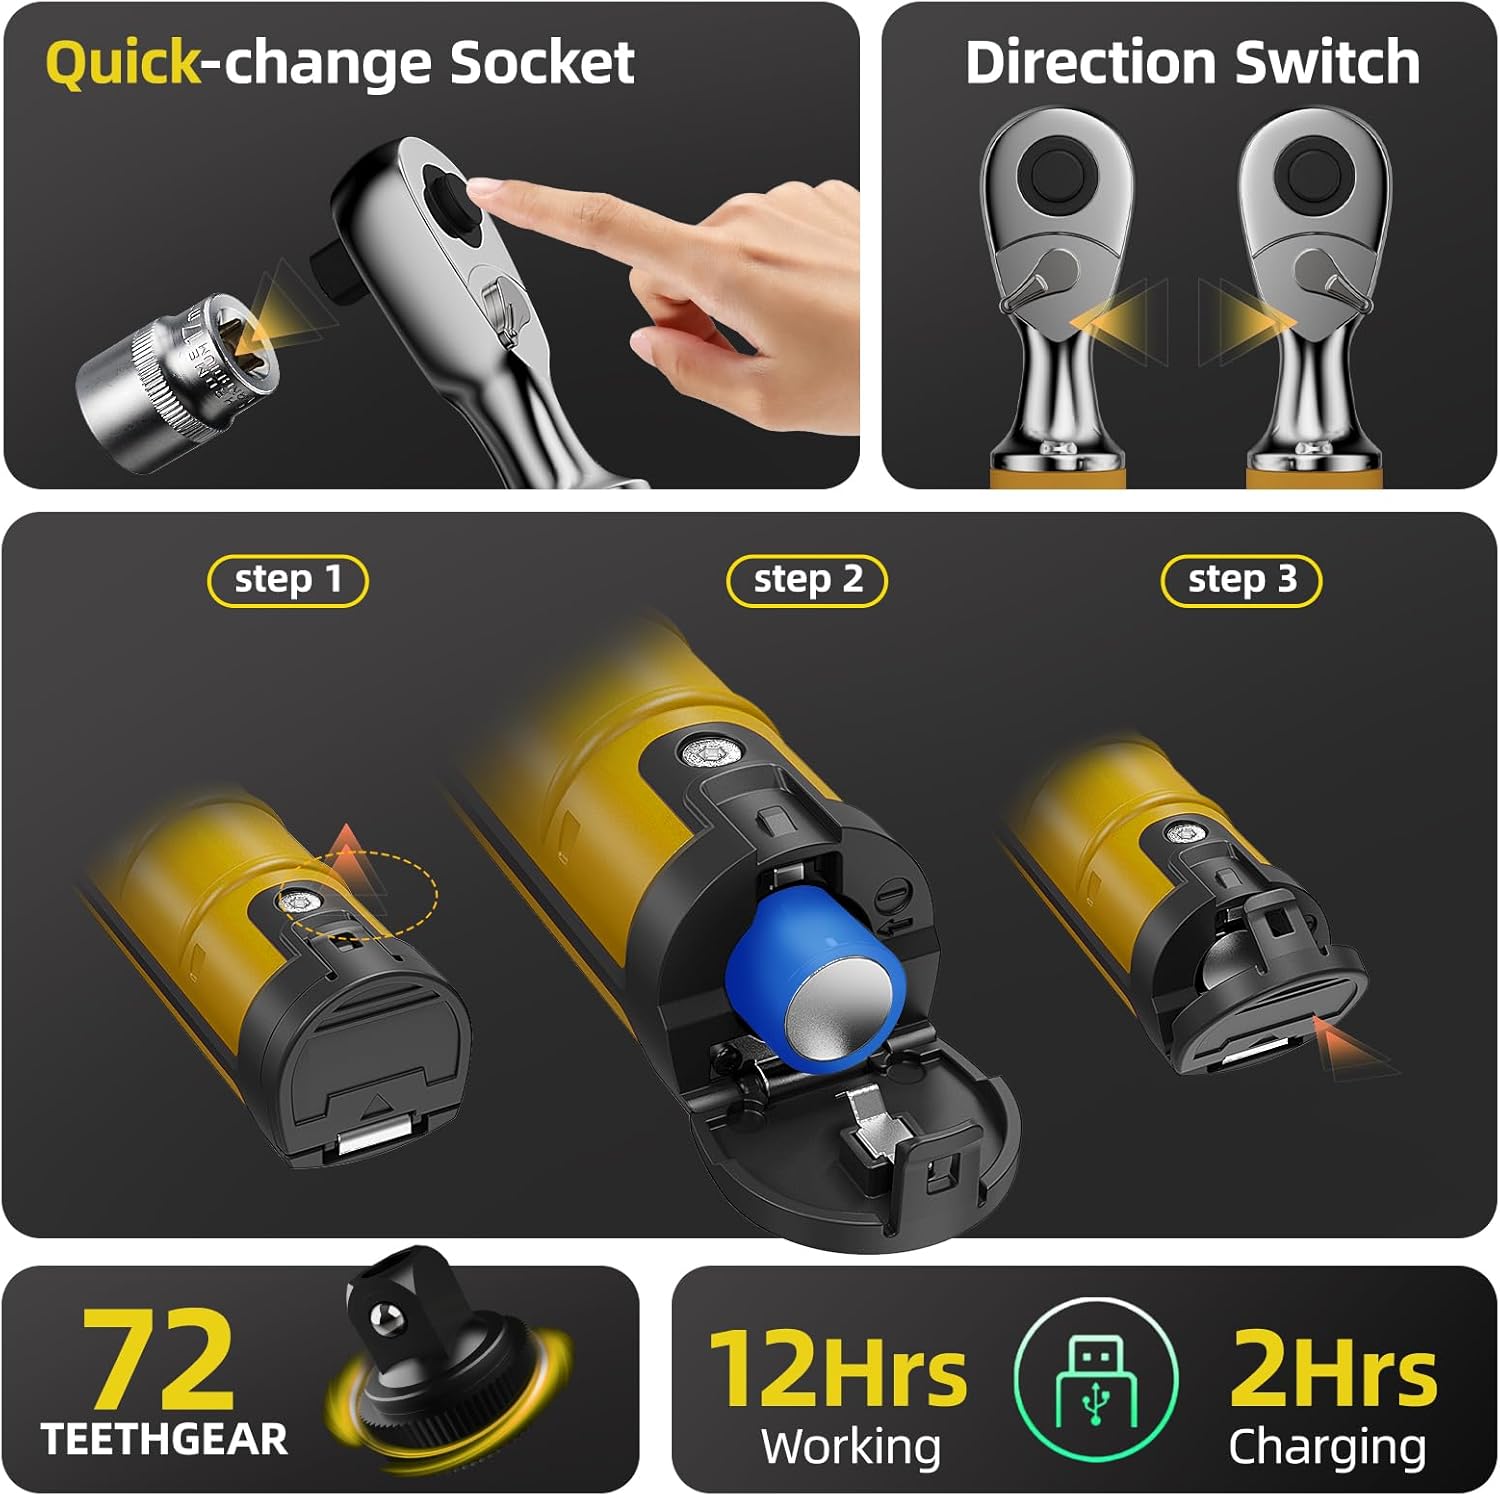
Figure 4.1: Illustration of the quick-change socket, direction switch, and the three-step process for accessing and charging the rechargeable battery.
- Locate the battery compartment cover, typically at the base of the handle.
- Open the cover to reveal the battery and USB charging port.
- Connect the wrench to a standard USB power source using the provided USB cable.
- The charging indicator on the screen will show charging status. A full charge typically takes approximately 2 hours and provides up to 12 hours of working time.
4.2. Initial Power On
Press and hold the Power/Reset button (leftmost button) briefly to power on the device. The digital display will illuminate.
5. Operation
5.1. Main Menu Navigation
Long press the U button to access the Main Menu. Use the Up/Down arrow buttons to navigate and the Power/Reset button to select.

Figure 5.1: Main Menu display, showing options such as Set Working Mode, Set Alarm Mode, Set Unit, Set Alarm Value, Set Time, Stored Data Menu, and Set Language.
- Set Working Mode: Choose between Peak Mode (P) and Track Mode (T).
- Set Alarm Mode: Configure T1 (single target value) or T2 (interval values).
- Set Unit: Select desired torque unit (N.m, Ft-lb, in-Lb, Kg.cm).
- Set Alarm Value: Define the target torque for T1 or the range for T2.
- Set Time: Adjust the internal clock.
- Stored Data Menu: Access recorded torque data.
- Set Language: Choose the display language.
5.2. Working Modes: Peak and Track
The wrench offers two primary working modes:
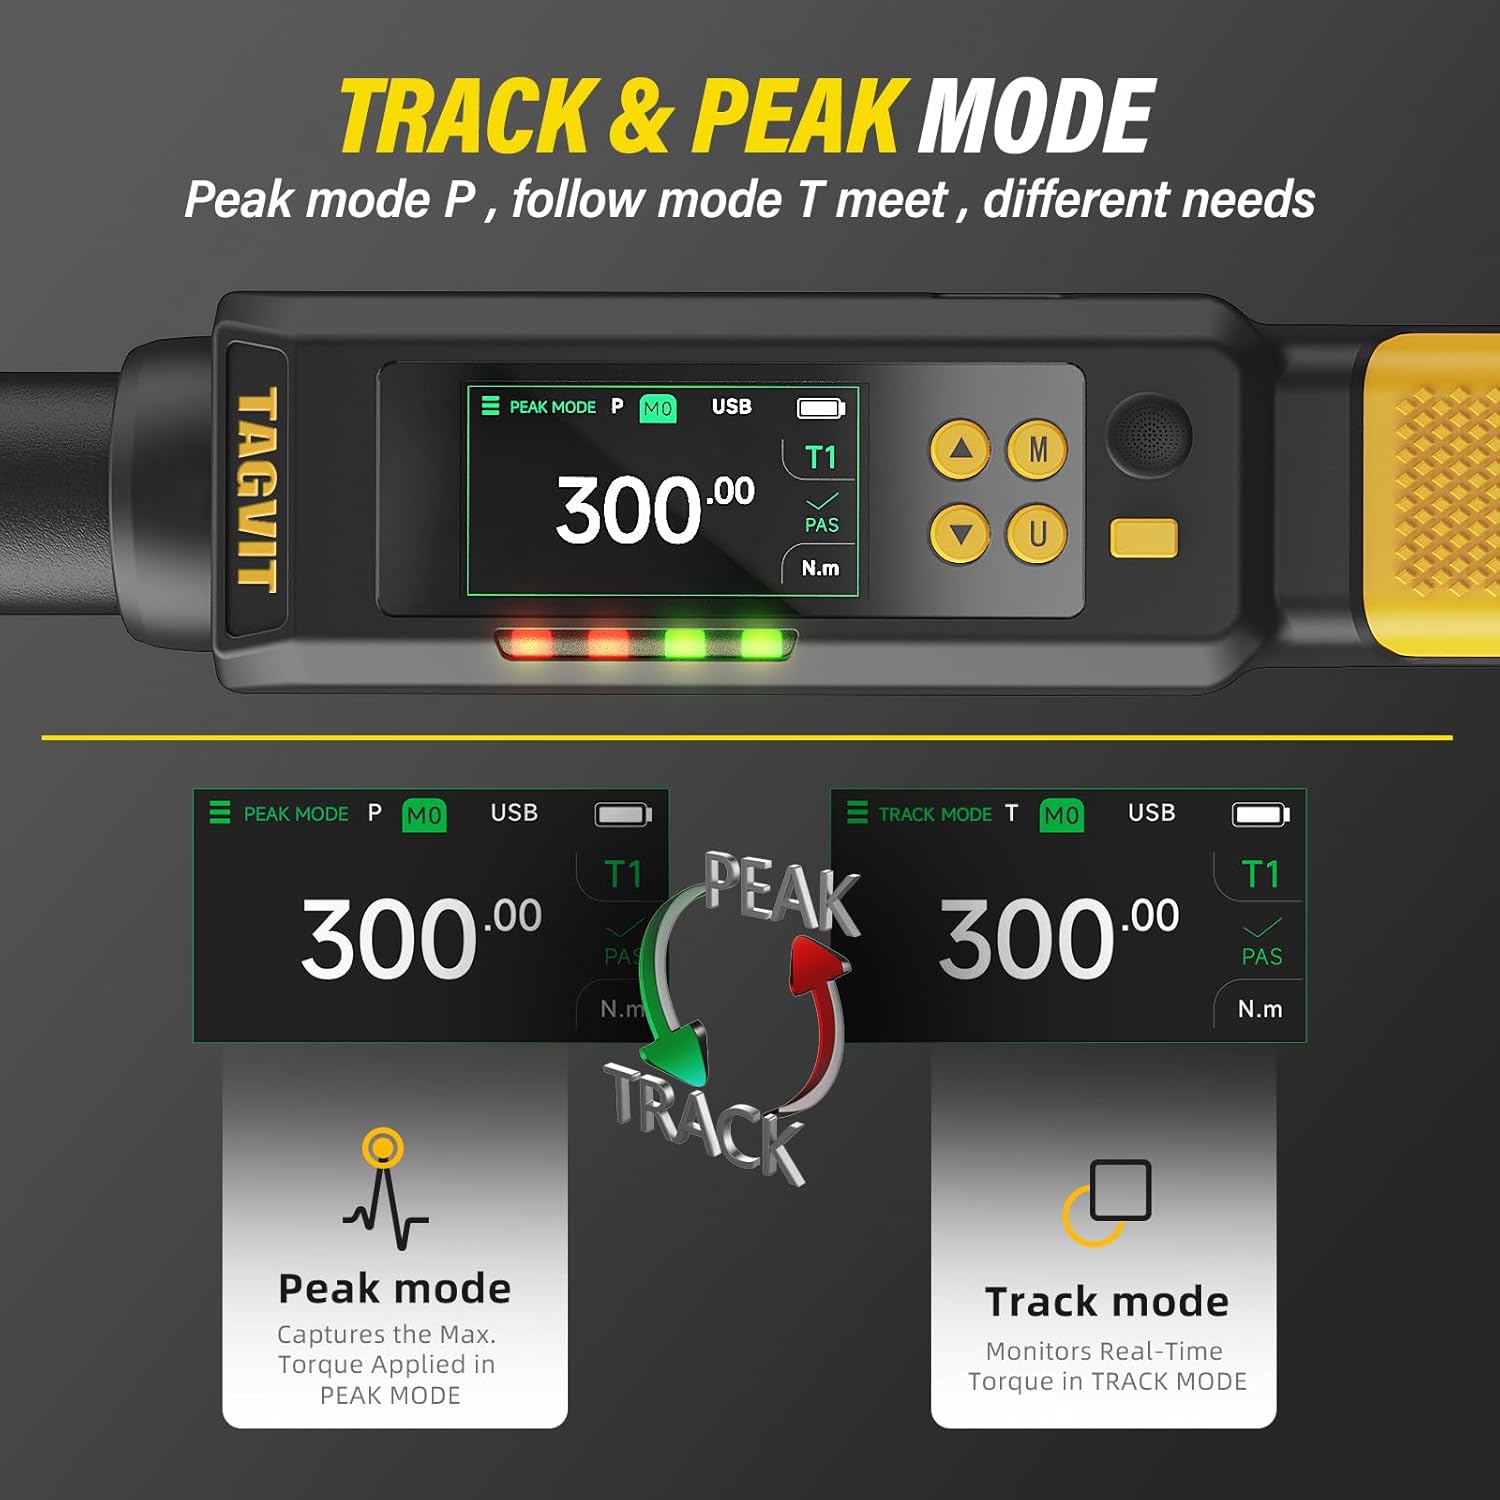
Figure 5.2: Comparison of Peak Mode (P), which captures the maximum applied torque, and Track Mode (T), which monitors real-time torque.
- Peak Mode (P): Captures and displays the maximum torque value applied during an operation. Useful for verifying the highest torque achieved.
- Track Mode (T): Monitors and displays the torque in real-time as it is being applied. Ideal for continuous monitoring during tightening.
To switch between modes, short press the M button or select via the Main Menu.
5.3. Setting Torque Units
From the Main Menu, navigate to "Set Unit" to select your preferred torque unit. Available units include Newton-meters (N.m), Foot-pounds (Ft-lb), Inch-pounds (in-Lb), and Kilogram-centimeters (Kg.cm).
5.4. Applying Torque and Alarm System
Once the desired mode and target torque value are set, attach the appropriate socket to the quick-change ratchet head. Position the wrench on the fastener and apply force smoothly.

Figure 5.3: Visual representation of the LED indicator and buzzer alarm system, showing green light for approaching torque and red light for target torque reached.
- As you approach the target torque (typically 85-90% of the set value), the LED indicator will flash green, and the buzzer will emit intermittent beeps.
- When the target torque (100%) is reached, the LED indicator will turn red, and the buzzer will emit a persistent beep. Stop applying force immediately.
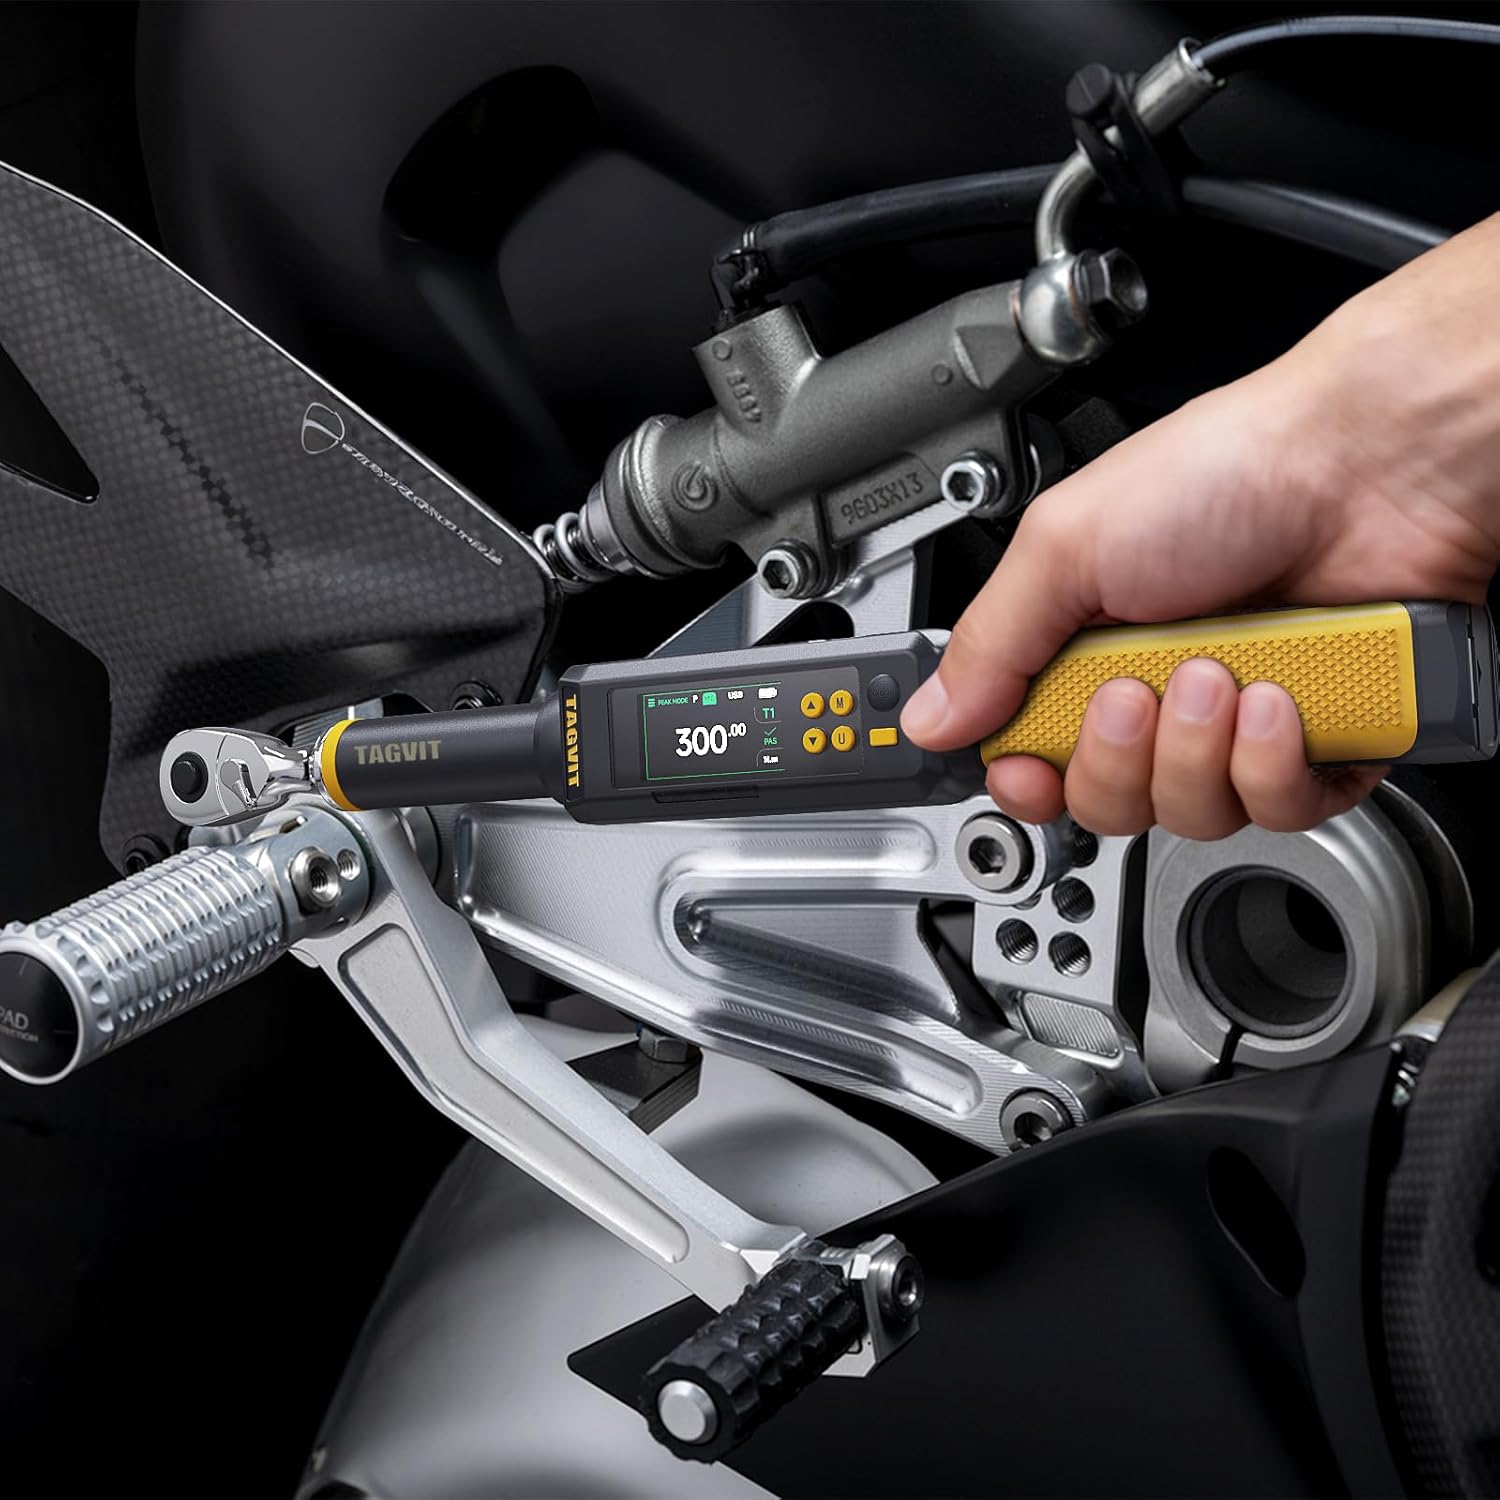
Figure 5.4: The TAGVIT Digital Torque Wrench being used to apply torque on a motorcycle component, demonstrating practical application.
5.5. Data Storage and Recall
The wrench can store up to 512 data values, allowing for detailed record-keeping and review of applied torque. This feature is useful for quality control and documentation.

Figure 5.5: The digital display showing a list of stored torque data, including peak torque, accuracy, and pass/fail results.
To access stored data, navigate to the "Stored Data Menu" from the Main Menu. You can review individual records, which typically include the applied torque value, accuracy, and a pass/fail (NG) indication.
6. Maintenance
6.1. Cleaning and Storage
- Wipe the wrench clean with a soft, dry cloth after each use. Do not use abrasive cleaners or solvents.
- Store the wrench in its protective case in a dry, temperature-controlled environment.
- Avoid dropping or subjecting the wrench to harsh impacts.
6.2. Calibration
The TAGVIT Digital Torque Wrench is factory calibrated to meet high accuracy standards (e.g., ISO 6789-1:2017 and ASME B107.14M). Regular calibration is crucial to maintain accuracy, especially after extensive use or if accuracy is suspected to be compromised.

Figure 6.1: The wrench displayed alongside a calibration certificate, highlighting its adherence to ISO 6789-1:2017 and ASME B107.14M standards, and indicating a fatigue test rating of 50,000+ uses.
- It is recommended to have the wrench professionally calibrated annually or after approximately 15,000 uses, whichever comes first.
- Do not attempt to recalibrate the wrench yourself unless you have specialized equipment and training.
7. Troubleshooting
If you encounter issues with your TAGVIT Digital Torque Wrench, refer to the following common problems and solutions:
| Problem | Possible Cause | Solution |
|---|---|---|
| Wrench does not power on. | Low or depleted battery. | Charge the battery using the provided USB cable. Ensure the cable and power source are functional. |
| Inaccurate torque readings. | Wrench needs calibration; improper technique. | Ensure smooth, consistent force application. Consider professional calibration if readings remain inconsistent. |
| Buzzer or LED indicator not working. | Alarm settings disabled or faulty component. | Check alarm settings in the Main Menu. If problem persists, contact customer support. |
| Screen is scratched or damaged. | Physical damage. | While functionality may not be affected, visual clarity can be reduced. Contact customer support for repair options if necessary. |
8. Specifications
Detailed specifications for the TAGVIT Digital Torque Wrench TA-DN1:

Figure 8.1: Visual representation of the wrench's dimensions and key technical specifications.
| Feature | Detail |
|---|---|
| Model Number | TA-DN1 |
| Chuck Size | 1/2 inch |
| Torque Range | 10-200 N.m (Newton-meters) |
| Accuracy | ±2% CW (Clockwise), ±2.5% CCW (Counter-Clockwise) |
| Units | N.m, Ft-lb, in-Lb, Kg.cm |
| Working Modes | Peak Mode (P), Track Mode (T) |
| Data Memory | 512 values |
| Battery | Rechargeable (approx. 2 hours charging for 12 hours working) |
| Dimensions | Approx. 48.5 cm (19 inches) length, 4 cm (1.57 inches) height |
| Item Weight | 4.64 pounds |
| Material | Aluminum |
| Color | Yellow |
9. Warranty and Support
TAGVIT is committed to providing high-quality tools. For warranty information, technical support, or service inquiries, please refer to the contact information provided with your product packaging or visit the official TAGVIT website.
Please retain your proof of purchase for warranty claims.