1. Important Safety Instructions
Please read all instructions carefully before using the Wancle Conical Burr Electric Coffee Grinder. Retain this manual for future reference.
- Do not immerse the main unit, cord, or plug in water or other liquids.
- Ensure the appliance is placed on a stable, flat, and dry surface.
- Unplug the grinder from the power outlet when not in use, before assembling or disassembling parts, and before cleaning.
- Avoid contact with moving parts.
- Do not operate the appliance with a damaged cord or plug, or after the appliance malfunctions or has been damaged in any manner.
- This appliance is for household use only. Do not use outdoors.
- Close supervision is necessary when any appliance is used by or near children.
- Do not use attachments not recommended or sold by the manufacturer.
2. Product Overview
The Wancle Conical Burr Electric Coffee Grinder is designed for precise and consistent coffee grinding. It features a touchscreen interface, 25 adjustable grind settings, and anti-static technology for a clean grinding experience.
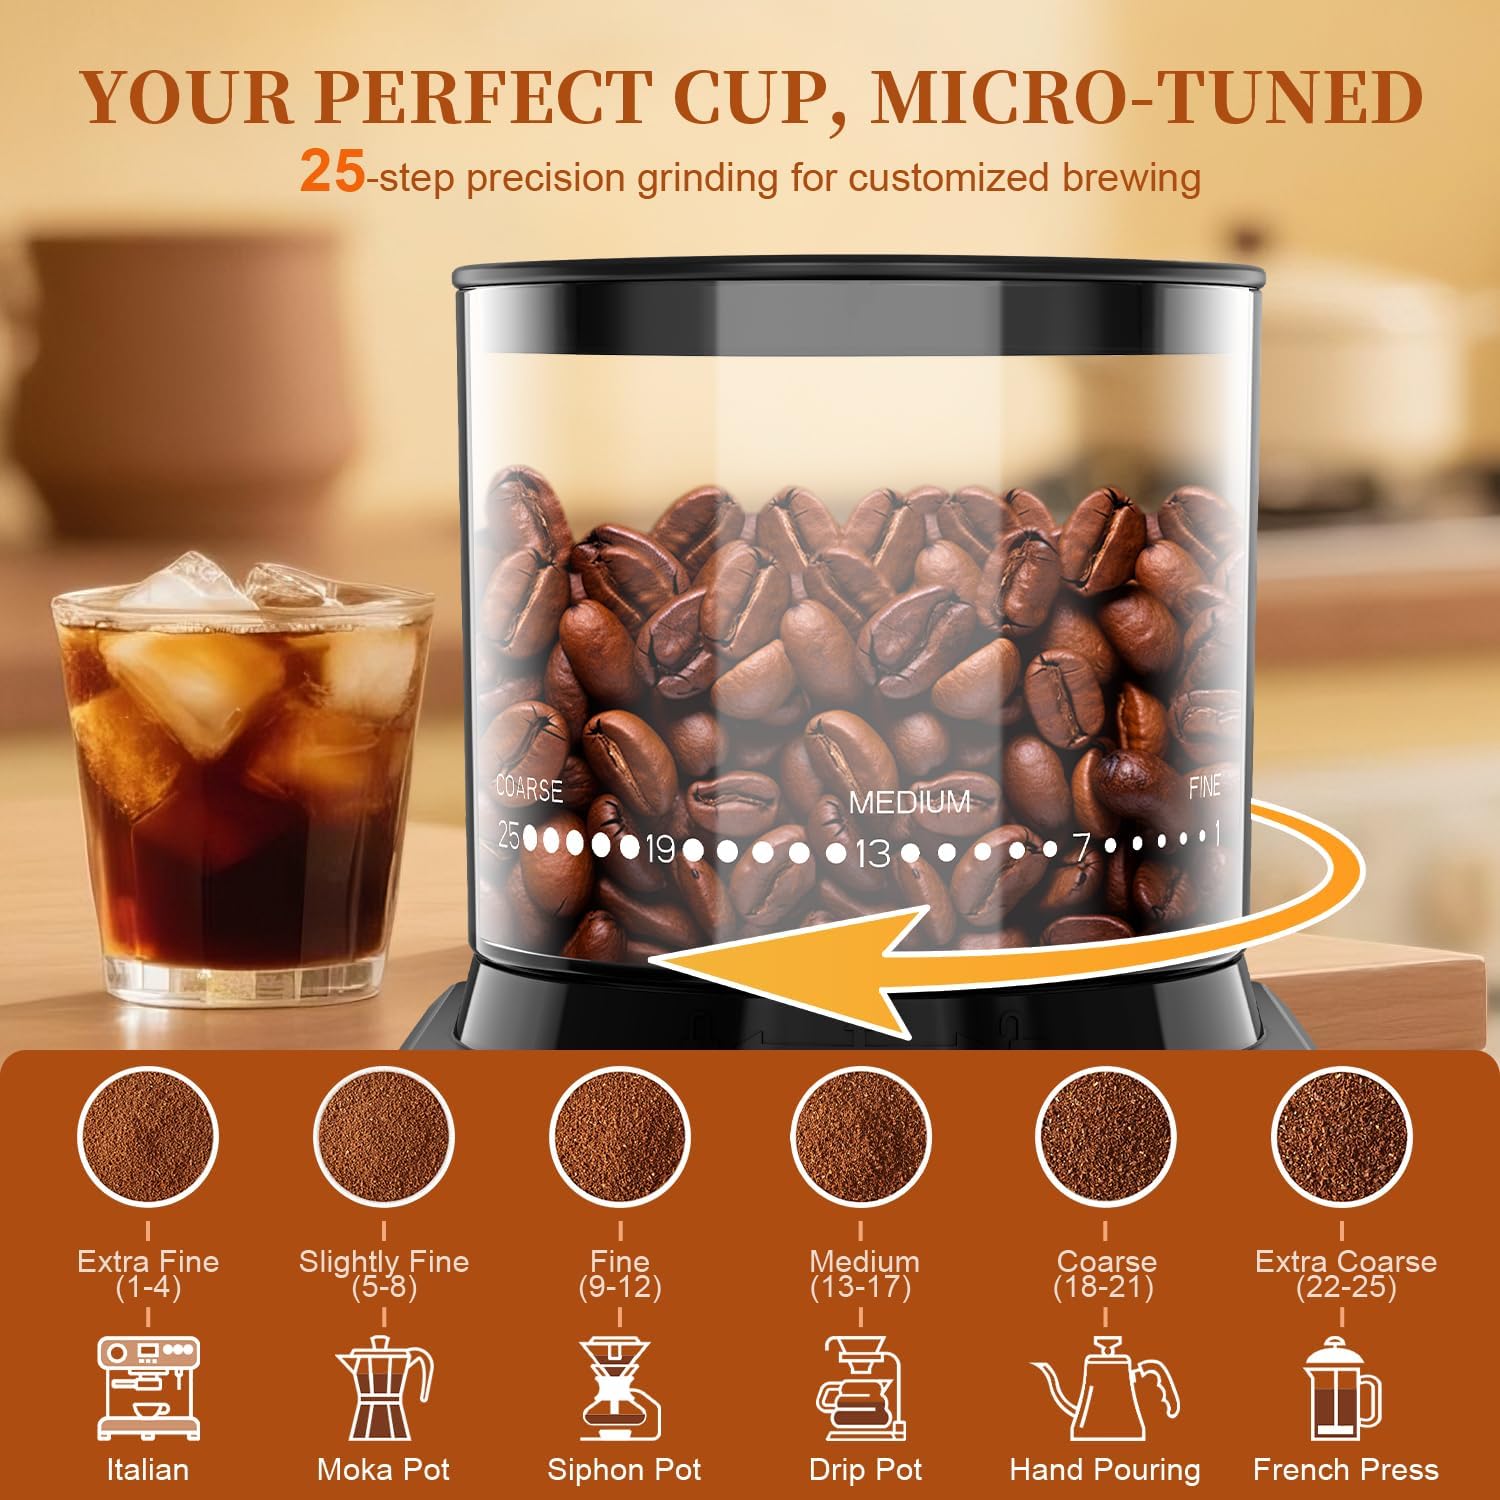
Image: The Wancle Conical Burr Electric Coffee Grinder, showcasing its sleek design and touchscreen controls.

Image: The Wancle coffee grinder demonstrating its compact dimensions (10.8"L x 3.7"W x 7.5"H) for easy storage.
3. Setup and Assembly
Follow these steps to set up your coffee grinder:
- Unpack Components: Carefully remove all parts from the packaging. You should have the main grinder unit, a coffee bean hopper with lid, a grounds container with lid, and a cleaning brush.
- Assemble Upper Burr and Hopper: Ensure the removable upper burr is correctly seated in the main body. Align the arrow on the rotating cup with the arrow on the main body, then push it down to secure. Place the coffee bean hopper on top of the main unit, ensuring it locks into place.
- Position Grounds Container: Place the grounds container into its designated slot on the front of the grinder.
- Connect Power: Plug the power cord into a standard 120V AC outlet.
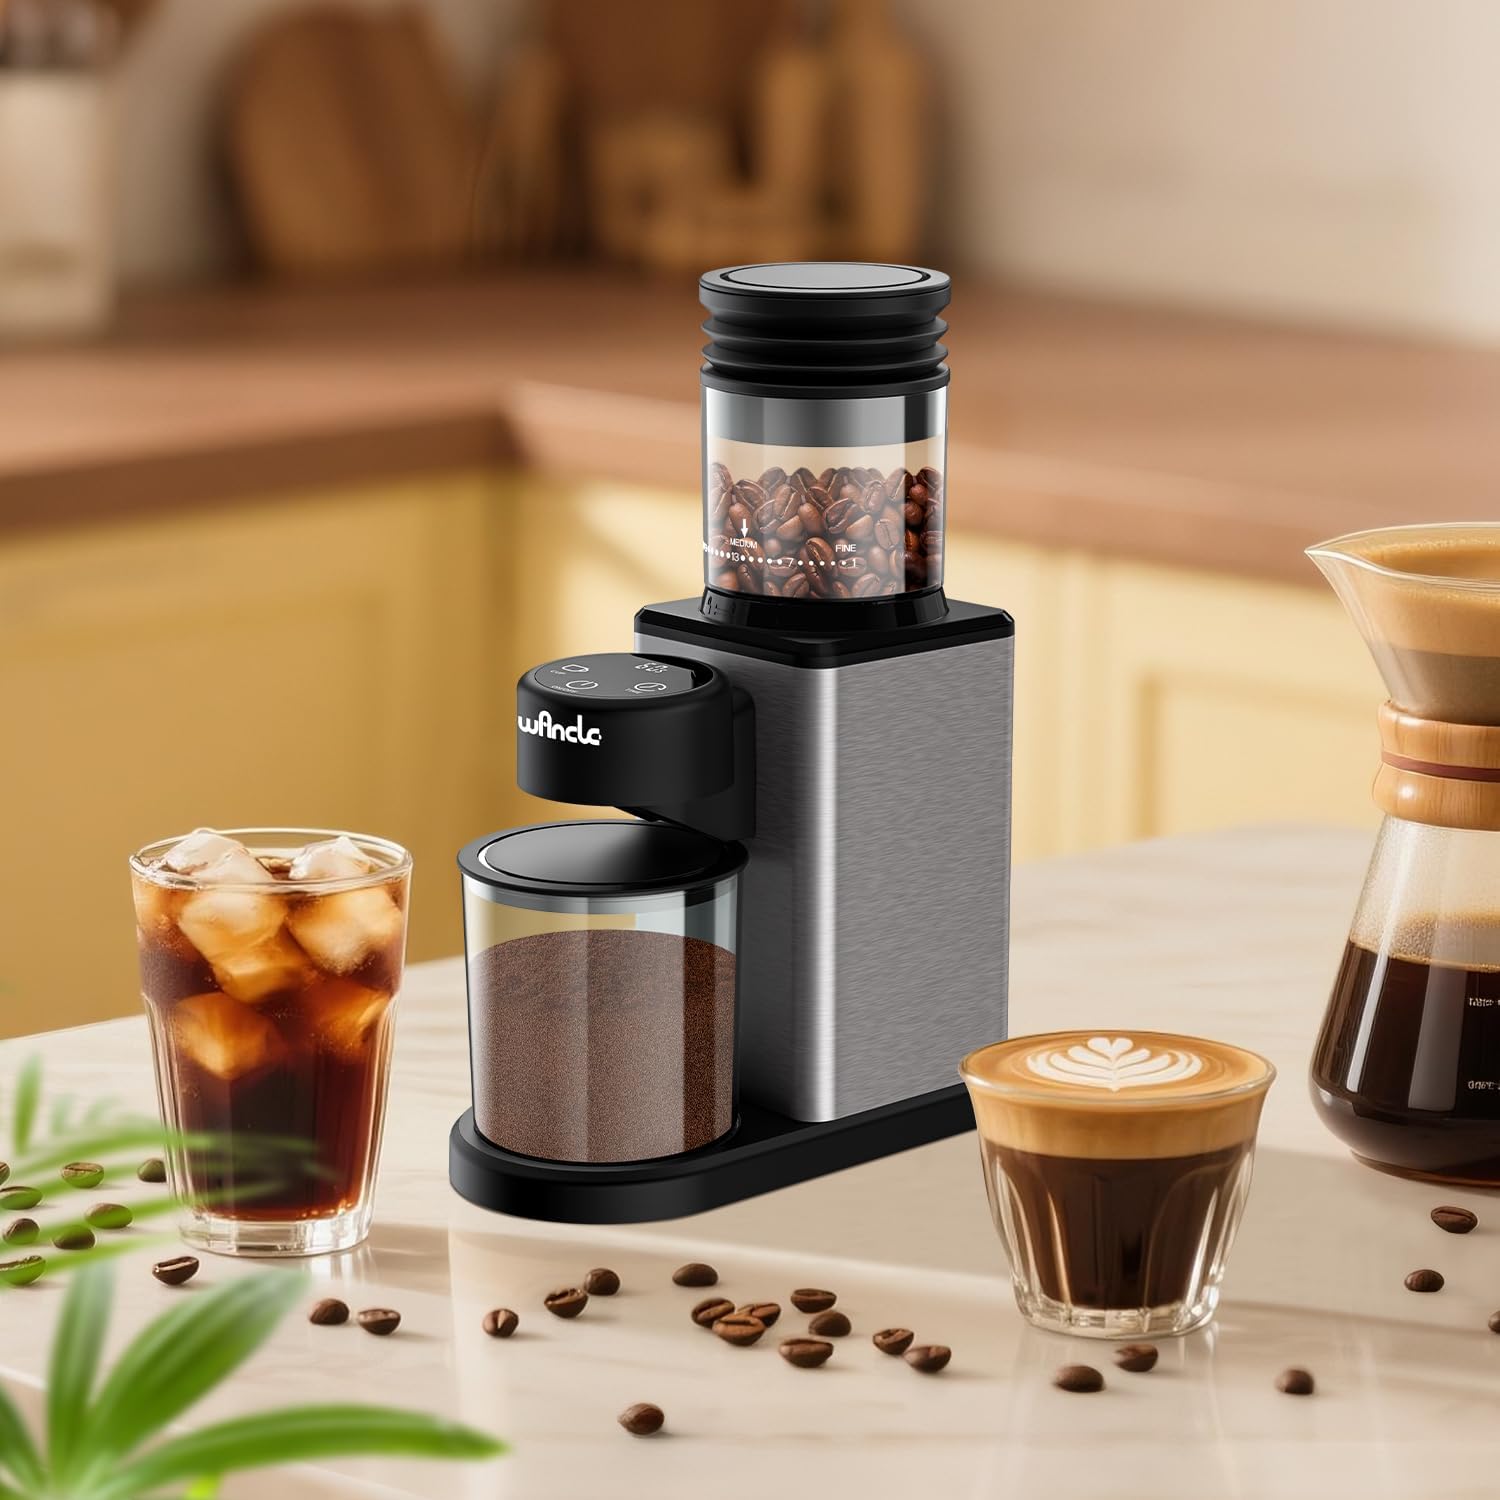
Image: The Wancle coffee grinder fully assembled on a countertop, ready for operation.
4. Operating Instructions
4.1 Adding Coffee Beans
- Open the lid of the coffee bean hopper.
- Pour whole coffee beans into the hopper. Do not overfill. The maximum capacity is approximately 12 cups of coffee beans.
- Close the hopper lid securely.

Image: The coffee grinder illustrating its bean hopper capacity and the grounds container below.
4.2 Adjusting Grind Settings
The grinder offers 25 precise grind settings, from extra fine to extra coarse. Rotate the coffee bean hopper to select your desired grind size. Refer to the grind settings guide below for recommendations.

Image: A detailed view of the coffee grinder's bean hopper, showing the 25 grind settings from coarse to fine, with corresponding brewing methods.
4.3 Grind Settings Guide
| Grind Setting Range | Recommended Brewing Method |
|---|---|
| 1-4 (Extra Fine) | Italian Espresso |
| 5-8 (Slightly Fine) | Moka Pot |
| 9-12 (Fine) | Siphon Pot |
| 13-17 (Medium) | Drip Pot |
| 18-21 (Coarse) | Hand Pouring |
| 22-25 (Extra Coarse) | French Press |
4.4 Using the Touchscreen Controls
- Power On/Off: Press the ON/OFF button to turn the grinder on or off.
- Select Cup Quantity: Press the CUP button to select the desired number of cups (2 to 12 cups). The display will show the selected quantity.
- Set Grinding Time: Alternatively, press the TIME button to set the grinding duration from 1 to 60 seconds, in 1-second increments.
- Start Grinding: Once the desired cup quantity or time is set, press the ON/OFF button to start grinding. The grinder will automatically stop when the selected quantity or time is reached.
5. Maintenance and Cleaning
Regular cleaning ensures optimal performance and extends the life of your grinder.
- Before Cleaning: Always unplug the grinder from the power outlet.
- Cleaning the Burrs: The upper burr is removable for easy cleaning. Gently lift and remove the upper burr. Use the provided cleaning brush to remove any coffee grounds from both the upper and lower burrs.
- Cleaning the Grounds Container: Remove the grounds container and empty it. Wash the container and its lid with warm, soapy water. Rinse thoroughly and dry completely before reattaching.
- Cleaning the Grinder Body: Wipe the exterior of the grinder with a damp cloth. Do not use abrasive cleaners or immerse the main unit in water.
- Anti-Static Technology: The grinder features anti-static technology to minimize grounds clinging. If grounds scattering is observed, promptly clean the plasma mitter inside the grounds outlet with the brush.

Image: The coffee grinder highlighting its easy-to-clean design and anti-static feature, with a cleaning brush shown.
6. Troubleshooting
If you encounter issues with your Wancle coffee grinder, refer to the following common problems and solutions:
| Problem | Possible Cause / Solution |
|---|---|
| Grinder does not turn on. | Ensure the power cord is securely plugged into a working outlet. Check if the ON/OFF button has been pressed. |
| Coffee beans are not feeding into the burrs. | The beans may be stuck. Gently shake the grinder or stir the beans in the hopper to encourage flow. Ensure the hopper is correctly seated. |
| Grounds are scattering or clinging. | Clean the plasma mitter inside the grounds outlet with the provided brush. Ensure the grounds container is properly in place. |
| Inconsistent grind size. | Ensure the burrs are clean and free of old coffee residue. Verify the grind setting is securely selected. |
If the problem persists after attempting these solutions, please contact customer support.
7. Specifications
| Feature | Detail |
|---|---|
| Brand | Wancle |
| Model | Conical Burr Coffee Grinder |
| Voltage | 120V |
| Power | 200W |
| Grind Settings | 25 (Fine to Coarse) |
| Capacity (Beans) | Up to 12 Cups |
| Material | Stainless Steel |
| Product Dimensions | 10.8"L x 3.7"W x 7.5"H |
| Included Components | 1*Conical Burr Coffee Grinder |
8. Warranty and Support
The Wancle Conical Burr Electric Coffee Grinder comes with a 1-Year Manufacturer's Warranty.
For any questions, issues, or support needs, please contact our customer service team. We guarantee a response within 24 hours to assist you.
Please refer to your purchase documentation for specific contact details.