1. Introduction
This manual provides detailed instructions for the assembly, safe operation, and maintenance of your Petony Large Outdoor Dog Enclosure. Designed for durability and pet safety, this enclosure offers a spacious and secure environment for your dog. Please read this manual thoroughly before assembly and use to ensure proper setup and to maximize the lifespan of your product.
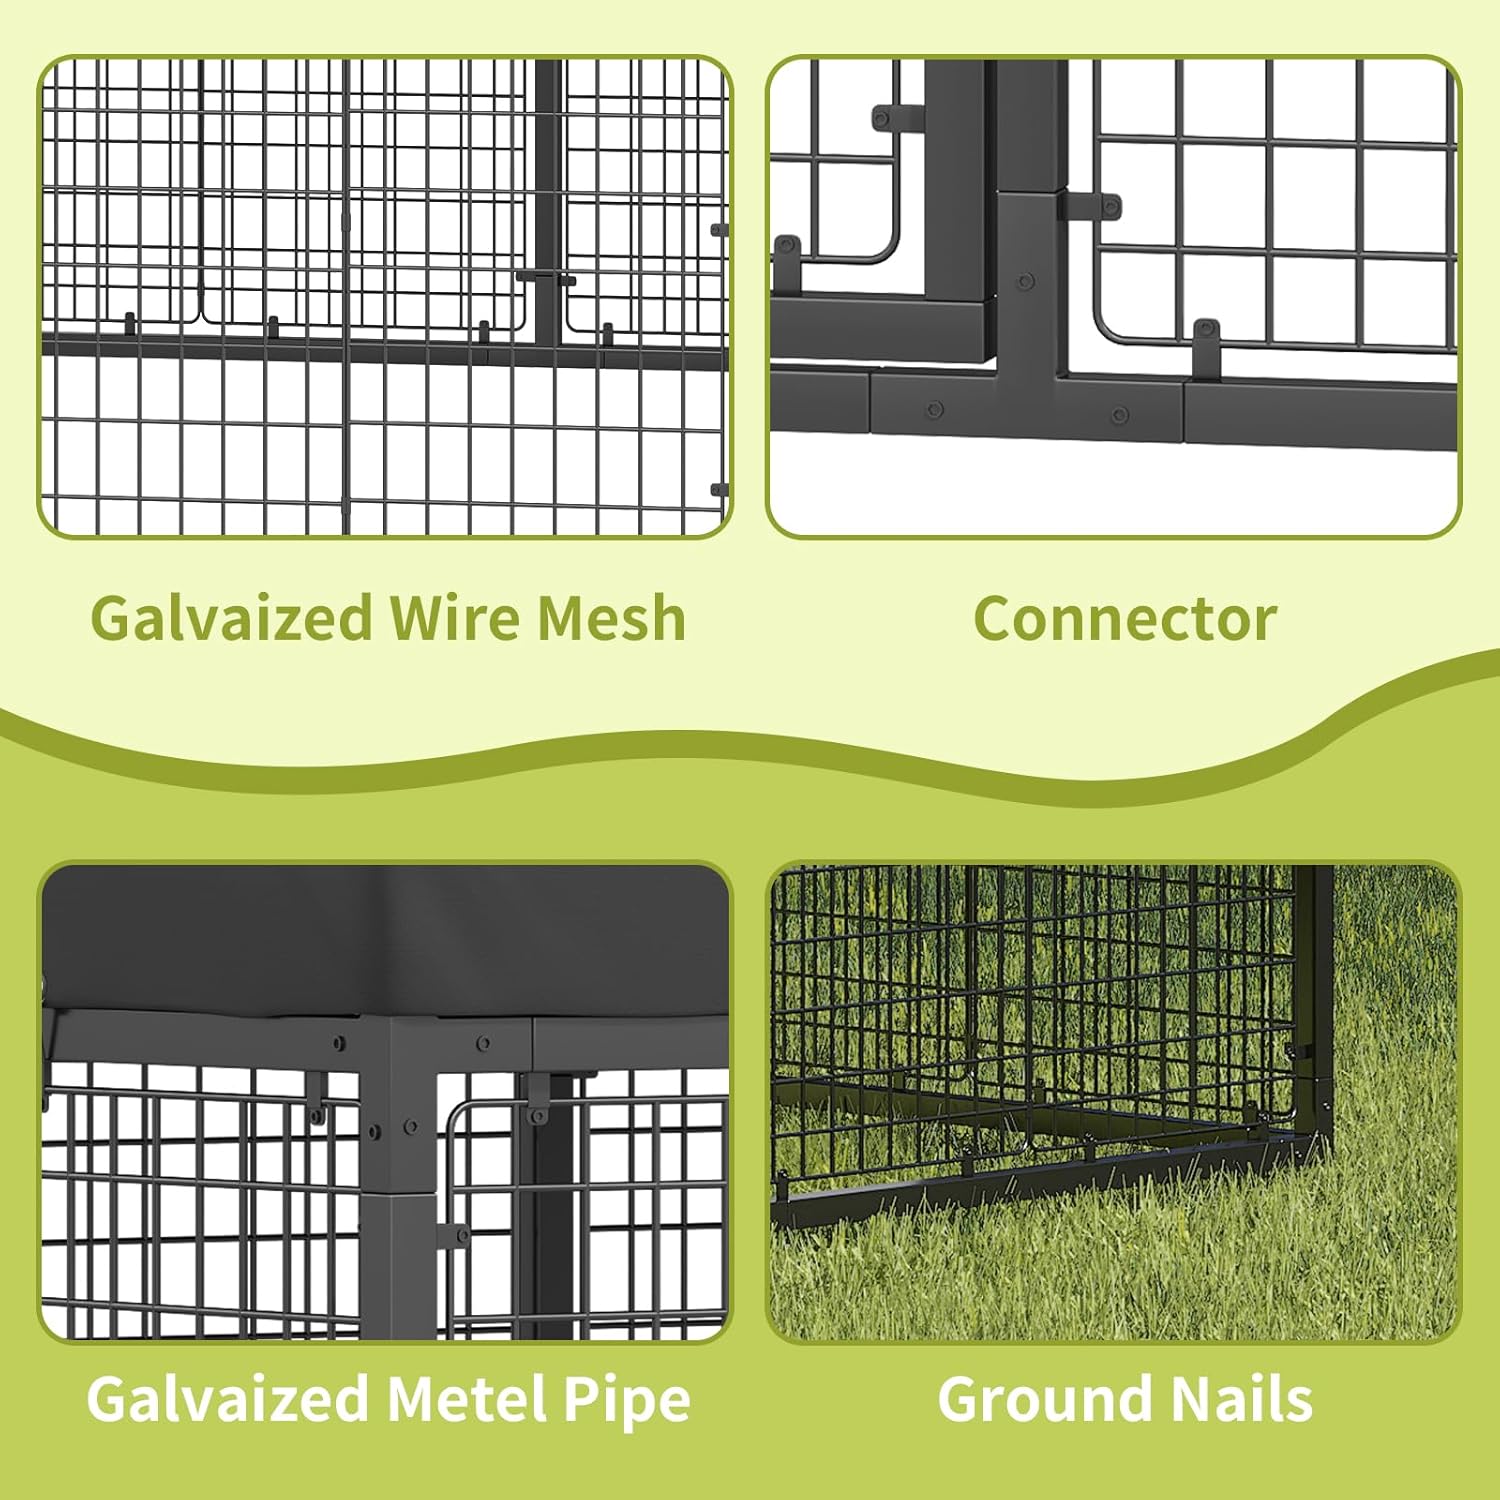
The Petony Large Outdoor Dog Enclosure features a robust galvanized steel frame with an anti-rust coating, a weather-resistant roof, and a dual-lock system for enhanced security. Its versatile design makes it suitable for various outdoor settings.
2. Safety Information
- Always ensure all connections are securely fastened before allowing pets into the enclosure.
- Regularly inspect the enclosure for any signs of wear, damage, or loose components. Tighten or replace as necessary.
- Ensure the enclosure is placed on a level and stable surface to prevent tipping. Use the provided ground nails for additional stability.
- Do not allow children to climb on or play inside the enclosure unsupervised.
- The roof provides weather protection; however, in extreme weather conditions (e.g., heavy snow, strong winds), consider additional measures to secure the roof or temporarily remove it to prevent damage.
- This enclosure is designed for pets. Do not use it for purposes other than its intended use.
3. Package Contents
Please verify that all components listed below are present before beginning assembly. If any parts are missing or damaged, contact customer support.
- Galvanized Steel Panels (various sizes)
- Gate Panel with Dual Locks
- Roof Frame Components
- Weather-Resistant Roof Cover
- Connectors and Fasteners (bolts, nuts, washers)
- Ground Nails
- Assembly Tools (basic wrench, hex key - additional tools like an electric driver with hex bit recommended for faster assembly)
4. Assembly Instructions
Assembly of the Petony Large Outdoor Dog Enclosure is straightforward but may require two people for optimal efficiency. An electric driver with a hex bit is recommended to expedite the process.
- Prepare the Area: Choose a level, stable outdoor location for the enclosure. Clear any debris or obstacles.
- Assemble Wall Panels: Connect the galvanized steel panels using the provided connectors, bolts, nuts, and washers. Ensure all connections are tight.
- Install Gate Panel: Integrate the gate panel into the desired position within the wall structure. Ensure the dual-lock mechanism operates smoothly.
- Secure to Ground: Once the main structure is assembled, use the ground nails to firmly anchor the enclosure to the ground. This significantly enhances stability.
- Assemble Roof Frame: Construct the roof frame according to the diagrams provided in the separate assembly guide (if applicable).
- Attach Roof Cover: Drape the weather-resistant roof cover over the assembled roof frame. Secure it using the integrated grommets and rubber ropes to the top bars of the enclosure.
- Final Inspection: Double-check all connections, locks, and the roof cover for security and proper installation.


5. Usage Guidelines
- Pet Placement: Gently guide your pet into the enclosure. The spacious design allows for comfortable movement.
- Secure Entry/Exit: Always use the dual-lock system on the gate to prevent accidental escapes, especially with larger or more active breeds.
- Weather Protection: The integrated roof provides shade from the sun and protection from rain, ensuring your pet remains comfortable.
- Supervision: While the enclosure is secure, regular supervision of your pet is always recommended.

6. Maintenance
- Cleaning: The smooth surfaces of the galvanized steel panels are easy to clean. Use mild soap and water with a soft cloth or brush. Rinse thoroughly and allow to air dry.
- Rust Prevention: The enclosure features an anti-rust coating. However, regular inspection for scratches or chips in the coating is recommended. Touch up any damaged areas to prevent rust.
- Roof Care: Periodically clean the roof cover to remove dirt and debris. Ensure it remains securely fastened, especially after strong winds.
- Fastener Check: Annually, or more frequently if needed, check all bolts and connections to ensure they remain tight.
7. Troubleshooting
- Issue: Enclosure feels unstable or wobbly.
- Solution: Ensure the enclosure is on a completely level surface. Verify that all ground nails are fully inserted and secure. Check all panel connections and tighten any loose bolts.
- Issue: Gate is difficult to open or close, or locks are stiff.
- Solution: Inspect the gate hinges and lock mechanism for any obstructions or debris. Apply a small amount of silicone lubricant to moving parts if necessary. Ensure the gate is properly aligned within the frame.
- Issue: Rust spots appearing on metal components.
- Solution: While the enclosure has an anti-rust coating, prolonged exposure to moisture or damage to the coating can lead to rust. Clean the rust spots with a wire brush, then apply a rust-inhibiting primer and paint suitable for outdoor metal. Regular maintenance can help prevent this.
- Issue: Roof cover is loose or damaged by wind.
- Solution: Ensure all grommets are securely fastened with the provided rubber ropes. In areas prone to high winds, consider adding additional tie-downs or temporarily removing the cover during severe weather to prevent damage.
8. Specifications
| Model | 354"W x 118"D x 72.5"H |
| Dimensions (L x W x H) | 354 x 118 x 72.5 inches |
| Material | Galvanized Steel (Metal) |
| Special Feature | Durable, Anti-rust Coating, Weather-resistant Roof |
| Target Audience | Dogs (All Breed Sizes) |
| Specific Uses | Outdoor Pet Enclosure |

9. Warranty and Support
For warranty information, product support, or to inquire about replacement parts, please contact Petony customer service. Refer to your purchase documentation for specific warranty terms and contact details.
You can also visit the official Petony store for additional product information and support: Petony Store on Amazon.


