1. Introduction
This manual provides detailed instructions for the setup, operation, and maintenance of your EASYERA 10-inch Digital Wall Clock, model AC-WCR10A. Please read this manual thoroughly before using the product to ensure proper function and longevity.

Figure 1.1: EASYERA 10-inch Digital Wall Clock with Remote Control. This image shows the clock's display with time, date, temperature, and Bluetooth indicator, alongside its dedicated remote control.
2. Safety Information
- Ensure the power source matches the clock's requirements. Use only the provided power adapter.
- Do not expose the clock to extreme temperatures, direct sunlight, or high humidity.
- Avoid dropping or subjecting the clock to strong impacts.
- Do not attempt to disassemble or repair the clock yourself. Contact qualified service personnel for assistance.
- Keep the remote control and its batteries out of reach of children.
3. Package Contents
Verify that all items are present in the package:
- EASYERA 10-inch Digital Wall Clock (Model AC-WCR10A)
- Remote Control
- USB Power Cable
- User Manual (this document)
4. Product Overview
The EASYERA Digital Wall Clock features a 10-inch low-reflectivity LED display, offering clear visibility from various angles. It includes a 360-degree RGB ambient backlight, dual alarms, a countdown timer, and Bluetooth time synchronization.
4.1 Key Features
- Large LED Display: 10-inch screen with low-reflection, scratch-resistant matte finish.
- 360° RGB Ambient Backlight: 11 backlight options (5 RGB, 6 solid colors) and 15 time display colors (8 RGB, 7 solid colors).
- Music Rhythm Lighting: Backlight pulses in sync with ambient sound.
- Smart Remote Control: Full control over clock functions.
- Bluetooth Time Sync: Automatic time synchronization for accuracy.
- Automatic DST: Adjusts for Daylight Saving Time automatically.
- Dual Alarms: Set two independent alarms.
- Countdown Timer: Up to 99 hours, 59 minutes, 59 seconds.
- Temperature Display: Integrated temperature sensor.
- Auto Dimming Mode: Adjusts display brightness based on ambient light.
5. Setup
5.1 Power Connection
The clock is powered by a corded electric connection. Connect the provided USB power cable to the clock and then to a suitable USB power adapter (not always included) plugged into a wall outlet. The clock does not require batteries for operation.
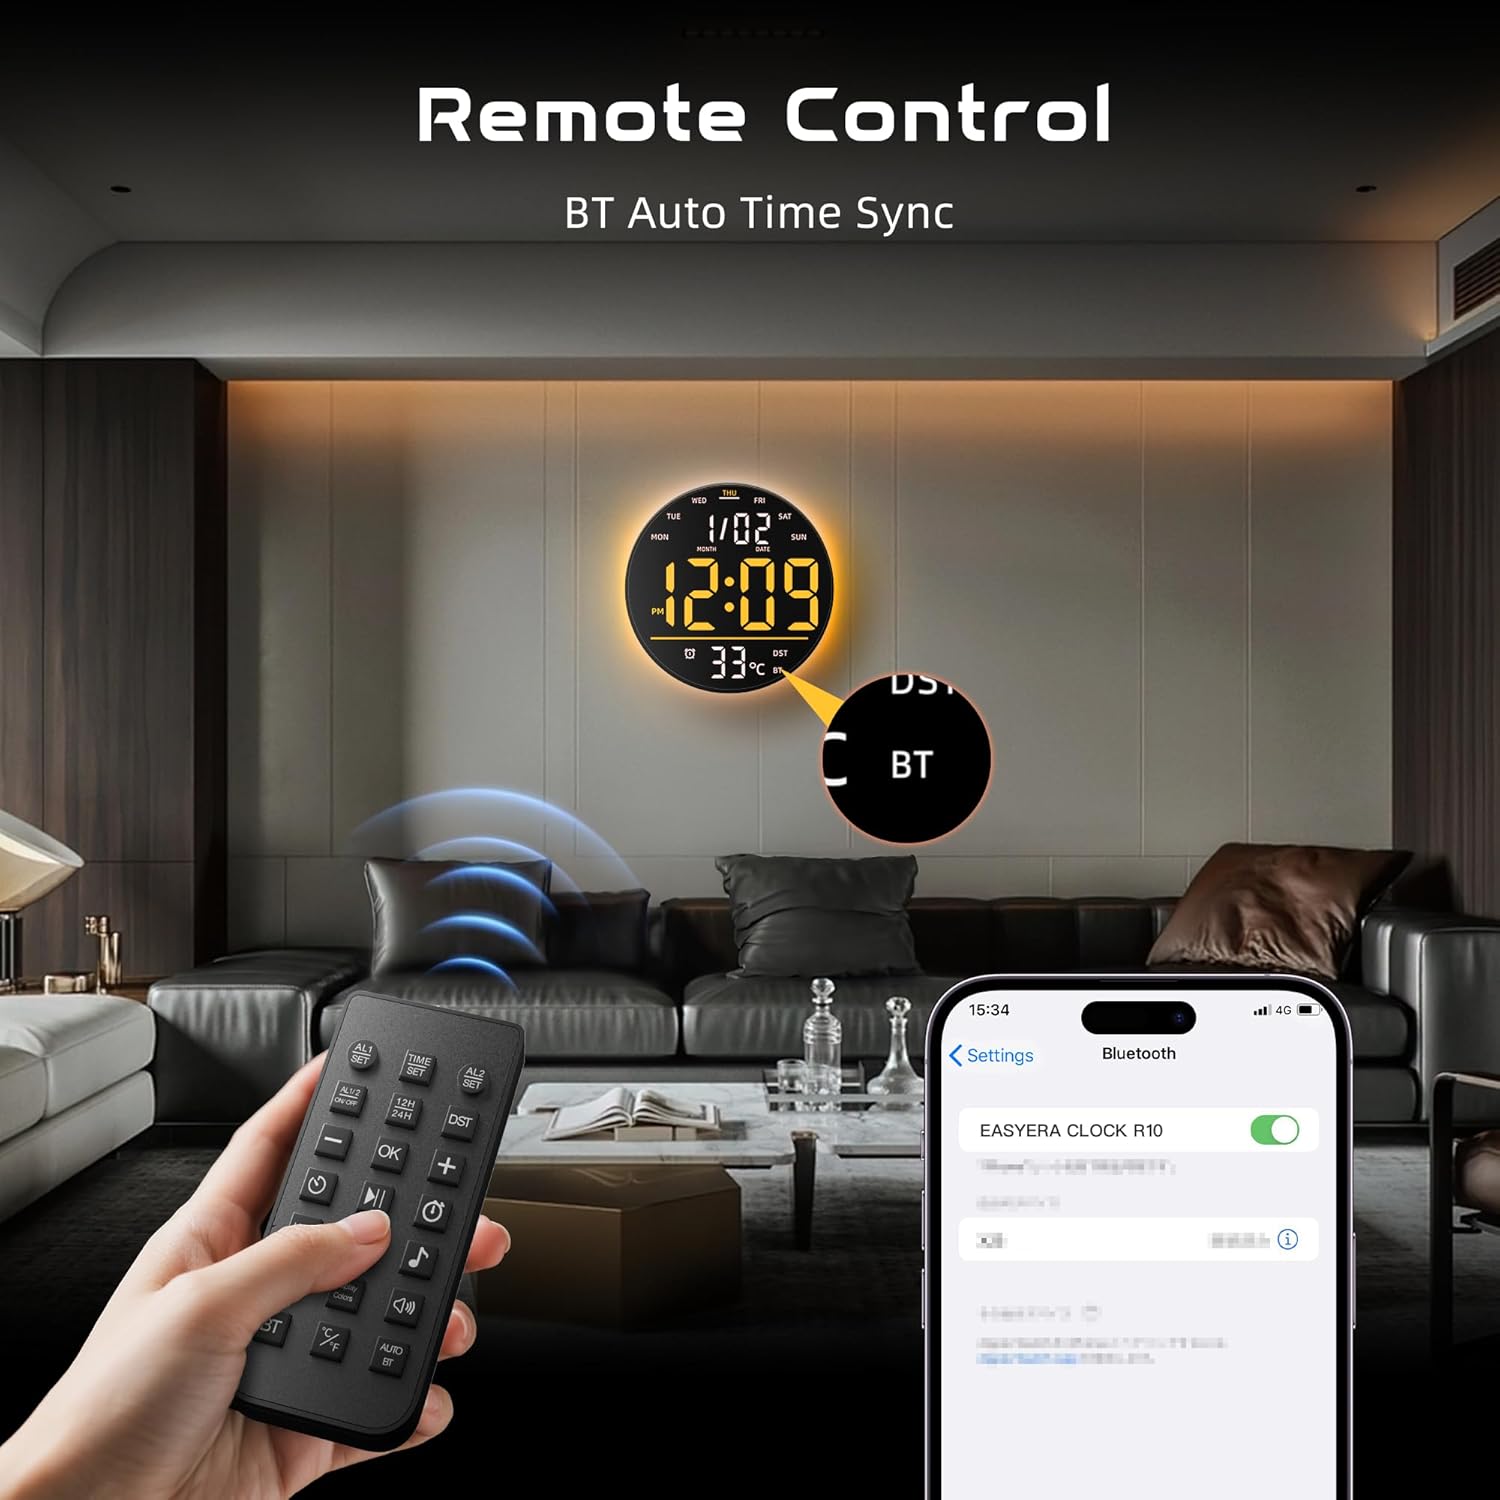
Figure 5.1: Powering the Clock. This image shows the digital wall clock plugged into a wall outlet with its power cable, illustrating its corded electric power source.

Figure 5.2: USB Powered Design. This image highlights the clock's 10-inch size and its USB power input, confirming it is not battery operated.
5.2 Mounting
The clock is designed for wall mounting. Use appropriate hardware (not included) for secure installation on your desired surface. Ensure the clock is placed within reach of a power outlet.
5.3 Remote Control
Insert batteries into the remote control (if not pre-installed). The remote allows full control over the clock's functions from a distance.

Figure 5.3: Remote Control and Bluetooth Sync. This image shows the remote control in use, alongside a smartphone screen indicating Bluetooth pairing with the clock.
6. Operating Instructions
6.1 Time and Date Setting
The clock features Bluetooth time synchronization for automatic and accurate time setting. Ensure Bluetooth is enabled on your device and pair it with the clock. The clock also automatically adjusts for Daylight Saving Time (DST).

Figure 6.1: Automatic DST Adjustment. This image illustrates how the clock automatically adjusts for Daylight Saving Time, showing both spring forward (+1H) and fall back (-1H) scenarios.
6.2 Display Brightness and Auto Dimming
The clock's display brightness can be adjusted manually using the remote control. It also features an auto dimming mode that automatically adjusts the display brightness based on the ambient light conditions in the room, ensuring optimal visibility day or night.
- Front Display Brightness: 4 adjustable levels.
- Backlight Brightness: 10 adjustable levels.

Figure 6.2: Brightness Adjustment Levels. This image details the 10 levels of adjustable backlight brightness and 4 levels of front display brightness.

Figure 6.3: Auto Dimming Mode. This series of images demonstrates the clock's automatic brightness adjustment from 20% to 100% based on ambient light.
6.3 RGB Atmosphere Light and Time Display Colors
The clock offers extensive customization for its lighting. You can choose from 11 different options for the 360-degree ambient backlight, including 5 RGB effects and 6 solid colors. The time display itself can be set to 15 different colors, comprising 8 RGB mixed lights and 7 solid colors.

Figure 6.4: Color Options. This image displays various color combinations for both the atmosphere light and the time display, showcasing the 11 atmosphere light options and 15 time display colors.
6.4 Music Rhythm Lighting
Activate the music rhythm lighting feature to have the clock's backlight pulse and change in response to ambient sounds and music. This creates a dynamic visual effect.

Figure 6.5: Music Rhythm Lighting in Action. This image shows the clock's backlight dynamically responding to music, creating an immersive atmosphere.
6.5 Dual Alarms
The clock supports setting two independent alarms. This is useful for different schedules, such as weekday and weekend wake-up times.

Figure 6.6: Dual Alarm Functionality. This image illustrates the convenience of setting two separate alarms for different daily routines.
6.6 Countdown Timer
Utilize the built-in countdown timer for various activities. It can be set for durations up to 99 hours, 59 minutes, and 59 seconds.

Figure 6.7: Countdown Timer Use. This image shows the countdown timer being used for activities like studying and exercise.
7. Maintenance
7.1 Cleaning
To clean the clock, gently wipe the display and casing with a soft, dry, lint-free cloth. Do not use abrasive cleaners, solvents, or spray directly onto the clock, as this may damage the surface or internal components.
7.2 Storage
If storing the clock for an extended period, disconnect it from power and store it in a cool, dry place away from direct sunlight and extreme temperatures.
8. Troubleshooting
If you encounter issues with your EASYERA Digital Wall Clock, refer to the following common problems and solutions:
| Problem | Possible Cause | Solution |
|---|---|---|
| Clock does not power on. | No power, faulty cable/adapter. | Check power connection, try a different USB port or adapter. |
| Remote control not responding. | Dead batteries, obstruction, out of range. | Replace remote batteries, ensure no obstructions between remote and clock, operate within effective range. |
| Time is incorrect. | Bluetooth sync issue, manual setting error. | Ensure Bluetooth is paired correctly. If manual setting, re-enter time and date. |
| Backlight/display colors not changing. | Incorrect setting, feature disabled. | Refer to the operating instructions for color and lighting mode selection using the remote. |
| Display is too bright/dim. | Brightness setting, auto dimming mode. | Adjust brightness manually with the remote. If auto dimming is active, ambient light changes will affect it. |
9. Specifications
| Feature | Detail |
|---|---|
| Brand | EASYERA |
| Model Number | AC-WCR10A |
| Display Type | Digital LED |
| Product Dimensions | 10"W x 10"H |
| Power Source | Corded Electric (USB Powered) |
| Material | Frosted Surface, Plastic |
| Mounting Type | Wall Mount |
| Alarm Clock | Yes (Dual Alarms) |
| Special Features | Large Display, RGB Atmosphere Light, Music Sync, Low-Reflectivity, Temperature Display, Bluetooth Sync, Auto DST, Countdown Timer |
| UPC | 810089906984 |
10. Warranty and Support
EASYERA products are designed for reliability and performance. For warranty information or technical support, please refer to the contact details provided with your purchase or visit the official EASYERA website. Please have your model number (AC-WCR10A) and purchase date available when contacting support.


