Introduction
This user manual provides comprehensive instructions for the installation, operation, and maintenance of your Shineforu RV-100 Gravity Flush RV Toilet. Please read this manual thoroughly before installation and use to ensure proper function and longevity of the product. Keep this manual for future reference.
Safety Information
- Always shut off the water supply to the RV toilet before performing any maintenance or installation.
- Wear appropriate personal protective equipment (PPE) during installation and maintenance, such as gloves and eye protection.
- Ensure all connections are secure and leak-free to prevent water damage.
- Do not use harsh chemicals or abrasive cleaners on the toilet surfaces, as this may damage the ABS material.
- Ensure proper ventilation when working with sealants or adhesives.
Package Contents
Verify that all components are present before beginning installation:
- Toilet Bowl
- Seat
- Floor Flange
- Mounting Hardware
Specifications
| Feature | Specification |
|---|---|
| Model Number | RV-100 |
| Color | White |
| Product Dimensions (D x W x H) | 19.5" x 14.5" x 19" |
| Material | ABS Plastic |
| Item Weight | 11.9 Pounds |
| Installation Type | Floor Mounted |
| Shape | Oval |
| Seat Material Type | Plastic |
| Flush Mechanism | Foot Pedal, Gravity Flush |
Setup and Installation
Follow these steps for proper installation of your RV toilet. Ensure the water supply is turned off before starting.
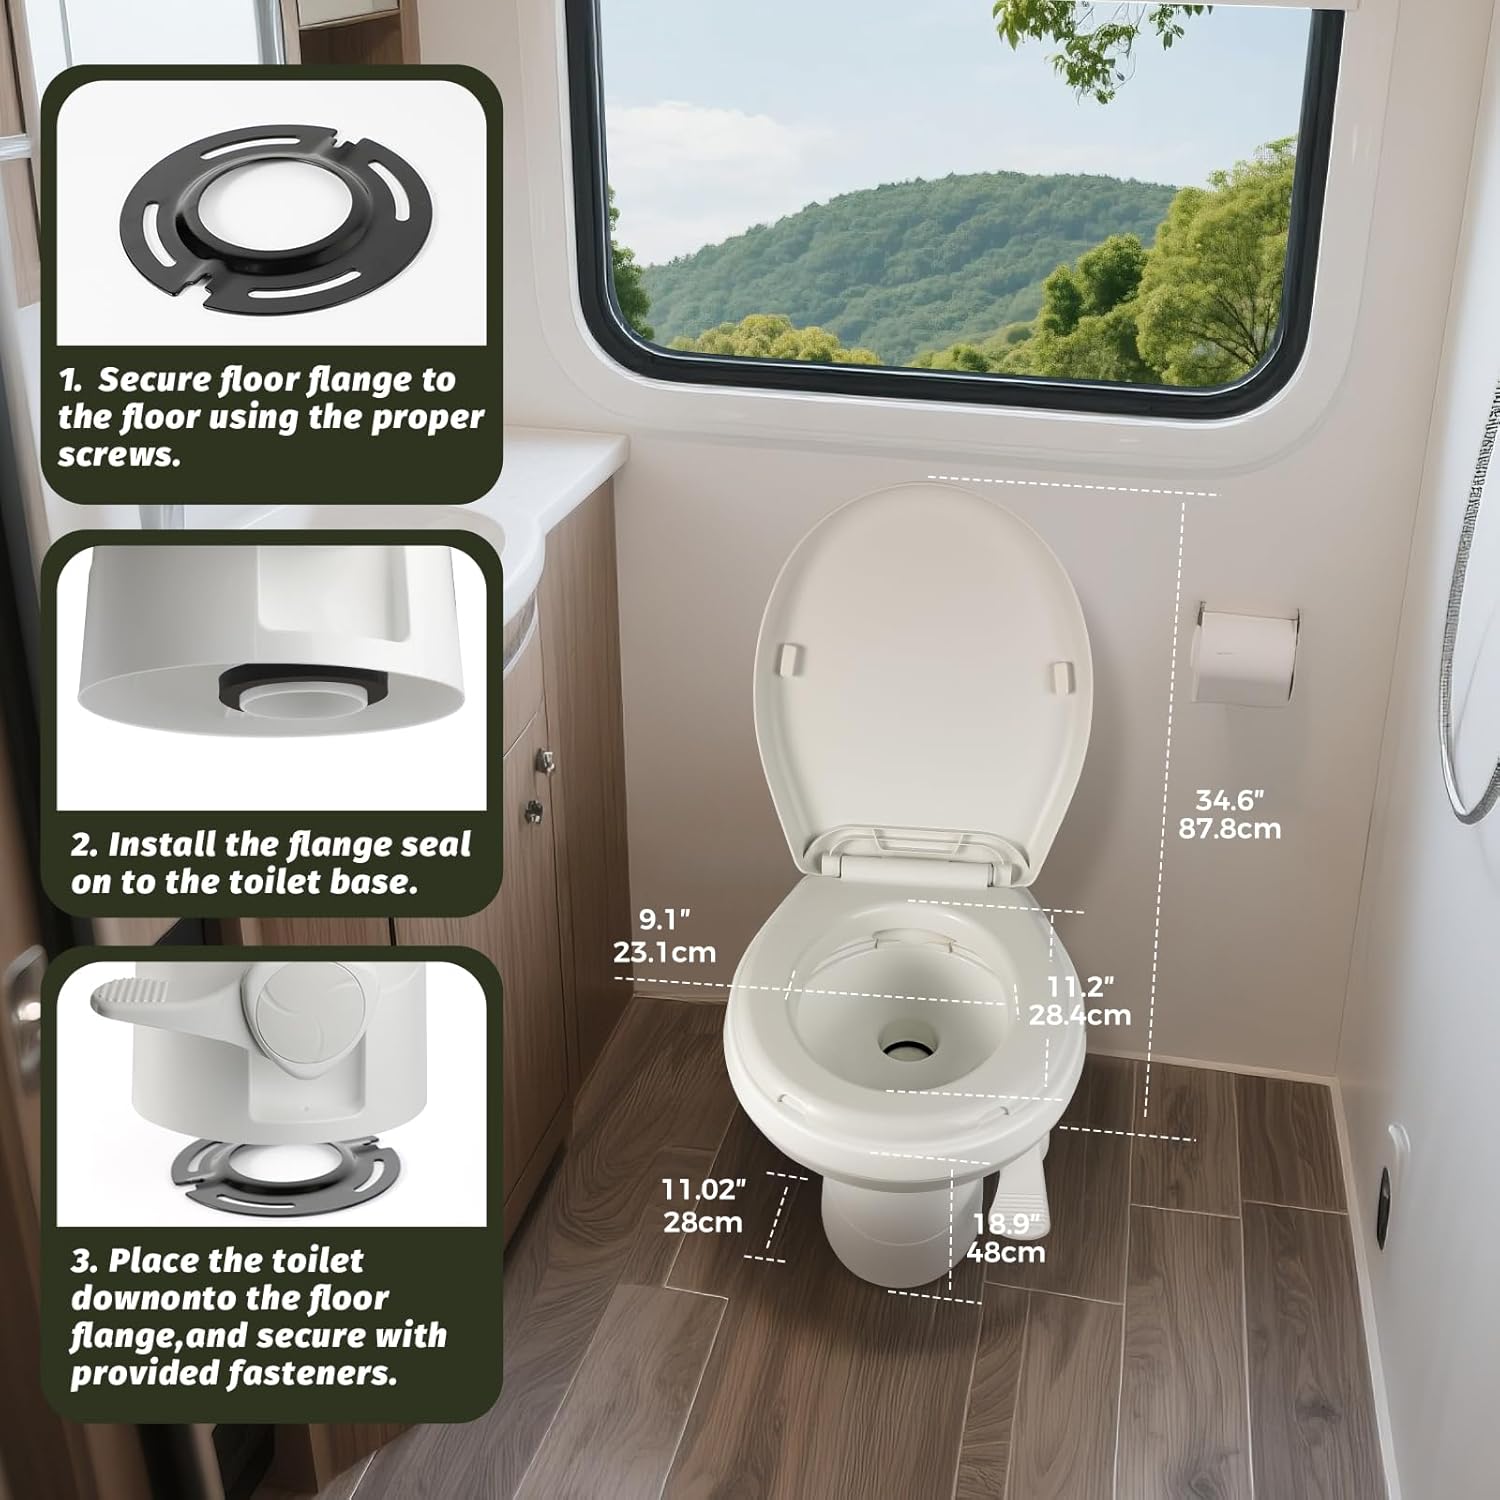
Image: Detailed diagram illustrating the three main steps for installing the RV toilet, including securing the floor flange, installing the flange seal, and positioning the toilet with dimensions.
- Prepare the Mounting Area: Ensure the floor area where the toilet will be installed is clean, dry, and level. Remove any old sealant or debris.
- Secure Floor Flange: Place the provided floor flange over the waste pipe opening. Secure it to the floor using appropriate screws (not always included, check your specific hardware). Ensure it is firmly attached.
- Install Flange Seal: Position the rubber flange seal onto the base of the toilet. This seal creates a watertight connection between the toilet and the floor flange.
- Position the Toilet: Carefully lower the toilet onto the secured floor flange, aligning the toilet's base with the flange and the waste pipe.
- Secure the Toilet: Use the provided mounting hardware to firmly attach the toilet to the floor. Tighten fasteners evenly to prevent stress on the toilet base.
- Connect Water Supply: Connect the RV's water supply line to the toilet's water inlet. Use a wrench to tighten the connection, being careful not to overtighten.
- Test for Leaks: Turn on the water supply and check all connections for leaks. Flush the toilet several times to ensure proper operation and check for any water seepage.

Image: The rear view of the RV toilet, highlighting the water inlet connection point, indicating straightforward installation and maintenance.
Operating Instructions
The Shineforu RV-100 toilet features a convenient foot pedal for flushing and adding water to the bowl.
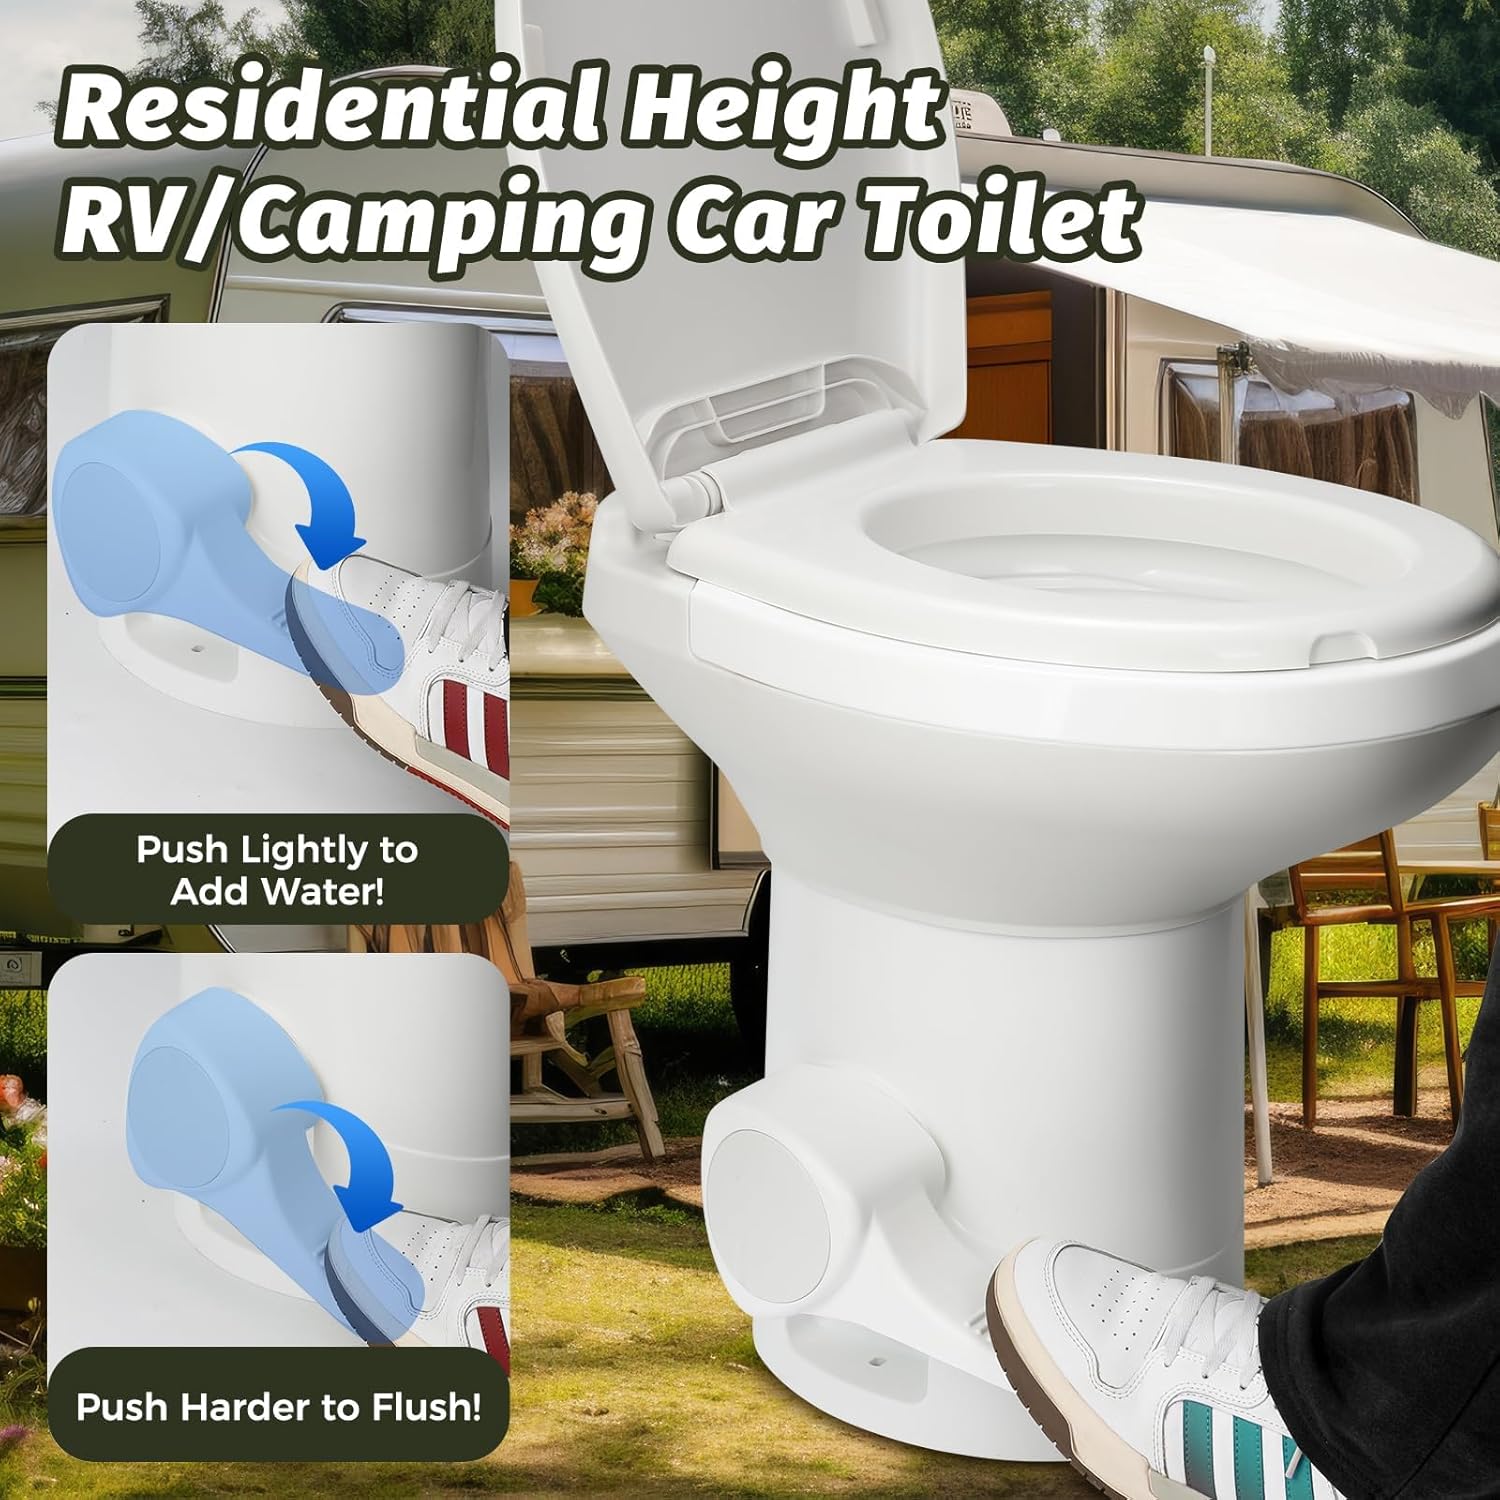
Image: A visual guide demonstrating how to use the foot pedal: a light press adds water to the bowl, while a full press activates the flush.
- Adding Water: To add water to the bowl, press the foot pedal lightly. This will open the water valve, allowing water to fill the bowl without opening the waste ball. Release the pedal when the desired water level is reached.
- Flushing: To flush the toilet, press the foot pedal down completely. This will open both the water valve and the waste ball, allowing contents to be flushed into the holding tank. Hold the pedal down until the bowl is clear, then release.
- Water Conservation: For optimal water conservation, use the 'add water' function sparingly and only flush when necessary.
Maintenance
Regular maintenance ensures the longevity and hygienic operation of your RV toilet.

Image: The soft-close mechanism of the toilet seat and cover, designed to prevent abrupt slamming and reduce wear.
- Cleaning: Clean the toilet regularly with mild soap and water. Avoid abrasive cleaners, scouring pads, or harsh chemicals (e.g., bleach, acid-based cleaners) as they can damage the ABS plastic and seals.
- Seal Lubrication: Periodically lubricate the waste ball seal with a silicone-based lubricant designed for RV toilets. This helps maintain a watertight seal and smooth operation of the foot pedal.
- Winterization: Before storing your RV in freezing temperatures, ensure the toilet and water lines are properly winterized according to your RV manufacturer's guidelines. This typically involves draining all water and adding RV antifreeze.
- Inspection: Regularly inspect the water connections, floor flange, and seals for any signs of leaks or wear. Address any issues promptly.
Troubleshooting
Refer to the table below for common issues and their solutions.
| Problem | Possible Cause | Solution |
|---|---|---|
| Toilet leaks at the base | Loose mounting bolts, damaged floor flange seal | Tighten mounting bolts. Inspect and replace floor flange seal if damaged. |
| Water leaks from water inlet connection | Loose connection, damaged water line fitting | Tighten water line connection. Inspect and replace fitting if damaged. |
| Foot pedal is stiff or hard to operate | Waste ball seal is dry or dirty | Clean and lubricate the waste ball seal with a silicone-based lubricant. |
| Toilet does not hold water in the bowl | Waste ball seal is dirty, damaged, or misaligned | Clean the waste ball seal. If damaged, replace the seal. Ensure the waste ball closes completely. |
| Weak flush | Low water pressure, clogged water jets | Check RV water pressure. Clean water jets if visible debris is present. |
Warranty and Support
For warranty information or technical support, please refer to the documentation provided at the time of purchase or contact Shineforu customer service. Keep your purchase receipt as proof of purchase for any warranty claims.