Introduction
Thank you for purchasing the HOMCOM 3-Drawer Vertical File Cabinet. This manual provides essential information for the safe assembly, operation, and maintenance of your new filing cabinet. Please read these instructions thoroughly before beginning assembly and retain them for future reference.

Image: The HOMCOM 3-Drawer Vertical File Cabinet, black with fluted drawer fronts and gold pulls, shown in an office environment with a printer on its top surface.
Safety Information
To ensure safe use and prevent injury or damage, please observe the following:
- Always assemble the cabinet according to the provided instructions.
- Use the anti-tip kits to prevent tipping. This is crucial for stability, especially in households with children or pets.
- Do not overload the cabinet or the top surface. Refer to the specifications for weight capacity.
- Keep the area around the cabinet clear to prevent accidents.
- Ensure all screws and fasteners are securely tightened before use. Periodically check and re-tighten as necessary.
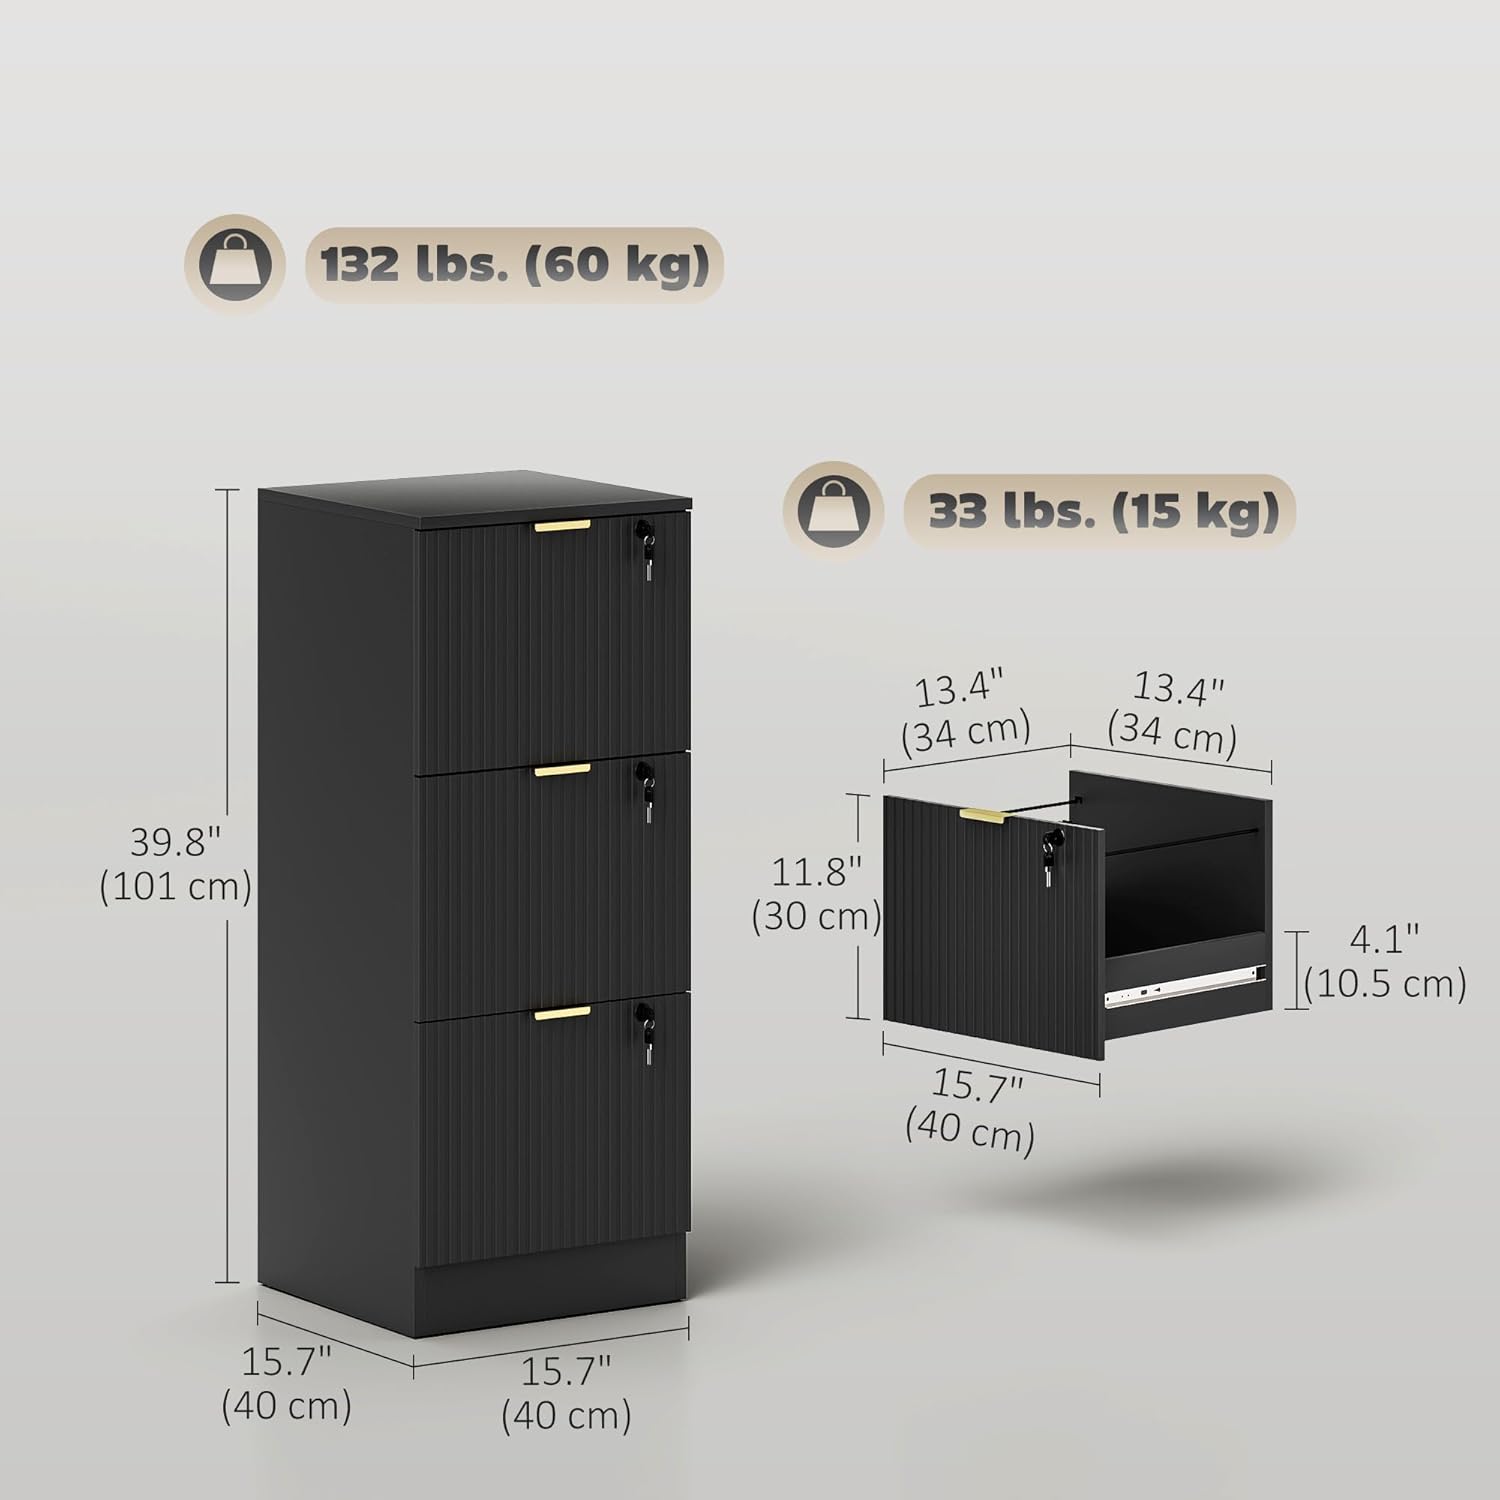
Image: A visual representation of the anti-tip kit being installed on the back of the file cabinet, emphasizing safety around children.
Specifications
| Feature | Detail |
|---|---|
| Brand | HOMCOM |
| Model Number | 924-108V01BK |
| Colour | Black |
| Material | Engineered Wood |
| Product Dimensions (D x W x H) | 40D x 40W x 101H Centimetres (15.7" x 15.7" x 39.8") |
| Number of Drawers | 3 |
| Weight Capacity (Maximum) | 132 lbs (60 kg) |
| Special Features | Anti-Tipping, Lockable, Scratch Resistant |
| Mounting Type | Floor Mount |
| Assembly Required | Yes |
| Lock Type | Key |
| Handle Material | Alloy Steel |

Image: Detailed dimensions of the file cabinet, including overall height, width, depth, and individual drawer measurements, along with weight capacities.
Assembly Instructions
Assembly of this file cabinet is required. Please follow the step-by-step instructions provided in the packaging. Ensure all parts are present before you begin. A typical assembly process involves:
- Unpacking and Part Identification: Carefully unpack all components and lay them out. Identify each part using the provided parts list.
- Frame Construction: Assemble the main frame of the cabinet using the designated fasteners.
- Drawer Slide Installation: Attach the drawer slides to the cabinet frame and to the drawer sides. Ensure they are aligned correctly for smooth operation.
- Drawer Assembly: Construct each drawer, ensuring the fluted front panels are correctly oriented.
- Drawer Insertion: Carefully insert the assembled drawers into the cabinet frame, aligning them with the slides.
- Lock Mechanism Installation: Install the locking mechanisms for each drawer as per the instructions.
- Anti-Tip Kit Installation: Securely attach the anti-tip kit to the back of the cabinet and to a wall stud to prevent accidental tipping. This step is critical for safety.
- Final Checks: Verify that all connections are tight and the cabinet is stable. Test drawer operation and locking mechanisms.
If you encounter any difficulties during assembly, refer to the detailed diagrams in your packaged manual or contact customer support.
Operating Instructions
Using the Drawers
The cabinet features three drawers designed for smooth and quiet operation. To open a drawer, gently pull the gold finger pull handle. To close, push the drawer until it is fully seated. The smooth glides ensure minimal noise.

Image: An inset showing the silent drawer glides, designed for quiet operation, with the drawers partially open.
Locking Mechanism
Each drawer is individually lockable for securing your documents. Insert the key into the lock on the drawer front and turn to engage or disengage the lock. Ensure the drawer is fully closed before attempting to lock it.
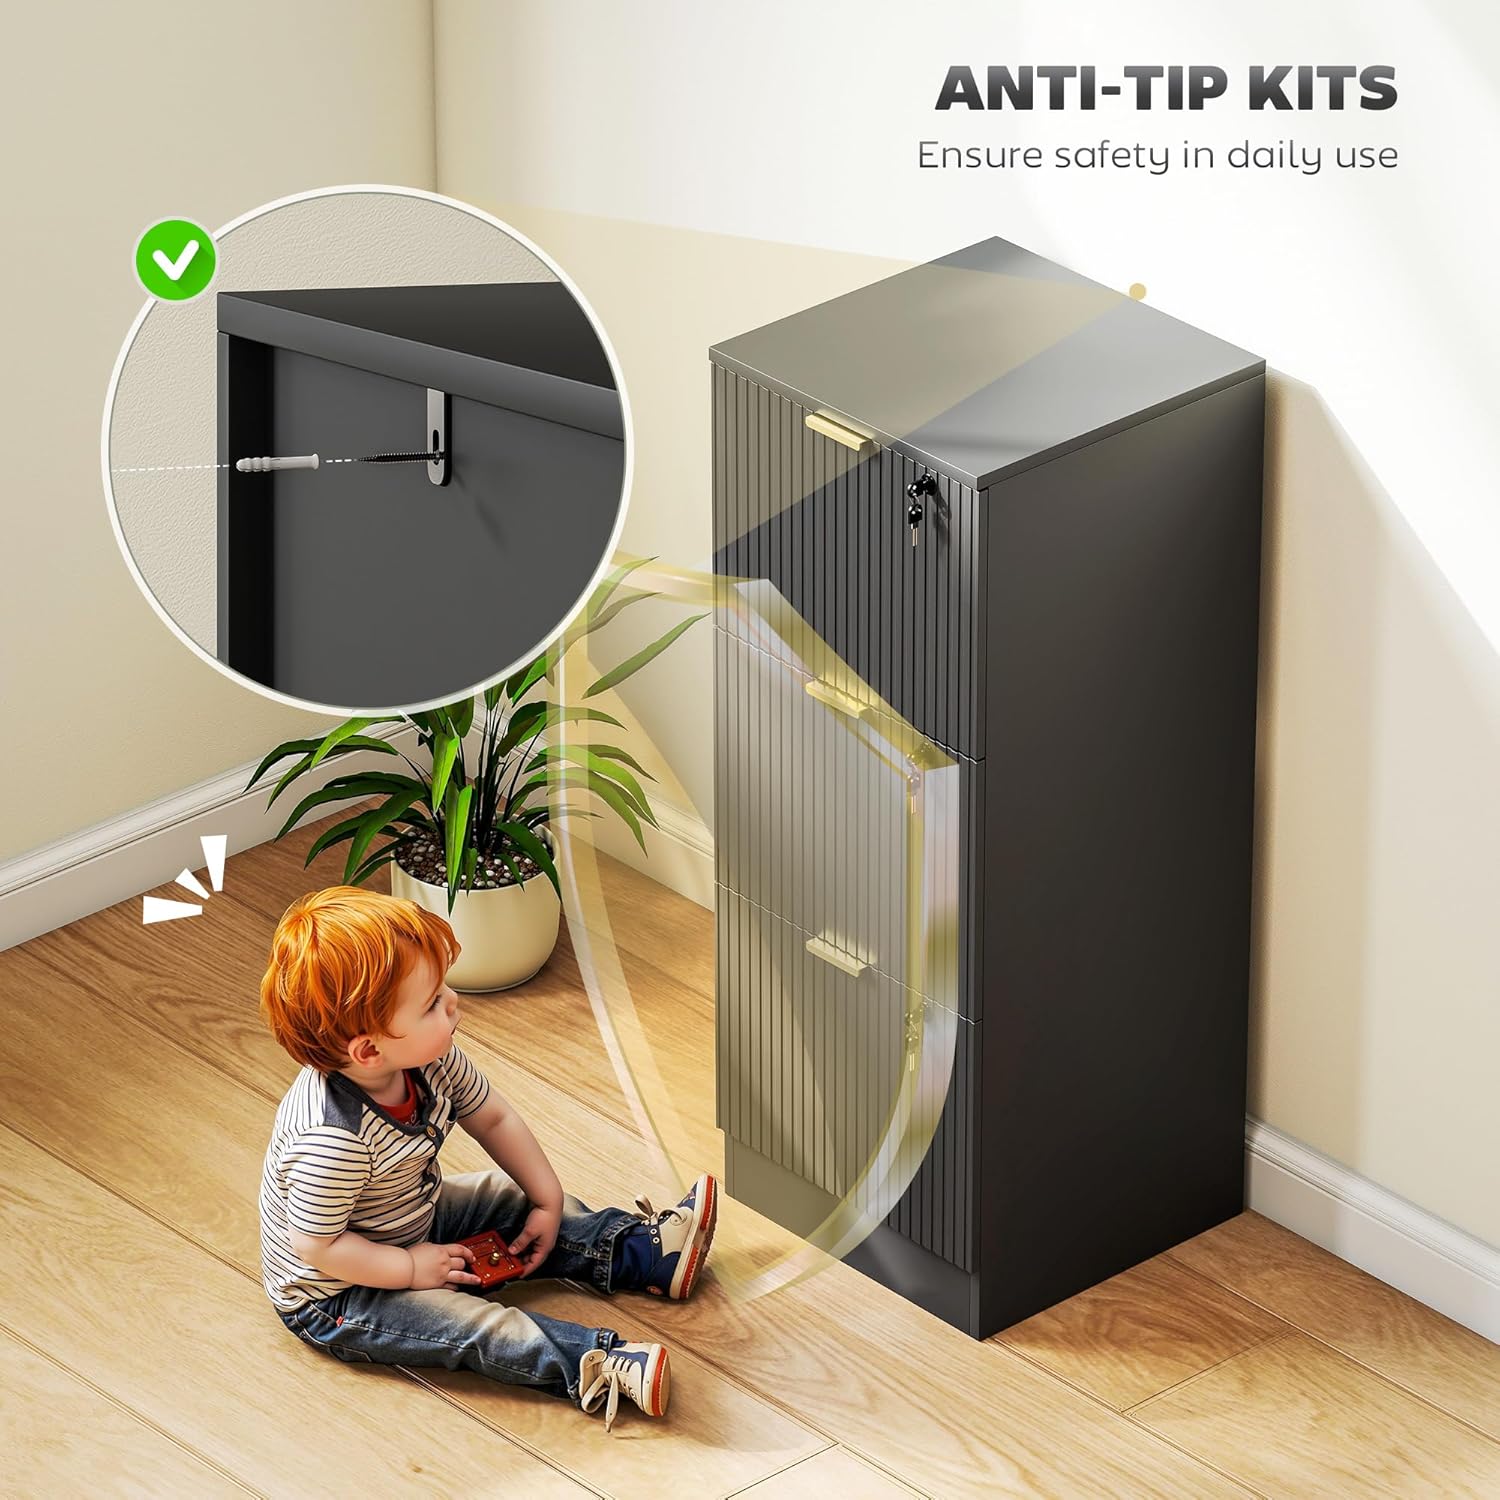
Image: A close-up of a hand using a key to lock one of the cabinet's drawers, illustrating the individual locking capability.
Adjustable Hanging Rails
The drawers are equipped with adjustable hanging rails to accommodate both A4 and letter-sized files. To adjust, simply reposition the hanging rails within the drawer to fit your desired file size.

Image: Instructions demonstrating the adjustment of internal hanging rails to support either A4 or Letter size documents within the drawers.
Maintenance
To maintain the appearance and functionality of your HOMCOM file cabinet:
- Cleaning: Wipe surfaces with a soft, damp cloth. Avoid abrasive cleaners or harsh chemicals, as these can damage the melamine finish.
- Spills: Clean up spills immediately to prevent staining or damage to the engineered wood.
- Hardware: Periodically check all screws and fasteners to ensure they remain tight. Re-tighten if necessary.
- Drawer Glides: If drawer operation becomes less smooth, a small amount of silicone-based lubricant can be applied to the glides.
Troubleshooting
- Drawers not closing smoothly: Check for obstructions in the drawer slides. Ensure the slides are properly aligned and free of debris. Verify that the drawer contents are not interfering with closure.
- Cabinet wobbles: Ensure the cabinet is placed on a level surface. Check that all assembly fasteners are securely tightened. Re-install the anti-tip kit if it has become loose.
- Lock not engaging: Ensure the drawer is fully closed before attempting to lock. Check if the key is fully inserted and turned correctly. Do not force the lock.
Warranty and Support
This HOMCOM file cabinet comes with a 90-day warranty against manufacturer defects. Please retain your proof of purchase for warranty claims.
For product support, missing parts, or warranty inquiries, please contact the manufacturer:
Manufacturer: Aosom Canada
Contact Information: Markham, Ontario, CA Tel. 1-416-792-6088
You may also visit the HOMCOM Store on Amazon for additional product information and support resources.


