1. Introduction
Thank you for choosing the Vipbear Smart Toilet Model OPT03. This manual provides essential information for the safe and efficient installation, operation, and maintenance of your new smart toilet. Please read all instructions carefully before installation and use, and retain this manual for future reference.
2. Safety Information
- Electrical Outlet: This smart toilet requires an accessible electrical outlet. Ensure your bathroom has a suitable GFCI (Ground Fault Circuit Interrupter) protected outlet within 1.5 meters of the toilet's power cord.
- Leakage Protection: The unit features UL-certified leakage protection. Regularly inspect the power cord and connections for any signs of damage.
- Flame-Retardant Seat: The toilet seat is constructed from flame-retardant material for enhanced safety.
- Power Outage Backup: In the event of a power outage, a 9V battery backup ensures continuous flushing functionality.
- Water and Electricity Separation: The design incorporates water and electricity separation for user safety.
- IPX4 Waterproof: The unit is IPX4 rated, providing protection against splashing water.
- Safe Voltage: Operates within safe voltage parameters.
- Professional Installation: If you are unsure about any installation steps, consult a qualified plumber or electrician.
3. Package Contents
Please verify that all components are present and undamaged before beginning installation.
- Smart Toilet Unit
- Flange Ring
- Instruction Manual
- Remote Control
- Water Valve (Angle Valve)
- AAA Batteries (for remote control)
- Angle Valve Accessories (washers, nuts, etc.)
4. Setup and Installation
Follow these steps for proper installation of your Vipbear Smart Toilet. Ensure the water supply is turned off before starting.
4.1 Pre-Installation Checks
- Dimensions: Confirm the toilet dimensions (26.77"D x 15.74"W x 17.91"H) fit your bathroom space.
- Rough-in Distance: The distance from the wall to the central point of the drain should be approximately 11.81 inches.
- Water Valve Height: The angle valve should be 10-16 inches from the ground.
- Electrical Outlet Height: The electrical socket should be 16-20 inches from the ground. The power cord is 1.5 meters long.

4.2 Unboxing and Preparation
Carefully unbox the smart toilet and its components. Remove all packaging materials and protective films.
4.3 Installing the Flange Ring
Clean the floor around the drain opening. Apply sealant around the base of the toilet where the flange ring will sit. Insert the flange ring into the toilet's waste outlet, ensuring a secure fit.
4.4 Positioning the Toilet
Carefully align the toilet's waste outlet with the floor drain. Lower the toilet onto the flange ring, ensuring it is level and stable. Apply gentle pressure to create a seal.
4.5 Water Supply Connection
Connect the provided water supply hose to the angle valve on the wall and to the water inlet on the toilet. Tighten connections securely with a wrench, but do not overtighten. Turn on the water supply and check for leaks.
4.6 Electrical Connection
Plug the toilet's power cord into a GFCI-protected electrical outlet. Ensure the power switch on the outlet or power cord is in the 'ON' position.
4.7 Sealing the Base
Apply a bead of silicone sealant around the base of the toilet where it meets the floor. Smooth the sealant for a clean finish and allow it to cure according to the manufacturer's instructions.
5. Operating Instructions
Your Vipbear Smart Toilet offers several advanced features for comfort and hygiene.
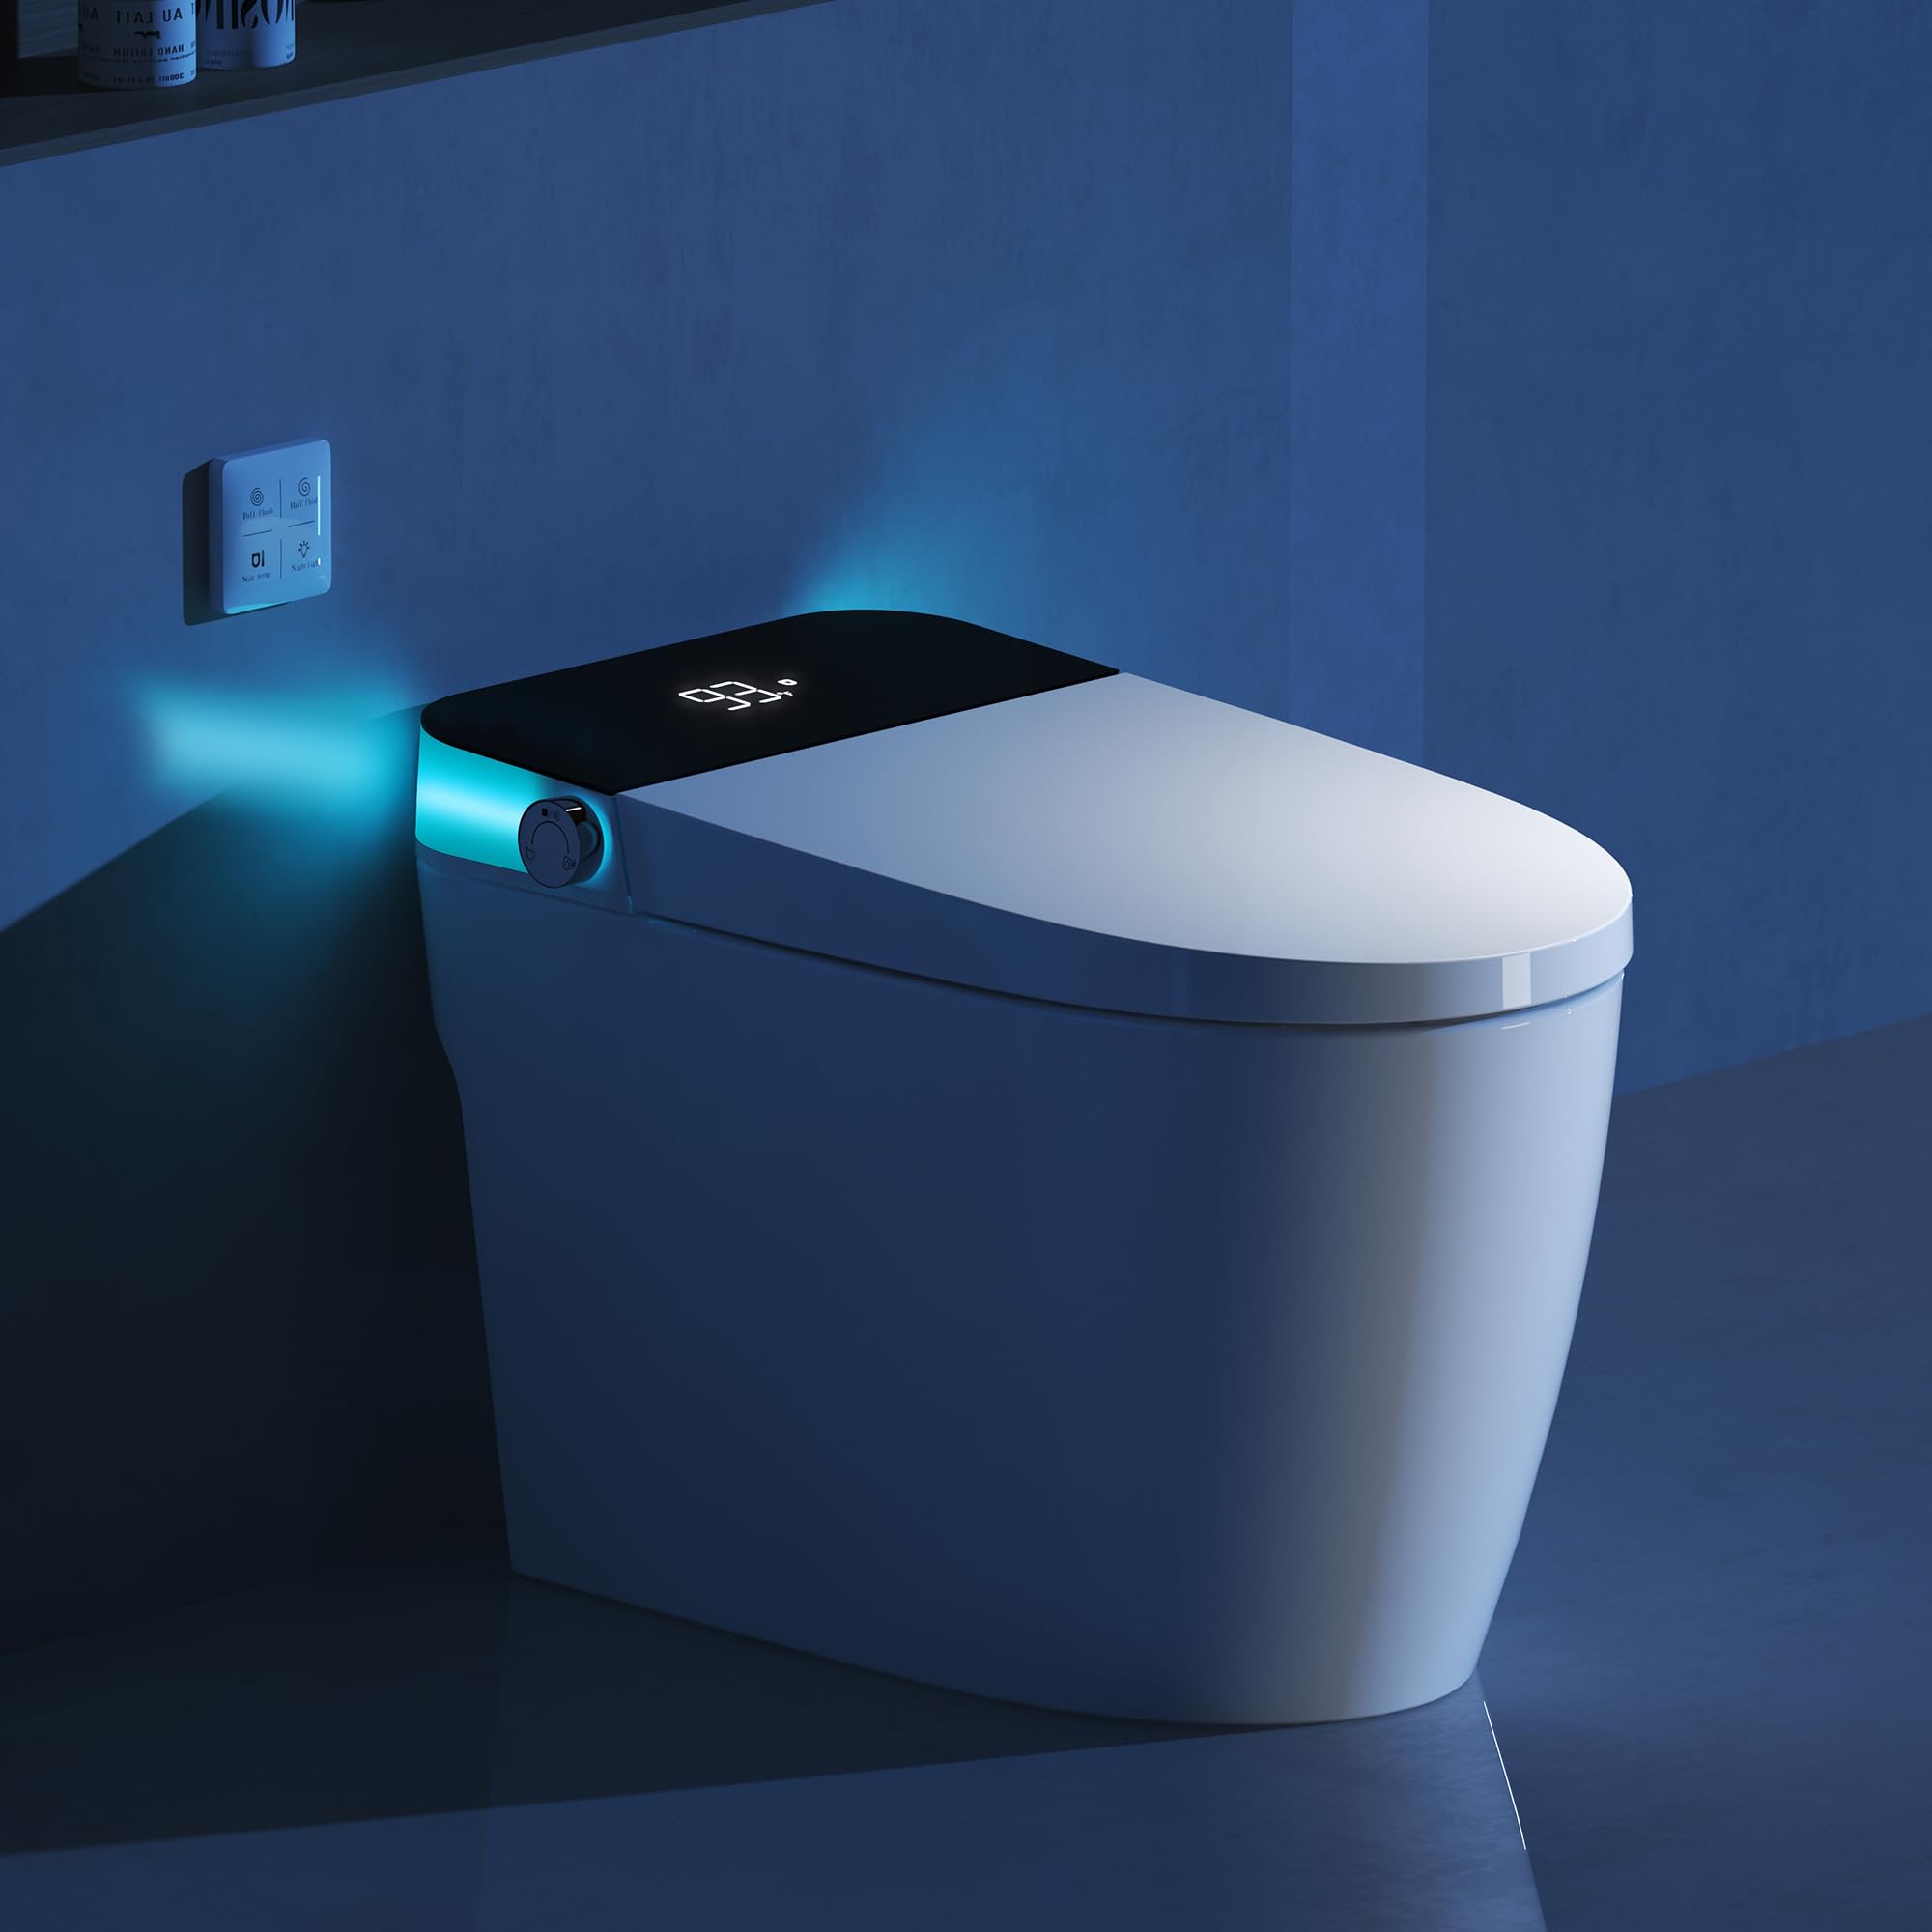
5.1 Heated Seat
The heated seat provides comfort with three adjustable temperature settings: 93°F, 99°F, and 104°F. The current temperature is displayed on the unit's top panel.

5.2 Automatic Flush
The toilet offers multiple flushing options:
- Foot Sensor: A contactless foot sensor activates flushing, promoting hygiene.
- Auto-Flush-on-Leave: The toilet can automatically flush after you stand up and leave.
- Remote Control/Side Buttons: Use the intuitive remote control or the side buttons on the toilet for full or half flush options.


5.3 Night Light and Slow-Close Lid
The soft blue night light illuminates the bowl for nighttime use without disturbing others. The damping slow-close technology ensures the seat and lid close quietly.

5.4 Multi-function Control Knob
The control knob on the side of the toilet allows you to seamlessly toggle ambient lights, heated seat settings, and flushing functions via rotation or press.

5.5 Remote Control
The wall-mounted remote control provides convenient access to all functions, including full flush, half flush, seat temperature adjustment, and night light control.

6. Maintenance
Regular maintenance ensures the longevity and optimal performance of your smart toilet.
- Cleaning: Use mild, non-abrasive cleaners and a soft cloth to clean the exterior and interior surfaces. Avoid harsh chemicals or abrasive pads that could damage the finish.
- Pre-moistening Function: The pre-moistening function (factory default: off) can be activated to prevent waste adhesion, making cleaning easier. Refer to the remote control or side panel instructions to enable this feature.
- Power Cord Inspection: Periodically check the power cord for any signs of wear or damage.
- Water Connection Check: Inspect water connections for any signs of leaks.
7. Troubleshooting
If you encounter any issues, refer to the following troubleshooting guide:
| Problem | Possible Cause | Solution |
|---|---|---|
| Toilet does not power on or display is off. | No power to the unit; power switch off; GFCI tripped. | Ensure the power cord is securely plugged in. Check if the power switch on the outlet or cord is ON. Reset the GFCI outlet if it has tripped. |
| Heated seat is not warming up. | Heated seat function is off; temperature setting is too low. | Activate the heated seat function using the control knob or remote. Adjust the temperature setting to a higher level. |
| Flush is weak or not activating. | Low water pressure; sensor obstruction; remote control battery low. | Check water supply valve is fully open. Ensure sensors are clean and unobstructed. Replace remote control batteries if necessary. |
| Night light is not working. | Night light function is off. | Activate the night light function using the control knob or remote. |
| Water leakage. | Loose connections; damaged seals. | Turn off water supply immediately. Check and tighten all water connections. If leaks persist, contact customer support. |
8. Specifications
| Feature | Detail |
|---|---|
| Brand | Vipbear |
| Model Number | OPT03 |
| Color | White |
| Product Dimensions | 26.77"D x 15.74"W x 17.91"H |
| Material | Ceramic (Toilet), Polypropylene (PP) (Seat) |
| Item Weight | 82.7 Pounds |
| Installation Type | Floor Mounted |
| Power Cord Length | 1.5M |
| Heated Seat Settings | 93°F, 99°F, 104°F |
| Flush System | Siphon Dual Flush, Air-assisted Pressure System, 360° Swirl Flush, Bottom Assisted Spray, Siphon Jet Flush |
| Safety Features | UL-certified leakage protection, Flame-retardant seat, 9V battery backup, Water & electricity separation, IPX4 waterproof, Safe voltage |
| Special Features | Foot sensor, Auto-flush-on-leave, Night light, Slow-close lid, Pre-moistening function |
9. Warranty and Support
For warranty information, technical support, or any questions not covered in this manual, please refer to the warranty card included with your product or contact Vipbear customer service directly. Contact details can typically be found on the product packaging or the official Vipbear website.