1. Safety Information
Please read all instructions carefully before assembly and use. Keep this manual for future reference.
- Recommended Age: This play kitchen is designed for children aged 36 months and up.
- Adult Supervision: Always ensure adult supervision during play.
- Small Parts: This product contains small parts which may pose a choking hazard for children under 3 years. Keep all assembly hardware and small accessories out of reach of young children.
- Assembly: Adult assembly is required. Ensure all fasteners are securely tightened before use.
- Stability: Place the play kitchen on a flat, stable surface to prevent tipping.
- Material Safety: This product is certified by ASTM and EN71 international safety standards.
- Inspection: Regularly inspect the play kitchen for any loose parts, damage, or wear. Discontinue use if any hazards are identified.
2. Package Contents
Before beginning assembly, please ensure all parts listed below are present and undamaged. Refer to the assembly video for a visual overview of all components.
- Wooden Play Kitchen components (various panels and pieces)
- Assembly Hardware (screws, dowels, hinges, etc.)
- 2 Storage Boxes
- Stove with knobs
- Sink basin and faucet
- Ice Maker mechanism with ice cubes
- Pots and Pans (Frying Pan x1, Pot with Lid x1)
- Kitchen Utensils (Colander x1, Frying Spatula x1, Spoon x1)
- S-shaped Hooks x3
- Salt Shaker x1, Pepper Shaker x1
- Cup x1
- Curtain
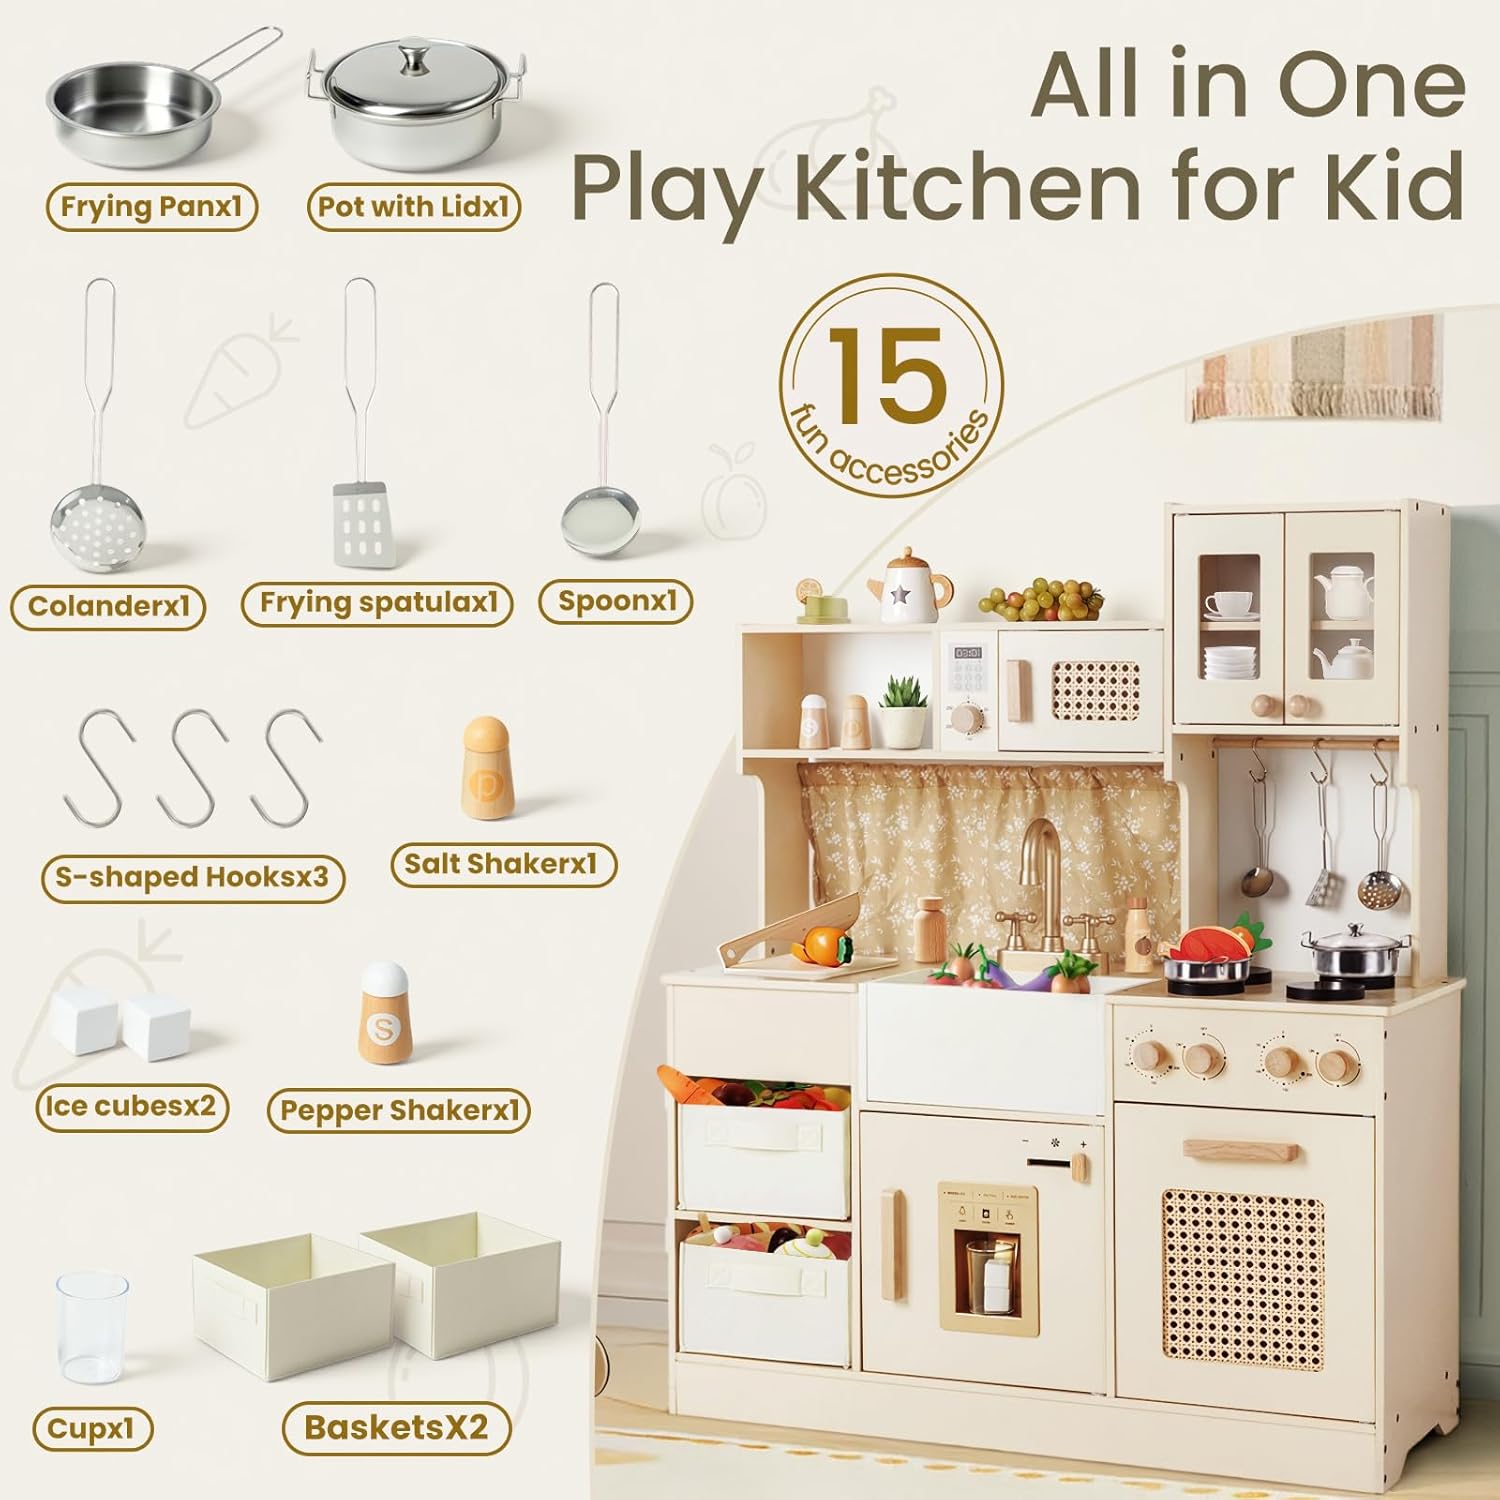
Image: All accessories included with the labebe Play Kitchen.
3. Assembly Instructions
Follow the steps below for proper assembly. It is highly recommended to watch the official installation video for visual guidance.
Video: Official installation guide for the labebe Play Kitchen. This video demonstrates each step of the assembly process.
- Step 1: Assemble Base Sections (0:04 - 0:19 in video)
Begin by connecting the base panels using the provided screws. Ensure all connections are secure. The video shows attaching side panels to a bottom panel to form a box-like structure.
- Step 2: Attach Stove Knobs (0:20 - 0:26 in video)
Secure the stove control panel to its designated position, ensuring the wooden knobs are correctly aligned and attached. The video demonstrates screwing the knob panel onto a side piece.
- Step 3: Construct Internal Compartments (0:27 - 0:38 in video)
Assemble the internal dividers and shelves for the main kitchen unit. This involves connecting several panels to create the structure for the sink and oven areas.
- Step 4: Install Ice Maker Unit (0:57 - 1:15 in video)
Carefully place and secure the ice maker unit into its slot. Attach the handle and any decorative elements as shown in the video.
- Step 5: Connect Main Sections (1:16 - 1:42 in video)
Join the pre-assembled base sections, including the stove and ice maker units, to form the lower part of the kitchen. Use screws to firmly connect these larger components.
- Step 6: Attach Back Panels (1:43 - 1:48 in video)
Slide the back panels into their grooves and secure them. These panels provide stability and complete the enclosed sections of the kitchen.
- Step 7: Assemble Microwave and Cabinet Doors (1:49 - 2:26 in video)
Assemble the microwave unit and the upper cabinet doors. This involves attaching hinges and handles. The video shows assembling the microwave door and the upper cabinet doors separately.
- Step 8: Install Upper Shelf and Microwave (2:27 - 2:55 in video)
Attach the upper shelf and then secure the microwave unit into its designated position above the sink area. The video shows attaching the microwave unit to the upper shelf.
- Step 9: Attach Curtain (2:45 - 2:48 in video)
Thread the curtain onto the rod and attach it to the designated area above the sink, creating a decorative backsplash.
- Step 10: Install Faucet and Sink (2:59 - 3:12 in video)
Place the faucet into the pre-drilled holes on the countertop and secure it. Then, insert the sink basin into its opening.
- Step 11: Final Upper Cabinet Assembly (3:13 - 3:20 in video)
Attach the upper cabinet unit to the top of the kitchen structure, ensuring it is level and securely fastened.
- Step 12: Add Accessories (3:21 - 3:26 in video)
Place the pots, pans, and utensils on the stove and hang them on the hooks. Add the salt and pepper shakers to the shelf.
4. Product Features
- Premium Wood Construction: Crafted from durable wood, this play kitchen offers a sturdy and long-lasting structure for endless pretend play.
- Realistic Play Areas: Features a stove with clicking knobs, a sink with a golden faucet, an ice maker that dispenses ice cubes, and an oven, simulating a real kitchen experience.
- Ample Storage: Includes two fabric storage boxes and multiple shelves and cabinets to keep play food and accessories organized.
- Interactive Elements: The microwave has a digital display and turning knob, and the stove knobs produce a realistic clicking sound.
- Skill Development: Encourages imaginative play, hand-eye coordination, and social skills through interactive cooking scenarios.

Image: Overview of the labebe Play Kitchen with children interacting with its various features.

Image: Detailed view of the microwave, oven, and ice maker for imaginative play.

Image: Storage boxes integrated into the play kitchen for organizing accessories.
5. Operating Instructions
- Stove: Turn the wooden knobs on the stove to hear a realistic clicking sound, simulating cooking. Place pots and pans on the burners for pretend cooking.
- Sink: Turn the faucet handles for pretend water flow. The sink basin is removable for easy cleaning.
- Ice Maker: Insert the included ice cubes into the top slot of the ice maker. Press the lever to dispense an ice cube into the cup.
- Microwave: Open the microwave door and place pretend food inside. Turn the knob to simulate cooking time. The digital display is for decorative play.
- Oven: Open the oven door to place pretend baked goods inside. The oven provides ample space for imaginative baking.
Video: Demonstration of the labebe Play Kitchen's interactive features, including the ice maker and stove knobs.
6. Maintenance and Care
- Cleaning: Wipe surfaces with a damp cloth and mild soap. Avoid abrasive cleaners or harsh chemicals that could damage the wood finish.
- Drying: Ensure all parts are thoroughly dry after cleaning to prevent warping or damage to the wood.
- Storage: Store the play kitchen in a dry environment, away from direct sunlight or extreme temperatures, to maintain its condition.
- Regular Checks: Periodically check all screws and fasteners to ensure they remain tight. Re-tighten if necessary.
7. Troubleshooting
- Ice Maker Not Dispensing: Ensure the ice cubes are correctly placed in the top slot and are not jammed. Press the lever firmly. If issues persist, check for any obstructions in the dispensing mechanism.
- Loose Parts: If any parts become loose during play, re-tighten screws or fasteners immediately. If a part is broken or missing, contact customer support for replacement.
- Damage Upon Arrival: If the product arrives with any broken or chipped parts (e.g., oven window), do not proceed with assembly. Contact customer support immediately for assistance.
8. Specifications
| Feature | Detail |
|---|---|
| Brand | labebe |
| Model Number | HY2530009 |
| Material Type | Wood |
| Item Dimensions (D x W x H) | 12"D x 31"W x 40"H (30.48cm x 78.74cm x 101.6cm) |
| Age Range | Kid (Manufacturer Minimum Age: 36 Months) |
| Included Components | Toy kitchen, pots, pans, utensils, storage boxes, ice cubes, shakers, cup. |
| Safety Certifications | ASTM, EN71 |

Image: Product dimensions for the labebe Play Kitchen.
9. Warranty and Support
For warranty information, product support, or to report any issues, please contact labebe customer service. Refer to the product packaging or the official labebe website for contact details.