Introduction
Thank you for purchasing the Gelielim Portable Cassette Player, Model UK-K66. This device combines classic cassette playback with modern features like Bluetooth connectivity, AM/FM/SW radio, and USB/TF card support. This manual will guide you through the setup, operation, and maintenance of your new player to ensure optimal performance and enjoyment.
Product Features
- Portable Cassette Player: Play your vintage cassette tapes.
- Bluetooth Boombox: Connect wirelessly to your smartphone or other Bluetooth devices for audio streaming.
- Cassette Recorder: Record audio onto blank cassette tapes using the built-in microphone.
- AM/FM/SW Radio: Enjoy local and international radio stations with excellent reception.
- Multiple Playback Options: Supports USB drives and TF cards for digital audio playback.
- Powerful Speaker: Features an 8W speaker for clear and room-filling stereo sound.
- Earphone Jack: Includes a 3.5mm headphone jack for private listening.
- Dual Power Modes: Operates on AC power (cable included) or 4 x D-size batteries (not included) for portable use.
- User-Friendly Design: Large, intuitive buttons and easy-to-grip knobs make operation simple for all ages.
Package Contents
- Gelielim Portable Cassette Player (Model UK-K66)
- AC Power Cable
- Instruction Manual
Controls and Functions
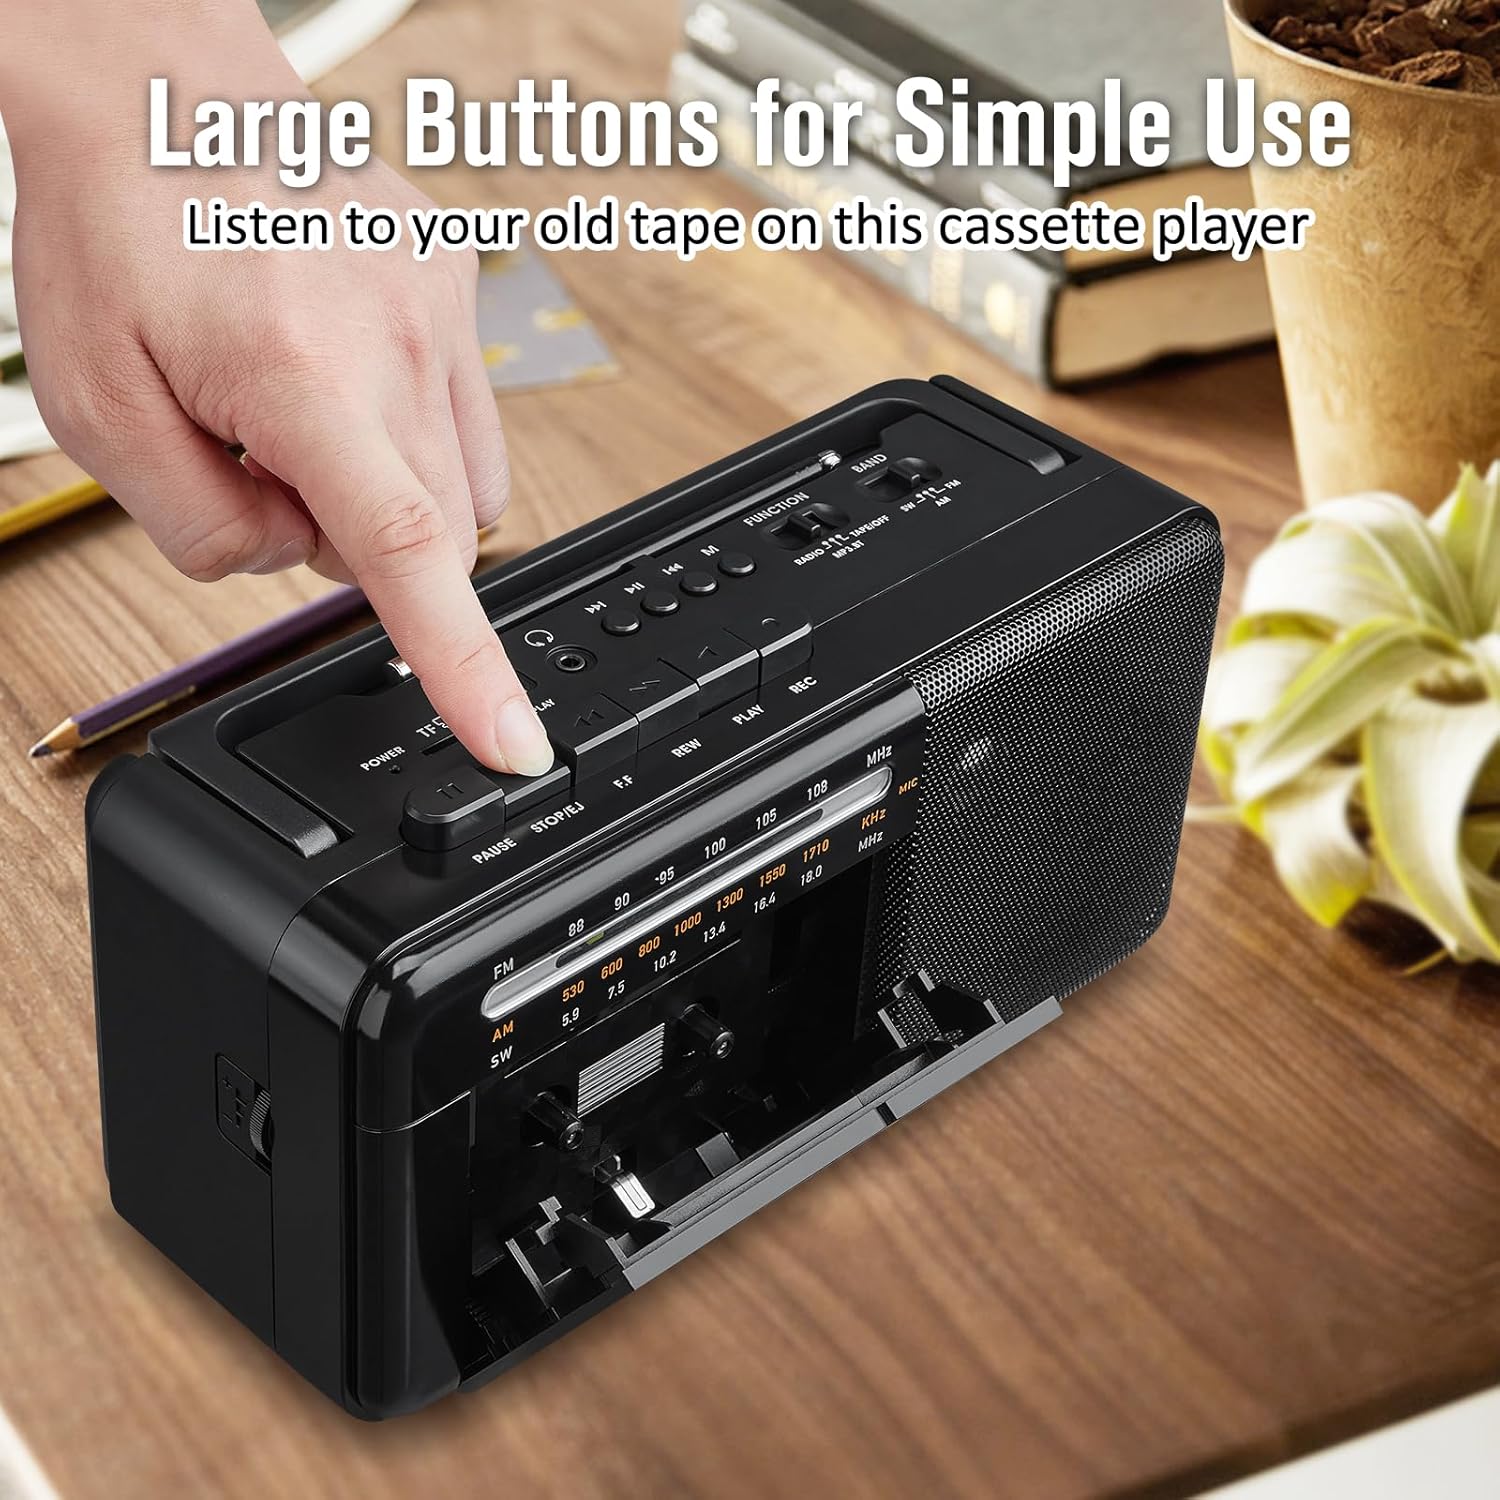
Image: Control Panel Overview. This image displays the main control buttons on the cassette player, designed for ease of use. The buttons include Power, Play, Pause, Stop/Eject, Fast Forward, Rewind, and Record. A function switch allows selection between Tape, Radio, and Bluetooth/USB/TF modes.

Image: Recording to Tape. This image illustrates the recording function of the cassette player. To record, insert a blank, recordable cassette tape, select the desired input source (e.g., radio, built-in microphone), and press the record button. Ensure the tape is recordable; otherwise, the function will not operate.

Image: Bluetooth and Digital Media Playback. The player supports one-step Bluetooth pairing for wireless audio streaming from devices like smartphones. Additionally, it features ports for USB drives and TF cards, allowing playback of digital music files.

Image: Radio Reception. The device is equipped with a long telescopic antenna and an improved DSP chip for stable and clear AM/FM/SW radio reception. Extend the antenna fully for best signal quality.

Image: Dual Power Sources. The cassette player can be powered by the included AC cable when indoors, or by 4 D-size batteries (not included) for portable outdoor use or during power outages.

Image: Earphone Jack. A 3.5mm earphone jack is provided for connecting headphones, allowing for private listening without disturbing others.
Setup
- Unpacking: Carefully remove the cassette player and all accessories from the packaging.
- Power Connection:
- AC Power: Insert the AC power cable into the AC input jack on the back of the unit and plug the other end into a standard wall outlet.
- Battery Power: Open the battery compartment on the back of the unit. Insert 4 D-size batteries (not included), ensuring correct polarity (+/-). Close the compartment securely.
- Antenna: For radio reception, extend the telescopic antenna fully.
Operating Instructions
Cassette Playback
- Set the Function switch to 'TAPE'.
- Press the 'STOP/EJECT' button to open the cassette door.
- Insert a cassette tape with the open edge facing upwards. Close the cassette door.
- Press the 'PLAY' button to start playback.
- Use 'FAST FORWARD' or 'REWIND' to navigate the tape.
- Press 'PAUSE' to temporarily stop playback and 'STOP/EJECT' to end playback and eject the tape.
Cassette Recording
- Insert a blank, recordable cassette tape into the cassette compartment.
- Select the desired input source (e.g., 'RADIO' for radio recording, or ensure the built-in microphone is facing the sound source for voice recording).
- Press the 'RECORD' button. The 'PLAY' button will also engage automatically.
- To stop recording, press the 'STOP/EJECT' button.
- Note: Recording will only function with recordable tapes.
Radio Operation
- Set the Function switch to 'RADIO'.
- Select the desired band (AM, FM, or SW) using the band selector switch.
- Extend the telescopic antenna for optimal reception.
- Rotate the 'TUNING' knob to find your desired station.
- Adjust the volume using the 'VOLUME' control.
Bluetooth Playback
- Set the Function switch to 'BT/USB/TF'. The unit will enter Bluetooth pairing mode.
- On your Bluetooth-enabled device (e.g., smartphone), search for available devices and select 'Gelielim UK-K66'.
- Once paired, you can play audio from your device through the cassette player.
USB/TF Card Playback
- Set the Function switch to 'BT/USB/TF'.
- Insert a USB drive into the USB port or a TF card into the TF card slot.
- The player will automatically detect and begin playing audio files from the inserted media.
- Use the playback controls (Play, Pause, Next/Previous Track) to manage your music.
Maintenance
- Cleaning: Wipe the unit with a soft, dry cloth. Do not use abrasive cleaners or solvents.
- Cassette Head Cleaning: Periodically clean the cassette heads with a specialized head cleaner to ensure optimal sound quality and recording performance.
- Storage: When not in use for extended periods, remove batteries and store the unit in a cool, dry place.
Troubleshooting
| Problem | Possible Cause | Solution |
|---|---|---|
| No power | AC cable not connected, batteries depleted or incorrectly inserted. | Check AC connection; replace or correctly insert batteries. |
| No sound | Volume too low, wrong function mode selected, headphones connected. | Increase volume; select correct function mode; disconnect headphones if using speaker. |
| Poor radio reception | Antenna not extended, weak signal. | Extend antenna fully; reposition the unit for better signal. |
| Cassette not playing/recording | Tape incorrectly inserted, tape damaged, not a recordable tape (for recording). | Re-insert tape correctly; try a different tape; ensure tape is recordable for recording. |
| Bluetooth not pairing | Device too far, Bluetooth not enabled on source device, wrong mode. | Ensure device is within range; enable Bluetooth on source; select 'BT' mode. |
Specifications
- Model Number: UK-K66
- Dimensions (L x W x H): 26 x 11.4 x 13 cm (10.2 x 4.5 x 5.1 inches)
- Weight: 1.2 kg
- Connectivity Technology: Bluetooth, Auxiliary
- Supported Standards: Bluetooth, AUX, MP3, AAC, WAV
- Power Source: AC (230V, cable included) or 4 x D-size batteries (not included)
- Speaker Output: 8W
- Radio Frequency Range:
- FM: 88 - 108 MHz
- AM: 530 - 1710 kHz
- SW: 5.9 - 18.0 MHz
- Earphone Jack: 3.5mm
- Supported Media: USB Drive, TF Card
Safety Information
- Do not expose the unit to rain or moisture to prevent fire or electric shock.
- Do not open the casing. Refer all servicing to qualified personnel.
- Keep batteries out of reach of children. Do not mix old and new batteries or different types of batteries.
- Avoid placing the unit near heat sources or in direct sunlight.
- Ensure proper ventilation; do not block ventilation openings.
Warranty and Support
Gelielim offers a 12-month warranty for this product and a 30-day money-back guarantee. For any questions or support, please contact Gelielim customer service. We are committed to providing excellent customer service.