1. Introduction
This manual provides detailed instructions for the safe and effective operation of your DMMRUTXB 12V 6A Intelligent Pulse Repair Car Battery Charger. Please read this manual thoroughly before use and retain it for future reference. This charger is designed for 12V lead-acid batteries (including CAR, AGM, MOTO, LiFePO4, GEL, EFB, Deep Cycle, WET) and features intelligent pulse repair technology, overvoltage protection, and an LCD display for real-time monitoring.

Image 1.1: Front view of the DMMRUTXB 12V 6A Intelligent Pulse Repair Car Battery Charger, showing the LCD screen, control button, and connected US plug and alligator clips.
2. Safety Instructions
- Always wear eye protection and protective clothing when working with batteries.
- Ensure adequate ventilation in the charging area to prevent the accumulation of explosive gases.
- Do not expose the charger to rain or excessive moisture.
- Never attempt to charge a frozen or damaged battery.
- Ensure the charger is disconnected from the AC power supply before making or breaking connections to the battery.
- Connect the positive (red) clamp to the positive (+) battery terminal and the negative (black) clamp to the negative (-) battery terminal.
- Keep out of reach of children.
3. Package Contents
- 1 x DMMRUTXB 12V 6A Intelligent Pulse Repair Car Battery Charger (US Plug)
- 1 x User Manual
4. Product Features and Components
The DMMRUTXB battery charger incorporates several key features for efficient and safe battery maintenance:
- Intelligent Pulse Repair Technology: Helps to restore sulfated or deeply discharged batteries and extend battery lifespan.
- Overvoltage Protection: Automatically prevents damage to the battery from excessive voltage during charging.
- LCD Digital Display: Provides real-time information including voltage, current, temperature, and charging progress.
- Multiple Charging Modes: Supports various 12V battery types including CAR, AGM, MOTO, LiFePO4, GEL, EFB, Deep Cycle, and WET batteries.
- Temperature Compensation (Winter/Summer Mode): Adjusts charging parameters based on ambient temperature for optimal performance.

Image 4.1: The large digital display of the charger, indicating various charging parameters and battery status.

Image 4.2: The charger's display highlighting the 'MODE' button and various selectable charging modes for different battery types.
5. Setup and Connection
- Prepare the Battery: Ensure the battery terminals are clean and free of corrosion. If necessary, clean them with a wire brush.
- Connect to Battery:
- Connect the red (+) positive clamp to the positive (+) terminal of the battery.
- Connect the black (-) negative clamp to the negative (-) terminal of the battery.
Ensure a secure connection. The charger will detect the battery voltage.
- Connect to AC Power: Plug the charger's AC power cord into a standard 120V AC wall outlet. The LCD display will illuminate.

Image 5.1: The charger connected to different types of 12V batteries, demonstrating proper connection for charging.
6. Operating Instructions
- Power On: Once connected to both the battery and AC power, the charger will automatically power on and display current battery information.
- Select Charging Mode: Press the 'MODE' button repeatedly to cycle through the available charging modes (CAR, AGM, MOTO, LiFePO4). Select the mode appropriate for your battery type. The charger will automatically detect ambient temperature and switch between Winter and Summer modes as needed.
- Start Charging: After selecting the mode, the charger will automatically begin the charging process. The LCD display will show real-time voltage, current, temperature, and charging progress (percentage).
- Pulse Repair Function: If your battery is deeply discharged or sulfated, select the 'REPAIR' mode. This function uses pulse technology to attempt to restore battery capacity. This process can take several hours.
- Charging Completion: The charger will automatically stop charging when the battery is fully charged. The display will indicate 'FULL' or 100%.
- Disconnecting: First, unplug the charger from the AC power outlet. Then, disconnect the negative (black) clamp from the battery, followed by the positive (red) clamp.
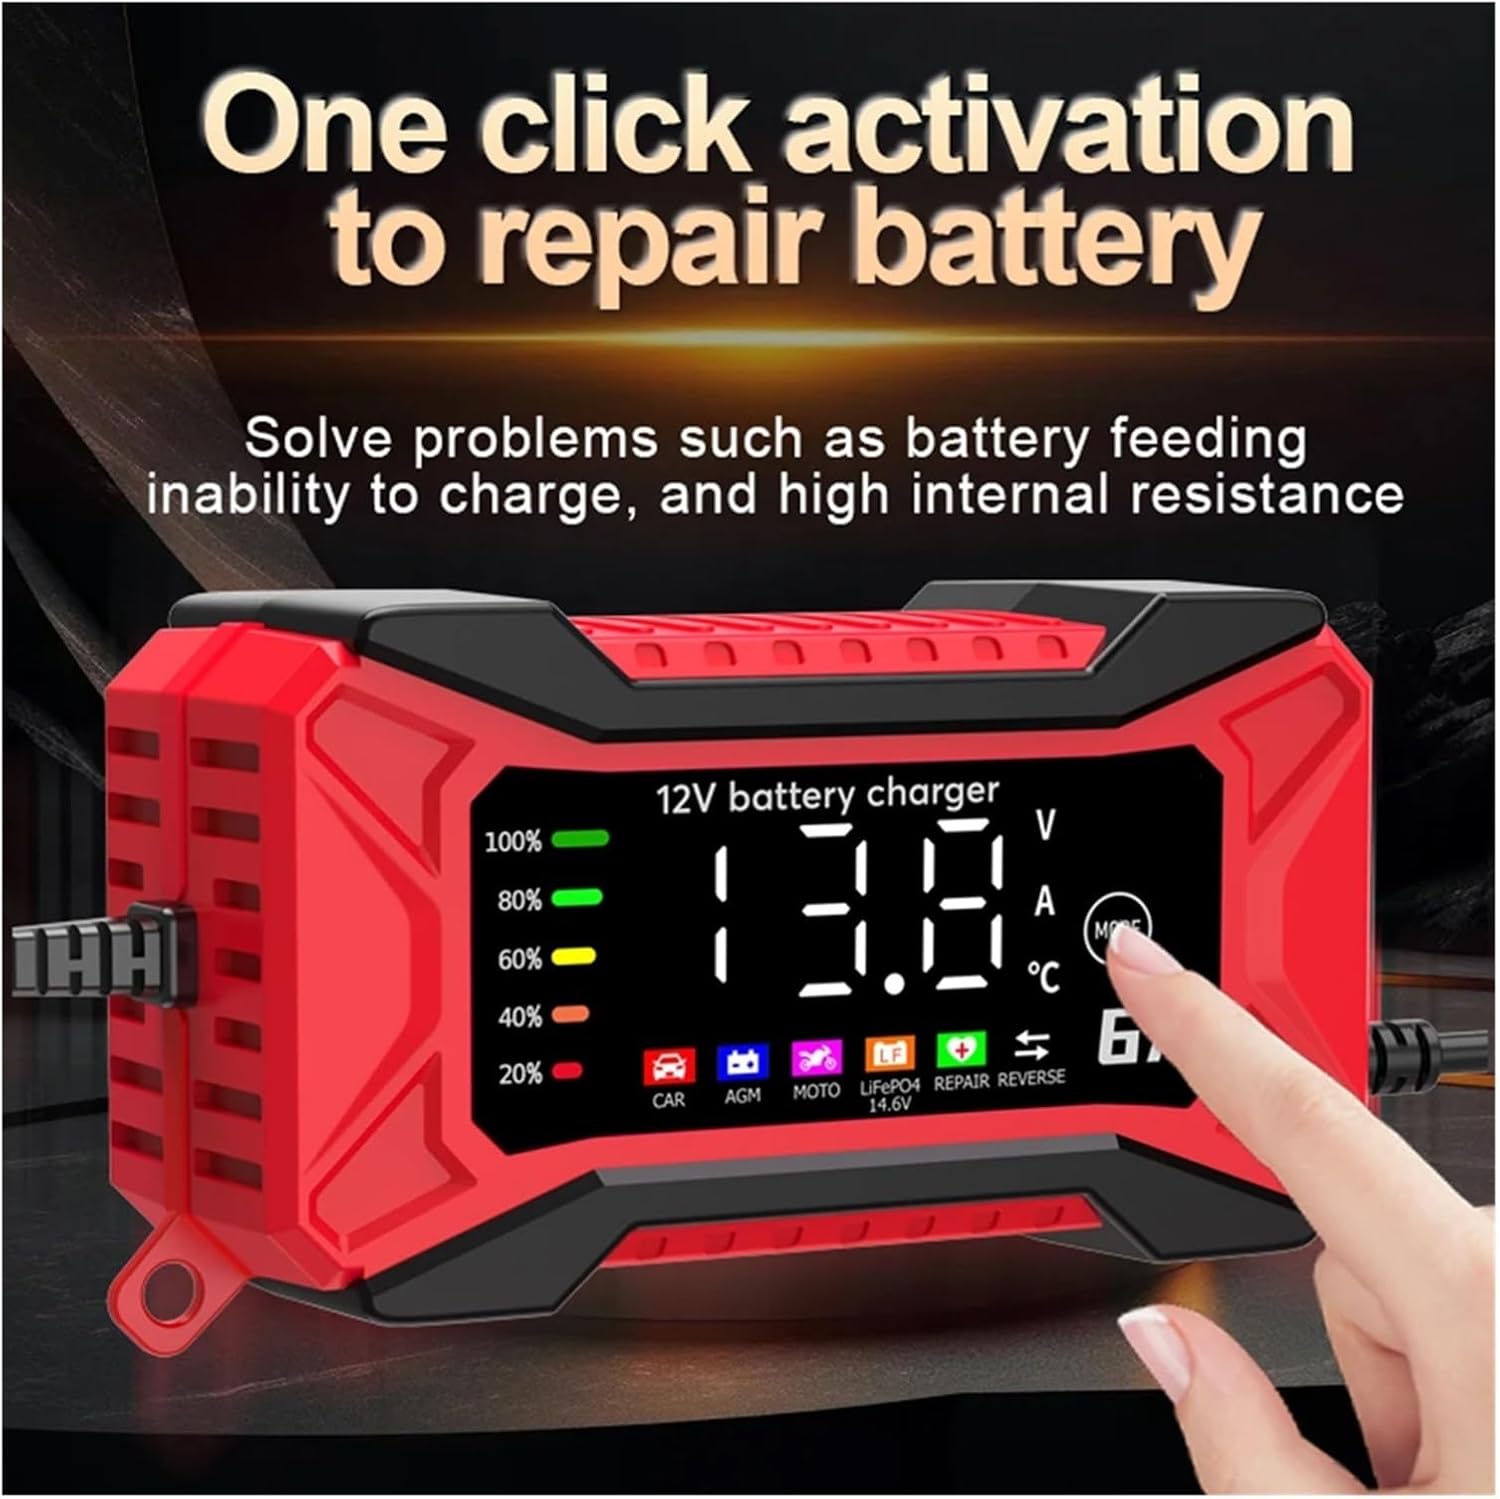
Image 6.1: A hand interacting with the 'MODE' button, illustrating the activation of the battery repair function.

Image 6.2: The charger's display illustrating the automatic adjustment between Winter and Summer charging modes based on ambient temperature.
7. Maintenance
- Cleaning: Disconnect the charger from all power sources before cleaning. Wipe the exterior with a soft, dry cloth. Do not use abrasive cleaners or solvents.
- Storage: Store the charger in a cool, dry place when not in use. Ensure cables are neatly coiled and not kinked.
- Cable Inspection: Regularly inspect the AC power cord and battery clamps for any signs of damage, fraying, or corrosion. Replace if necessary.
8. Troubleshooting
| Problem | Possible Cause | Solution |
|---|---|---|
| Charger does not power on. | No AC power; faulty outlet; damaged power cord. | Check AC power connection; try a different outlet; inspect power cord for damage. |
| Charger not charging battery. | Incorrect battery connection; battery too deeply discharged; battery faulty. | Ensure correct polarity and secure connection; try 'REPAIR' mode; have battery tested by a professional. |
| Error message on display. | Reverse polarity; short circuit; battery fault. | Disconnect and reconnect clamps with correct polarity; check for short circuits; consult a professional if error persists. |
9. Specifications
- Model: DMMRUTXB
- Input Voltage: 100-240V AC, 50/60Hz (US Plug variant)
- Output Voltage: 12V DC
- Output Current: 6A
- Battery Types: 12V Lead-Acid (CAR, AGM, MOTO, LiFePO4, GEL, EFB, Deep Cycle, WET)
- Overvoltage Protection: Yes
- Pulse Repair Function: Yes
- Display: LCD Digital Display
- Package Dimensions: 0.39 x 0.39 x 0.39 inches
- Item Weight: 1.76 ounces (50 Grams)
10. Warranty and Support
For warranty information or technical support, please contact the manufacturer or your point of purchase. Keep your purchase receipt as proof of purchase.