1. Introduction
Thank you for choosing the iPormis Queen Bed Frame. This upholstered platform bed frame features four integrated storage drawers, a wingback headboard with built-in Type-C and USB charging ports, and a sturdy solid wood slat system. This manual provides comprehensive instructions for safe assembly, proper operation, and effective maintenance to ensure long-lasting use and enjoyment of your new bed frame.
2. Included Components
Please verify that all components listed below are present before beginning assembly. If any parts are missing or damaged, please contact customer support.
- Metal Bed Frame x1
- Wingback Storage Headboard x1
- Solid Wood Slats x12
- Storage Drawer x4
- Installation Accessories (screws, bolts, washers)
- Assembly Tools (Allen wrench, screwdriver)
- Instruction Manual x1
3. Assembly Instructions
Assembly is designed to be straightforward and can typically be completed within 40 minutes with the provided tools and instructions. It is recommended to assemble the bed frame in the room where it will be used.
3.1 Preparation
- Unpack all components and lay them out on a clean, soft surface to prevent scratches.
- Identify each part using the provided labels and the components list.
- Ensure all necessary tools are at hand.
3.2 Frame Assembly
- Attach the side rails to the headboard and footboard using the designated bolts and the provided Allen wrench. Ensure all connections are secure but do not overtighten initially.
- Install the central support beam(s) to the frame. Note that some support pieces may have foam padding to reduce noise; ensure these are positioned correctly as per the diagram.
- Insert the solid wood slats into the designated slots on the side rails. The one-click installation mechanism ensures a secure and noise-free fit.
- Once all frame components are in place, tighten all bolts securely.
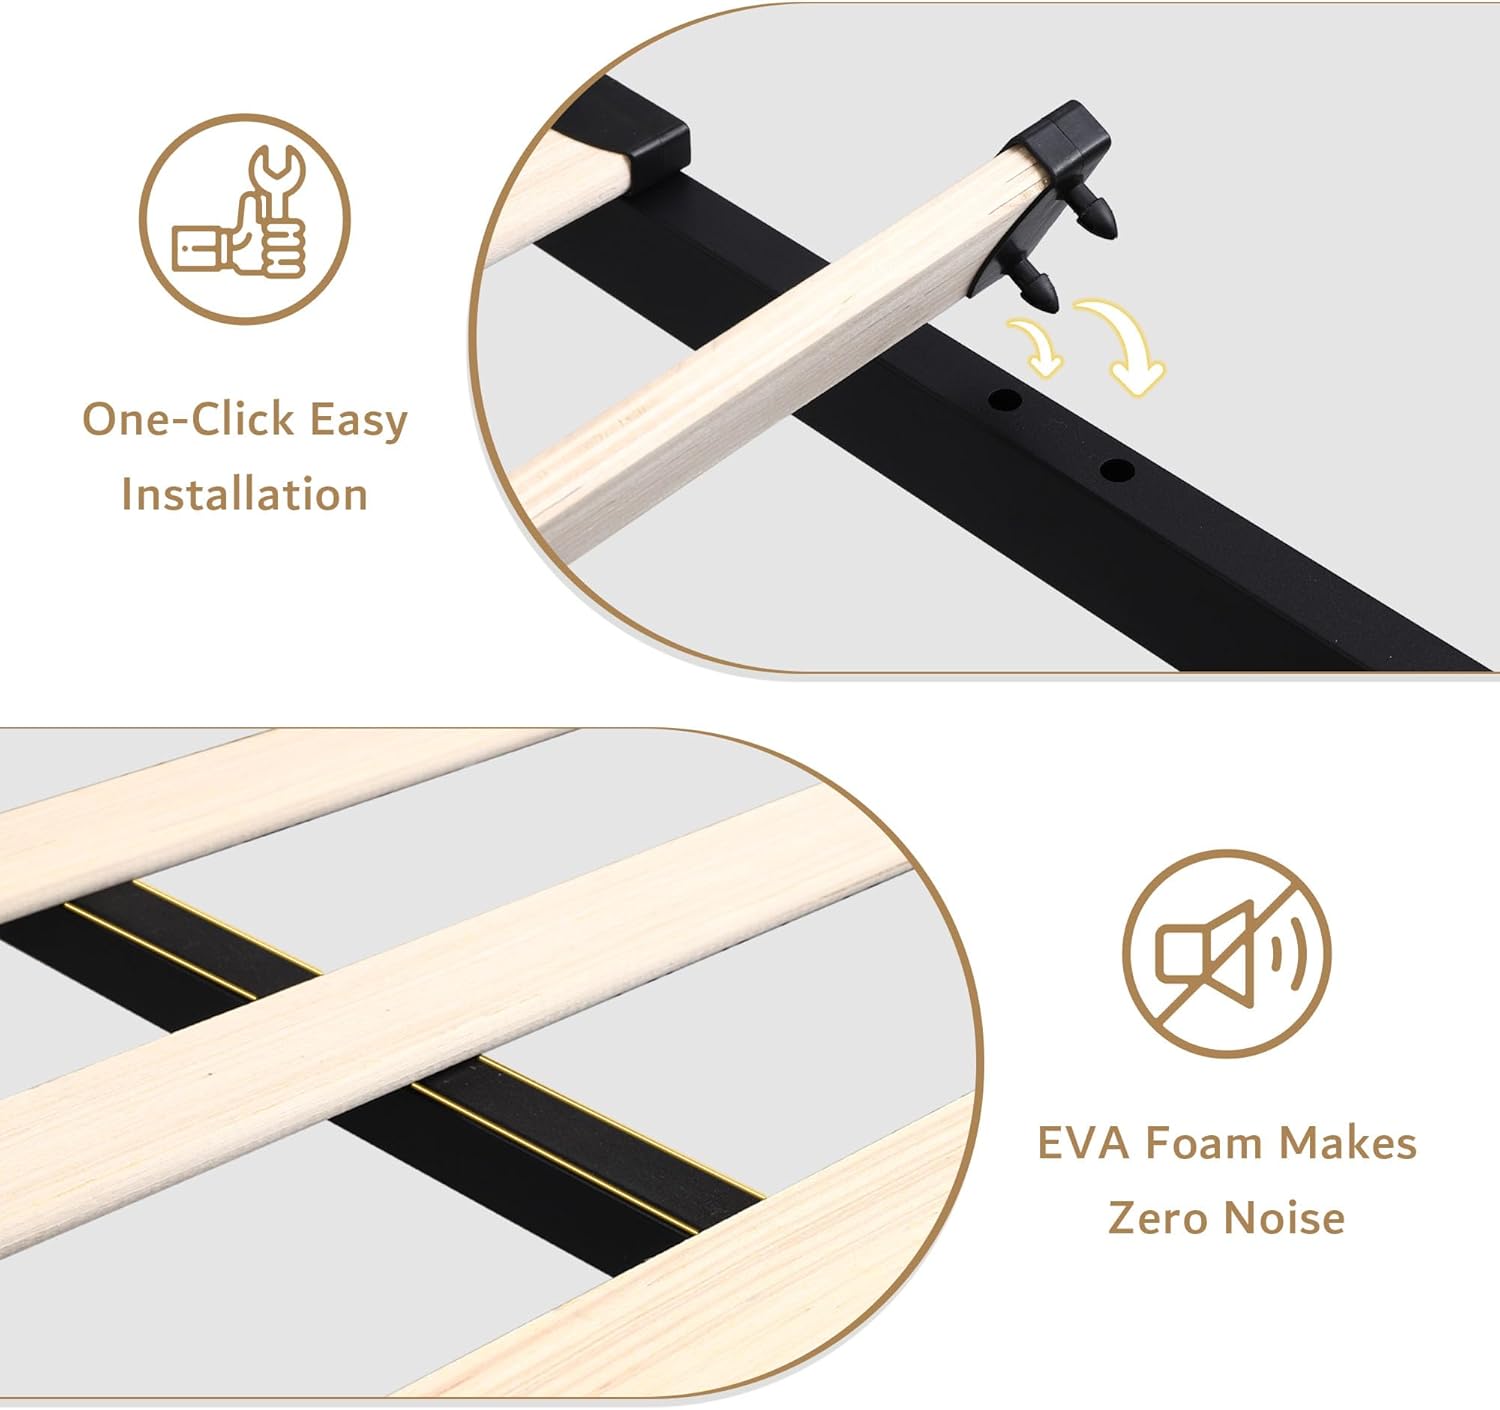
Figure 1: Detail of one-click slat installation and EVA foam for noise reduction.
3.3 Storage Drawer Installation
- Assemble the four storage drawers according to the separate instructions provided for the drawers. Ensure the smooth mute wheels are correctly attached to the bottom of each drawer.
- Slide the assembled drawers into the designated spaces under the bed frame. The integrated lock system allows for easy latching to keep drawers securely closed.

Figure 2: Ample storage space provided by the integrated drawers.
3.4 Headboard Charging Ports
- Locate the power cord extending from the headboard.
- Plug the power cord into a standard wall outlet. The built-in 20W fast charging Type-C and USB ports, along with the two standard outlets, are now ready for use.

Figure 3: Integrated charging ports and outlets on the headboard's top shelf.
4. Operating Instructions
4.1 Using the Storage Drawers
The four separated storage drawers are designed for easy access and organization. Simply pull the drawer handle to open. To close, push the drawer back until the lock system engages, ensuring it stays securely in place. The smooth mute wheels allow for quiet operation.
4.2 Utilizing the Charging Station
The headboard features a convenient charging station. Plug your devices into the Type-C, USB-A, or standard AC outlets as needed. The widened top shelf provides a stable surface for placing phones, tablets, or other small items while charging.
4.3 Headboard and Mattress Placement
The 14-inch wingback headboard is designed to prevent mattress sliding and offers comfortable back support. Ensure your mattress is placed centrally on the slats. The recommended mattress height is between 8 and 14 inches for optimal aesthetic and functional integration with the low-profile design.
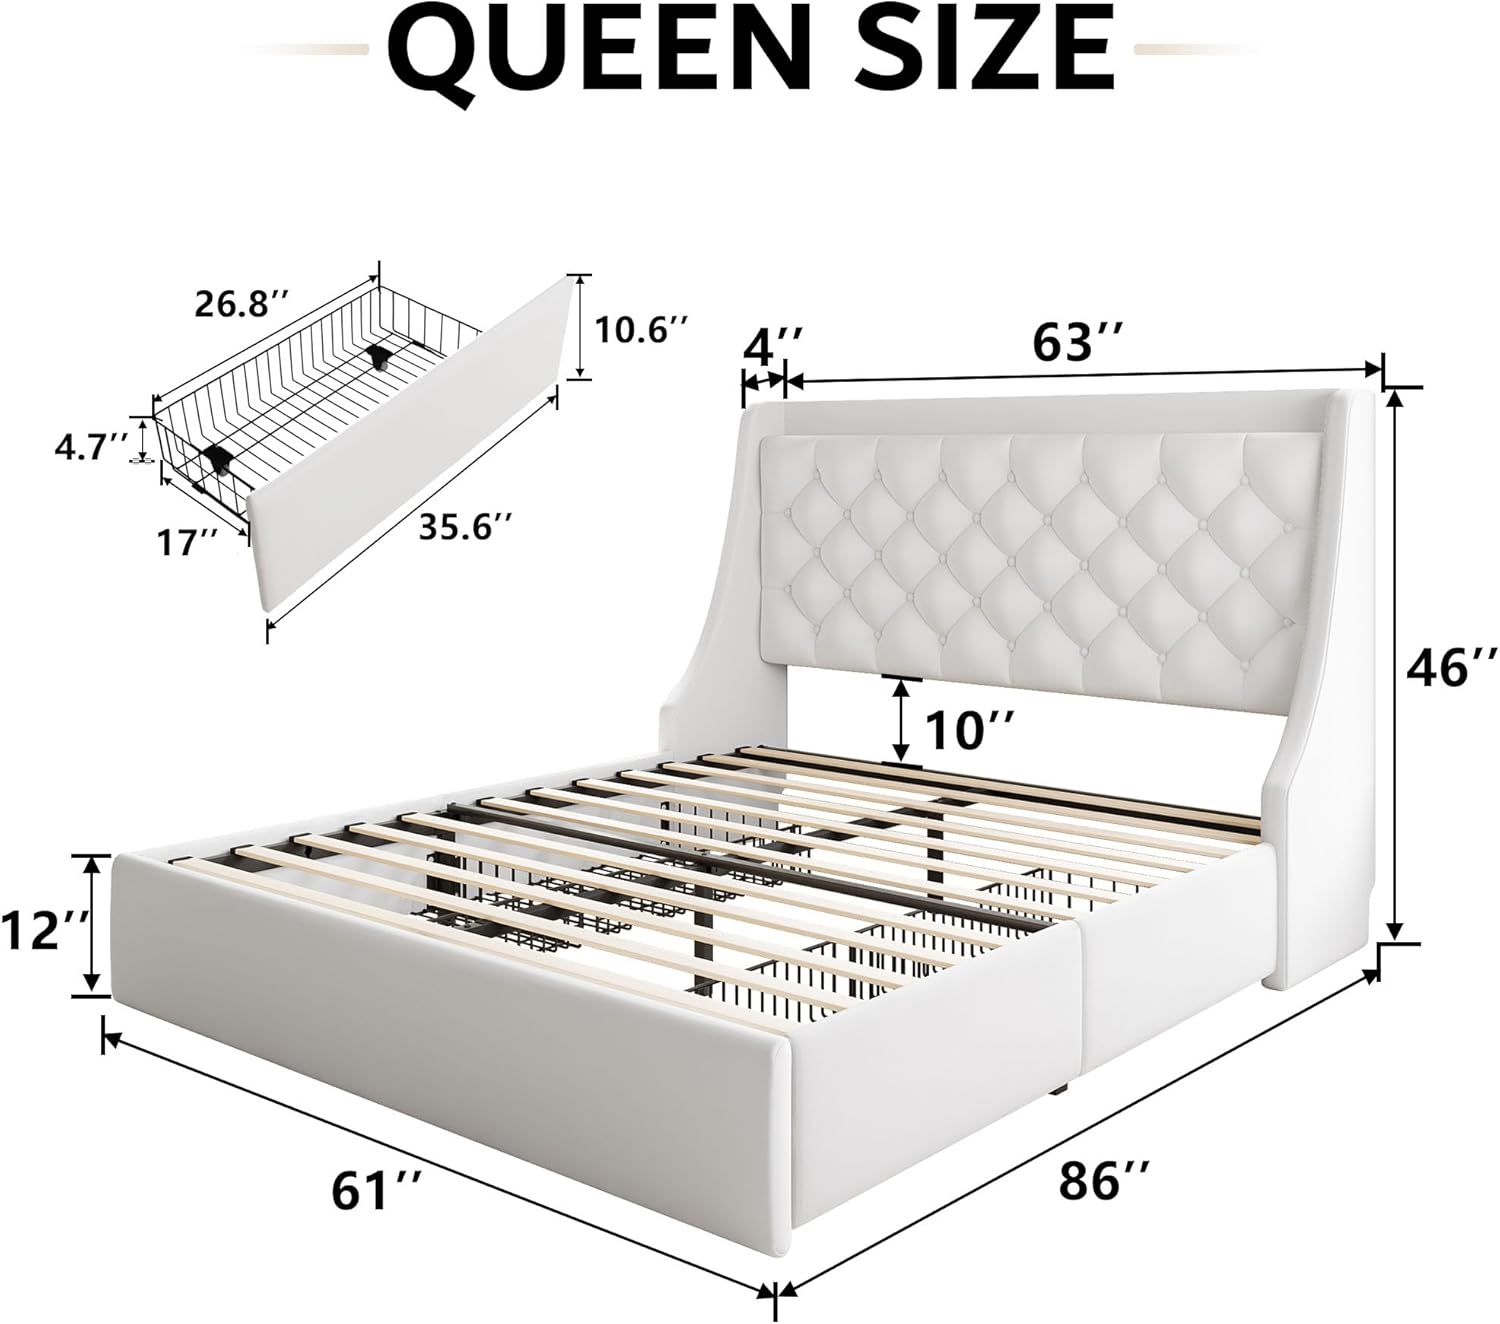
Figure 4: Queen Bed Frame dimensions overview.
5. Maintenance
- Cleaning: For the upholstered parts, gently vacuum regularly to remove dust. For spills, blot immediately with a clean, dry cloth. For stubborn stains, use a mild fabric cleaner following the product's instructions. Avoid harsh chemicals.
- Frame Inspection: Periodically check all bolts and screws to ensure they remain tight. Retighten if necessary to maintain stability and prevent noise.
- Drawer Care: Keep the drawer wheels free of debris to ensure smooth operation.
- Electrical Ports: Ensure the charging ports and outlets are kept dry and free from dust. Do not overload the outlets.
6. Troubleshooting
| Issue | Possible Cause | Solution |
|---|---|---|
| Bed frame is wobbly or noisy. | Loose bolts or improperly installed slats. | Check and tighten all assembly bolts. Ensure all slats are fully seated in their holders and the EVA foam is correctly positioned. |
| Storage drawers do not slide smoothly. | Debris in wheels or misaligned drawers. | Clean any debris from the drawer wheels. Ensure drawers are aligned correctly within their tracks and the lock system is not obstructed. |
| Charging ports/outlets are not working. | Power cord unplugged or overloaded circuit. | Verify the headboard power cord is securely plugged into a functional wall outlet. Check for tripped circuit breakers. Avoid overloading the outlets with too many high-power devices. |
7. Specifications
| Model Number: | IPO737E2 |
| Size: | Queen |
| Product Dimensions: | 86"L x 63"W x 46"H |
| Color: | White |
| Material: | Metal, Wood, Upholstered Fabric |
| Maximum Weight Recommendation: | 1000 Pounds |
| Special Features: | 20W Fast Charging Type-C & USB Ports, 2 AC Outlets, 4 Separated Storage Drawers, Wingback Storage Headboard, Low Profile Stable Structure, Noise-Free Design |
| Assembly Required: | Yes |
8. Warranty and Support
For warranty information, replacement parts, or technical support, please refer to the contact details provided with your purchase documentation or visit the official iPormis website. Please have your model number (IPO737E2) and purchase date available when contacting support.