1. Introduction
Thank you for purchasing the FINOTI V888 Drone. This advanced quadcopter features an 8K HD triple camera system, optical flow positioning, and omnidirectional obstacle avoidance for a stable and intuitive flight experience. This manual provides essential information for safe operation, setup, maintenance, and troubleshooting.
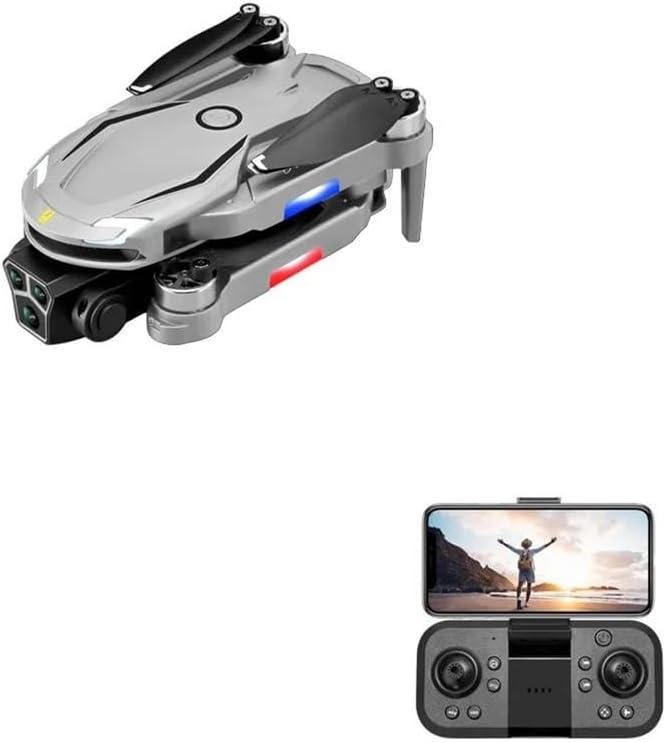
Figure 1.1: FINOTI V888 Drone (folded) and Remote Control with smartphone holder.
2. Package Contents
Verify that all items listed below are included in your package:
- 1 x V888 RC Quadcopter
- 1 x Remote Control
- 3 x 3.7V 1800mAh Li-polymer Battery (Triple Battery variant)
- 4 x Spare Propellers
- 1 x USB Charging Cable
- 1 x Screwdriver
- 2 x User Manual (this document and possibly a quick start guide)
3. Components Overview
3.1. V888 Drone

Figure 3.1: V888 Drone with arms unfolded, showcasing its design and 8K aerial photography capability.
The V888 Drone features a foldable design for portability. Key components include:
- 8K HD Triple Camera System: Front wide-angle lens and bottom optical flow lens for versatile shooting angles.
- Brushless Motors: Provide powerful and quiet performance for stable flight.
- Propellers: Four main propellers for lift and propulsion.
- Battery Compartment: Located on the underside for the 3.7V 1800mAh Li-polymer battery.
- Obstacle Avoidance Sensors: 720° omnidirectional sensors for collision prevention.
- LED Indicator Lights: Located on the arms for flight status and orientation.

Figure 3.2: Detailed view of the 8K triple camera system, allowing for multiple shooting angles.
3.2. Remote Control

Figure 3.3: Remote Control layout with key functions labeled.
The remote control provides intuitive command over the drone. Refer to Figure 3.3 for button identification:
- Power Switch: Turns the remote control on/off.
- Throttle Stick (Left): Controls altitude (up/down) and yaw (rotate left/right).
- Steering Sticks (Right): Controls forward/backward and left/right side flight.
- One-click Takeoff/Landing Button: Initiates automatic takeoff or landing.
- One-click Rolling Button: Executes a 360° flip.
- Speed Switching Button: Toggles between different flight speeds.
- Obstacle Avoidance Button: Activates/deactivates the obstacle avoidance system.
- Fine Tune/Calibration Buttons: Adjusts drone trim for stable hovering.
- Camera Angle Adjustment: Buttons to adjust the camera lens up or down.
- Smartphone Holder: Integrated holder for FPV viewing via the mobile app.
4. Setup
4.1. Charging the Battery
The drone is powered by a 3.7V 1800mAh Li-polymer battery. Ensure the battery is fully charged before each flight.
- Remove the battery from the drone.
- Connect the battery to the USB charging cable.
- Connect the USB charging cable to a USB power adapter (e.g., computer USB port, phone charger).
- The charging indicator light will show charging status (refer to charger's specific indicator behavior). A full charge takes approximately 1 hour.
- Once charged, disconnect the battery and install it into the drone.
4.2. Installing Propellers
The drone comes with pre-installed propellers. If replacement is needed, use the provided spare propellers and screwdriver.
- Identify the correct propeller for each motor. Propellers are typically marked (e.g., A or B) and must match the corresponding motor arm.
- Carefully attach the propeller to the motor shaft, ensuring it is securely fastened.
- Use the screwdriver to tighten any screws if necessary, but do not overtighten.
4.3. Installing Remote Control Batteries
The remote control requires its own batteries (not specified in product data, assume standard AA/AAA). Open the battery compartment on the back of the remote control and insert the batteries according to the polarity markings.
4.4. Downloading the Mobile App
For FPV viewing, advanced features, and custom flight paths, download the official FINOTI drone app on your smartphone. The app is available on both Android (Google Play Store) and iOS (Apple App Store).

Figure 4.1: HD image transmission via mobile app, with Google Play and App Store icons.
Search for "FINOTI Drone" or refer to the QR code in the quick start guide if provided.
5. Operating Instructions
5.1. Pairing the Drone and Remote Control
- Place the drone on a flat, level surface.
- Turn on the drone's power switch. The drone's indicator lights will flash.
- Turn on the remote control's power switch.
- Push the left joystick (throttle) all the way up, then all the way down. The remote control will beep, and the drone's lights will become solid, indicating successful pairing.
- For FPV and app control, connect your smartphone to the drone's Wi-Fi network (usually named "FINOTI_XXXXX") in your phone's Wi-Fi settings. Then open the FINOTI drone app.
5.2. Takeoff and Landing
- One-click Takeoff: After pairing, press the One-click Takeoff/Landing button. The drone will automatically ascend and hover at a stable altitude.
- Manual Takeoff: After pairing, push both joysticks down and outwards simultaneously to unlock the motors. Then slowly push the left joystick (throttle) up to ascend.
- One-click Landing: During flight, press the One-click Takeoff/Landing button. The drone will automatically descend and land.
- Manual Landing: Slowly pull the left joystick (throttle) down to descend. Once landed, push both joysticks down and inwards to stop the motors.
5.3. Flight Controls
- Ascend/Descend: Push the left joystick (throttle) up to ascend, pull down to descend.
- Forward/Backward: Push the right joystick (steering) up to fly forward, pull down to fly backward.
- Left/Right Sideways Flight: Push the right joystick (steering) left to fly left, push right to fly right.
- Rotate Left/Right (Yaw): Push the left joystick (throttle) left to rotate counter-clockwise, push right to rotate clockwise.
5.4. Intelligent Flight Features
- Intelligent Hovering / Optical Flow Positioning: The drone uses air pressure and optical flow sensors to maintain a stable altitude and position, reducing the need for constant throttle adjustments.

Figure 5.1: Intelligent hovering maintained by air pressure calculation.
- 720° Omnidirectional Obstacle Avoidance: The drone is equipped with sensors that detect obstacles from all directions, automatically adjusting its flight path to prevent collisions. Activate this feature using the dedicated button on the remote control.
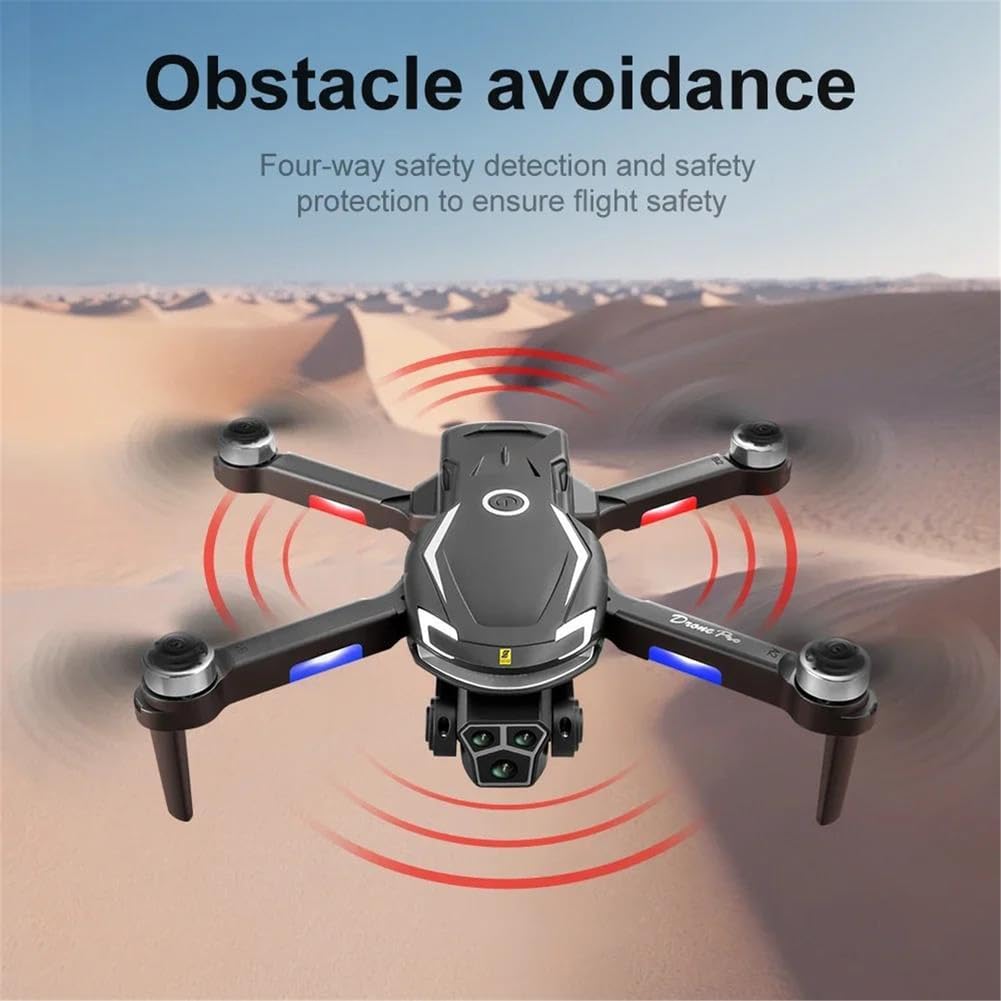
Figure 5.2: Four-way safety detection for obstacle avoidance.
- Gesture Photography/Video: Perform specific hand gestures in front of the drone's camera to trigger photo or video recording. Refer to the app's instructions for specific gestures.
- Custom Route (Waypoint Flight): In the mobile app, you can draw a desired flight path on the screen. The drone will then follow this path automatically.
- Headless Mode: In headless mode, the drone's orientation is relative to the pilot, regardless of which way the drone's front is facing. This simplifies control for beginners.
- One-Key Return: Press the one-key return button on the remote control, and the drone will automatically fly back towards its takeoff point.
6. Maintenance
- Cleaning: Use a soft, dry cloth to clean the drone and remote control. Do not use liquid cleaners or solvents.
- Propeller Inspection: Regularly check propellers for damage (cracks, bends). Replace damaged propellers immediately using the provided spares.
- Battery Care: Store batteries in a cool, dry place. Do not overcharge or over-discharge batteries. If storing for extended periods, charge batteries to approximately 50% capacity.
- Storage: When not in use, store the drone in a cool, dry environment, away from direct sunlight and extreme temperatures. Fold the arms for compact storage.
7. Troubleshooting
| Problem | Possible Cause | Solution |
|---|---|---|
| Drone does not respond to remote control. | Not paired; low battery on drone or remote; out of range. | Re-pair the drone and remote. Charge drone battery. Replace remote control batteries. Ensure drone is within operating range. |
| Drone drifts during flight. | Not calibrated; strong wind; damaged propeller. | Perform gyroscope calibration (refer to app/quick start guide). Fly in calm conditions. Check and replace damaged propellers. Use fine-tune buttons. |
| Poor image/video quality or no FPV feed. | Weak Wi-Fi signal; app not connected; camera lens dirty. | Ensure strong Wi-Fi connection between phone and drone. Reconnect app. Clean camera lens. |
| Drone crashes despite obstacle avoidance. | Obstacle avoidance off; sensors dirty/blocked; very thin objects. | Ensure obstacle avoidance is activated. Clean sensors. Note that very thin objects (e.g., power lines) may not be detected. |
| Short flight time. | Battery not fully charged; old battery; aggressive flying. | Ensure battery is fully charged. Consider replacing old batteries. Fly more conservatively. |
8. Specifications
| Feature | Detail |
|---|---|
| Model Name | V888 Drone |
| Camera | 8K HD Triple Camera (Front wide-angle, Bottom optical flow) |
| Video Resolution | 3840x2160P (EIS stabilized) |
| Photo Resolution | 7680x4320P |
| Transmission Frequency | 5GHz High Frequency WIFI |
| Control Distance | Up to 10000M (via 5G WIFI transmission) |
| FPV Distance (Gesture Control) | Within 8000M |
| Battery | 3.7V 1800mAh Li-polymer |
| Flight Time | Approximately 20 minutes |
| Charging Time | Approximately 1 hour (USB charge) |
| Motor Type | Brushless |
| Obstacle Avoidance | 720° Omnidirectional |
| Take-off Weight | 149g |
| Folded Dimensions | 12.5 x 8 x 5.5 CM |
| Gyroscope | 6-axis |
| Frame Rate | 25fps |
9. Warranty and Support
FINOTI products are manufactured to high quality standards. For information regarding warranty coverage, please refer to the warranty card included with your product or contact FINOTI customer support.
For technical assistance, troubleshooting, or spare parts inquiries, please contact FINOTI customer support through the official website or the contact information provided on your purchase receipt.
Manufacturer: FINOTI
Model Number: B-TRIPLEBATTERY-66510917