1. Introduction
This manual provides essential information for the safe and efficient installation, operation, and maintenance of your SANOTECHNIK® Sauna LUXOR 1. Please read all instructions carefully before assembly and use. Retain this manual for future reference.
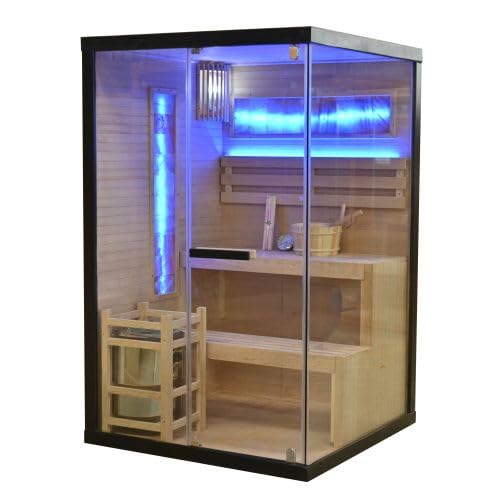
Image 1.1: Exterior view of the SANOTECHNIK® Sauna LUXOR 1, showcasing its corner design with glass panels and hemlock wood structure.
2. Safety Information
WARNING: Failure to follow these safety instructions may result in fire, electric shock, serious injury, or death.
- Consult a physician before using the sauna, especially if you have health conditions such as heart disease, high blood pressure, diabetes, or are pregnant.
- Do not use the sauna under the influence of alcohol, drugs, or medications that may impair judgment or cause drowsiness.
- Limit sauna sessions to 10-20 minutes to avoid overheating. Exit immediately if you feel dizzy, nauseous, or unwell.
- Keep children and pets away from the sauna, especially when in operation.
- Ensure proper ventilation as specified in the installation instructions.
- Do not place flammable materials inside or near the sauna heater.
- The sauna heater and stones become extremely hot. Avoid direct contact to prevent burns.
- Use only water on the sauna stones. Do not pour excessive amounts of water at once.
- Ensure the electrical installation meets local codes and is performed by a qualified electrician.
- Regularly inspect the sauna for any damage or wear. Do not operate if damaged.
3. Package Contents
Verify that all components are present before beginning assembly:
- Sauna cabin panels (walls, floor, ceiling)
- Tempered safety glass door and fixed glass panels
- Harvia Hiiliosauna heater (3.5 kW)
- Sauna stones
- Integrated LED lighting system
- Wooden benches
- Sauna accessories: bucket, ladle, thermometer, hourglass
- Assembly hardware and fasteners
- Instruction manual

Image 3.1: Included sauna accessories: a wooden bucket and ladle, a thermometer, and an hourglass for timing sauna sessions.
4. Setup and Installation
Professional installation by a qualified electrician is recommended for the heater's electrical connection.
4.1 Site Preparation
- Choose a level, stable, and dry location indoors.
- Ensure adequate space around the sauna for assembly and maintenance, and for proper air circulation.
- Verify that the electrical supply meets the requirements for the 3.5 kW Harvia heater.
4.2 Assembly Steps
- Base Assembly: Place the floor panel on the prepared site.
- Wall Panel Installation: Erect the wall panels, starting with the corner sections, and secure them according to the provided diagrams.
- Glass Panel Integration: Carefully install the tempered glass door and fixed glass panels into their designated frames. Ensure seals are properly seated.
- Ceiling Placement: Position and secure the ceiling panel.
- Heater Installation: Mount the Harvia heater in its designated location. Follow the heater's specific installation instructions for electrical connections and stone placement.
- Bench Installation: Install the wooden benches securely.
- LED Lighting: Connect the integrated LED lighting system.
- Final Checks: Inspect all connections and ensure the sauna is stable and secure.
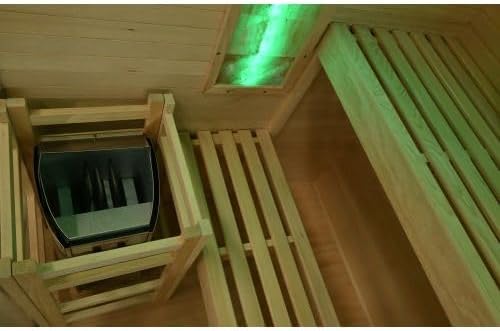
Image 4.1: Detail of the Harvia sauna heater, positioned within its protective wooden frame inside the sauna.
5. Operating Instructions
5.1 Pre-heating the Sauna
- Ensure the sauna door is closed.
- Turn on the main power switch for the sauna.
- Activate the Harvia heater using its control panel. Set the desired temperature and heating duration. Refer to the Harvia heater's specific manual for detailed controls.
- Allow 30-60 minutes for the sauna to reach the desired temperature. The thermometer can be used to monitor the internal temperature.
5.2 Using the Sauna
- Before entering, ensure the temperature is comfortable.
- You may pour small amounts of water onto the hot sauna stones using the bucket and ladle to create steam (löyly). Do not over-pour.
- Use the hourglass to monitor your session duration.
- The integrated LED lighting can be adjusted to your preference.

Image 5.1: Interior view of the sauna, showing the wooden benches and the integrated LED lighting emitting a green hue.
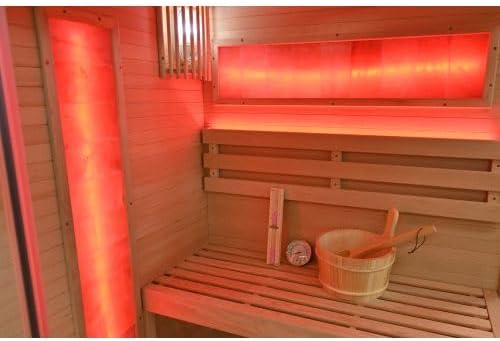
Image 5.2: Interior view of the sauna, showing the wooden benches and the integrated LED lighting emitting a red hue.
5.3 Post-Sauna
- Turn off the heater and LED lighting after use.
- Leave the door slightly ajar to allow the sauna to air out and dry.
6. Maintenance
6.1 Cleaning
- Wood Surfaces: Wipe down wooden surfaces with a damp cloth after each use. For deeper cleaning, use a mild sauna cleaner specifically designed for wood. Do not use harsh chemicals or abrasive cleaners.
- Glass Surfaces: Clean glass panels with a standard glass cleaner.
- Heater: Periodically remove any debris from around the heater. Do not spray water directly onto the heater.
6.2 General Care
- Ensure proper air circulation to prevent mold and mildew.
- Inspect electrical connections and components periodically for signs of wear or damage.
- Replace sauna stones as recommended by the Harvia heater manual, typically every 1-2 years, or if they show signs of crumbling.
7. Troubleshooting
- Heater Not Working:
- Check if the main power switch is on.
- Verify the circuit breaker has not tripped.
- Ensure the heater's control panel is correctly set for temperature and time.
- Consult the Harvia heater manual for specific troubleshooting steps.
- LED Lights Not Functioning:
- Check electrical connections to the LED system.
- Ensure the LED controller is powered on.
- Insufficient Heat:
- Allow sufficient pre-heating time.
- Ensure the sauna door is fully closed and sealed.
- Check the heater's temperature setting.
For issues not resolved by these steps, contact customer support.
8. Specifications
| Feature | Specification |
|---|---|
| Model Number | SB50120 |
| Dimensions (L x W x H) | 120 x 120 x 190 cm |
| Weight | 215 kg |
| Capacity | 2 persons |
| Heater Type | Harvia Hiiliosauna |
| Heater Power | 3.5 kW |
| Glass Type | 8 mm Tempered Safety Glass |
| Wood Type | Hemlock |
| Lighting | Integrated LED |
| Included Accessories | Bucket, Ladle, Thermometer, Hourglass |
9. Warranty and Support
For warranty information, please refer to the documentation provided at the time of purchase or contact your retailer. For technical support or inquiries regarding your SANOTECHNIK® Sauna LUXOR 1, please contact the manufacturer or authorized service center.
Customer Support: For assistance, please refer to the contact information provided by your seller, Home 36 GmbH, or visit the official Sanotechnik website.