1. Introduction
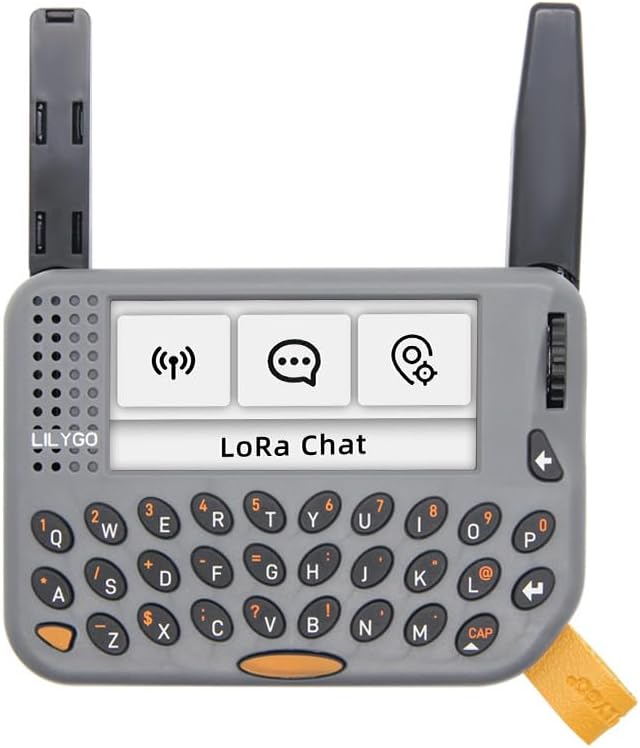
The LILYGO T-Lora Pager is a new model of handheld AIoT programmable development device, integrating LoRa and ESP32-S3 technology. It is designed for various application scenarios, offering smooth interaction through its encoder toggle and a comprehensive set of onboard functions.
2. Key Features
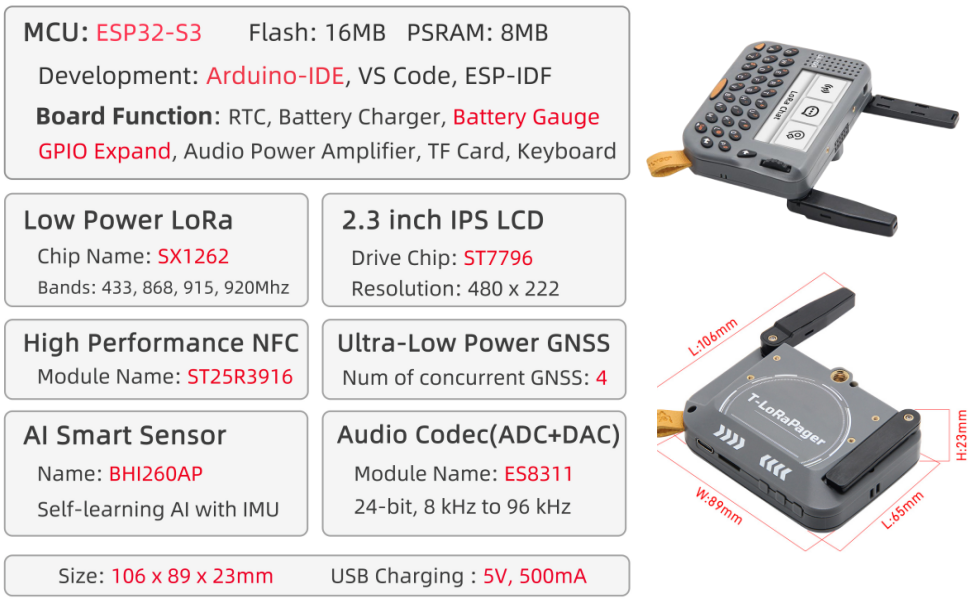
- MCU: ESP32-S3 with 16MB Flash and 8MB PSRAM.
- Development Environment: Supports Arduino-IDE, VS Code, and ESP-IDF.
- Display: 2.3-inch IPS LCD with 480 x 222 resolution (Drive Chip: ST7796).
- LoRa Connectivity: Low Power LoRa (Chip Name: SX1262) supporting 433, 868, 915, and 920Mhz bands.
- NFC: High Performance NFC (Module Name: ST25R3916).
- GNSS: Ultra-Low Power GNSS (MIA-M10Q) with 4 concurrent GNSS.
- AI Smart Sensor: BHI260AP with self-learning AI and IMU.
- Audio: Audio Codec (ADC+DAC) ES8311, 24-bit, 8 kHz to 96 kHz.
- Onboard Functions: RTC, Battery Charger, Battery Gauge, GPIO Expand, Audio Power Amplifier, TF Card slot, and QWERTY Keyboard.
- Power: USB Charging (5V, 500mA).
3. Technical Specifications
| Component | Specification |
|---|---|
| MCU | ESP32-S3 |
| Flash Memory | 16MB |
| PSRAM | 8MB |
| Display Type | 2.3 inch IPS LCD |
| Display Resolution | 480 x 222 |
| LoRa Chip | SX1262 |
| LoRa Bands | 433, 868, 915, 920Mhz |
| NFC Module | ST25R3916 |
| GNSS Module | MIA-M10Q (4 concurrent GNSS) |
| AI Smart Sensor | BHI260AP (Self-learning AI with IMU) |
| Audio Codec | ES8311 (24-bit, 8 kHz to 96 kHz) |
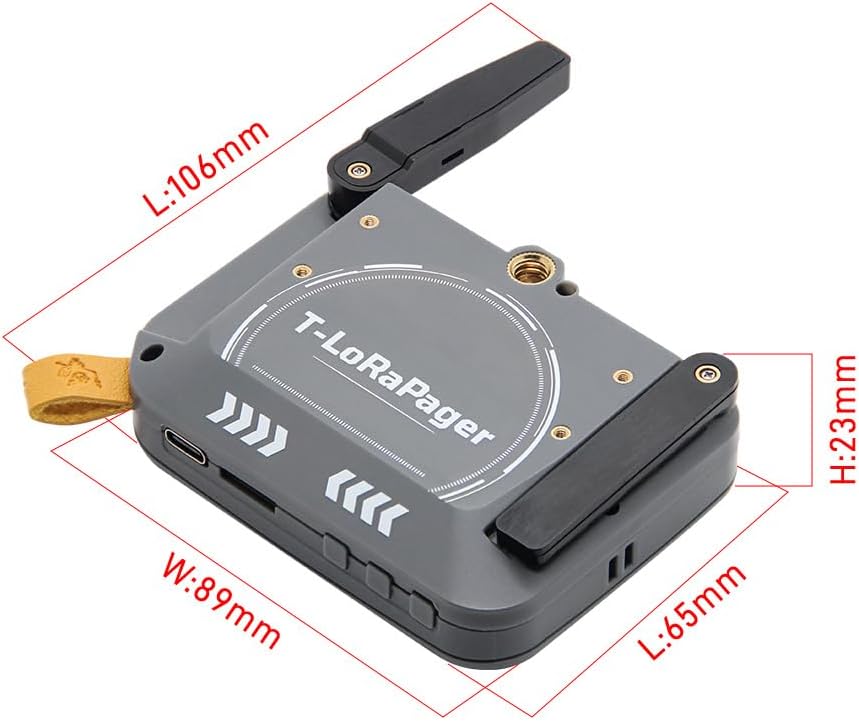
| Dimensions (L x W x H) | 106 x 89 x 23mm |
| Charging Input | 5V, 500mA (USB-C) |
| Operating System | FreeRTOS |
4. Setup Guide
4.1. Initial Power On
To power on the LILYGO T-Lora Pager, ensure the device is charged. Connect the provided USB-C cable to the device's USB-C port and a power source. The device will typically power on automatically or can be turned on using the designated power button.
4.2. Charging the Device
The T-Lora Pager is equipped with a battery charger. Use the USB-C port for charging. A 5V, 500mA power supply is recommended. The battery gauge function allows monitoring of the battery level.
4.3. Physical Overview and Ports
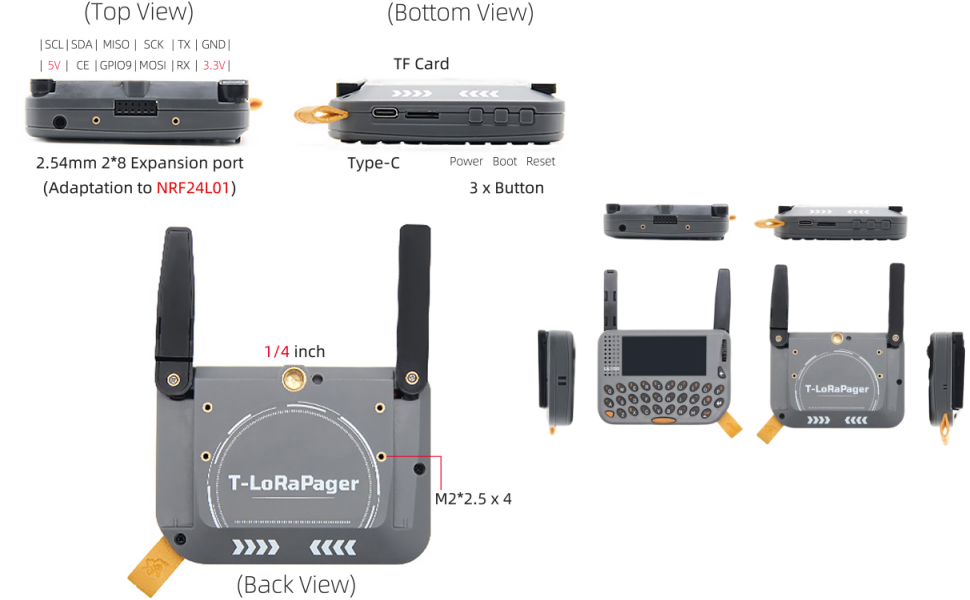
Familiarize yourself with the device's ports and buttons:
- USB-C Port: For charging and data communication.
- 2.54mm 2*8 Expansion Port: For adapting to modules like NRF24L01.
- Buttons: Power, Boot, Reset, and 3 additional buttons for navigation.
- Encoder with Button: Used for UI navigation and selection.
- 1/4 inch Screw Hole: For mounting on tripods or other accessories.
- 4 x M2 Standoffs: For secure mounting and custom enclosures.
5. Operating Instructions
5.1. User Interface Navigation
The LILYGO T-Lora Pager features a factory firmware UI Demo that allows for smooth interaction using the encoder toggle. Rotate the encoder to scroll through options and press it to select. The QWERTY keyboard can be used for text input where applicable.
5.2. LoRa Communication
The device supports LoRa communication across multiple frequency bands. The UI allows configuration of LoRa parameters for sending and receiving data. Refer to the official GitHub repository for example code and detailed LoRa implementation guides.
5.3. NFC Functionality
The integrated NFC module (ST25R3916) enables Near Field Communication capabilities. This can be used for various applications such as reading NFC tags or interacting with other NFC-enabled devices.
5.4. Audio Features
The device includes an ES8311 Audio Codec, supporting 24-bit audio at sample rates from 8 kHz to 96 kHz. It features a microphone/speaker for audio input/output and a 3.5mm headphone jack for private listening.
5.5. Pinmap and Advanced Usage
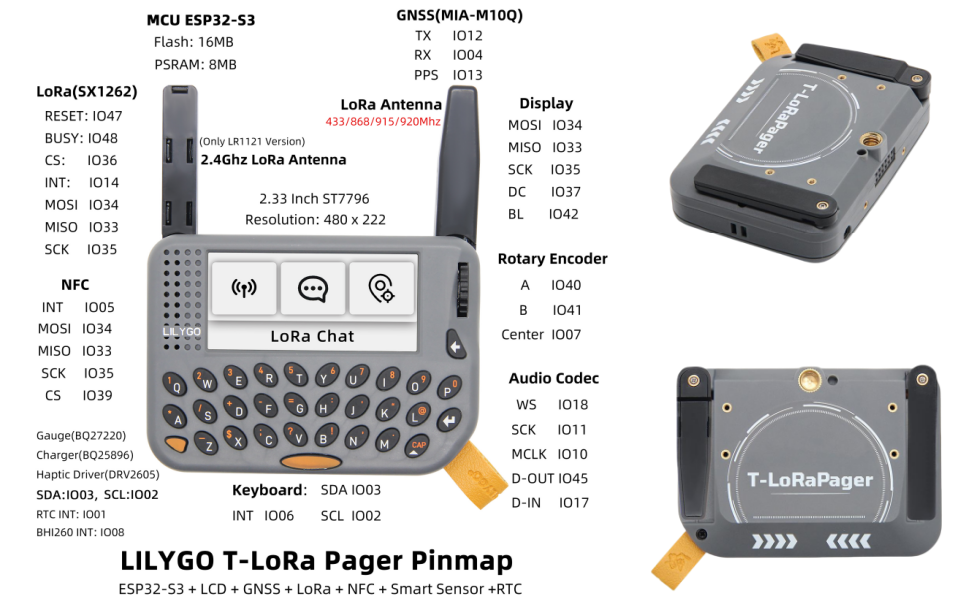
For advanced users and custom development, the detailed pinmap (Figure 5) provides information on GPIO, I2C, and other connections. This allows for integration with external sensors and modules.
5.6. Operational Demonstration Video
6. Maintenance and Care
- Keep the device dry and away from extreme temperatures.
- Clean the screen and casing with a soft, dry cloth. Avoid abrasive cleaners.
- Handle with care to prevent physical damage to the screen, keyboard, and antennas.
- Ensure proper ventilation when operating for extended periods.
7. Troubleshooting
7.1. Device Not Powering On
- Ensure the device is fully charged. Connect it to a power source using the USB-C cable.
- Press and hold the power button for a few seconds.
- If unresponsive, try a hard reset by pressing the reset button (if available and accessible).
7.2. LoRa Communication Issues
- Verify that both transmitting and receiving devices are configured to the correct LoRa frequency band and parameters.
- Check antenna connections for security.
- Ensure there are no significant obstructions between devices that could interfere with the signal.
7.3. Display Problems
- If the screen is blank or flickering, try restarting the device.
- Ensure the device is adequately powered.
8. Warranty and Support
While specific warranty details are not provided in this manual, LILYGO is committed to customer satisfaction. If you have any questions or suggestions about the product, please feel free to contact us. We will answer your question as soon as possible.
For technical support, development resources, and community discussions, please refer to the official LILYGO GitHub repository: