1. Product Overview
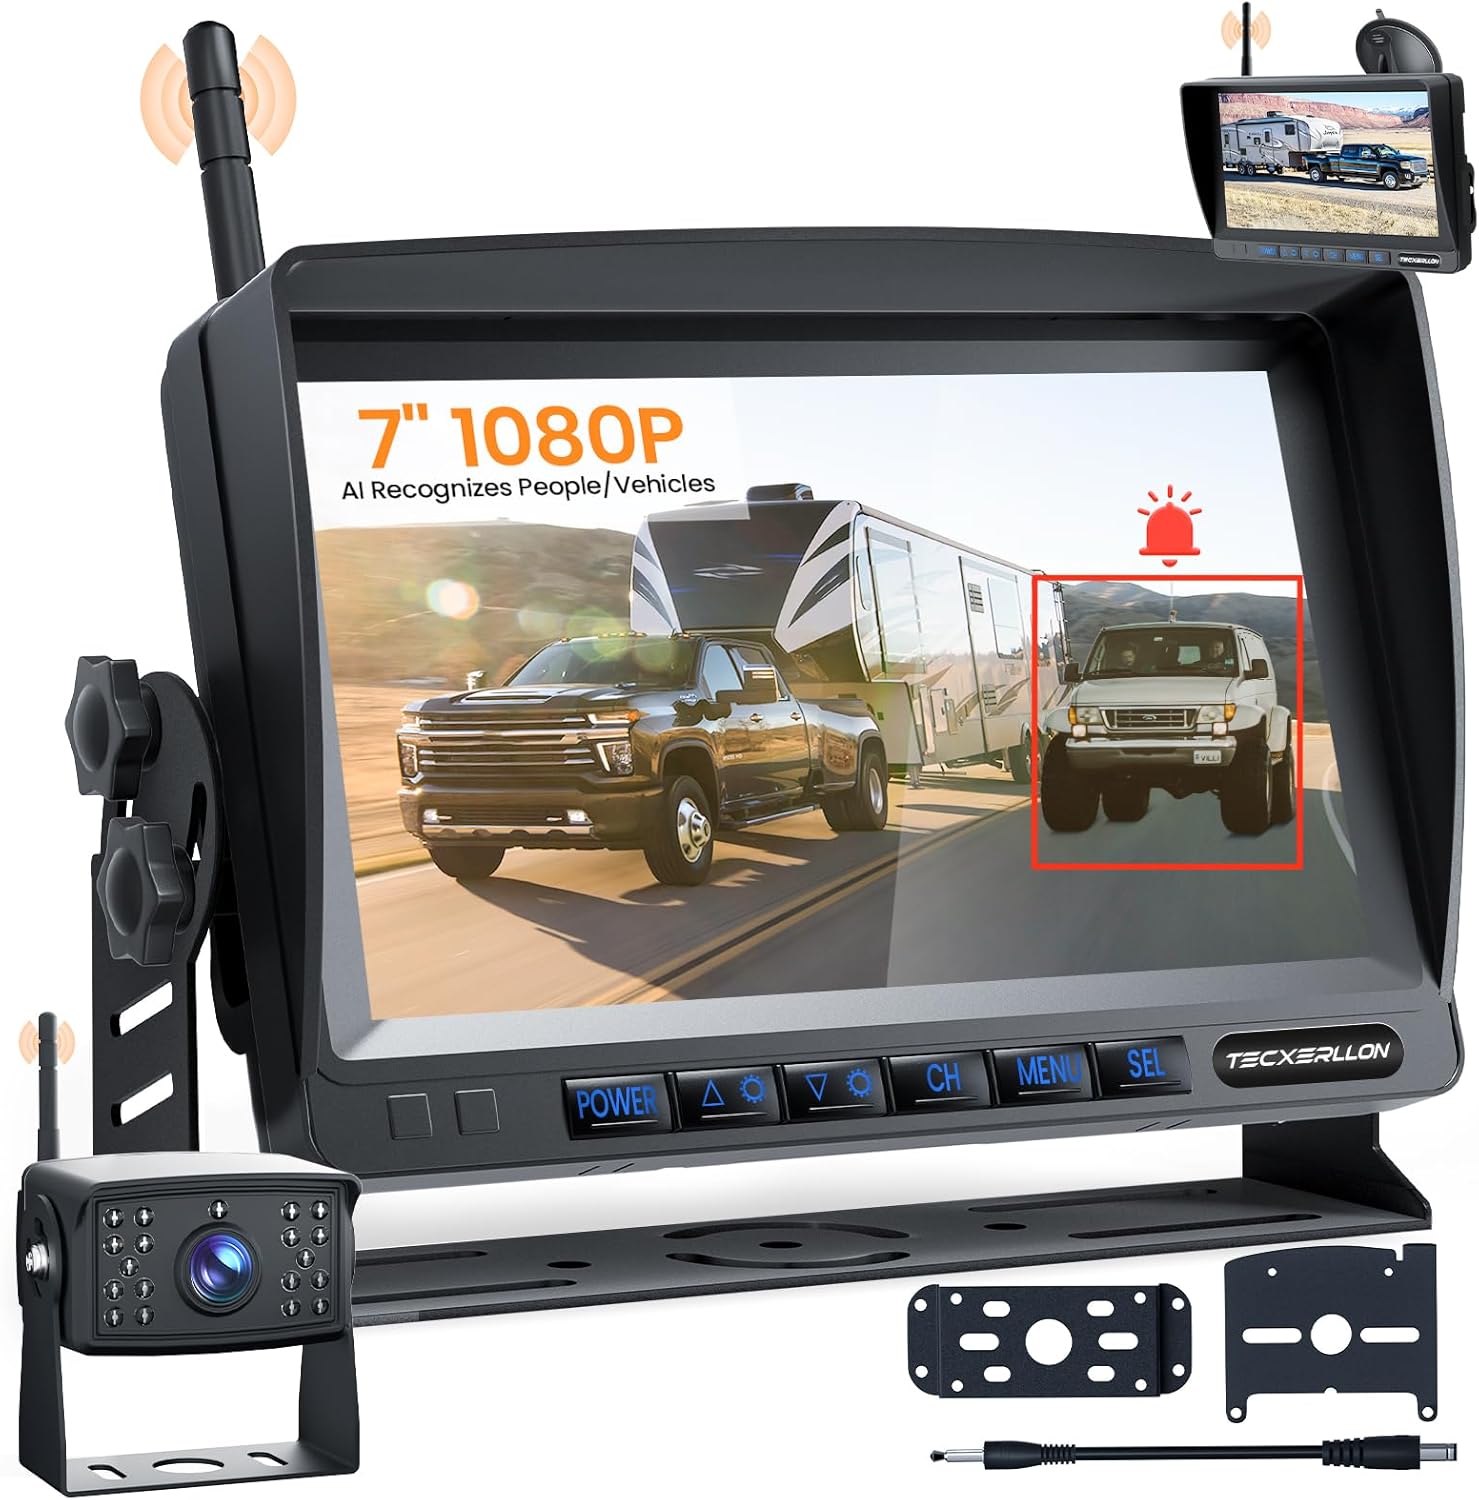
The TECXERLLON Wireless RV Backup Camera System provides enhanced safety and convenience for various vehicles, including RVs, trucks, trailers, and campers. This system features a 1080P 7-inch monitor, AI detection capabilities, robust wireless signal transmission, night vision, and DVR recording.
Key Features:
- Effortless Plug & Play Setup: Designed for quick installation without specialized tools.
- AI-Powered Safety: Real-time detection of pedestrians, vehicles, and obstacles with instant alerts.
- Rock-Solid Wireless Signal: 2.4GHz transmission for clear video up to 320 feet, ensuring no interference or frame loss.
- Expandable 4-Camera System: Supports up to four cameras for comprehensive coverage on the 1080P HD monitor.
- DVR Recording & Durability: Built-in DVR for continuous recording (SD card sold separately) and IP69K waterproof camera with night vision.
2. Setup Guide
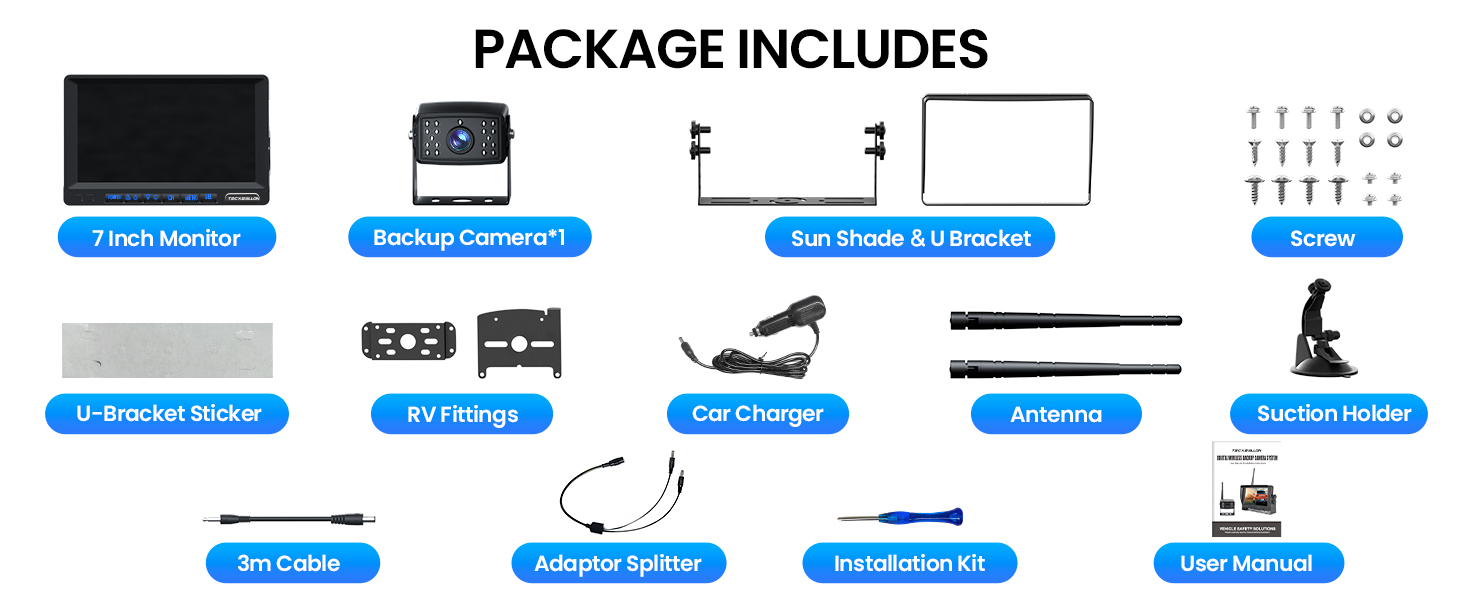
2.1 Package Contents
Verify that all items are present in your package:
- 7-inch Monitor (x1)
- Backup Camera (x1)
- Sun Shade & U-Bracket (x1)
- RV Fittings (x1 set)
- Antenna (x1)
- Suction Holder (x1)
- 3m Cable (x1)
- Adaptor Splitter (x1)
- Installation Kit (x1)
- User Manual (x1)
- Screws (x18)
- U-Bracket Sticker (x1)
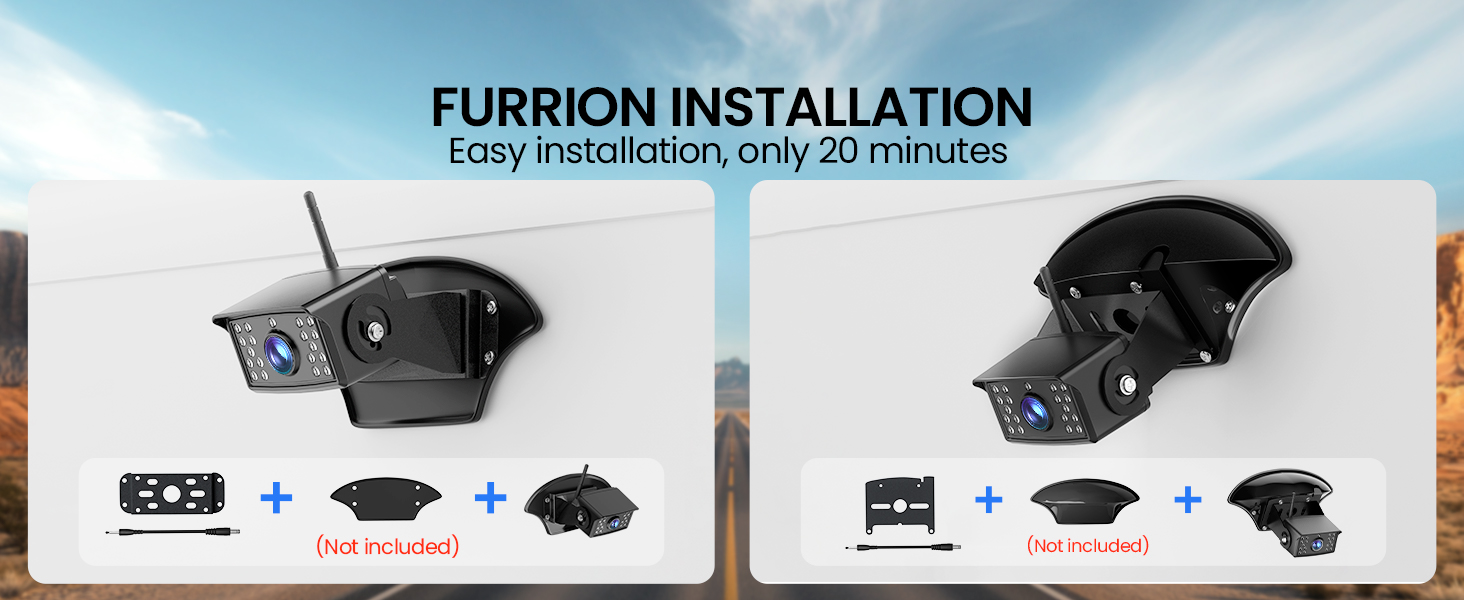
2.2 Installation Options
The system supports multiple installation methods to suit various vehicle types. The camera can be installed using Furrion adapters (not included) or a general wired connection.

2.3 General Installation Steps (Wired)
- Mount the Camera: Choose a suitable location at the rear of your vehicle (RV, trailer, truck) that provides a clear view. Secure the camera using the provided screws and mounting bracket. Ensure the antenna is attached and positioned for optimal signal.
- Wire the Camera: Connect the camera's power cable to your vehicle's power source. For continuous monitoring, connect to a constant 12V power source (e.g., running lights). For reverse-only activation, connect to the reversing lights. Ensure proper grounding.
- Mount the Monitor: Attach the 7-inch monitor to your dashboard or windshield using the suction holder or U-bracket. Position it for optimal viewing without obstructing your driving view.
- Power the Monitor: Connect the monitor to your vehicle's 12V power outlet (cigarette lighter socket) using the provided car charger.
- Pairing (Automatic): The camera and monitor are typically pre-paired. Once both are powered on, the monitor should automatically display the camera feed. If not, refer to the "Troubleshooting" section for manual pairing instructions.
3. Operating Instructions
3.1 Monitor Functions
The monitor features several buttons for control:
- POWER: Turns the monitor on/off.
- CH (Channel): Switches between connected cameras (if multiple cameras are installed).
- MENU: Accesses the monitor's settings menu.
- SEL (Select): Confirms selections within the menu.
- Up/Down Arrows: Navigate through menu options or adjust settings.
3.2 AI Detection and Alerts
The system incorporates advanced AI to identify pedestrians, vehicles, and other obstacles in real-time. When an object is detected, an audible and/or visual alert will be triggered on the monitor, enhancing safety during reversing or maneuvering.

3.3 DVR Recording
The monitor has a built-in DVR function that supports loop recording. An SD card (not included) is required to utilize this feature. Insert a compatible SD card into the designated slot on the monitor to begin recording. The system will automatically overwrite the oldest files when the card is full.

3.4 Multi-Camera Display
The system supports up to four cameras (additional cameras sold separately). You can view feeds from multiple cameras simultaneously in various display modes, including single screen, split screen, triple screen, or quad screen, by pressing the "CH" button.

3.5 Night Vision
The camera is equipped with 18 IR lights and a wide-angle lens, providing clear and detailed imaging even in low-light conditions or complete darkness. The IP69K waterproof rating ensures reliable performance in various weather conditions.

4. Maintenance
- Cleaning: Regularly clean the camera lens and monitor screen with a soft, damp cloth. Avoid abrasive cleaners that could scratch surfaces.
- Connections: Periodically check all cable connections to ensure they are secure and free from corrosion.
- Weather Protection: While the camera is IP69K waterproof, ensure proper installation to prevent water ingress into wiring connections.
- Antenna: Ensure the camera and monitor antennas are securely attached and unobstructed for optimal signal strength.
5. Troubleshooting
| Problem | Possible Cause | Solution |
|---|---|---|
| No image on monitor |
|
|
| Image is blurry or distorted |
|
|
| AI detection not working |
|
|
| DVR not recording |
|
|
6. Specifications
| Feature | Detail |
|---|---|
| Model | B0FGJC4DKC |
| Monitor Screen Size | 7 Inches |
| Video Resolution | 1080P HD |
| Wireless Transmission | 2.4GHz, up to 320 feet |
| Camera Waterproof Rating | IP69K |
| Night Vision | 18 IR Lights |
| AI Detection | Pedestrian, Vehicle, Obstacle detection with alerts |
| DVR Recording | Loop recording (SD card not included) |
| Expandability | Supports up to 4 cameras |
| Voltage | 12 Volts |
| Product Dimensions | 8.2 x 2.4 x 5.3 inches |
| Item Weight | 3.5 pounds |
7. Warranty and Support
For warranty information and technical support, please refer to the official TECXERLLON website or contact their customer service directly. Details are typically provided on the product packaging or through the seller's information page.
You can visit the TECXERLLON Store on Amazon for additional product information and support resources.