1. Introduction
This manual provides essential instructions for the installation, operation, and maintenance of your EDECOA Hybrid Inverter 7000VA/6200W. This device integrates an inverter, an MPPT solar charger, and a battery charger into a single unit, designed to provide reliable power for various applications. Please read this manual thoroughly before installation and use to ensure proper function and safety.
2. Safety Instructions
Always observe the following safety precautions to reduce the risk of electric shock, fire, or injury:
- Installation must be performed by qualified personnel.
- Ensure all wiring is correctly connected and securely fastened.
- Do not disassemble the inverter. There are no user-serviceable parts inside.
- Keep the inverter away from flammable materials and ensure adequate ventilation.
- Wear appropriate personal protective equipment (PPE) during installation and maintenance.
- Disconnect all power sources (AC, PV, and battery) before performing any maintenance or wiring.
- This inverter is designed for indoor use in a controlled environment. Avoid exposure to water, high humidity, or extreme temperatures.
3. Product Overview
3.1 Key Features
- Pure Sine Wave Output: Provides clean and stable power suitable for sensitive electronics.
- Integrated MPPT Solar Charge Controller: 110A maximum PV current for efficient solar energy harvesting.
- Battery Charger: 80A maximum AC charging current.
- Wide PV Input Range: Adaptable to various solar panel types and sizes.
- Multiple Operating Modes: 4 charging modes and 3 output modes for flexible power management.
- Battery Compatibility: Supports FLD, AGM, Gel, and LiFePo4 battery types, configurable via LCD.
- Safety Protections: Overload, over-temperature, and short-circuit protection.
- ECO Mode: Reduced power consumption (< 15 W) to prevent battery wear.
- Communication Ports: Includes RS232/RS485+BMS for monitoring and control (WiFi module compatible).
3.2 Product Components and Dimensions
The EDECOA Hybrid Inverter combines multiple functionalities in a compact design. Below are the general dimensions and a diagram of its main components and connection ports.

Figure 3.2.1: Product dimensions. The inverter measures approximately 423mm (16.65 inches) in height, 300mm (11.81 inches) in width, and 105mm (4.13 inches) in depth.

Figure 3.2.2: Front and rear panel overview. The front panel features an LCD display, touchable buttons, and RGB LED indicators. The rear panel includes terminals for Battery In (+/-), PV In (+/-), AC EPS Out Port, AC Main Out Port, AC In Port, Ground Terminal, RS232/RS485+BMS Comm Port, and an ON/OFF Switch.
4. Setup and Installation
4.1 Mounting the Inverter
- Choose a suitable location that is dry, well-ventilated, and protected from direct sunlight and moisture.
- Ensure sufficient clearance around the inverter for proper airflow and heat dissipation.
- Mount the inverter vertically on a sturdy wall using appropriate fasteners.
4.2 Wiring Connections
Refer to Figure 3.2.2 for port locations. All wiring must comply with local electrical codes.
- Battery Connection: Connect the battery bank (48V DC) to the 'Batt. In (+)' and 'Batt. In (-)' terminals. Ensure correct polarity.
- PV Array Connection: Connect the solar panel array to the 'PV In+' and 'PV In-' terminals. Observe correct polarity and ensure the PV input voltage and current are within the inverter's specifications (max 110A PV).
- AC Input Connection: Connect the AC utility grid or generator to the 'AC In Port'.
- AC Output Connection: Connect your loads to the 'AC Main Out Port' and 'AC EPS Out Port'.
- Grounding: Connect the ground terminal to a reliable earth ground.
Important: Always connect the battery first, then the PV array, and finally the AC input. When disconnecting, reverse the order.
5. Operating Instructions
5.1 Initial Power-Up
- After all connections are secure, switch on the battery breaker.
- Switch on the PV array breaker.
- Switch on the AC input breaker.
- Finally, turn on the inverter's ON/OFF switch. The LCD display will illuminate.
5.2 LCD Display and Settings
The LCD provides real-time system status and allows configuration of various parameters.
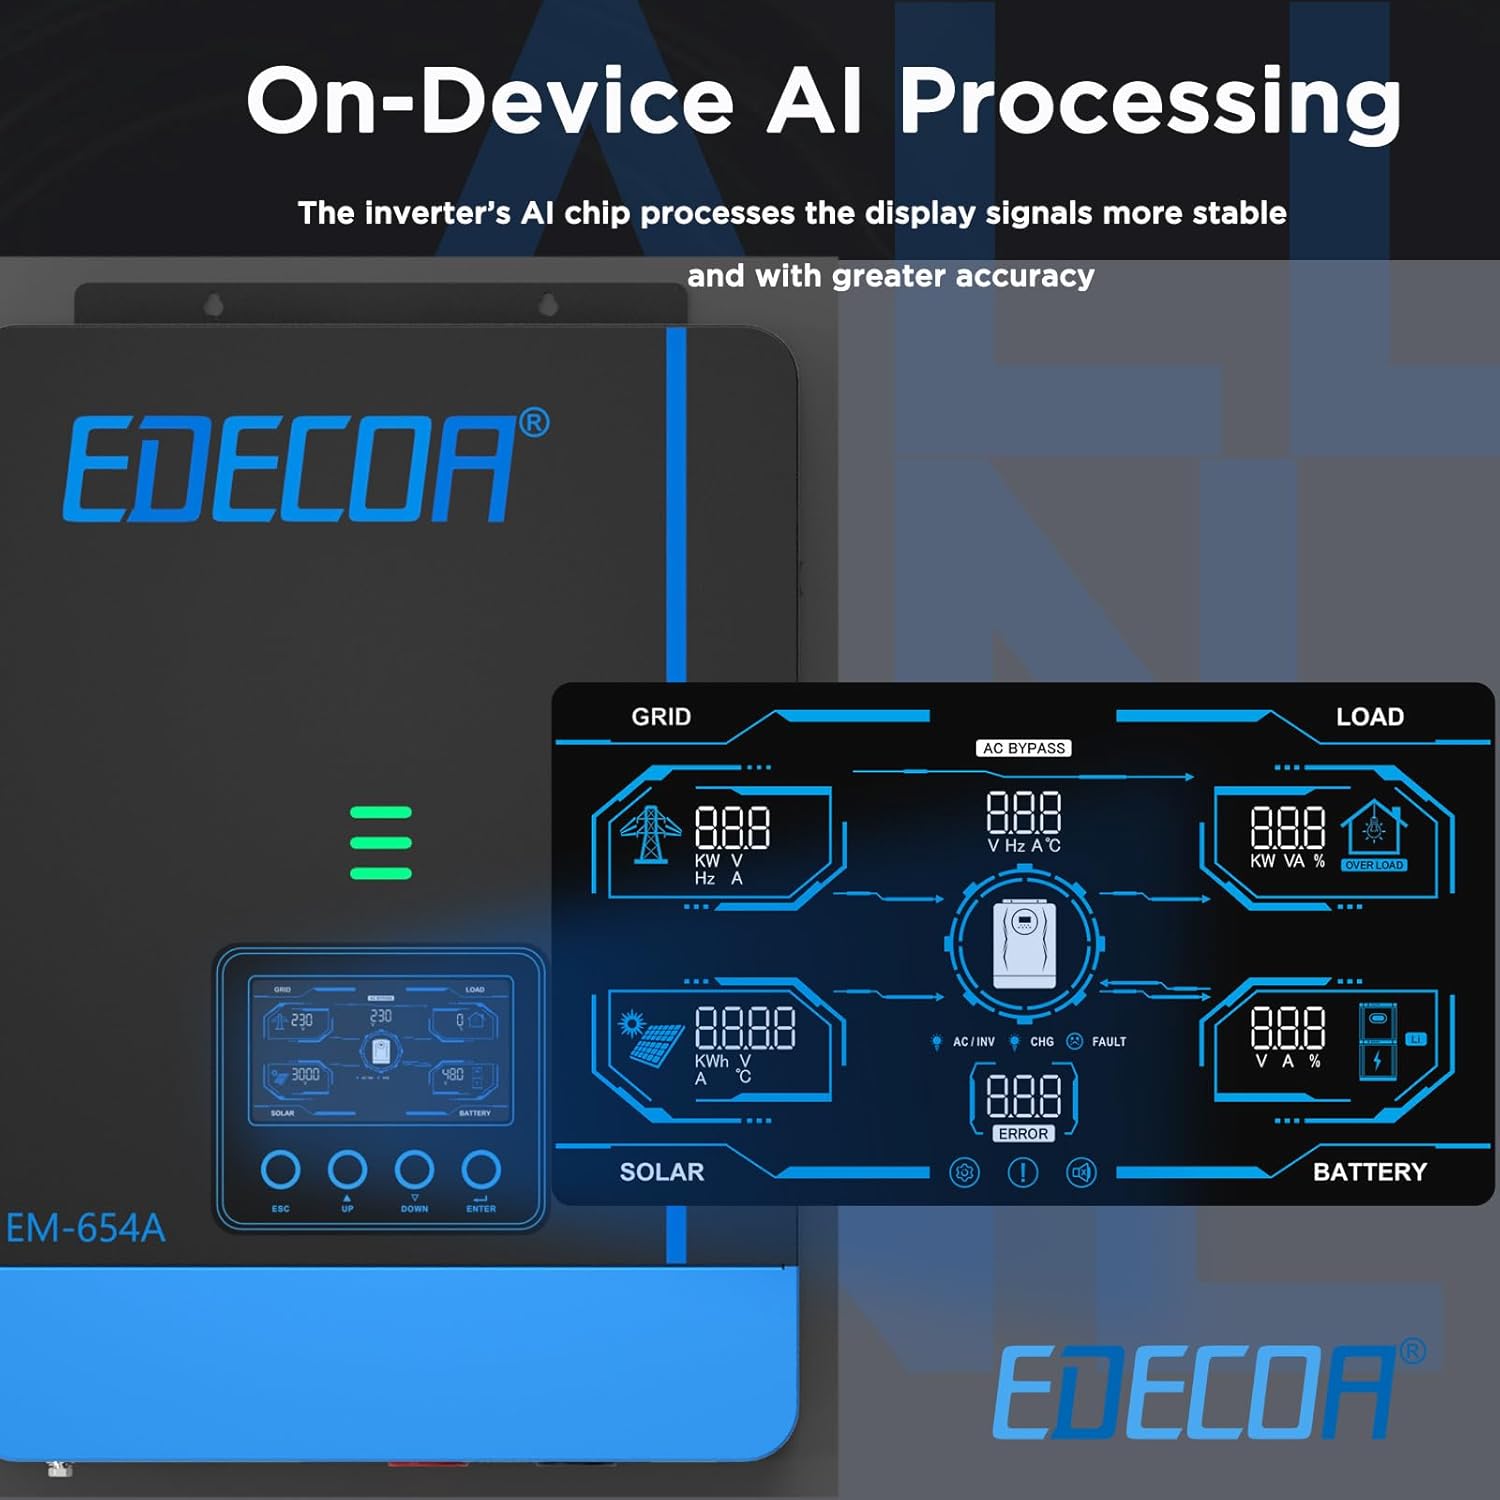
Figure 5.2.1: LCD display interface. The display shows detailed information for Grid, Load, Solar, and Battery, including voltage, current, power, frequency, and error indicators.
Use the touchable buttons (ESC, UP, DOWN, ENTER) to navigate menus and adjust settings. Key settings include:
- Battery Type: Select the correct battery type (FLD, AGM, Gel, LiFePo4) to ensure optimal charging and discharge cycles.
- Charging Current: Adjust the maximum charging current from AC and PV sources.
- Output Voltage/Frequency: Configure AC output parameters.
5.3 Operating Modes
The inverter offers flexible operating modes to optimize power usage.

Figure 5.3.1: Output and Charging Modes. This diagram illustrates how the inverter prioritizes power sources for both load and battery charging.
5.3.1 Output Modes (for Load)
- SBU Mode (Solar > Battery > Utility): Solar power is prioritized for the load, then battery power, and finally utility power if solar and battery are insufficient.
- SUB Mode (Solar > Utility > Battery): Solar power is prioritized for the load, then utility power, and finally battery power if solar and utility are insufficient.
5.3.2 Charging Priority Options
- OSO (Solar Only): Batteries are charged exclusively by solar power.
- CSO (Solar Priority): Solar power is prioritized for charging, with utility power used only if solar is unavailable or insufficient.
- SNU (Solar + Utility): Both solar and utility power are used to charge the batteries simultaneously.
5.4 ECO Mode
The ECO mode reduces the inverter's self-consumption to less than 15 W, helping to preserve battery life when the inverter is idle or under light load conditions.
5.5 Remote Monitoring and Control (WiFi Module Compatible)
The inverter supports remote monitoring and control via a compatible WiFi module (sold separately) and a dedicated mobile application. This allows users to personalize settings, view real-time system sensors, analyze data, and retrieve system error guidelines.

Figure 5.5.1: EDECOA App for Intelligent Control. The app provides a user-friendly interface for monitoring and managing the inverter's performance.
6. Maintenance
Regular maintenance ensures the longevity and optimal performance of your inverter.
- Cleaning: Periodically clean the exterior of the inverter with a dry cloth. Ensure ventilation openings are free from dust and debris.
- Connections: Annually check all electrical connections for tightness and signs of corrosion.
- Battery Inspection: If using lead-acid batteries, check electrolyte levels and terminal conditions as per battery manufacturer guidelines.
- Environment: Ensure the installation environment remains within specified temperature and humidity ranges.
Warning: Disconnect all power sources before performing any cleaning or inspection.
7. Troubleshooting
This section provides guidance for common issues. For complex problems, contact technical support.
| Problem | Possible Cause | Solution |
|---|---|---|
| Inverter not turning on | No battery connection; Battery voltage too low; Inverter switch off | Check battery connections; Charge battery; Turn on inverter switch |
| No AC output | Overload; Short circuit; Inverter fault | Reduce load; Check for short circuits; Restart inverter; Contact support if fault persists |
| Battery not charging | PV input too low; AC input not connected; MPPT fault; Incorrect battery settings | Check PV array; Verify AC connection; Check MPPT status on LCD; Adjust battery type settings |
| Over-temperature warning | Insufficient ventilation; Ambient temperature too high; Overload | Ensure clear airflow; Move to cooler environment; Reduce load |
8. Specifications
Technical specifications for the EDECOA Hybrid Inverter 7000VA/6200W:
| Brand | EDECOA |
| Model Name | Hybrid Inverter |
| Model Number | EDECOA-7000VA-6200W |
| Recommended Product Uses | Home |
| Power Source | Solar Powered |
| Power (Rated) | 6200 W |
| Inverter Power (VA) | 7000 VA |
| Peak Output Power | 5600 W |
| Input Voltage | 48 Volts (DC) |
| Output Voltage | 230 Volts (AC) |
| Electrical Output Waveform | Pure Sine Wave |
| Battery Capacity (Recommended) | 200 Ampere-hours |
| Display Type | LCD |
| Item Dimensions (L x W x H) | 42L x 30W x 12H centimeters |
| Energy Specifications Met | CE |
9. Warranty and Support
9.1 Warranty Information
This EDECOA Hybrid Inverter comes with a 2-year manufacturer's warranty. Please retain your proof of purchase for warranty claims. The warranty covers defects in materials and workmanship under normal use. It does not cover damage caused by improper installation, misuse, accidents, or unauthorized modifications.
9.2 Technical Support
For technical assistance, troubleshooting beyond this manual, or warranty inquiries, please contact EDECOA customer support. Refer to the product packaging or the official EDECOA website for current contact information.