1. Introduction
Welcome to the user manual for your Kayoote Rugged Handheld Smart Terminal, model SM5+2D. This device is engineered for demanding environments, combining the functionality of an Android 11 smartphone with a high-precision barcode scanner. It is designed for professionals in retail, logistics, warehousing, and fieldwork, offering robust performance and connectivity.
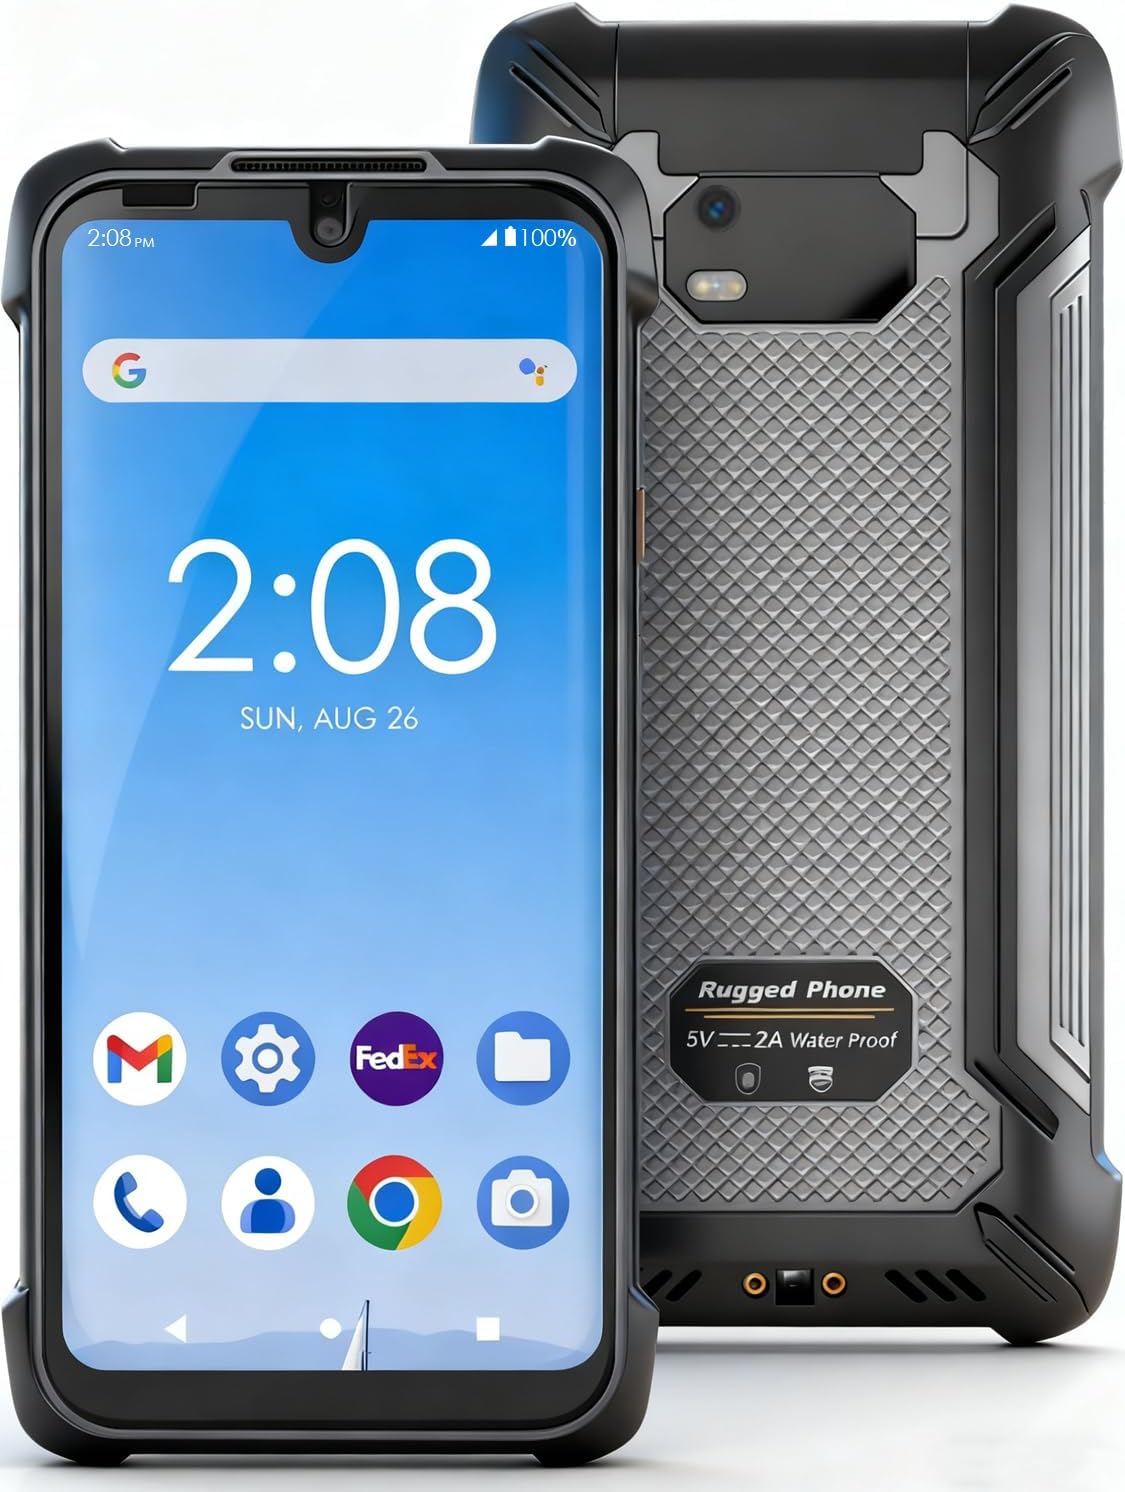
Figure 1: Front and back view of the Kayoote Rugged Handheld Smart Terminal. The front displays the 5.7-inch screen with Android interface, while the back shows the rugged casing and camera module.
2. Device Components
Familiarize yourself with the physical components of your Kayoote Smart Terminal.
- Display: 5.7-inch, 720x1520 resolution, 10-point touch screen.
- Barcode Scanner: Integrated high-precision scanner for 1D/2D barcodes.
- Cameras: 5MP front camera, 13MP rear camera.
- Ports: Type-C port (for charging and data transfer), SIM/TF card slot.
- Buttons: Power button, Volume up/down, Scan button, SOS button.
- Sensors: Light, Magnetic, Pressure, G-sensor, Distance, Acceleration, Gyroscope, Motor.

Figure 2: Side view of the Kayoote Smart Terminal, highlighting the SOS button, SIM/TF card slot, and other controls.
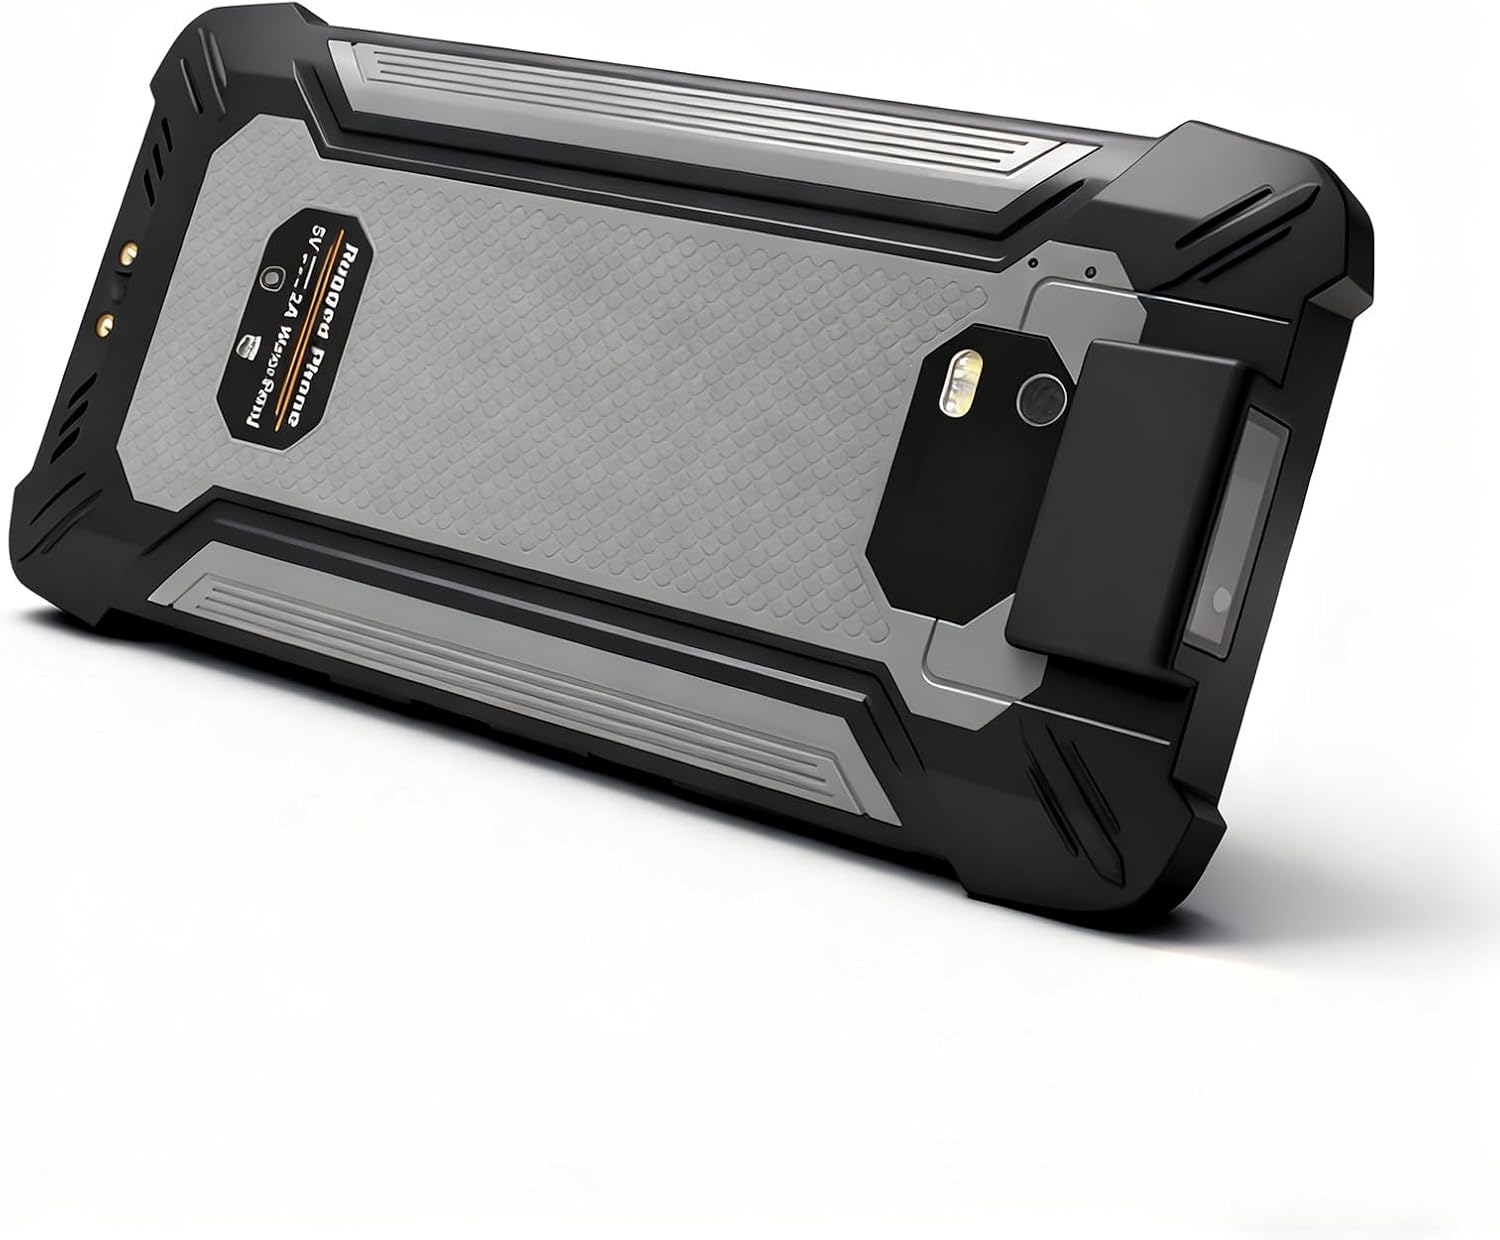
Figure 3: Top and bottom views of the Kayoote Smart Terminal, illustrating the integrated barcode scanner at the top and the Type-C charging port at the bottom.
3. Initial Setup
3.1. Charging the Device
Before first use, fully charge the device. Connect the provided Type-C cable to the device's charging port and the other end to a compatible power adapter. The battery indicator on the screen will show charging status. A full charge typically takes several hours.
- Battery Capacity: 4000mAh, 3.8V.
- Expected Standby Time: Up to 12 days.
- Expected Talk Time: Up to 12 hours.
- Expected Video Playback: Up to 5 hours.
3.2. Inserting SIM/TF Card
- Locate the SIM/TF card slot on the side of the device (refer to Figure 2).
- Use the provided tool (if applicable) or your fingernail to open the card tray.
- Carefully place your Nano-SIM card(s) and/or TF (microSD) card into the designated slots on the tray. The device supports either two SIM cards or one SIM card and one TF card.
- Gently push the tray back into the device until it clicks into place.
4. Operating Instructions
4.1. Power On/Off
- To Power On: Press and hold the Power button (located on the side) until the Kayoote logo appears on the screen.
- To Power Off: Press and hold the Power button until the power options menu appears. Select "Power Off" and confirm.
- To Restart: From the power options menu, select "Restart" and confirm.
4.2. Using the Barcode Scanner
The integrated barcode scanner allows for efficient data capture.
- Open an application that supports barcode scanning (e.g., inventory management app, text editor).
- Point the scanner window (located at the top of the device) towards the barcode or QR code.
- Press the dedicated "Scan" button (refer to Figure 3) on the side of the device. A red laser or light will emit from the scanner.
- Ensure the barcode is within the scanning area and the device is held steady until a successful scan is indicated (e.g., beep, vibration, data appearing on screen).

Figure 4: The Kayoote Smart Terminal demonstrating its built-in NLS-N1 barcode scanner for fast and precise scanning.
4.3. Connectivity Features
Your device supports various connectivity options:
- Wi-Fi (802.11a/b/g/n/ac): Access wireless networks. Go to Settings > Network & internet > Wi-Fi to connect. Supports 2.4G and 5G bands.
- Bluetooth 5.0: Connect to wireless headsets, speakers, or other Bluetooth-enabled devices. Go to Settings > Connected devices > Bluetooth.
- 4G LTE (WWAN): Utilize cellular data for internet access and calls. Supports FDD-LTE (B1/B2/B3/B4/B5/B7/B8/B20), TDD-LTE (B38/B39/B40/B41), WCDMA (B1/B2/B5/B8), and GSM (B2/B3/B5/B8).
- NFC: For quick, secure transactions and data sharing. Enable in Settings > Connected devices > Connection preferences > NFC.
- GPS (GPS, Beidou, GLONASS): For accurate navigation and location services.
- OTG (On-The-Go): Connect USB devices directly to your terminal via the Type-C port with an OTG adapter (sold separately).
5. Care and Maintenance
To ensure the longevity and optimal performance of your Kayoote Smart Terminal, follow these guidelines:
- Cleaning: Use a soft, damp cloth to clean the device. Avoid harsh chemicals or abrasive materials. Ensure all ports are closed before cleaning to maintain water resistance.
- Environmental Protection: The device is rated IP65 for dust and water resistance and meets MIL-STD-810G military-grade standards for drops, shocks, and extreme temperatures. While rugged, avoid intentional abuse or prolonged exposure to extreme conditions beyond its specifications.
- Battery Care: Avoid fully discharging the battery frequently. For long-term storage, charge the device to about 50-60% and store in a cool, dry place.
- Software Updates: Regularly check for and install system updates to ensure security and optimal performance.
6. Troubleshooting
If you encounter issues with your device, refer to the following common problems and solutions:
- Device does not power on:
- Ensure the battery is charged. Connect to a power source and try again.
- Perform a forced restart by holding the Power button for 10-15 seconds.
- Barcode scanner not working:
- Ensure the scanning application is open and active.
- Check for obstructions on the scanner window.
- Verify the barcode is clean and well-lit.
- Restart the device.
- Wi-Fi/Bluetooth connectivity issues:
- Toggle Wi-Fi/Bluetooth off and on in settings.
- Restart your router/access point (for Wi-Fi).
- Forget the network/device and reconnect.
- Device is slow or unresponsive:
- Close unnecessary background applications.
- Clear cache from apps or perform a system cache clear (if available).
- Consider a factory reset as a last resort (Warning: This will erase all data).
7. Technical Specifications
| Feature | Specification |
|---|---|
| Model Number | SM5+2D |
| Operating System | Android 11.0 |
| CPU | MTK MT6765 Octa Core; 2.3GHz |
| GPU | IMG PowerVR GE8320 |
| RAM/ROM | 4GB RAM / 64GB ROM |
| Display | 5.7 inch; 720*1520; 450nits; 10 Point Touch |
| Cameras | Front: 5MP, Rear: 13MP |
| Battery | 4000mAh, 3.8V Lithium Ion |
| WWAN (4G LTE) | FDD-LTE: B1/B2/B3/B4/B5/B7/B8/B20; TDD-LTE: B38/B39/B40/B41; WCDMA: B1/B2/B5/B8; GSM: B2/B3/B5/B8 |
| WIFI | 802.11a/b/g/n/ac (2.4G, 5G) |
| Bluetooth | 5.0 Version |
| NFC | Supported |
| GPS | GPS, Beidou, GLONASS |
| Sensors | Light, Magnetic, Pressure, G-sensor, Distance, Acceleration, Gyroscope, Motor |
| Dimensions | 6.1 x 3.1 x 0.5 inches (15.5 x 7.9 x 1.3 cm) |
| Weight | 0.5 pounds (0.23 kg) |
| Durability | IP65 Anti-dust & Waterproof, 1.5 meters Dropping Resistance, MIL-STD-810G Certified |
| Operating Temperature | -25 °C to 50 °C |
| Storage Temperature | -40 °C to 60 °C |
8. Warranty and Support
Kayoote products are designed for reliability and performance. For specific warranty details, please refer to the warranty card included with your product or visit the official Kayoote website. If you require technical assistance, troubleshooting beyond this manual, or have questions about your device, please contact Kayoote customer support through the vendor's contact information provided at the point of purchase or on the official Kayoote support channels.
For additional resources and product information, you may visit the product page on Amazon.