1. Introduction
The Colourbing RG36PRO is a portable retro video game console designed to provide an immersive gaming experience with its open-source system and extensive library of classic games. This manual will guide you through the device's features, setup, operation, and maintenance.
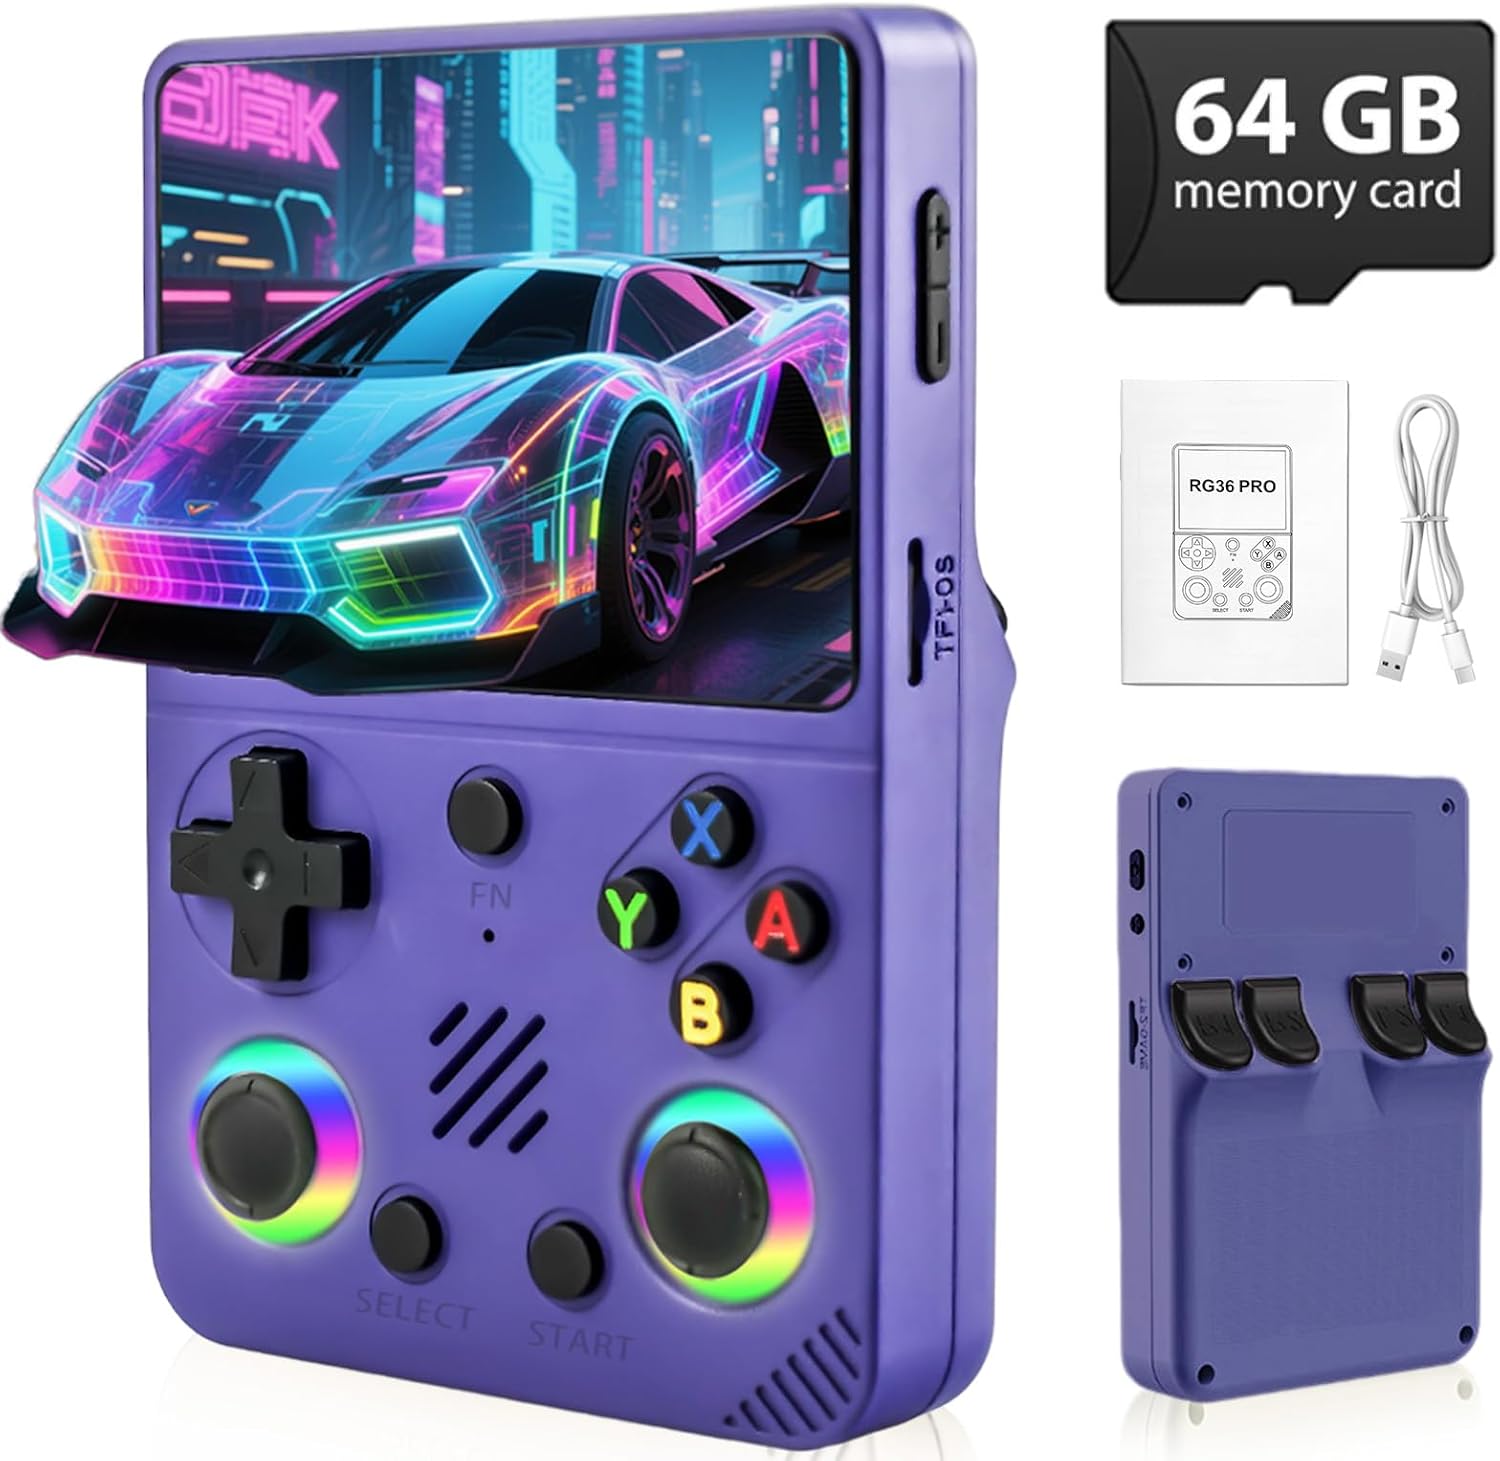
Figure 1.1: Colourbing RG36PRO Handheld Game Console and included accessories.
2. Safety Information
To ensure safe operation and prolong the life of your device, please observe the following:
- Use only a charger with at least 5V/2A (10W) output for optimal charging.
- Always charge the device via the DC port.
- The device contains a built-in rechargeable Li-Po battery. Only use certified chargers.
- Do not expose the device to extreme temperatures, direct sunlight, or moisture.
- Avoid dropping or subjecting the device to strong impacts.
- Keep out of reach of small children. Recommended age for use is 14 years and up.
3. Package Contents
Upon opening your Colourbing RG36PRO package, please verify that all the following items are included:
- Colourbing RG36PRO Retro Game Console
- 64GB TF Card (pre-inserted)
- Type-C Charging Cable
- User Manual (this document)

Figure 3.1: Contents of the RG36PRO package.
4. Device Overview
Familiarize yourself with the layout and functions of your RG36PRO console:

Figure 4.1: Front, back, and top views of the RG36PRO with labeled components.
- Power Button: Located on the top left side. Press and hold to power on/off.
- Reset Button: Located next to the Power button. Used to restart the console.
- Volume Keys: Located on the top right side. Adjusts audio output.
- TF1 (OS) Card Slot: MicroSD card slot for the operating system (pre-inserted).
- TF2 (Game) Card Slot: MicroSD card slot for game storage.
- D-Pad: Directional pad for navigation.
- Action Buttons (A, B, X, Y): Used for in-game actions and menu selections.
- Analog Joysticks (L3, R3): For precise movement and camera control in games.
- Select/Start Buttons: For menu navigation and starting games.
- Shoulder Buttons (L1, L2, R1, R2): Located on the back for additional in-game controls.
- DC Port: Dedicated port for charging the device.
- Type-C Headphone Jack: For connecting headphones.
- OTG Port: For connecting external devices, such as a controller.
5. Setup
Follow these steps for initial setup:
- Initial Charge: Before first use, fully charge the console using the provided Type-C charging cable and a 5V/2A (10W) adapter connected to the DC port. The charging indicator light will show the charging status.
- TF Card: The 64GB TF card containing the operating system and pre-loaded games is pre-inserted into the TF1 (OS) slot. Ensure it is securely in place. An additional TF card can be inserted into the TF2 (Game) slot for expanded storage.
- Power On: Press and hold the Power button until the screen illuminates and the system boots up.
6. Operating Instructions
6.1. Basic Navigation
- Use the D-Pad or Analog Joysticks to navigate through menus and game lists.
- Press the A button to select an option or launch a game.
- Press the B button to go back to the previous menu.
- The FN button may offer additional context-sensitive functions depending on the system or game.
6.2. Game Selection and Launch
- From the main menu, select the desired emulator or game system.
- Browse the list of available games.
- Highlight a game and press the A button to launch it.
6.3. Saving and Loading Game Progress
Specific saving and loading methods may vary by emulator and game. Generally:
- Many emulators support Save States, allowing you to save your progress at any point. Access this feature through the in-game menu (often by pressing a combination of buttons like FN + Select or Start).
- Traditional in-game saving methods (if available in the original game) can also be used.
7. Game Library
The RG36PRO comes pre-loaded with a vast library of over 30,000 classic video games across various systems. The open-source system allows for easy navigation and access to these titles.

Figure 7.1: The RG36PRO supports over 20 emulators and 30,000+ classic games.
8. Charging and Battery
The RG36PRO is equipped with a 3000mAh Lithium-Ion battery, providing approximately 6 hours of play time on a full charge.
- Charging: Connect the provided Type-C cable to the DC port on the console and to a 5V/2A (10W) power adapter.
- Battery Indicator: The console features a battery indicator on the screen to show the current charge level.
- Optimal Charging: Always use the DC port for charging to ensure proper power delivery and battery longevity.

Figure 8.1: Battery capacity and estimated play time of the RG36PRO.
9. Connectivity
The RG36PRO offers various connectivity options:
- Headphones: Connect 3.5mm headphones to the Type-C Headphone Jack for private audio.
- External Controllers: An external controller can be connected via the OTG port for an alternative control method. The device supports Bluetooth controllers.
- MicroSD Card Expansion: The TF2 (Game) slot allows for additional MicroSD card storage, supporting up to 512GB.
10. Maintenance
To keep your RG36PRO in optimal condition:
- Cleaning: Use a soft, dry cloth to clean the console's exterior. Avoid liquid cleaners.
- Storage: Store the device in a cool, dry place away from direct sunlight and extreme temperatures.
- Software Updates: Periodically check for system updates to ensure optimal performance and access to new features. Refer to the manufacturer's website or community forums for update instructions.
11. Troubleshooting
If you encounter issues with your RG36PRO, consider the following:
- Device Not Powering On: Ensure the device is fully charged. Connect it to a power source using the DC port and a 5V/2A adapter.
- Games Freezing: If a game freezes, press the Reset button to restart the console. This typically does not delete saved game progress.
- Screen Issues: If the screen is unresponsive or displays incorrectly, try restarting the device. Ensure the screen is clean and free of debris.
- Sound Issues: Check the volume settings using the volume keys. Ensure headphones are properly connected if in use.
- TF Card Not Detected: Ensure the TF card is correctly inserted into its slot. Power off the device, re-insert the card, and power on again.
12. Specifications
| Feature | Specification |
|---|---|
| Model | RG36PRO |
| Screen Size | 3.5 Inches IPS |
| Display Resolution | 640x480 Pixels |
| Battery Capacity | 3000mAh Lithium-Ion |
| Memory Storage | 64 GB (TF card) |
| TF Card Expansion | Up to 512GB (via TF2 slot) |
| Power Source | Battery Powered |
| Charging Input | 5V/2A (10W) via DC port |
| Form Factor | Handheld |
| Item Weight | 12.3 ounces |
| Manufacturer Recommended Age | 14 years and up |
13. Warranty and Support
For warranty information and customer support, please refer to the documentation included with your purchase or visit the official Colourbing website. Keep your proof of purchase for any warranty claims.