1. Introduction
Thank you for choosing the EAFC 12V 6A Smart Battery Charger & Maintainer. This intelligent charger is designed to efficiently charge and maintain various 12V lead-acid batteries, including Calcium, GEL, AGM, Wet, and EFB types. Featuring microprocessor control, an LCD display, and multiple protection functions, it ensures optimal battery performance and extended lifespan. This manual provides essential information for safe and effective use of your charger.

Image 1.1: EAFC 12V 6A Smart Battery Charger & Maintainer (Yellow units). These chargers feature an LCD display for monitoring charging status and mode selection buttons.
2. Safety Information
Please read and understand all safety instructions before using the charger. Failure to follow these instructions may result in electric shock, fire, or serious injury.
- Indoor Use Only: This charger is designed for indoor use. Do not expose it to rain, snow, or excessive moisture.
- Ventilation: Ensure adequate ventilation during charging. Do not cover the charger or place it in an enclosed area.
- Battery Type: Use this charger only for 12V lead-acid batteries (Calcium, GEL, AGM, Wet, EFB). Do not attempt to charge non-rechargeable batteries or other battery types.
- Explosive Gases: Batteries can produce explosive gases during charging. Avoid flames, sparks, and smoking near the battery.
- Eye and Skin Protection: Wear eye protection and protective clothing when working with batteries. Battery acid is corrosive.
- Disconnect Power: Always disconnect the AC power from the charger before connecting or disconnecting the battery clamps.
- Correct Polarity: Connect the red (+) clamp to the positive battery terminal and the black (-) clamp to the negative battery terminal. Reverse polarity can damage the charger and battery.
- Damaged Charger/Cables: Do not operate the charger if it has been dropped, damaged, or if the power cord or clamps are compromised.
- Children: Keep the charger and battery out of reach of children.
3. Product Overview
The EAFC 12V 6A Smart Battery Charger features a compact design with an intuitive LCD display and robust protection mechanisms.
3.1 Components
- Main Charger Unit with LCD Display
- AC Power Cord
- Red (+) Battery Clamp
- Black (-) Battery Clamp
- Cooling Fan (located on the side)
3.2 Dimensions

Image 3.1: Product Dimensions. The charger is compact for easy handling and storage.
The charger measures approximately 142mm (5.59 inches) in length, 75mm (2.95 inches) in width, and 51mm (2.00 inches) in height, with a net weight of approximately 1.06 pounds (less than 500g as stated in description, but specifications list 1.06 pounds, which is approx 480g).
4. Setup
Follow these steps to safely set up your EAFC Smart Battery Charger.
- Prepare the Battery: Ensure the battery terminals are clean and free of corrosion. If necessary, clean them with a wire brush.
- Connect Battery Clamps:
- Connect the RED (+) positive clamp to the positive (+) battery terminal.
- Connect the BLACK (-) negative clamp to the negative (-) battery terminal.
Ensure a secure connection. Do not allow the clamps to touch each other once connected to the battery.
- Connect to AC Power: Plug the charger's AC power cord into a standard 110-220V AC wall outlet. The charger will power on and display the current battery voltage.
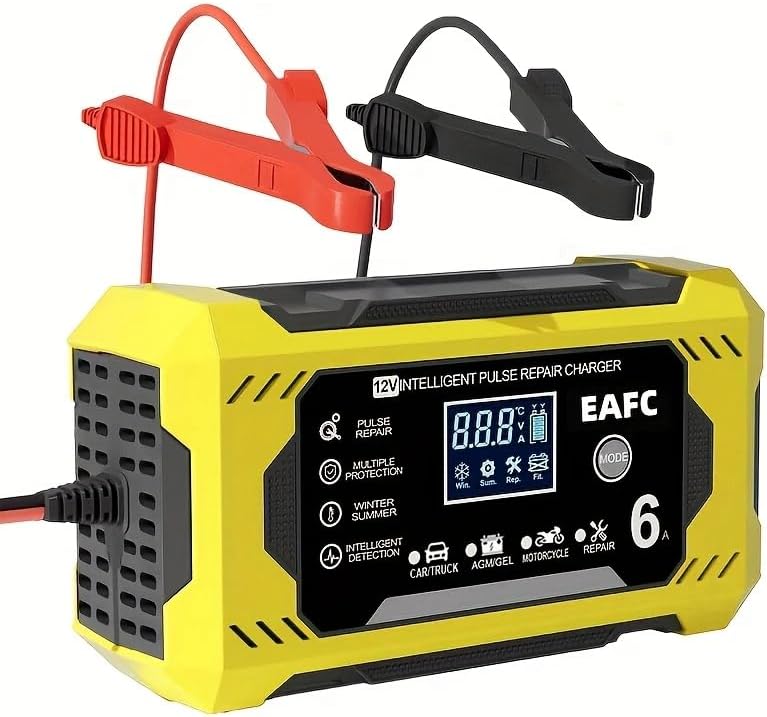
Image 4.1: Proper connection of battery clamps. The red clamp connects to the positive terminal, and the black clamp connects to the negative terminal.
5. Operating Instructions
Once connected, the charger will automatically detect the battery voltage and begin the charging process. You can select specific modes as needed.
5.1 Automatic Charging
Upon successful connection to both the battery and AC power, the charger will automatically initiate the charging process. The LCD display will show the charging voltage, current, and battery charge percentage.

Image 5.1: The charger provides quick charging and acts as a battery maintainer, suitable for various vehicle batteries.
5.2 Mode Selection
Press the 'MODE' button on the charger to cycle through different charging modes. The selected mode will be indicated on the LCD display.
- Vehicle Mode (Car/Truck): Standard charging for conventional car and truck batteries.
- AGM/GEL Mode: Optimized charging for AGM and Gel batteries.
- Motorcycle Mode: Lower current charging suitable for motorcycle batteries.
- Repair Mode (Pulse Repair): Designed to restore lost performance in aged or sulfated batteries. This mode uses pulse technology to break down sulfation.
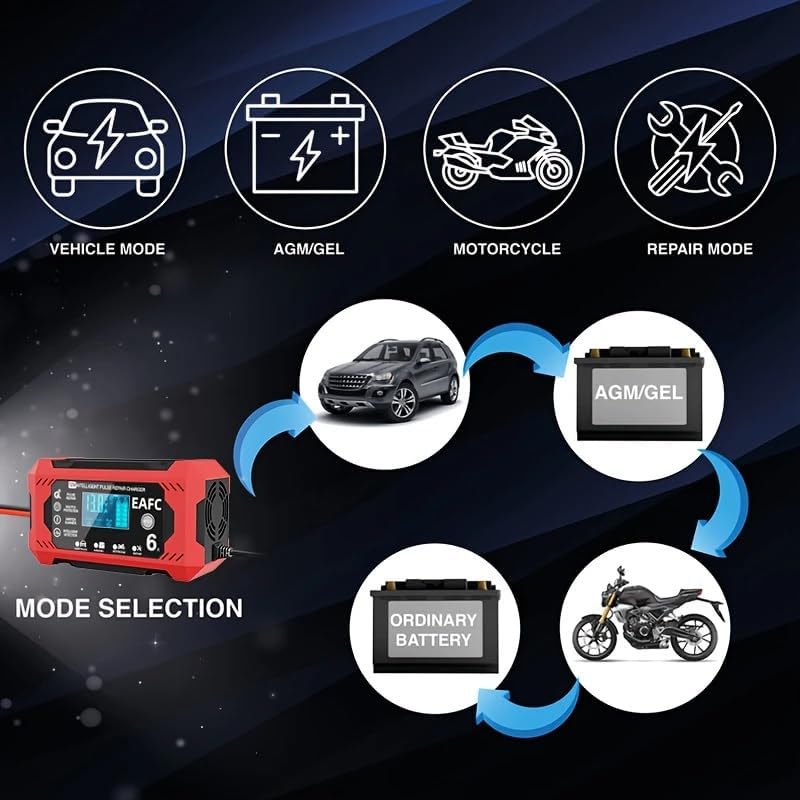
Image 5.2: Mode Selection. Choose the appropriate mode for your battery type to ensure optimal charging.
5.3 Winter and Summer Modes
The charger automatically adjusts the charging voltage based on ambient temperature to ensure full charge in varying conditions.
- Winter Mode: Automatically activated when the room temperature is below approximately 10°C (50°F).
- Summer Mode: Automatically activated when the room temperature is above approximately 27°C (80.6°F).

Image 5.3: Automatic Winter and Summer Mode adjustment for optimal charging in different temperatures.
5.4 Pulse Repair Function
The pulse repair function can help to restore batteries that have lost performance due to sulfation, often caused by long idle times, lack of endurance, aging, or weak starting force. Select 'Repair Mode' to activate this function.

Image 5.4: The Pulse Repair function helps restore performance to batteries affected by common issues.
5.5 Disconnecting the Charger
Once charging is complete or you need to disconnect:
- Unplug the AC power cord from the wall outlet.
- Disconnect the BLACK (-) negative clamp from the battery terminal.
- Disconnect the RED (+) positive clamp from the battery terminal.
6. Maintenance
Proper maintenance ensures the longevity and reliable operation of your charger.
- Cleaning: Clean the charger's exterior with a soft, dry cloth. Do not use solvents or abrasive cleaners.
- Storage: Store the charger in a cool, dry place when not in use. Keep cables neatly coiled.
- Cable Inspection: Regularly inspect the AC power cord and battery clamps for any signs of damage, fraying, or corrosion. Replace if damaged.
- Ventilation: Ensure the cooling fan and vents remain clear of dust and debris to prevent overheating.
7. Troubleshooting
If you encounter issues with your charger, refer to the following common problems and solutions:
| Problem | Possible Cause | Solution |
|---|---|---|
| Charger does not power on. | No AC power; Damaged power cord. | Check AC outlet and power cord connection. Ensure outlet is live. |
| Battery not charging. | Incorrect battery connection; Battery too deeply discharged (below 8.0V); Incorrect mode selected. | Verify correct polarity (+ to +, - to -). Check if battery voltage is above 8.0V. Select appropriate charging mode. |
| Error message on LCD. | Reverse polarity; Short circuit; Overheat. | Disconnect and reconnect with correct polarity. Check for short circuits. Allow charger to cool down if overheated. |
| Charger gets hot. | Normal operation during high current charging; Blocked ventilation. | Some heat is normal. Ensure vents are clear and charger is in a well-ventilated area. If excessively hot, disconnect and allow to cool. |
8. Specifications
| Model Name | 12V 6A Intelligent Charger |
| Input Voltage | AC 110-220V, 50-60Hz |
| Output Voltage | 12V |
| Output Current | 6A |
| Battery Types | Most types of 12V lead-acid batteries including Calcium, GEL, AGM, Wet, EFB, etc. |
| Battery Range | 4-100Ah |
| Minimum Start Voltage | 8.0V |
| Cooling | Fan |
| Protection Features | Overheat, Overcharge, Short Circuit, Reverse Polarity Protection |
| Product Dimensions | 2.01 x 5.59 x 2.95 inches (approx. 51 x 142 x 75 mm) |
| Item Weight | 1.06 pounds (approx. 480g) |
| UPC | 717687367509 |
9. Warranty Information
For specific warranty details, please refer to the warranty card included with your product or visit the official EAFCAuto website. Keep your purchase receipt as proof of purchase for any warranty claims.
10. Support
If you have any questions or require technical assistance, please contact EAFCAuto customer support through their official website or the contact information provided with your product packaging.