Introduction
This manual provides detailed instructions for the setup, operation, and maintenance of your VEDO VDA208L 8-Channel Professional Audio Mixer. Please read this manual thoroughly before using the device to ensure proper functionality and to prevent damage.
The VDA208L is a versatile 8-channel professional audio mixer designed for various applications including live shows, karaoke, studio recording, and stage control. It features USB/Bluetooth connectivity, a reverb effect, and monitoring output.
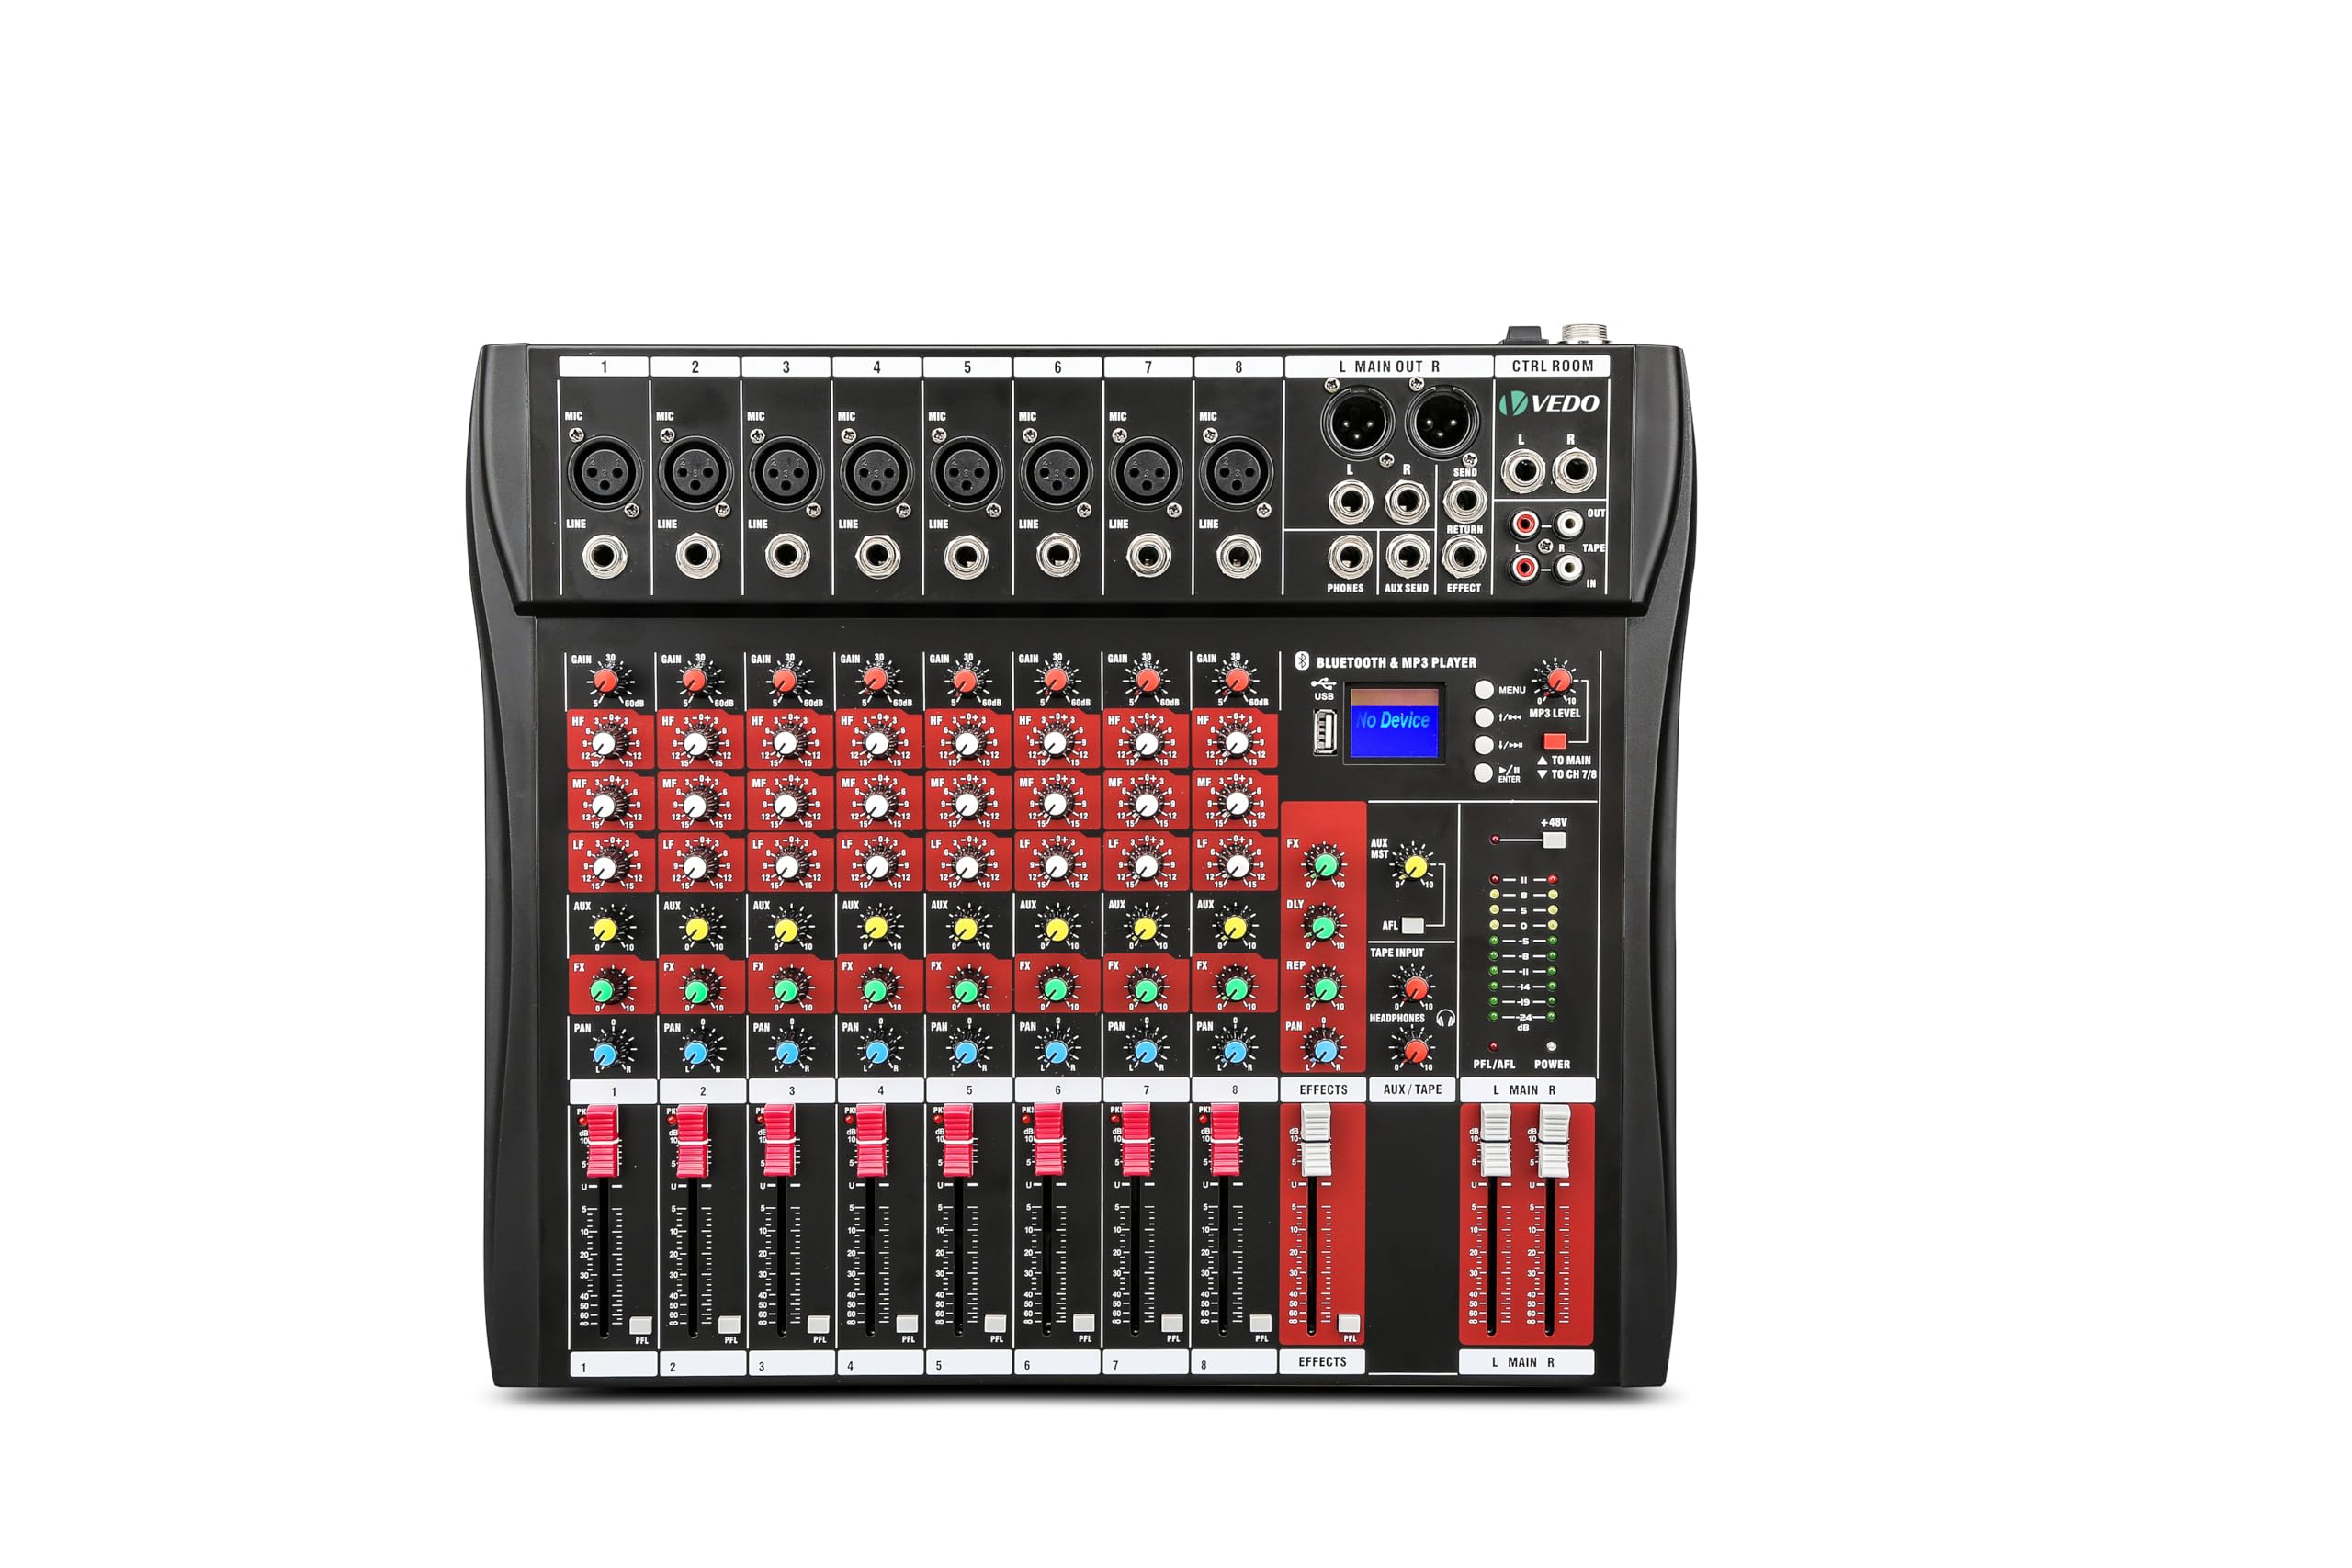
Image: Front view of the VEDO VDA208L 8-Channel Professional Audio Mixer, showing all controls and inputs.

Image: The VEDO VDA208L mixer depicted in various use cases, including concerts, home cinema, live streaming, and church events, highlighting its versatility.
Product Overview
Key Features
- 8-Channel Input: 8 mono microphone/line inputs and 1 stereo input set.
- 3-Band Equalizer: Independent bass, mid, and treble controls for each channel.
- Low Noise Design: Ultra-low noise and dynamic mixer for clear audio.
- Bluetooth Connectivity: Seamless wireless connection to most Bluetooth-enabled devices.
- 48V Phantom Power: Compatible with most condenser microphones.
- Adjustable Reverb Effect: Adds depth and ambiance to your audio.
- USB/MP3 Player: Integrated LCD screen for direct playback of music files from a U-disk.
- Recording Capability: Connect to a computer or USB storage device for recording.
- Wide Compatibility: Connects to wireless microphones, amplifiers, electronic instruments, wired microphones, speakers, and more.
- Durable Construction: Fine and lightweight body with impact-resistant powder-coated metal casing.

Image: A person holding the VEDO VDA208L mixer, illustrating its compact size and lightweight design for easy transport.
Control Panel Functions

Image: Diagram illustrating the various controls and their functions on the VEDO VDA208L mixer's top panel, including inputs, faders, and knobs.
The control panel features a comprehensive layout for managing audio inputs and outputs. Key components include:
- Microphone Input Connector: XLR inputs for microphones.
- Line Input Interface: TRS inputs for line-level devices.
- Auxiliary Equipment: Connect external auxiliary devices.
- Gain Control: Adjusts the input sensitivity for each channel.
- Balance Control: Pans the sound between left and right channels.
- Input Effect Controls: Adjusts effects for individual channels.
- Auxiliary Stereo: Stereo auxiliary controls.
- Sound Balance Control: Overall sound balance adjustment.
- Peak Indicator: Lights up when the signal is too high, indicating potential clipping.
- Volume Adjustment: Faders for individual channel volume.
- Effect Volume Fader: Controls the overall volume of the effects.
- Master Volume Fader: Controls the main output volume.
- Total Output Balance Interface: Balanced outputs for main mix.
- Monitor Line Output: Outputs for monitoring.
- Send Effect: Sends signal to the effect processor.
- MP3 Playback Controls: For USB/Bluetooth media playback.
- 48V Phantom Power: Button to activate phantom power for condenser microphones.
- Headphone Monitor: Controls for headphone monitoring.
- Master Reverb Control: Adjusts the overall reverb level.

Image: Close-up view of the multi-single-channel input ports, highlighting the balanced microphone inputs for high-quality audio signals.
Setup
Power Connection
- Ensure the mixer's power switch is in the OFF position.
- Connect the provided power adapter to the AC INPUT port on the rear of the mixer.
- Plug the power adapter into a suitable electrical outlet.
- Turn on the main power switch located on the rear panel.
Connecting Audio Devices
The VDA208L mixer offers broad compatibility with various audio devices.

Image: Visual representation of the mixer's compatibility with devices such as microphones (wired and wireless), electronic instruments, laptops, and speakers.
- Microphones: Connect XLR microphones to the MIC inputs. If using condenser microphones, activate the +48V PHANTOM POWER button.
- Line-Level Devices: Connect instruments, media players, or other line-level sources to the LINE inputs using TRS cables.
- Stereo Input: Use the dedicated stereo input for devices requiring a stereo connection.
- Output Devices: Connect your main speakers or recording interface to the MAIN OUT L/R XLR ports.
- Headphones: Plug headphones into the PHONES TRS jack for monitoring.
Operating Instructions
Basic Mixing
- Gain Adjustment: For each input channel, adjust the GAIN knob to achieve an optimal input level. The peak indicator should flash occasionally, but not stay lit.
- Volume Control: Use the channel faders to set the individual volume levels for each input.
- Main Output: Adjust the MAIN MIX fader to control the overall output volume.
- Balance/Pan: Use the PAN knob to position the sound of each mono channel in the stereo field (left to right).
Equalization (EQ)
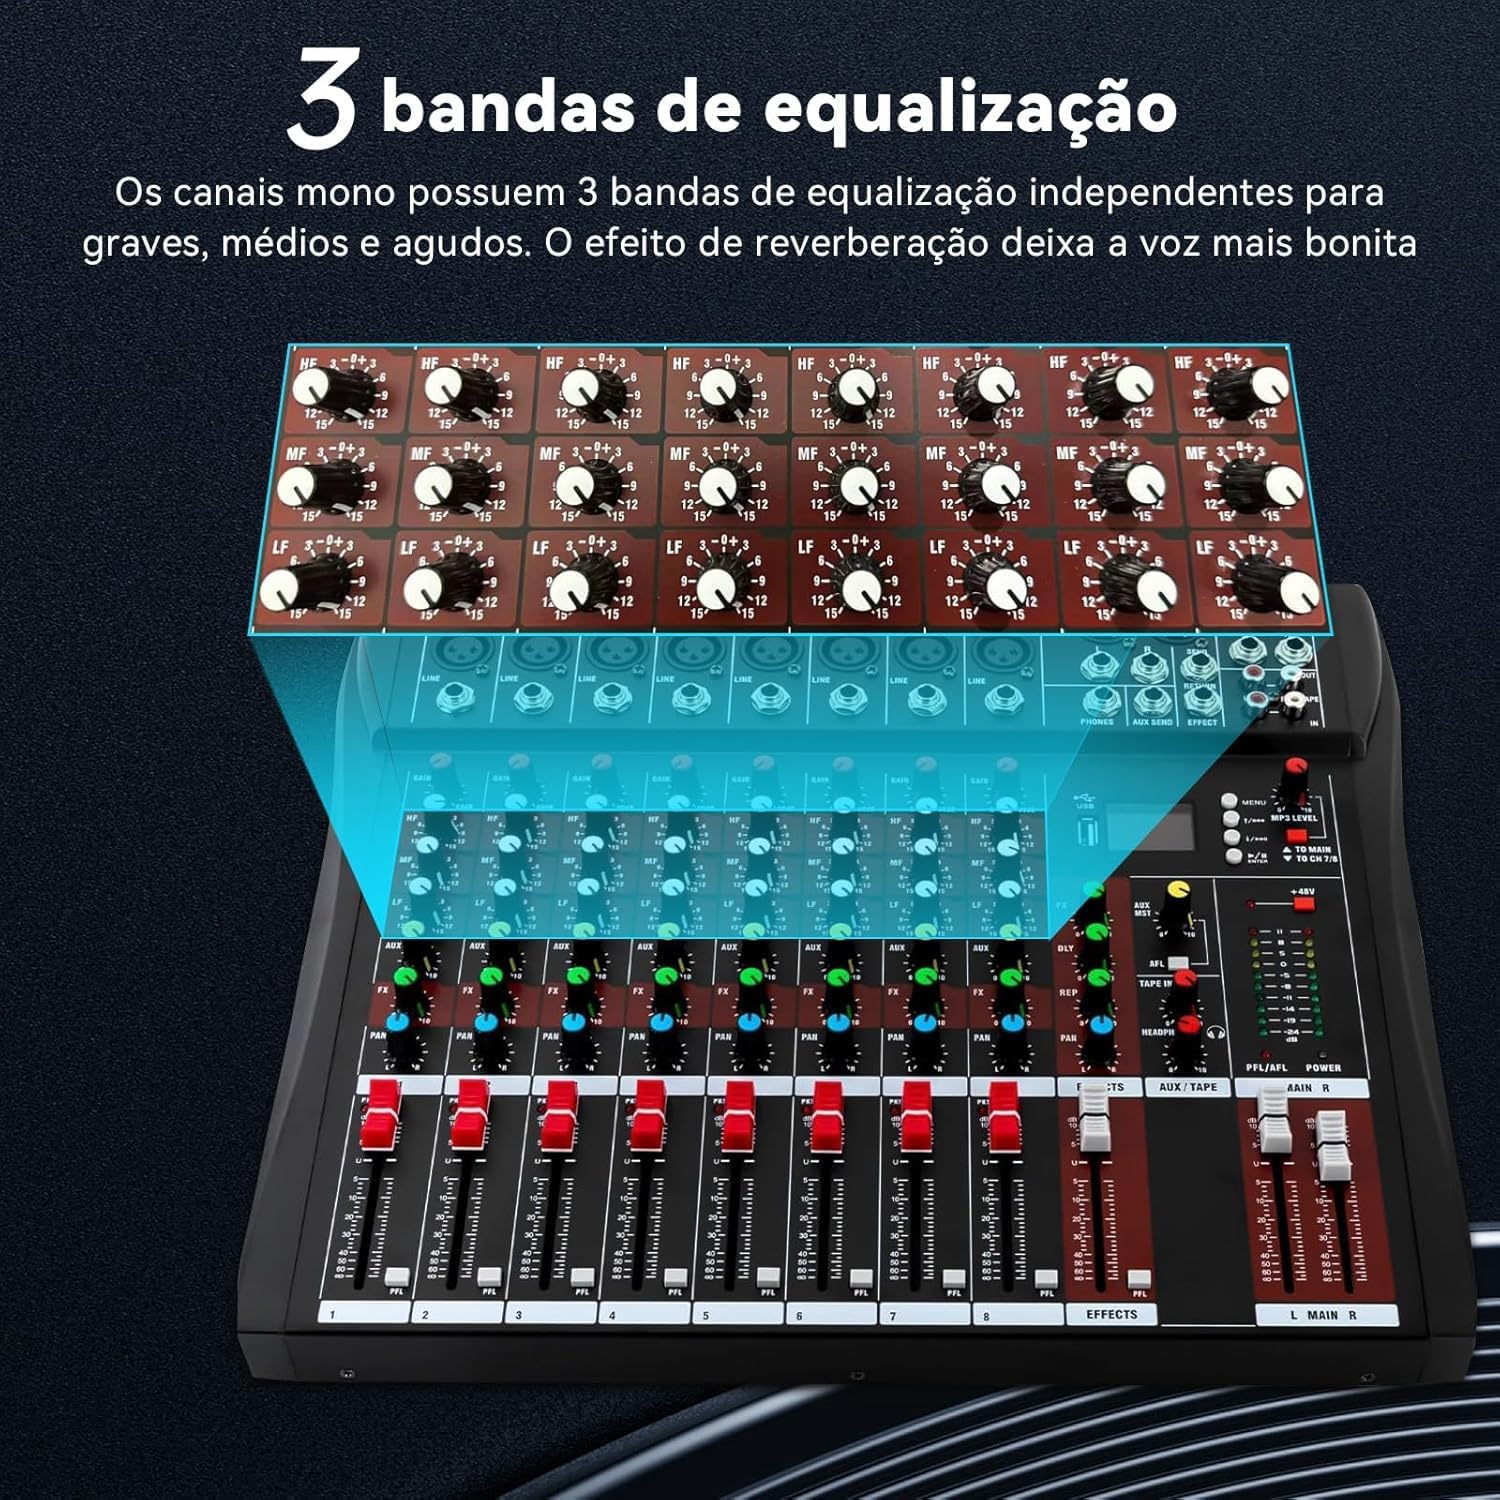
Image: Close-up view of the 3-band equalization section for individual channels, showing controls for high, mid, and low frequencies.
Each channel features a 3-band equalizer to shape the tone of your audio:
- HIGH (HF): Adjusts the high frequencies (treble).
- MID (MF): Adjusts the mid-range frequencies.
- LOW (LF): Adjusts the low frequencies (bass).
Turn the knobs clockwise to boost frequencies and counter-clockwise to cut them. Start with all EQ knobs at the center (0dB) and make subtle adjustments to achieve the desired sound.
Reverb Effect
The mixer includes an adjustable reverb effect to add spatial depth to your audio.
- Use the EFFECTS knob on each channel to send a portion of that channel's signal to the internal effect processor.
- Adjust the EFFECT VOLUME FADER to control the overall level of the reverb effect in the main mix.
- Use the MASTER REVERB CONTROL for fine-tuning the master reverb level.
Connectivity
Bluetooth Connection

Image: Illustration of a smartphone connecting wirelessly to the mixer via Bluetooth, with the mixer's LCD screen displaying "No Device" before connection and "BT-AUDIO" after successful pairing.
To connect a Bluetooth device:
- Ensure the mixer is powered on.
- Activate Bluetooth on your smartphone, tablet, or other device.
- On your device, search for available Bluetooth devices. The mixer should appear as "BT-AUDIO" or a similar name.
- Select the mixer to pair. Once connected, the mixer's LCD screen will indicate a successful connection.
- You can now stream audio wirelessly from your device to the mixer.
USB Playback and Recording
The mixer supports USB flash drives for MP3 playback and can connect to a computer for recording.
- USB Playback: Insert a USB flash drive containing MP3 files into the USB port. Use the integrated LCD screen and controls to navigate and play your music.
- USB Recording: Connect the mixer to a computer via the USB port. The mixer will function as an audio interface, allowing you to record the mixed audio directly to your computer's recording software. Refer to your computer's operating system and recording software manual for specific setup instructions.
Maintenance
- Cleaning: Use a soft, dry cloth to clean the mixer's surface. Avoid using liquid cleaners or solvents, as they may damage the finish or internal components.
- Storage: When not in use, store the mixer in a cool, dry place away from direct sunlight and extreme temperatures.
- Ventilation: Ensure the cooling vents on the rear of the mixer are not obstructed to prevent overheating.
- Cable Management: Keep cables organized and avoid sharp bends or excessive tension to prevent damage.
Troubleshooting
| Problem | Possible Cause | Solution |
|---|---|---|
| No sound output |
|
|
| Distorted audio |
|
|
| Microphone not working (condenser mic) |
|
|
| Bluetooth connection issues |
|
|
Specifications

Image: A detailed view of the mixer's technical specifications, including input/output levels, frequency response, and dimensions.
| Feature | Detail |
|---|---|
| Max. Microphone Input Level | +24dBu |
| Max. Line Input Level | +24dBu |
| Max. Output Level (XLR CANON) | +26dBu |
| Master Meter | 10-segment LED, -24dB to CLIP |
| Frequency Response | 20Hz to 20kHz ±0.5dB |
| Max. Power Input | 15W |
| Total Harmonic Distortion (THD+N) | <0.01% (channel input to mix output) |
| Crosstalk (1kHz) | Fader off >85dB, between channels >82dB |
| Noise (22Hz to 22kHz) | Equivalent Input Noise = 122dBu / Residual Output Noise = -90dBu |
| Mono Channel EQ | 3-Band (Low, Mid, High), ±15dB boost/cut. Mid frequency centered at 2.5kHz. |
| Mono Input (XLR) | Balanced, 2 kohms, -60 to +14dBu sensitivity, +48V Phantom Power |
| Mono Input (TRS) | Balanced, 10 kohms, -40 to +14dBu sensitivity |
| 2 Track Returns | RCA connectors, balanced, 4 kohms -2dBu |
| 2 Track Input | Unbalanced RCA, <75 ohms -2dBu |
| Left/Right Output | Balanced XLR, <75 ohms, +4dBu, max. +22dBu |
| FX/AUX Output | Unbalanced TRS, <75 ohms, -2dBu, max. +18dBu |
| Headphone Output | TRS (L tip), recommended for 30-600 ohm headphones |
| Dimensions (L*W*H) | 400mm x 340mm x 37mm |
Warranty and Support
Warranty Information
This VEDO VDA208L Audio Mixer comes with a 3-month warranty from the date of purchase. This warranty covers manufacturing defects and malfunctions under normal use. It does not cover damage caused by misuse, accidents, unauthorized modifications, or improper installation.
Please retain your proof of purchase for warranty claims.
Customer Support
For technical assistance, troubleshooting, or warranty inquiries, please contact VEDO customer support through the retailer where the product was purchased or refer to the official VEDO website for contact information.
When contacting support, please have your product model (VDA208L) and proof of purchase ready.


