Introduction
This instruction manual provides detailed guidance for the installation, operation, and maintenance of your COREBAY Universal Ceiling Fan Remote Control Kit. This kit is designed to convert a standard 3-speed AC ceiling fan into a remote-controllable unit, offering convenience and enhanced control over fan speed and lighting. Please read this manual thoroughly before installation and use to ensure proper function and safety.
Important Safety Information
- Always disconnect power at the circuit breaker or wall switch before installing or servicing the fan and receiver.
- Installation should be performed by a qualified electrician or a person with electrical experience.
- Ensure the supply voltage is AC 110-120V, 60Hz.
- Do not use this product with DC motors.
- The maximum motor amps for the receiver is 1A.
- The maximum light watts for the receiver is 240W (incandescent, CFL, or LED).
- Do not install in a damp location or immerse in water.
- Replace the remote control battery with a 12V battery (type 23A) when needed. Dispose of used batteries properly.
Package Contents
Verify that all items listed below are included in your package:
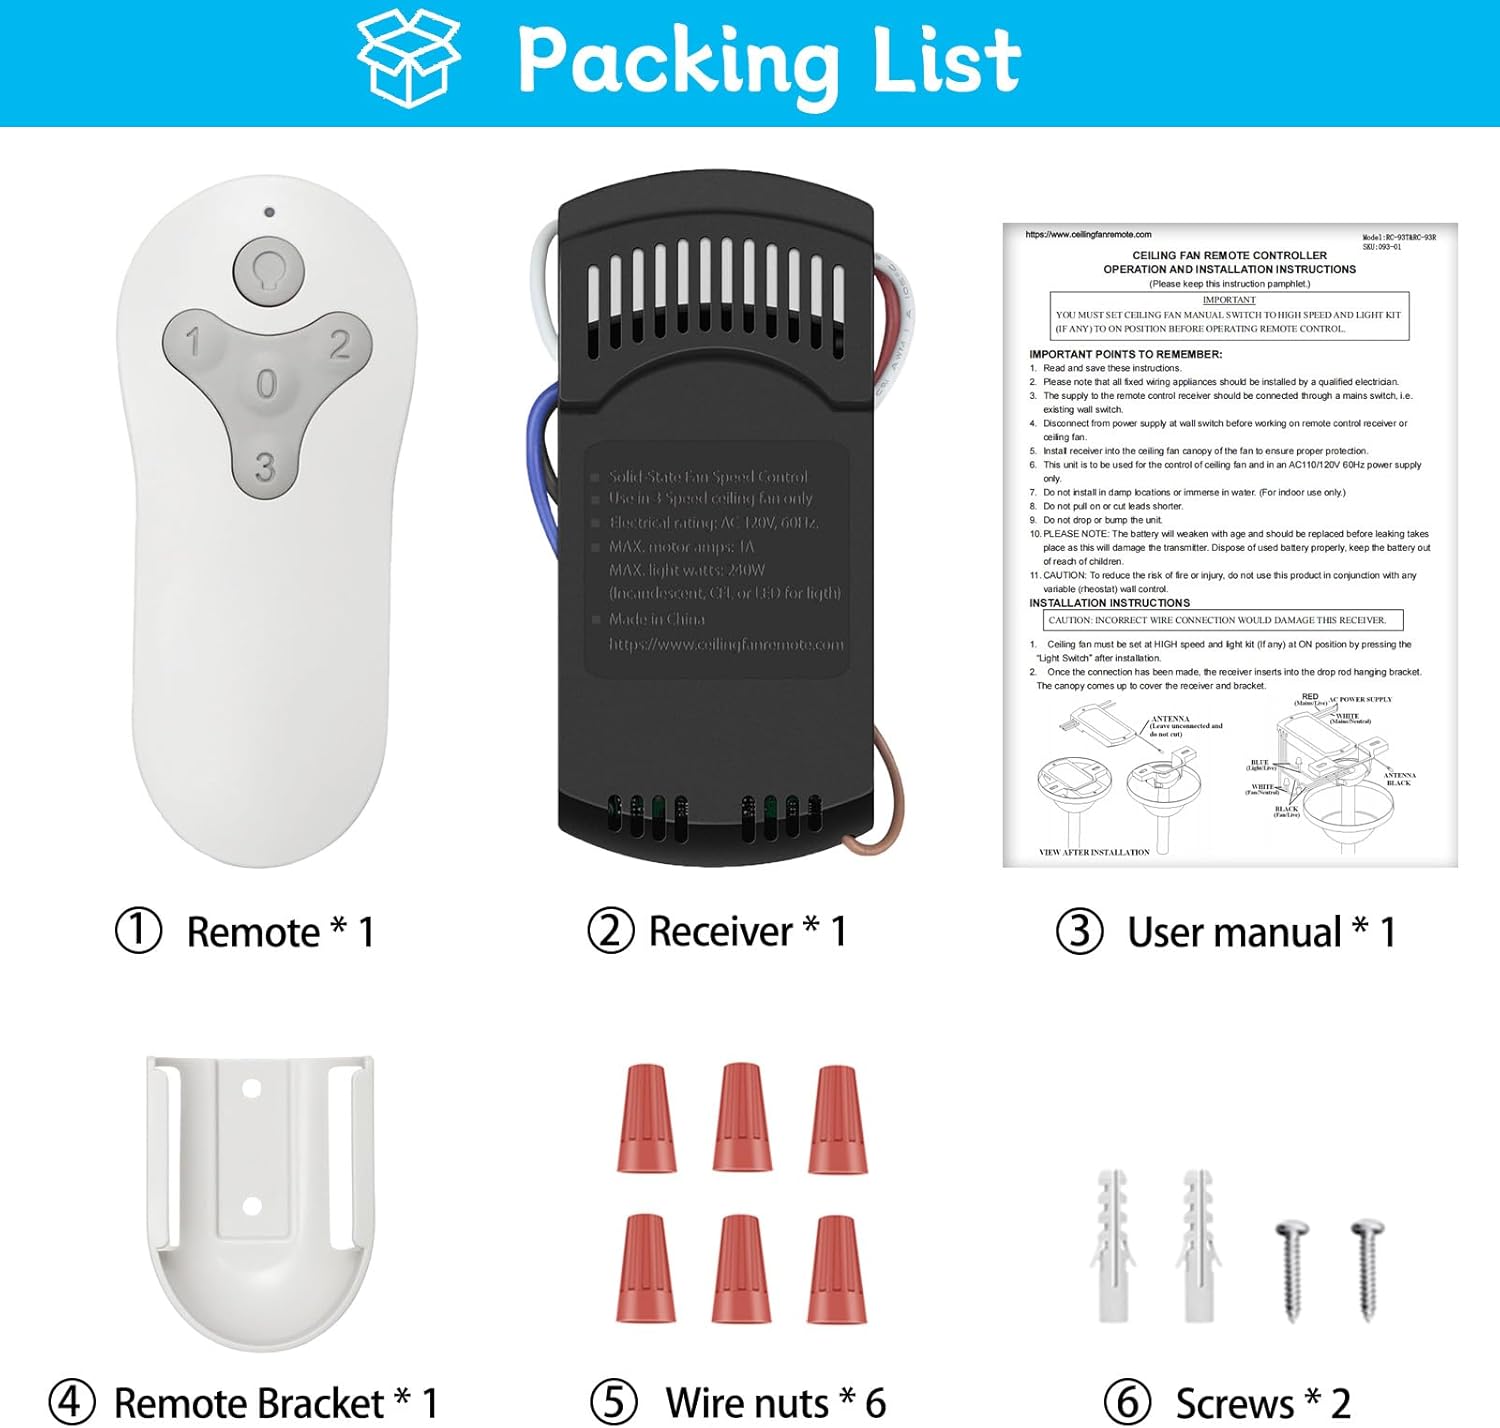
Image showing the remote control, receiver, wall mount holder, user manual, wire nuts, and screws included in the package.
- Remote Control (RC-93T) x 1
- Receiver (RC-93R) x 1
- Wall Mount Holder x 1
- User Manual x 1
- Wire Nuts x 6
- Screws x 2
- Note: A 12V battery (type 23A) for the remote control is NOT INCLUDED and must be purchased separately.
Specifications
| Model Number | RC-93T&RC-93R |
| Electrical Rating | AC 110-120V, 60Hz |
| Max Motor Amps | 1A |
| Max Light Watts | 240W (Incandescent, CFL, or LED) |
| Frequency | 304.25MHz |
| Product Dimensions (Remote) | 3.78 x 1.65 x 0.59 inches (9.6 x 4.2 x 1.5 cm) |
| Product Dimensions (Receiver) | 4.65 x 2.08 x 0.79 inches (11.8 x 5.3 x 2 cm) |
| Item Weight | 6.4 ounces (181g) |
| Connectivity Technology | Radio Frequency |
| Special Features | 3 speeds, Light dimmer, Universal compatibility |

Detailed dimensions of the remote control and receiver unit.
Installation Guide
Follow these steps carefully to install the receiver unit into your ceiling fan. Ensure power is disconnected before beginning.
Step 1: Disconnect Power
Before starting any electrical work, turn off the power to the ceiling fan at the circuit breaker or wall switch. Verify that the power is off by attempting to operate the fan or light.
Step 2: Access Fan Wiring
Remove the canopy cover of your ceiling fan to expose the wiring connections. Disconnect the existing wiring from the fan to the house wiring.
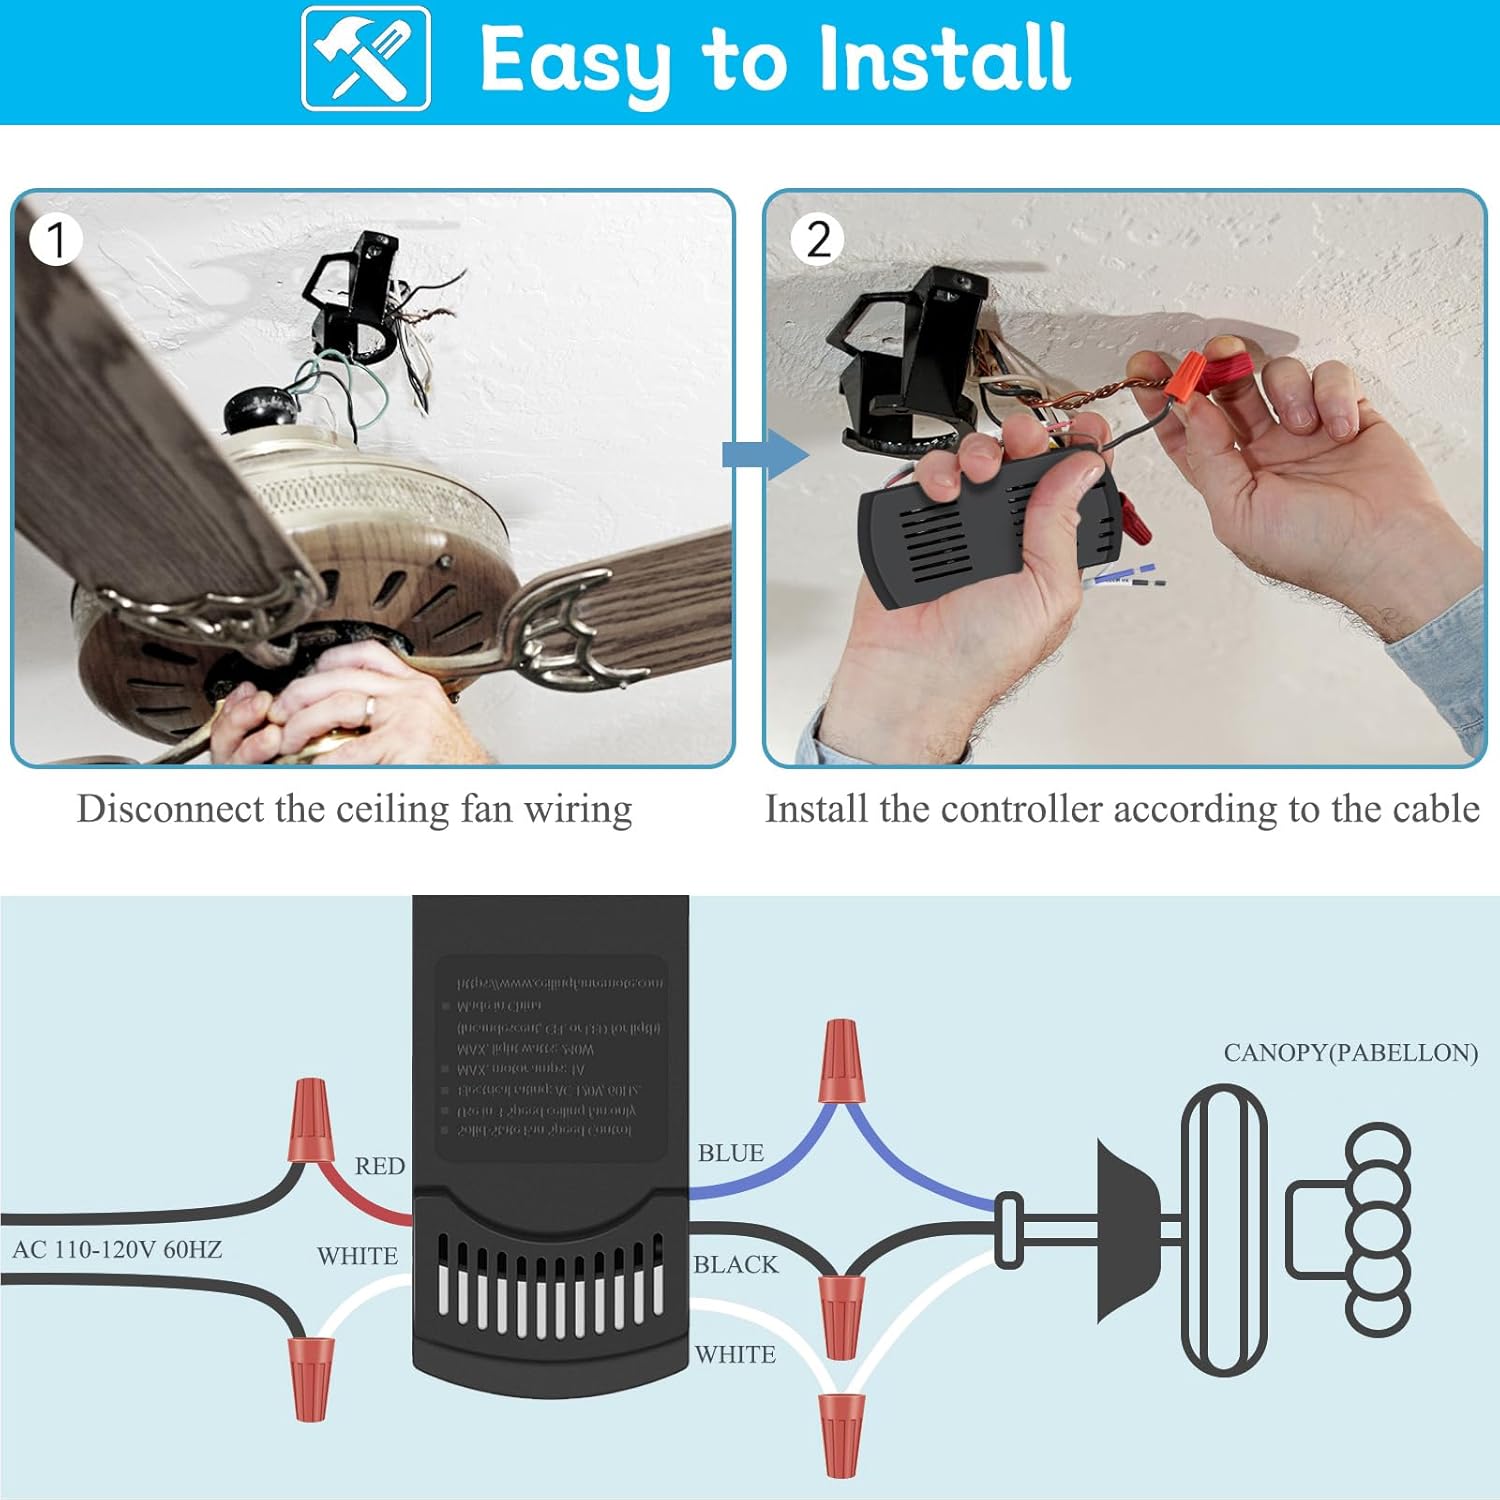
Illustration of disconnecting fan wiring and connecting the receiver.
Step 3: Wire the Receiver
Connect the receiver wires to the fan and house wiring using the provided wire nuts according to the diagram below. Match wire colors carefully:
- Receiver BLACK wire to Fan BLACK wire (for fan motor)
- Receiver BLUE wire to Fan BLUE wire (for light)
- Receiver WHITE wire to Fan WHITE wire (Neutral)
- House AC 110-120V BLACK wire to Receiver RED wire
- House AC 110-120V WHITE wire to Receiver WHITE wire

Wiring diagram showing connections between house wiring, receiver, and ceiling fan components.
Step 4: Mount the Receiver
Carefully tuck the wired receiver into the fan's canopy. Ensure all wires are securely connected and not pinched. Reattach the canopy cover.
Step 5: Restore Power
Once installation is complete, restore power to the ceiling fan at the circuit breaker or wall switch.
Remote Control Pairing
The remote control and receiver are typically pre-paired from the factory. If the remote does not operate the fan after installation, follow these pairing instructions:

Location of the 'LEARN' button inside the remote control's battery compartment.
Method 1: Using the "0" (Fan OFF) Button
- Cycle power to the fan by turning power off and back on at the wall switch (or circuit breaker if necessary).
- Install a 12V battery (type 23A) into the remote control.
- Within 30 seconds of restoring power, press and hold the "0" (Fan OFF) button on the remote for five seconds. The fan light should flash twice and then turn off, indicating successful pairing.
Method 2: Using the "LEARN" Button (Inside Remote)
- Cycle power to the fan by turning power off and back on at the wall switch (or circuit breaker if necessary).
- Install a 12V battery (type 23A) into the remote control.
- Within 30 seconds of restoring power, press and hold the "LEARN" button (located inside the remote's battery compartment) for five seconds. The fan light should flash twice and then turn off, indicating successful pairing.

Visual guide for the two remote pairing methods.
Operating Instructions
The remote control provides convenient operation of your ceiling fan and light. Familiarize yourself with the button functions:

Remote control button functions for fan speed and light.
- Light Button: Press to turn the light ON or OFF. Hold to dim the light (for compatible dimmable bulbs).
- "1" Button: Sets fan speed to LOW.
- "2" Button: Sets fan speed to MEDIUM.
- "3" Button: Sets fan speed to HIGH.
- "0" Button: Turns the fan OFF.

Illustrates the three fan speed settings.

Explanation of the light dimmer function, adjustable from 10% to 100% brightness.
Compatibility
This COREBAY remote kit is designed for broad compatibility with many ceiling fan systems. Please review the following:
- Fan Types: Suitable for most 110V 3-speed AC ceiling fans. Compatible with most downrod style fans.
- Incompatible Fan Types: Not available for DC motors. Not recommended for use with hugger style fans, wall-mounted fans, or exhaust-type fans.
- Light Bulbs:
- Compatible with dimmable LED and incandescent light bulbs for full dimming functionality.
- Other LED and all CFL lamps only support ON/OFF function (no dimming).
- Brand Compatibility: Compatible with many popular brands including Harbor Breeze, Hunter, and Hampton Bay.
- Remote Model Compatibility: Replaces Harbor Breeze Fan remote models: KUJCE10311, TR214A, KUJCE10712, TR214B, 2BB78-ITL-F304C, A25-FA0138, KUJCE10610, 2AQZU-18018/TR214D.

Visual guide to compatible fan styles and light bulb types.
Troubleshooting
If you encounter issues with your remote control kit, refer to the following common problems and solutions:
| Problem | Possible Cause | Solution |
|---|---|---|
| Fan or light does not respond to remote. | No power to receiver, remote battery low/dead, remote not paired, incorrect wiring. | Check circuit breaker/wall switch. Replace remote battery. Re-pair remote (see "Remote Control Pairing" section). Verify wiring connections. |
| Light does not dim. | Non-dimmable light bulbs, incorrect light button usage. | Ensure you are using dimmable LED or incandescent bulbs. Hold the light button to dim, do not just press. |
| Fan operates at only one speed or incorrectly. | Incorrect wiring, receiver malfunction. | Recheck fan motor wiring to the receiver. If problem persists, contact support. |
| Remote signal interference. | Other RF devices nearby, multiple remotes on same frequency. | Ensure no other devices are interfering. Re-pair the remote to reset the signal. |
Maintenance
- Battery Replacement: When the remote's indicator light dims or the remote becomes unresponsive, replace the 12V (type 23A) battery. Open the battery compartment on the back of the remote, remove the old battery, and insert a new one with correct polarity.
- Cleaning: Wipe the remote control and receiver with a soft, dry cloth. Do not use abrasive cleaners or allow moisture to enter the components.
- Storage: If storing the remote for an extended period, remove the battery to prevent leakage.
Warranty and Support
For warranty information or technical support, please refer to the contact details provided with your purchase or visit the COREBAY official website. Keep your purchase receipt as proof of purchase for any warranty claims.
For additional assistance, you may visit the COREBAY Store on Amazon.