TAZPI TW-E30BK
TAZPI 30-Inch Wall Mount Range Hood TW-E30BK User Manual
Model: TW-E30BK
1. Introduction
This manual provides detailed instructions for the installation, operation, and maintenance of your TAZPI 30-Inch Wall Mount Range Hood, model TW-E30BK. Please read this manual thoroughly before installation and use to ensure proper function and safety.
1.1 Safety Information
- Always disconnect power before servicing or cleaning.
- Installation must be performed by a qualified technician in accordance with all local codes and standards.
- Ensure adequate ventilation for proper combustion of fuel-burning equipment to prevent back-drafting.
- Do not operate the range hood without filters in place.
- Never leave cooking unattended.
- Clean grease filters regularly to prevent grease fires.
2. Package Contents
Verify that all components are present before beginning installation:
- TAZPI 30-Inch Wall Mount Range Hood Unit
- Baffle Filters (Pre-installed)
- Remote Control (Telecontrol)
- Mounting Hardware
- User Manual
- Ducting components (if applicable for ducted installation)
3. Specifications
| Feature | Specification |
|---|---|
| Model | TW-E30BK |
| Dimensions (W x D x H) | 29.68" x 7.86" x 20.83" (Hood body) |
| Air Flow Capacity | 1200 CFM |
| Number of Speeds | 4 |
| Noise Level | 55 Decibels (Max) |
| Controls Type | Touch Sensor & Gesture Control |
| Lighting | Dual LED Lights (4000K, 2x3W) |
| Filter Type | Baffle Filters (Dishwasher-safe) |
| Ventilation Type | Ducted / Ductless Convertible |
| Material | Stainless Steel |
| Voltage | 220V |
| Item Weight | 45.6 Pounds |
Note: The product specifications list 220V. Please verify electrical requirements for your region before installation. Specifications are subject to change without notice.
4. Installation and Setup
4.1 Planning the Installation
Before installation, determine whether you will use ducted or ductless (recirculating) ventilation. Ensure you have the necessary tools and materials, and that the installation area meets local building codes.
- Mounting Height: The recommended mounting height above the cooking surface is 25.6 to 29.5 inches. Refer to local codes for specific requirements.
- Electrical Requirements: Ensure a dedicated grounded electrical outlet is available within the range hood's reach, matching the specified voltage.
- Ducting (for ducted installation): Use rigid metal ductwork of appropriate size (typically 6-inch round or equivalent). Minimize duct length and number of elbows for optimal performance.
- Ductless (Recirculating) Installation: Requires charcoal filters (sold separately, if not included) to remove odors before returning air to the kitchen.

4.2 Mounting the Range Hood
- Mark the mounting points on the wall according to the installation template (if provided) or the hood's dimensions.
- Drill pilot holes for mounting screws.
- Secure the mounting bracket to the wall.
- Carefully lift the range hood and hang it onto the mounting bracket.
- Secure the hood to the wall using additional screws as needed.
4.3 Electrical Connection
Connect the range hood to a grounded electrical outlet. If direct wiring is required, consult a qualified electrician.
4.4 Ducting Connection (Ducted Installation)
- Attach the ductwork to the exhaust outlet of the range hood.
- Seal all duct connections with aluminum foil tape to prevent air leaks.
- Route the ductwork to the exterior of the building, ensuring a clear path for exhaust.
4.5 Ductless (Recirculating) Setup
If using the ductless option, install charcoal filters (if not pre-installed) according to their specific instructions. These filters are essential for odor removal.
5. Operation
Your TAZPI range hood features a touch sensor control panel and gesture control for convenient operation.

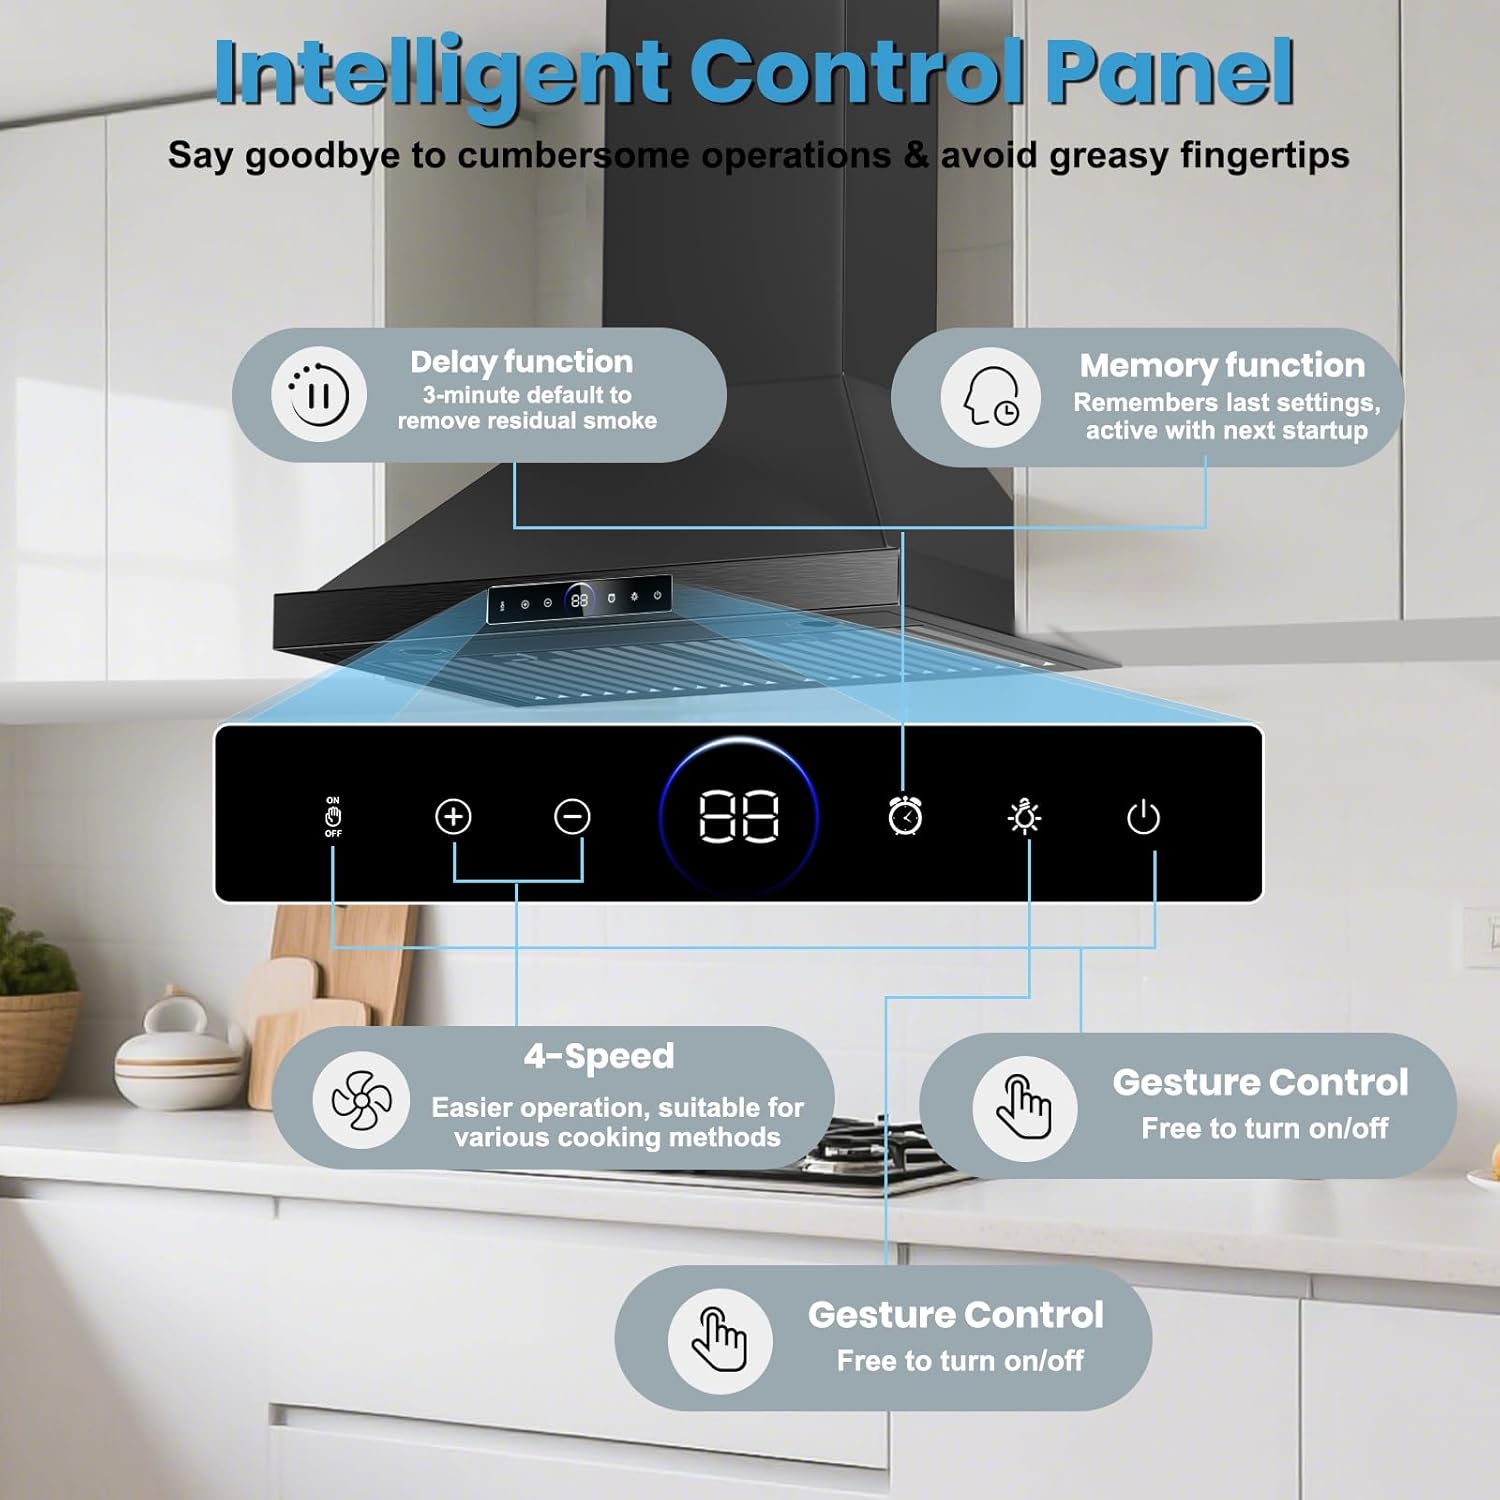
5.1 Control Panel Functions
- Power Button (U): Press to turn the hood on or off.
- Speed Adjustment (+ / -): Adjust fan speed from 1 to 4.
- Light Button (☀): Press to turn the LED lights on or off.
- Timer Button (⏲): Activates the shutdown timer (1-15 minutes adjustable). The hood will automatically turn off after the set time.
- Auto Purge / Delay Function: A 3-minute post-cooking purge can be activated to eliminate residual smoke and odors.
- Memory Function: The hood remembers the last used settings and activates them upon next startup.
5.2 Gesture Control
The range hood can be operated hands-free using gesture control.
- Turn On/Off: Wave your hand across the sensor area to activate or deactivate the hood.
- Adjust Speed: Specific gestures may be available to adjust fan speed. Refer to the quick start guide for detailed gesture patterns.

5.3 Cooking Methods and Speed Selection
Select the appropriate fan speed based on your cooking activity:
- Speed 1-2: Light cooking, simmering, stewing.
- Speed 3: General cooking, light frying.
- Speed 4: Heavy cooking, stir-frying, deep frying, or when producing significant smoke/steam.

6. Maintenance
Regular maintenance ensures optimal performance and extends the lifespan of your range hood.
6.1 Cleaning Grease Filters
The baffle filters are dishwasher-safe and should be cleaned regularly (e.g., monthly, depending on usage) to prevent grease buildup.
- Ensure the range hood is turned off and power is disconnected.
- Remove the baffle filters by pulling the release latches.
- Place filters in a dishwasher or wash by hand with hot, soapy water.
- Allow filters to dry completely before re-installing.

6.2 Cleaning Exterior Surfaces
Wipe the stainless steel surfaces with a soft cloth and a non-abrasive stainless steel cleaner. Do not use abrasive cleaners or scouring pads, as they can scratch the finish.
6.3 Replacing Charcoal Filters (Ductless Installation Only)
Charcoal filters are not washable and must be replaced periodically (typically every 3-6 months, depending on usage). Refer to the charcoal filter packaging for specific replacement instructions.
6.4 LED Light Replacement
The LED lights are designed for long life. If replacement is necessary, ensure the hood is disconnected from power. Consult a qualified technician or contact customer support for compatible replacement parts and instructions.
7. Troubleshooting
Before contacting customer support, review the following common issues and solutions:
| Problem | Possible Cause | Solution |
|---|---|---|
| Hood does not operate. | No power supply. | Check if the power cord is plugged in and the circuit breaker is not tripped. |
| Poor suction performance. | Clogged grease filters. | Clean or replace grease filters. |
| Improper ducting (ducted models). | Ensure ductwork is correctly installed, sealed, and free of obstructions. Minimize bends. | |
| Charcoal filters saturated (ductless models). | Replace charcoal filters. | |
| Excessive noise during operation. | Loose components or improper installation. | Check for loose screws or parts. Ensure the hood is securely mounted. Refer to installation instructions. |
| Ducting obstructions or incorrect impeller placement. | Inspect ductwork for obstructions. If noise persists and is unusual, consult a qualified technician. | |
| Lights not working. | LED bulb failure. | Contact customer support for replacement LED lights. |
8. Warranty and Customer Support
For warranty information or technical assistance, please contact TAZPI customer support. Keep your purchase receipt as proof of purchase for warranty claims.
Visit the official TAZPI store for more information: TAZPI Store
Ask a question about this manual
Ask about setup, troubleshooting, compatibility, parts, safety, or missing instructions. Manuals+ will review the question and use this page’s manual context to help answer it.