1. Introduction
This manual provides essential information for the safe assembly, operation, and maintenance of your YOLOWAY 26-inch 1000W Electric Bike. Please read it thoroughly before your first ride and keep it for future reference. Your electric bike is designed for commuting, outdoor leisure, and light trail use, offering a powerful motor, long-range battery, and comfortable riding experience.
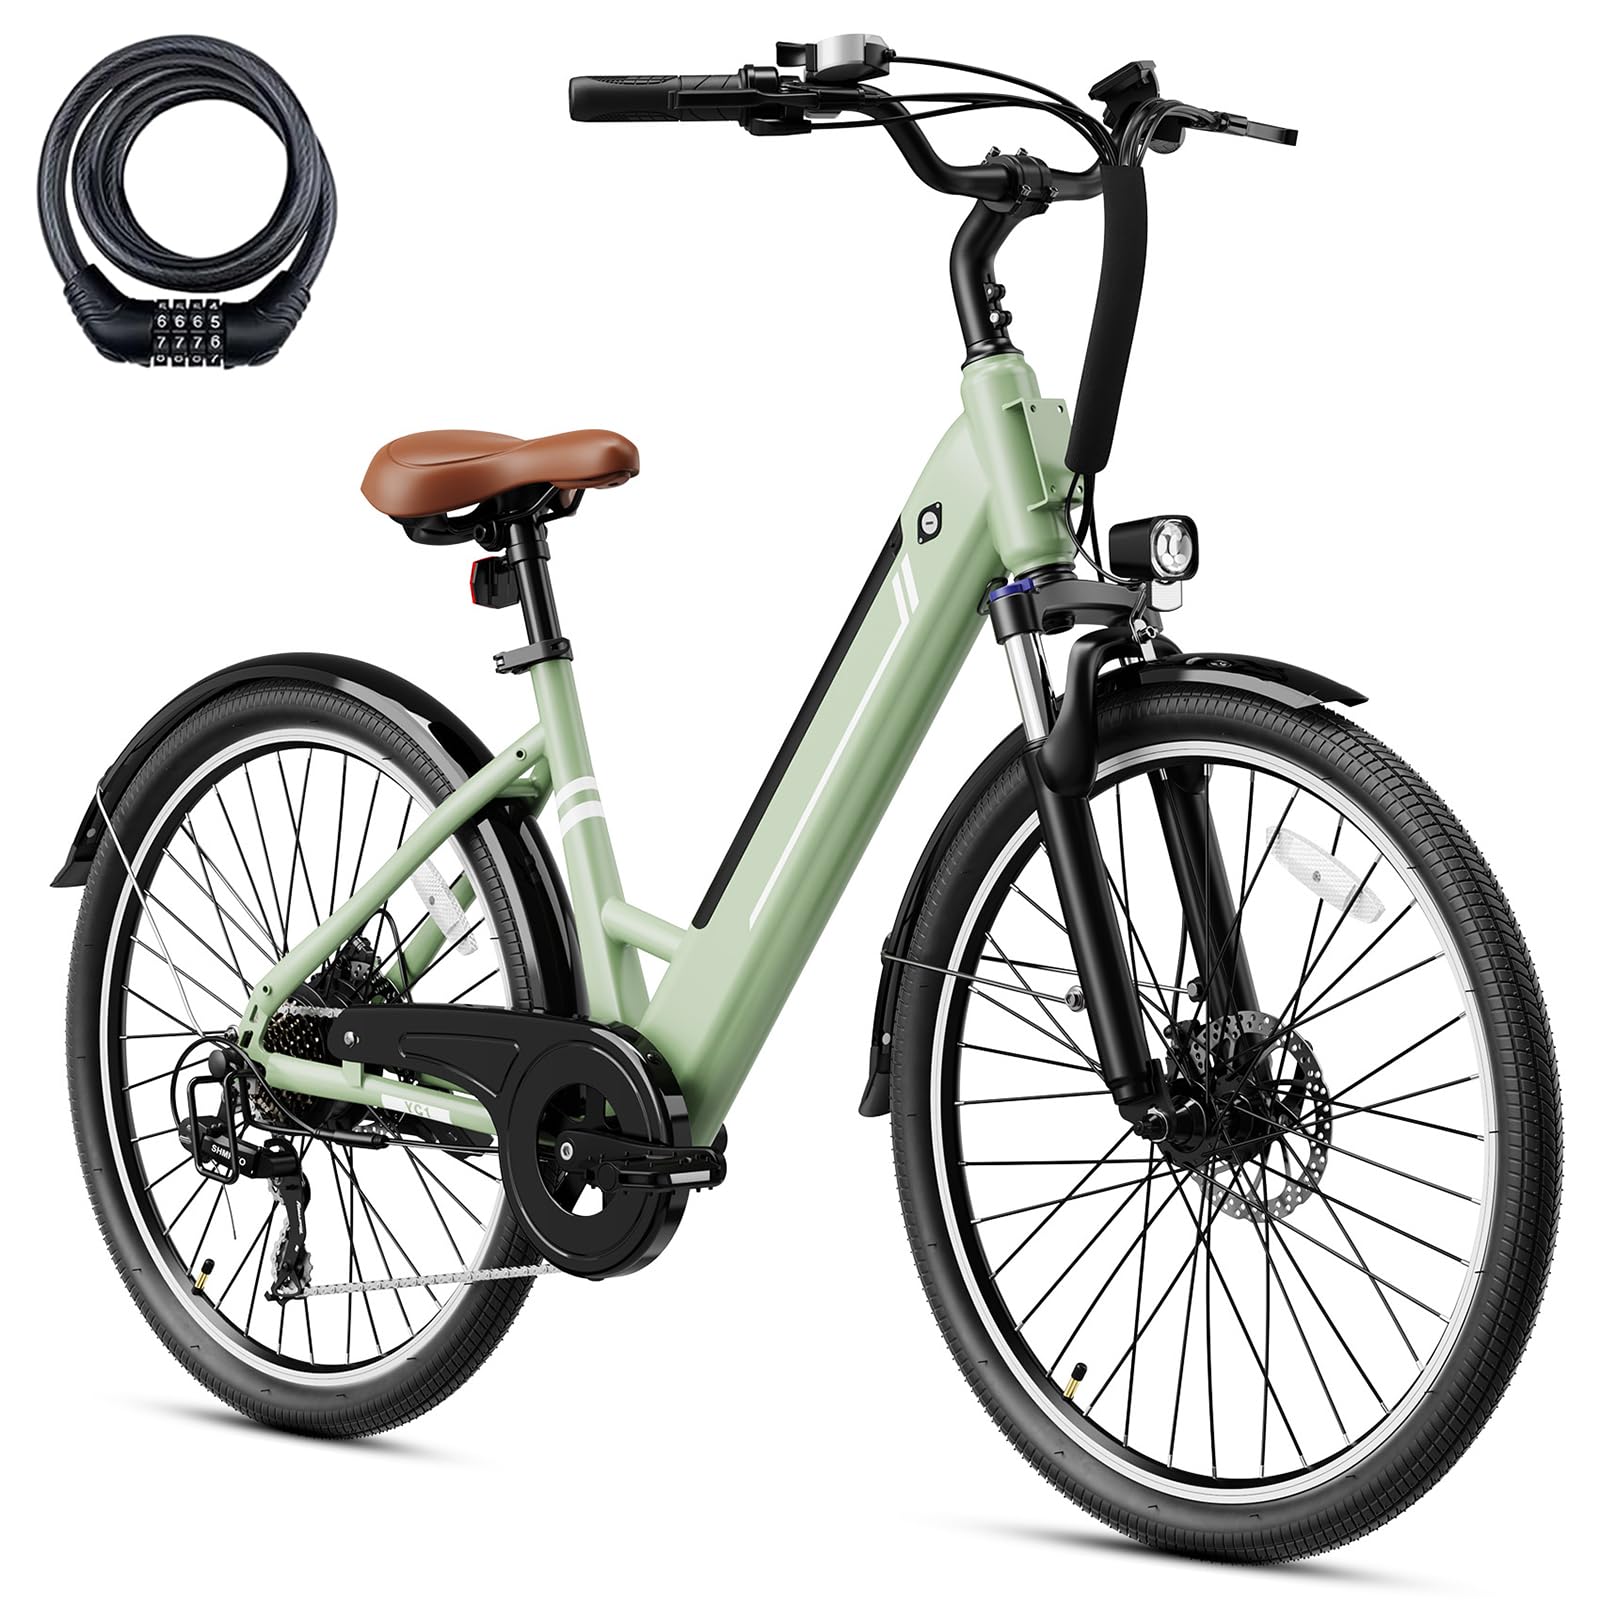
Image: The YOLOWAY 26-inch 1000W Electric Bike, highlighting its 1000W peak brushless motor, 28 MPH max speed, 55 N.M torque, and 25° max uphill capability.
2. Safety Information
Your safety is paramount. Always wear a helmet when riding. Before each ride, perform a quick safety check:
- Ensure tires are properly inflated to the recommended pressure.
- Verify that both front and rear brakes are functioning correctly.
- Check the battery charge level.
- Confirm all quick releases and bolts are securely tightened.
- Ensure headlights and reflectors are clean and functional for visibility.
This electric bike has passed UL 2849 certification, ensuring compliance with safety standards for electrical systems.

Image: Visual representation of the bike's safety features including double fenders, reflective strips on wheels, and a front fork shock absorber.
3. Setup and Assembly
Your YOLOWAY electric bike comes partially assembled. Follow these steps carefully for complete setup. It is recommended to have a second person assist during certain steps.
Unboxing and Component Identification
Carefully open the packaging and remove all components. Remove all protective wrapping and ties. Identify all parts against the packing list provided in the box.

Image: All components of the YOLOWAY electric bike laid out on a white surface, ready for assembly.
Assembly Steps
For a detailed visual guide on assembly, please refer to the official assembly video below. The video covers the installation of the kickstand, handlebars, display, front wheel, headlights, seat post, pedals, and battery.
Video: Official YOLOWAY Electric Bike Assembly Guide. This video demonstrates the step-by-step process of assembling the bike from the box, including attaching the kickstand, handlebars, display, front wheel, headlights, seat, pedals, and installing the removable battery.
- Install the Kickstand: Attach the kickstand to the designated mounting points on the bike frame using the provided screws and tools. Ensure it is securely tightened.
- Install the Handlebars: Remove the top cap and screws from the stem. Position the handlebars, ensuring they are centered and aligned with the front wheel. Reinstall the screws and tighten them evenly.
- Mount the Display: Secure the display unit to the handlebars. Connect the necessary cables.
- Attach the Front Wheel: Carefully align the front wheel with the fork. Ensure the brake rotor slides correctly into the caliper. Secure the wheel using the quick-release mechanism or axle nuts.
- Install the Headlight: Mount the headlight to the front fork using the bracket and screws. Connect it to the bike's electrical system.
- Adjust the Seat Post: Insert the seat post into the frame. Adjust the height for a comfortable riding position and secure it with the quick-release lever. Consider adding the provided seat cover for enhanced comfort.
- Attach the Pedals: Identify the left (L) and right (R) pedals. Thread the pedals into the crank arms (left pedal counter-clockwise, right pedal clockwise). Tighten securely with a wrench.
- Install the Battery: Slide the removable battery into its compartment on the frame. Lock it in place with the key.
4. Operating Instructions
Powering On/Off
To power on the bike, press and hold the power button on the display unit. To power off, press and hold the power button again.
Riding Modes
Your YOLOWAY electric bike offers diverse riding experiences:
- Pedal Assist System (PAS): Provides motor assistance as you pedal. Use the '+' and '-' buttons on the control panel to select from 3 levels of assistance.
- Pure Electric Mode (Throttle): Engage the throttle for motor power without pedaling.
- Manual Pedaling: Ride the bike like a traditional bicycle with the motor off.

Image: The intuitive display on the handlebars, showing battery level, fault indicators, current speed, and mileage.
Gear Shifting
The 7-speed drivetrain allows for precise gear changes to adapt to various terrains. Use the shifter on the handlebars to select the appropriate gear for climbing hills or cruising on flat surfaces.

Image: Detailed view of the 7-speed shifting system, including the shifter on the handlebar and the rear derailleur, ensuring smooth gear transitions.
Battery Charging
The removable 36V 10Ah (360Wh) lithium-ion battery provides up to 40+ miles per charge in Pedal Assist mode. To charge, remove the battery from the frame or charge it directly on the bike. Connect the charger to the battery and then to a standard power outlet. A full charge takes approximately 5-6 hours. The integrated Battery Management System (BMS) ensures safe charging and extends battery life.

Image: The removable 36V 10Ah 360Wh battery, highlighting its features like range, intelligent safety, waterproof rating, and charging time.
5. Maintenance
Regular maintenance ensures the longevity and optimal performance of your electric bike.
- Battery Care: Store the battery in a cool, dry place. Avoid extreme temperatures. Charge the battery regularly, even if not in use, to maintain its health.
- Tires: Check tire pressure before each ride. Refer to the tire sidewall for recommended PSI. Inspect tires for wear and tear.
- Brakes: Regularly check brake pads for wear and ensure brake levers provide firm and responsive stopping power. Adjust or replace as needed.
- Chain: Keep the chain clean and lubricated to ensure smooth shifting and prevent rust.
- Cleaning: Clean your bike with a damp cloth and mild soap. Avoid high-pressure washing directly on electrical components.
- Fasteners: Periodically check all bolts and screws for tightness.
6. Troubleshooting
Here are some common issues and their potential solutions:
| Problem | Possible Cause | Solution |
|---|---|---|
| Bike not powering on | Battery not charged or not properly installed. Loose connections. | Charge the battery. Ensure battery is fully seated and locked. Check all cable connections. |
| Motor not assisting | PAS level set to 0. Brake levers engaged. Faulty sensor. | Increase PAS level. Ensure brake levers are fully released. Check display for error codes. |
| Brakes feel weak | Worn brake pads. Loose cables. Air in hydraulic system (if applicable). | Inspect and replace brake pads. Adjust brake cable tension. Consult a bike mechanic for hydraulic issues. |
| Unusual noises | Loose components. Dry chain. Misaligned gears. | Check all bolts and connections. Lubricate the chain. Adjust derailleur if gears are skipping. |
If you encounter issues not listed here or cannot resolve a problem, please contact YOLOWAY customer support.
7. Specifications
Key technical specifications for your YOLOWAY 26-inch 1000W Electric Bike:
- Motor: Up to 1000W Peak Brushless Hub Motor
- Battery: Removable 36V 10Ah (360Wh) Lithium-ion
- Max Speed: Up to 25 MPH
- Range: 40+ Miles (in Pedal Assist mode)
- Wheel Size: 26 Inches
- Tires: 26" x 2.0" for all-terrain comfort
- Gears: 7-Speed Drivetrain (Shimano)
- Brakes: Front and Rear Mechanical Disc Brakes
- Frame Material: Aluminum
- Maximum Weight Recommendation: 330 Pounds
- E-bike Weight: Approximately 59.5 lbs
- Special Features: Adjustable Seat, Front Light, IPX4 Water Resistance, Front Suspension Fork
- Certifications: UL 2849

Image: Detailed dimensions of the YOLOWAY electric bike, including recommended height range (5'4"-6'6"), bicycle weight (59.5 lbs), and max load capacity (330 lbs).
8. Warranty and Support
Your YOLOWAY electric bike comes with a Limited Warranty. For specific details regarding warranty coverage, terms, and conditions, please refer to the warranty information included with your purchase or contact YOLOWAY customer service directly.
For technical assistance, parts, or any questions not covered in this manual, please reach out to YOLOWAY customer support. Provide your product model and purchase date for efficient service.