1. Product Overview
The GROWNEER Solar Powered Exhaust Fan is designed to provide efficient ventilation and air circulation in various enclosed spaces. It features a 30W solar panel, a 12-inch high-speed fan, and a power adapter for continuous operation. This system is ideal for maintaining optimal air quality and temperature in environments such as greenhouses, attics, sheds, chicken coops, and pet houses.
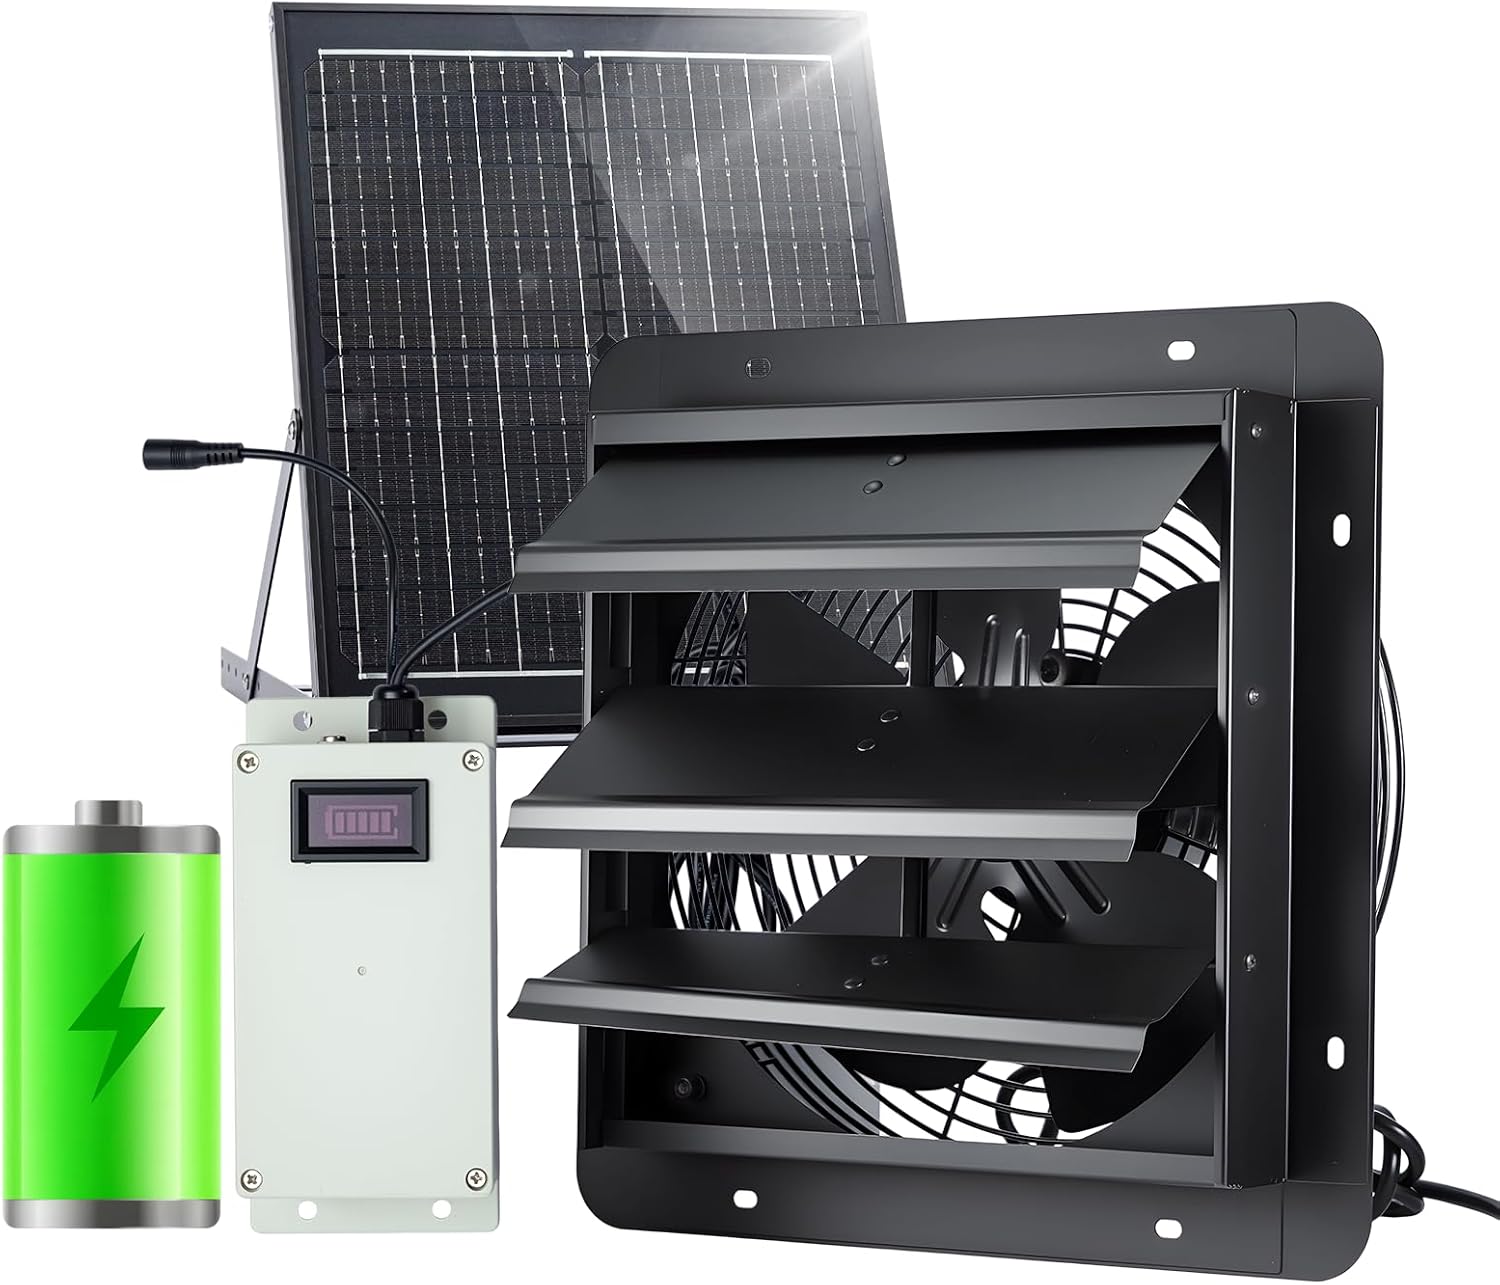
Image: Main components of the GROWNEER Solar Powered Exhaust Fan system.
Key Features:
- Smart Power Supply: Utilizes a solar-priority mode, directly powering the fan and charging the built-in 3200mAh high-capacity battery during ample sunlight. Automatically switches to battery power on cloudy days, at night, or in low-light conditions for continuous operation.
- Smart Control and Powerful Performance: Features a single-button control for easy switching between low, medium, and high fan speeds. Delivers up to 1200 CFM airflow and 1200 RPM speed, suitable for spaces up to 1400 square feet.
- Durable Design, Quiet Operation: Constructed from sturdy metal for rust and corrosion resistance, ensuring a lifespan exceeding 20,000 hours. Operates with noise levels between 40-60 dBA. Includes an automatic louver design that closes when the fan stops, preventing dust and backdraft.
- Easy Installation: Comes with a detailed installation kit and a template for precise hole placement. The solar panel mount features an adjustable angle (25°-75°) for optimized sunlight collection.
- Wide Range of Applications: Effective for heat dissipation and air circulation in greenhouses, hothouses, sunrooms, attics, garages, warehouses, work sheds, chicken coops, and pet houses.
2. Safety Instructions
Please read and understand all safety instructions before installing or operating the fan. Failure to follow these instructions may result in electric shock, fire, or serious injury.
- Ensure the power source matches the fan's voltage requirements (120 Volts AC).
- Disconnect power before performing any installation, maintenance, or cleaning.
- Mount the fan securely to a stable surface to prevent it from falling.
- Keep hands, hair, and loose clothing away from moving parts of the fan.
- Do not operate the fan with a damaged cord or plug.
- Avoid exposing electrical components to excessive moisture or direct water spray. The fan unit is waterproof, but connections should be protected.
- Install the solar panel in a location with maximum direct sunlight exposure, away from shading.
- Keep children and pets away from the fan during operation.
3. Package Contents
Verify that all items listed below are included in your package:

Image: Contents of the product package.
- 1x 12-inch Exhaust Fan Unit with Automatic Louvers
- 1x 30W Solar Panel with Adjustable Bracket
- 1x Control Box with Integrated Battery (3200mAh)
- 1x Power Adapter (AC)
- 1x Installation Template
- Mounting Hardware (screws, anchors, etc.)
- Instruction Manual
4. Setup and Installation
Follow these steps for proper installation of your GROWNEER Solar Powered Exhaust Fan.
4.1 Choosing a Location
- Fan Unit: Select a wall location that allows for effective air circulation and exhaust. Ensure there is sufficient space for the fan and its louvers to operate.
- Solar Panel: Choose a location that receives maximum direct sunlight throughout the day, free from obstructions like trees or buildings. The solar panel cable length is approximately 177.2 inches (4.5 meters) for flexible placement.
4.2 Fan Mounting
- Use the provided installation template to mark the precise hole placement on the wall.
- Cut the opening for the fan unit according to the template dimensions.
- Insert the fan unit into the opening and secure it using the provided mounting hardware. Ensure the fan is level and firmly attached.
4.3 Solar Panel Installation
- Mount the solar panel in your chosen sunny location using its adjustable bracket.
- Adjust the angle of the solar panel between 25° and 75° to optimize sunlight absorption based on your geographic location and season.

Image: Adjustable solar panel for optimized charging.
4.4 Wiring Connections
- Connect the solar panel cable to the designated input port on the control box.
- Alternatively, or for continuous power during low light, connect the provided AC power adapter to the same input port on the control box and plug it into a standard electrical outlet.
- Connect the fan unit cable to the output port on the control box.
The control box manages power distribution, prioritizing solar power and switching to battery or AC adapter as needed.
Video: Demonstrates the connection process for the solar panel, power adapter, and fan unit to the control box, followed by the fan's operation and automatic louver function.
5. Operating Instructions
The GROWNEER Solar Powered Exhaust Fan is designed for user-friendly operation.
5.1 Power Modes
- Solar-Priority Mode: When sufficient sunlight is available, the solar panel directly powers the fan and simultaneously charges the internal 3200mAh battery.
- Automatic Battery Backup: In low-light conditions, during cloudy weather, or at night, the system automatically switches to the internal battery to maintain fan operation.
- AC Adapter Option: The included power adapter can be used to provide continuous power, especially during prolonged periods of low sunlight or when the battery is depleted.

Image: Illustration of solar-priority and battery backup operation.
5.2 Speed Control
The control box features a single button to cycle through fan speeds and turn the unit off.
- Press the button once for Low speed.
- Press the button a second time for Medium speed.
- Press the button a third time for High speed.
- Press the button a fourth time to turn the fan OFF.

Image: Single-button control for fan speed adjustment.
5.3 Automatic Louvers
The fan unit is equipped with automatic gravity shutters. These louvers open when the fan is operating to allow airflow and close automatically when the fan is turned off. This mechanism helps prevent dust, debris, and backdraft from entering the ventilated space when the fan is inactive.
6. Maintenance
Regular maintenance ensures optimal performance and longevity of your fan system.
- Cleaning Fan Blades: Periodically inspect and clean the fan blades to remove any accumulated dust or debris. Ensure the fan is OFF and disconnected from power before cleaning. Use a soft cloth, slightly damp if necessary.
- Cleaning Solar Panel: Keep the surface of the solar panel clean from dirt, leaves, or snow to maximize sunlight absorption. Use a soft, damp cloth for cleaning.
- Check Connections: Annually inspect all electrical connections for tightness and signs of wear or corrosion.
- Louver Inspection: Ensure the automatic louvers open and close freely. Clean any obstructions that might hinder their movement.
7. Troubleshooting
If you encounter issues with your GROWNEER Solar Powered Exhaust Fan, refer to the table below for common problems and solutions.
| Problem | Possible Cause | Solution |
|---|---|---|
| Fan not operating | No sunlight, depleted battery, loose connection, fan switch off. | Ensure solar panel is in direct sunlight. Check battery charge level on control box. Verify all cables are securely connected. Turn fan ON via the control box button. Use AC adapter if needed. |
| Low airflow | Fan blades or louvers obstructed, low fan speed setting. | Clean fan blades and ensure louvers move freely. Increase fan speed setting on the control box. |
| Battery not charging | Insufficient sunlight, dirty solar panel, faulty connection. | Relocate solar panel to a sunnier spot. Clean solar panel surface. Check solar panel cable connection to the control box. |
| Excessive noise | Loose mounting, debris in fan blades. | Ensure fan is securely mounted. Turn off and inspect fan blades for debris; remove if found. |
8. Specifications
Technical specifications for the GROWNEER Solar Powered Exhaust Fan (Model AX242801004).

Image: Product dimensions for installation planning.
| Feature | Specification |
|---|---|
| Brand | GROWNEER |
| Model Name | AX242801004 |
| Electric Fan Design | Exhaust Fan |
| Power Source | Solar / AC Adapter |
| Style | 12 Inch with Solar Panel |
| Product Dimensions (Fan) | 10.83"W x 10.83"H x 6"D |
| Room Type | Attic, Bathroom, Bedroom, Garage, Study Room (suitable for various outdoor/utility spaces) |
| Special Feature | Adjustable Height (solar panel), Waterproof, Automatic Louvers |
| Recommended Uses | Air Circulation, Cooling, Exhausting, Ventilating |
| Noise Level | 40-60 Decibels |
| Wattage | 35 watts (Fan), 30 watts (Solar Panel) |
| Number of Blades | 5 |
| Air Flow Capacity | 1200 Cubic Feet Per Minute (CFM) |
| Speed | 1200 RPM |
| Voltage | 120 Volts (AC Adapter) |
| Switch Type | Push Button (on control box) |
| Included Components | Fan, Solar Panel, Control Box, Power Adapter, Mounting Hardware |
| Indoor/Outdoor Usage | Outdoor |
| Control Method | Push Button |
| Number of Power Levels | 3 (Low, Medium, High) |
| Installation Type | Wall Mount |
| Item Weight | 18.48 pounds |
| Date First Available | June 27, 2025 |
9. Warranty and Support
For warranty information or technical support, please refer to the contact details provided with your purchase or visit the official GROWNEER website. Keep your purchase receipt as proof of purchase for any warranty claims.
Online Support: Visit the GROWNEER Store on Amazon