This manual provides detailed instructions for the AILRINNI 4K Digital Camera, Model X9-M. Please read this manual carefully before using the camera to ensure proper operation and to maximize your photography experience. Keep this manual for future reference.
What's in the Box
AILRINNI X9-M Digital Camera Body
Rechargeable Battery (1 included)
64GB Memory Card
Data Cable
User Manual
Setup
1. Battery Installation and Charging
The camera uses a Lithium-Ion battery. Ensure the battery is fully charged before first use.
Open the battery compartment cover located on the bottom of the camera.
Insert the rechargeable battery, ensuring the correct polarity.
Close the battery compartment cover securely.
Connect the camera to a power source using the provided data cable to charge the battery. The charging indicator light will show the charging status.
2. Memory Card Installation
A 64GB memory card is included for storage.
Locate the memory card slot, usually on the side or bottom of the camera.
Insert the 64GB memory card into the slot until it clicks into place. Ensure it is inserted in the correct orientation.
To remove, gently push the card until it springs out.
3. Initial Power On
Press and hold the Power button (usually marked with ON/OFF or a power symbol) to turn on the camera. Follow any on-screen prompts for initial setup, such as setting the date and time.
Operating Instructions
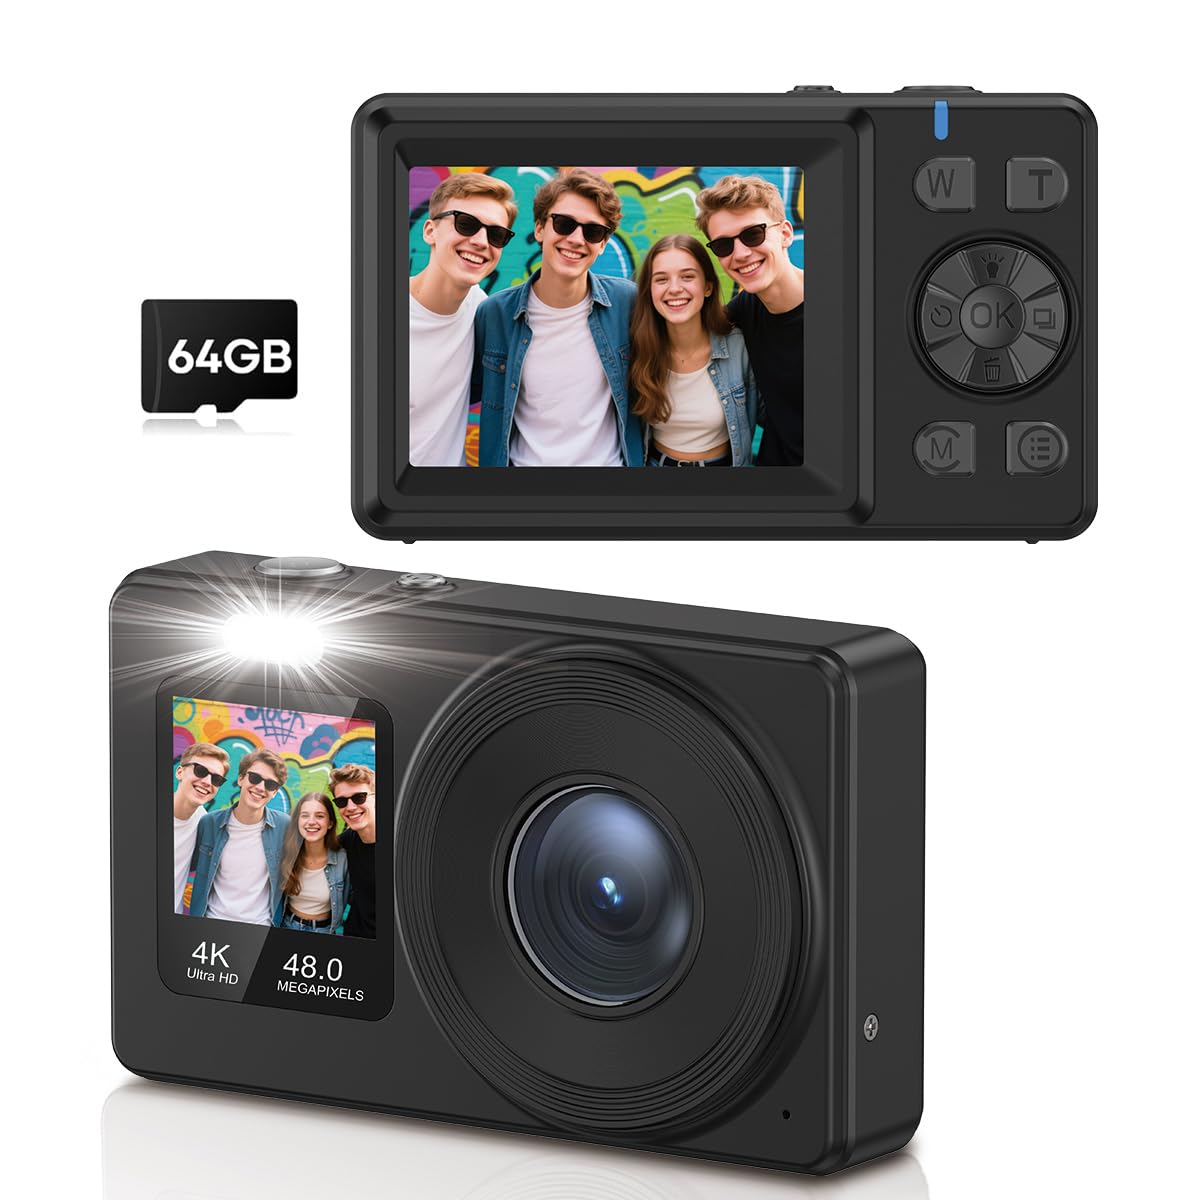
Camera Overview and Controls
Familiarize yourself with the camera's buttons and screens.
Image: Front and rear view of the AILRINNI X9-M camera, highlighting its compact design and control buttons.
Power Button: Turns the camera on/off.
Shutter Button: Takes photos or starts/stops video recording.
W/T Buttons: Control the 18x digital zoom (Wide/Telephoto).
OK Button: Confirms selections, also used to switch to selfie mode.
M (Mode) Button: Switches between different shooting modes (e.g., Photo, Video, Playback).
E (Settings) Button: Accesses camera settings and menu options.
1. Taking Photos (48MP)
The camera captures images at 48-megapixel resolution with autofocus.
Image: A user capturing a moment with the AILRINNI X9-M camera, highlighting its 4K video and 48MP photo capabilities.
Turn on the camera.
Ensure the camera is in Photo mode (check the display or press the M button).
Frame your shot using the 2.4-inch rear LCD screen.
The camera features one-touch autofocus. Press the Shutter button halfway down to focus, then press fully to capture the image.
2. Recording Videos (4K)
Record high-definition videos at 4K resolution (4320p).
Turn on the camera.
Switch to Video mode using the M button.
Press the Shutter button to start recording. A recording indicator will appear on the screen.
Press the Shutter button again to stop recording.
3. Using Dual Screens and Selfie Mode
The camera features a 2.4-inch rear screen and a 1.4-inch front screen for versatile shooting.
Image: The AILRINNI X9-M camera displaying its dual screen functionality, with a 2.4-inch rear screen and a 1.4-inch front screen.
Rear Screen (2.4-inch): Used for general framing, reviewing photos/videos, and accessing menus.
Front Screen (1.4-inch): Ideal for selfies and vlogging. To activate selfie mode, press and hold the OK button for 3 seconds. The front screen will activate, allowing you to frame yourself.
4. 18x Digital Zoom
Utilize the 18x digital zoom to capture distant subjects.
Image: Demonstrates the 18x digital zoom capability and various color filters (Regular, B&W, Red, Blue) available on the camera.
Use the W (Wide) and T (Telephoto) buttons to adjust the zoom level. Press T to zoom in and W to zoom out.
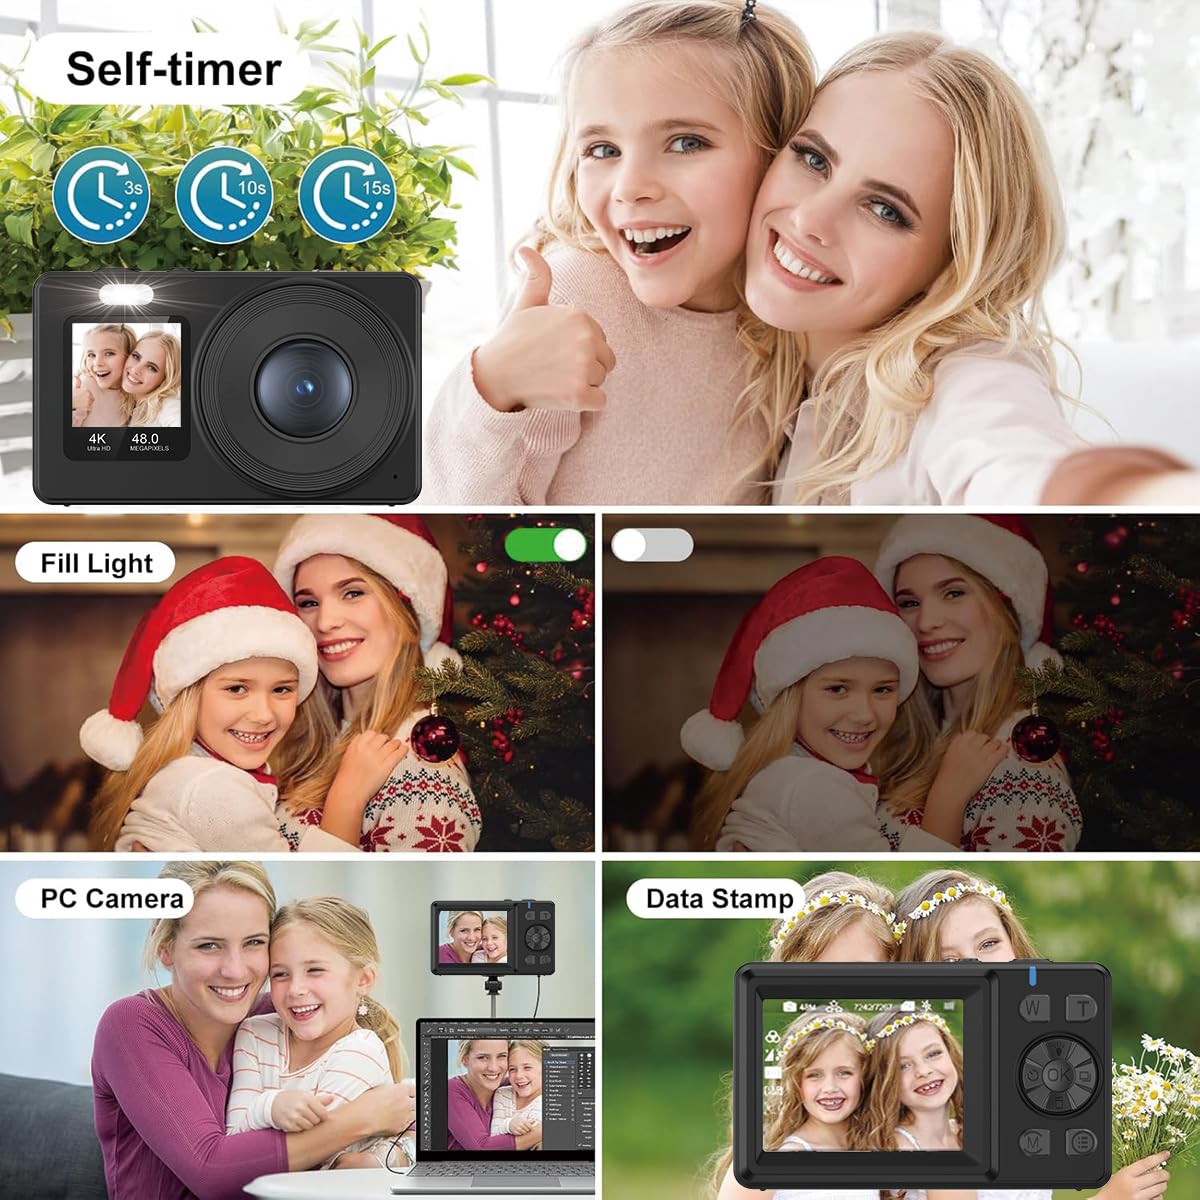
5. Advanced Features
Image: A collage illustrating key features: Self-timer (3s, 10s, 15s options), Fill Light activation, PC Camera function for live streams, and Data Stamp for adding date/time to photos.
Anti-shake and Auto-lighting: These technologies are built-in to ensure sharp photos and videos, even in challenging lighting conditions.
Auto-shutdown: The camera can be set to automatically power off after a period of inactivity to save battery. Adjust this setting in the menu.
Image Rotation: Rotate images during playback via the menu options.
Auto-shoot & Continuous Shooting: Access these modes through the menu for timed shots or rapid-fire sequences.
Special Effects: Apply various filters and effects to your photos (e.g., B&W, Red, Blue as shown in the zoom image).
Self-timer: Set a delay (e.g., 3s, 10s, 15s) before taking a photo, useful for group shots or selfies.
Fill Light: Activate the built-in fill light for better illumination in low-light conditions.
Data Stamp: Add date and time information directly onto your photos.
6. Webcam Function
The camera can function as a high-quality webcam for live streams and video calls.
Connect the camera to your computer using the provided data cable.
Select "PC Camera" or "Webcam Mode" on the camera's screen if prompted.
Your computer should recognize the camera as a webcam. Select it in your video conferencing or streaming software.
7. Transferring Files
Transfer photos and videos to your computer or smartphone using the data cable.
Connect the camera to your computer using the provided data cable.
Select "Mass Storage" or "Data Transfer" on the camera's screen if prompted.
The camera's memory card will appear as a removable drive on your computer. You can then copy files to your desired location.
Maintenance
Cleaning the Camera: Use a soft, dry cloth to clean the camera body. For the lens, use a specialized lens cleaning cloth and solution. Avoid harsh chemicals.
Battery Care: Store the battery in a cool, dry place when not in use. Do not expose to extreme temperatures. Recharge regularly even if not used for extended periods to maintain battery health.
Storage: Store the camera in a protective case or bag to prevent scratches and dust accumulation. Avoid storing in humid or dusty environments.
Troubleshooting
Problem
Possible Cause
Solution
Camera does not turn on.
Battery is depleted or incorrectly inserted.
Ensure battery is fully charged and correctly inserted.
Images are blurry.
Camera shake, incorrect focus, or dirty lens.
Hold camera steady, ensure autofocus is engaged, clean the lens. Check lighting conditions.
Memory card error.
Card not inserted correctly, card is full, or card is corrupted.
Reinsert the memory card. Delete unnecessary files or format the card (this will erase all data). Try a different memory card.
Cannot transfer files to computer.
Incorrect USB mode selected, faulty cable, or driver issue.
Ensure "Mass Storage" mode is selected on the camera. Try a different USB port or cable. Restart both camera and computer.
Specifications
Feature
Detail
Brand
AILRINNI
Model Name
X9-M
Photo Sensor Resolution
48 MP
Video Capture Resolution
4320p (4K)
Zoom
18x Digital Zoom
Rear Screen Size
2.4 Inches (LCD)
Front Screen Size
1.4 Inches
Memory Storage Capacity
64 GB (included)
Battery Type
Lithium Ion (1 included)
Autofocus
Yes
Image Stabilization
Optical
Webcam Function
Yes
Supported File Format
JPEG (for photos)
Has Self-Timer
Yes
Audio Recording
Yes
Network Connectivity Technology
Wi-Fi
Warranty and Support
For warranty information or technical support, please refer to the documentation included with your purchase or contact AILRINNI customer service. Keep your proof of purchase for warranty claims.
Ask a question about this manual
Ask about setup, troubleshooting, compatibility, parts, safety, or missing instructions. Manuals+ will review the question and use this page’s manual context to help answer it.