1. Introduction
Thank you for choosing the SINOPUREN OL122 9-Inch Thermal Laminator Machine. This versatile 3-in-1 device is designed for efficient and reliable lamination, featuring a built-in paper trimmer and corner rounder. It is suitable for preserving documents, photos, artwork, and more in home, office, and school environments. This manual provides essential information for safe and effective operation.


2. Safety Instructions
- Read all instructions before use.
- Keep the laminator away from water or wet environments.
- Do not touch the machine's hot surfaces during or immediately after operation.
- Unplug the laminator when not in use or before cleaning.
- Ensure proper ventilation around the machine during operation.
- Do not laminate items thicker than recommended pouch thickness (3mil or 5mil).
- Keep out of reach of children.
- It is normal to notice a slight odor during first use; this will fade and is non-toxic.
- Allow the machine to cool after 20 minutes of continuous use to prolong its life.
3. Package Contents
- SINOPUREN OL122 Thermal Laminator Machine
- Power Cord
- Built-in Paper Trimmer (integrated)
- Corner Rounder Tool
- Laminating Pouches (starter set)
- User Manual
4. Product Overview
The SINOPUREN OL122 laminator is designed for user-friendly operation and includes integrated tools for convenience.
Key Components:
- Power Switch: Located at the rear, controls ON/OFF.
- Power Indicator Light: Red light indicates power is on.
- Ready Indicator Light: Green light indicates the machine is warmed up and ready for lamination.
- Feed Slot: Front opening for inserting laminating pouches.
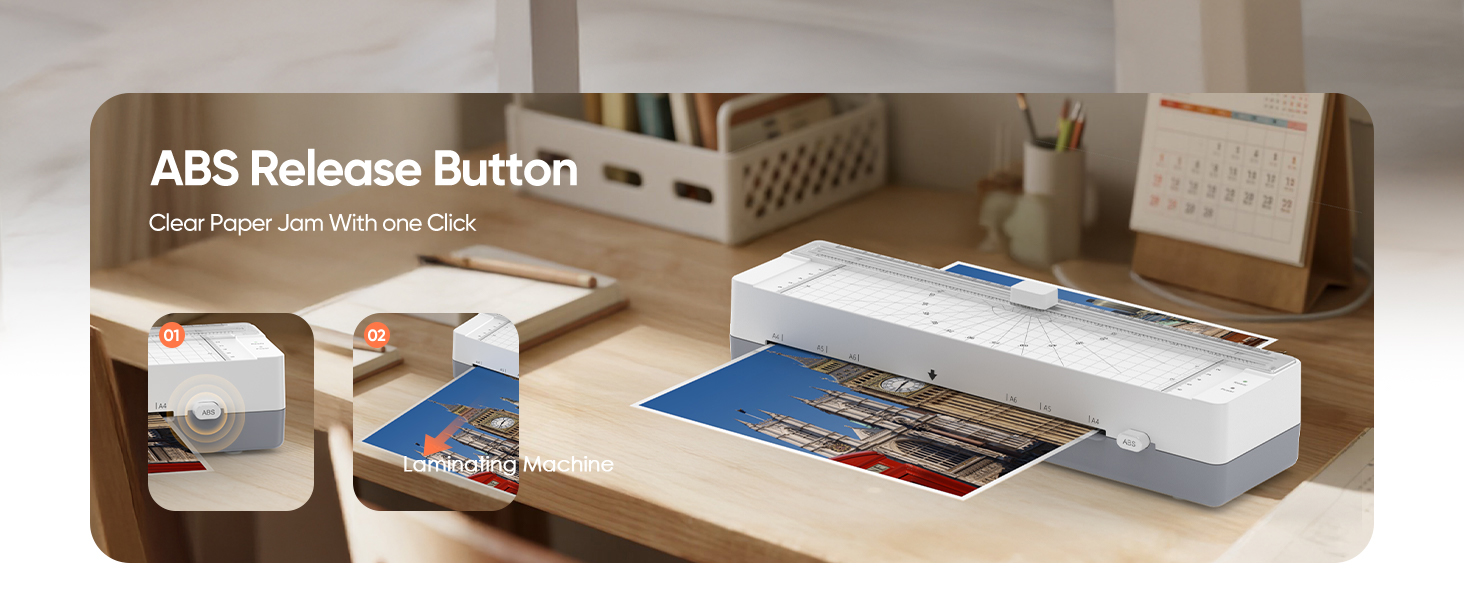
- ABS Release Button: Located near the feed slot, used to clear jammed pouches.
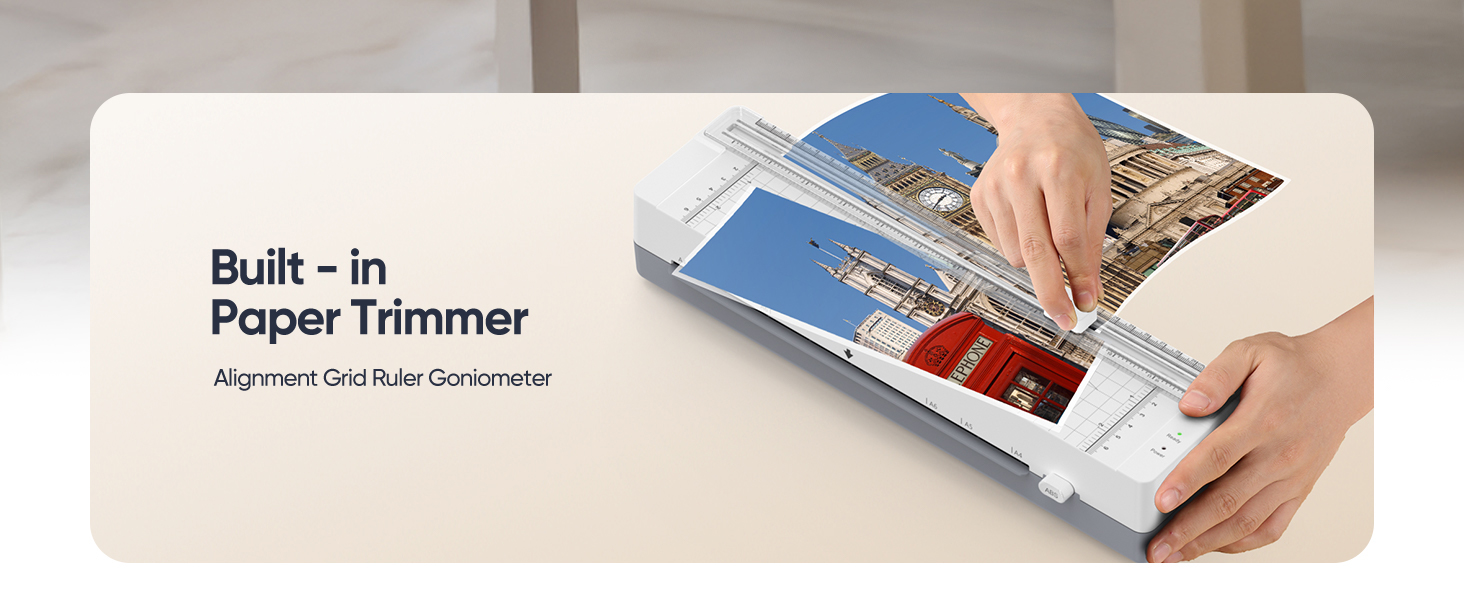
- Built-in Paper Trimmer: Integrated on top for straight cuts.
- Corner Rounder: Separate tool for rounding sharp corners of laminated documents.


5. Setup
- Place the laminator on a flat, stable surface.
- Ensure there is enough space behind the machine for laminated documents to exit freely.
- Plug the power cord into a standard electrical outlet.
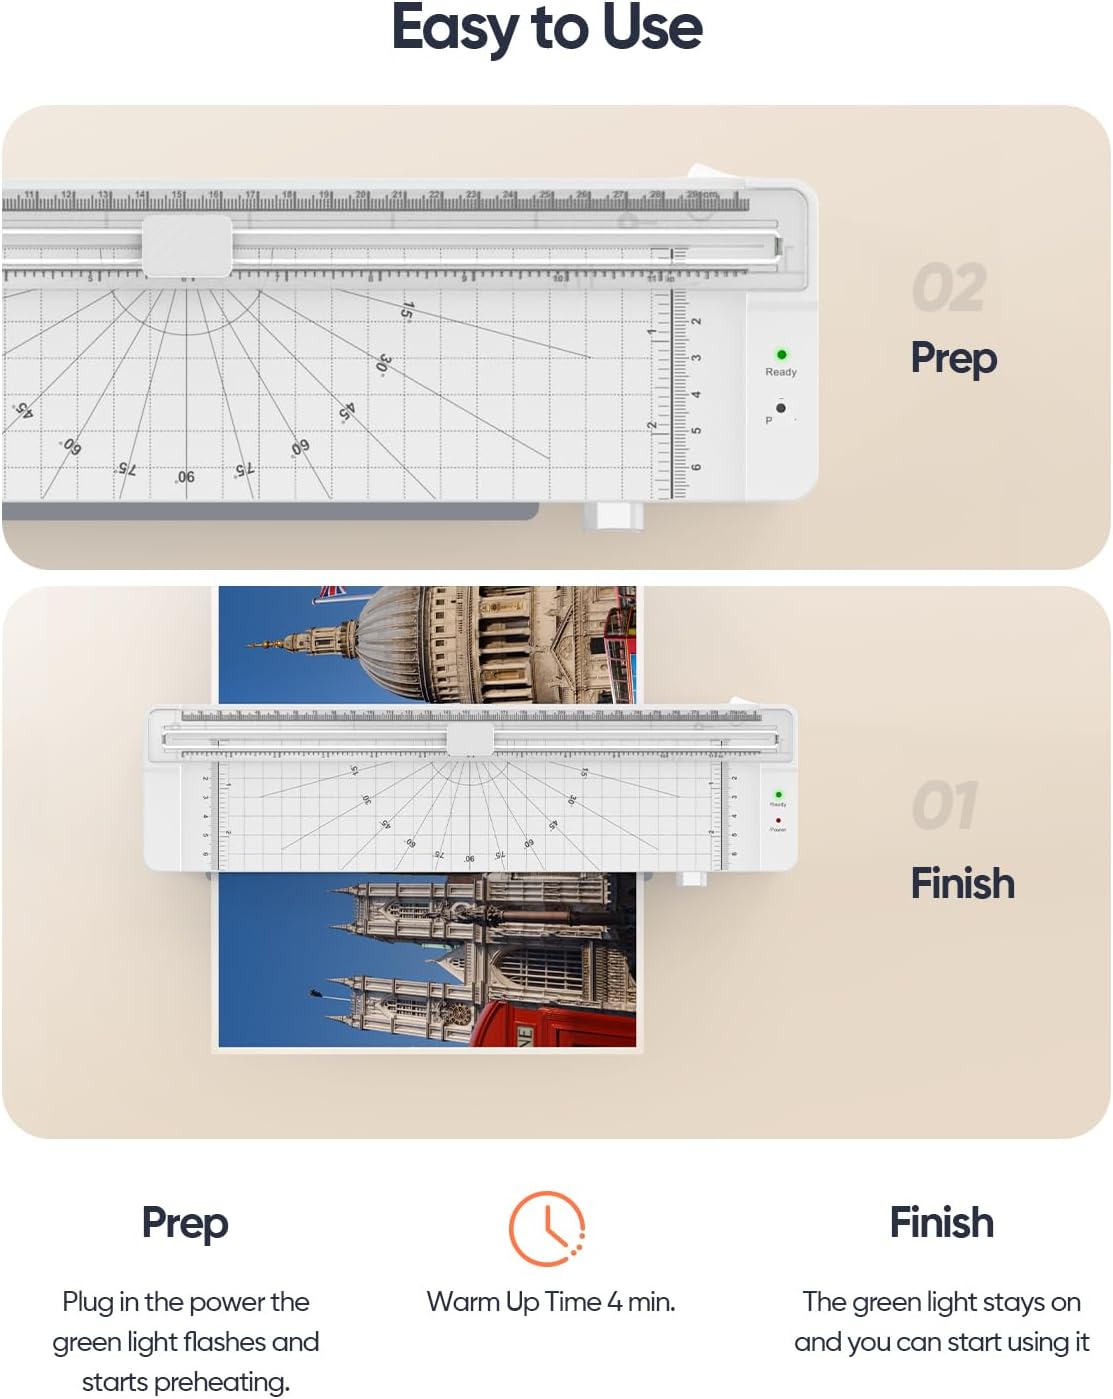
- Turn the power switch to the 'ON' position. The red 'Power' indicator light will illuminate.
- Wait approximately 4 minutes for the machine to warm up. The green 'Ready' indicator light will illuminate when it's ready for use.
6. Operating Instructions
Laminating a Document:
- Ensure the laminator is warmed up (green 'Ready' light is on).
- Place your document or photo inside a laminating pouch, ensuring it is centered and leaves a small border around the edges.
- Insert the sealed edge of the pouch into the laminator's feed slot first.
- The machine will automatically feed the pouch through. Do not pull or push the pouch during this process.
- Once the laminated document exits the rear, allow it to cool on a flat surface.

Using the Built-in Paper Trimmer:
- Place the laminated document under the trimmer guide.
- Align the edge you wish to trim with the cutting line.
- Press down on the cutting blade and slide it along the guide to make a clean cut.
Using the Corner Rounder:
- Take the separate corner rounder tool.
- Insert a corner of your laminated document into the slot of the corner rounder.
- Press down firmly to round the corner. Repeat for all desired corners.
Official Product Videos:
Video 6.1: A demonstration of the SINOPUREN OL122 laminator in action, showcasing its portable design and ease of use for various lamination tasks.
Video 6.2: An honest review and practical use demonstration of the laminator, highlighting its performance and features from a user's perspective.
Video 6.3: A closer look at the laminator, detailing its design, components, and how it functions during the lamination process.
Video 6.4: A personal review of the laminator, demonstrating its features and suitability for individual use and small projects.
Video 6.5: A demo and review of the laminator from the perspective of a mom and teacher, highlighting its practical applications in educational and home settings.
7. Tips & Usage Recommendations
- For standard paper, use 3 mil pouches.
- For thicker items like photos or cards, use 5 mil pouches.
- Always insert the sealed end of the pouch into the laminator first to avoid jams.
- Let the machine cool after 20 minutes of continuous use to prolong its life.
- The upgraded anti-jam system ensures smooth feeding and prevents pouch misalignment, reducing paper jams and protecting your important documents.
8. Maintenance
- Always unplug the laminator before cleaning.
- Wipe the exterior with a soft, dry cloth. Do not use abrasive cleaners or solvents.
- Regularly check the feed slot for any debris or adhesive residue.
- If a jam occurs, press the ABS release button and gently pull the pouch out.
9. Troubleshooting
- Machine not turning on: Ensure the power cord is securely plugged in and the power switch is in the 'ON' position. Check the power outlet.
- Green 'Ready' light not illuminating: Allow sufficient time (approx. 4 minutes) for warm-up. If it still doesn't light up, unplug and re-plug the machine.
- Pouch jamming: Press the ABS release button immediately. Gently pull the pouch out. Ensure the sealed edge is inserted first and the pouch is not too thick or misaligned.
- Poor lamination quality (bubbles, wrinkles): Ensure the machine is fully warmed up. Use appropriate pouch thickness (3mil for standard, 5mil for thicker items). Ensure the document is centered in the pouch.
10. Specifications
- Brand: SINOPUREN
- Model: OL122
- Item Weight: 1.83 pounds
- Product Dimensions: 13.58 x 3.74 x 3 inches
- Color: White
- Sheet Size Compatibility: Up to 9 inches (240mm) width, including 8.5 × 11 Inches (Letter Size), A4, A5, A6.
- Pouch Thickness: Compatible with 3mil and 5mil pouches.
- Warm-up Time: Approximately 4 minutes.
- Lamination Speed: 300mm/min.
- Features: 3-in-1 (Laminator, Built-in Paper Trimmer, Corner Rounder), Jam-Free System, NTC Temperature Control System.


11. Warranty & Support
For warranty information, technical support, or customer service inquiries, please refer to the contact details provided on the product packaging or visit the official SINOPUREN website. Keep your purchase receipt for warranty claims.