Pisichen HD-22INTS-NEW
Pisichen 22 Inch Touchscreen Monitor User Manual
Model: HD-22INTS-NEW
Introduction
This manual provides detailed instructions for the installation, operation, and maintenance of your Pisichen 22 Inch FHD 1080P Touchscreen Monitor. Please read this manual thoroughly before using the product to ensure proper functionality and to prevent damage.
Product Features
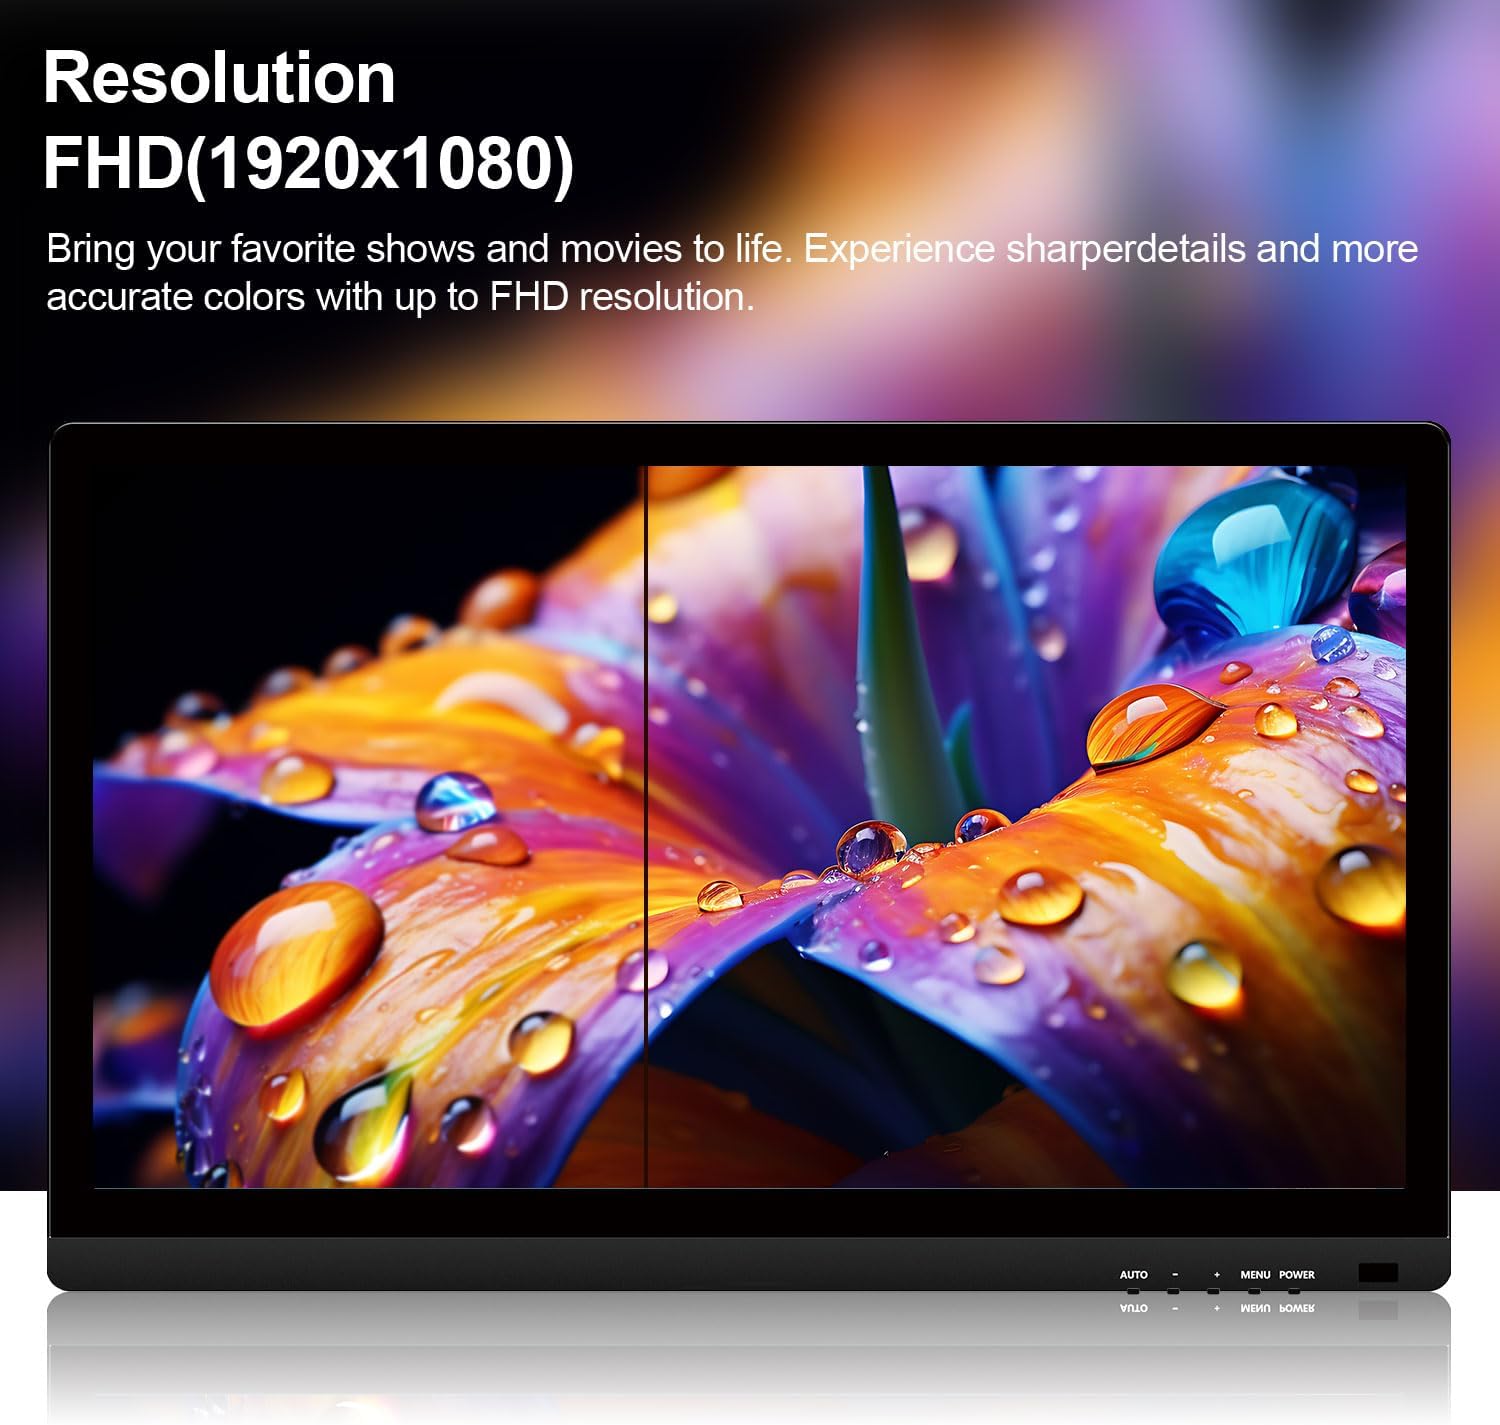
- 22-Inch Full HD (1920x1080P) Display: Provides crisp and detailed images with vibrant colors.
- 10-Point Capacitive Touch: Responsive multi-touch technology for intuitive interaction.
- Versatile Connectivity: Equipped with HDMI, VGA, and USB ports for broad compatibility.
- Built-in Speakers: Integrated audio for convenience.
- VESA Mount Compatible: Supports 75x75mm VESA mounting for flexible installation.
- Stable Stand: Designed to minimize wobbling during touch operation.
- Frameless Design: Modern aesthetic with narrow bezels.
Package Contents
Please verify that all items listed below are included in your package:
- Pisichen 22 Inch Touchscreen Monitor
- Power Adapter
- HDMI Cable
- VGA Cable
- USB-A to USB-B Cable (for touch functionality)
- User Manual

This image displays the 22-inch touchscreen monitor along with all the cables and power adapter necessary for its operation, including an HDMI cable, VGA cable, USB cable for touch, and the power supply.
Setup Instructions
1. Assembling the Stand
The monitor comes with a pre-attached stand designed for stability. Ensure the monitor is placed on a flat, stable surface. The stand is fixed and offers limited adjustability for angle. For enhanced stability during touch use, the stand is securely fastened.

This image illustrates the robust design of the monitor's stand, engineered to provide stability and prevent wobbling during touch interactions. It shows the base and the connection point to the monitor.
2. VESA Wall Mounting (Optional)
The monitor supports VESA 75x75mm mounting standards. This allows for installation on compatible wall mounts or adjustable arms (sold separately). To mount the monitor, remove the stand (if detachable) and secure the monitor to the VESA mount using appropriate screws.

This image provides a rear view of the monitor, clearly indicating the VESA 75x75mm mounting pattern for wall or arm installation. It also shows the overall dimensions of the monitor.
3. Connecting Cables
Connect the necessary cables to the corresponding ports on the back of the monitor and your computer:
- Power: Connect the power adapter to the DC port on the monitor and then to a power outlet.
- Video Input:
- For HDMI connection: Connect one end of the HDMI cable to the monitor's HDMI port and the other end to your computer's HDMI output.
- For VGA connection: Connect one end of the VGA cable to the monitor's VGA port and the other end to your computer's VGA output.
- Touch Functionality: To enable touch input, connect the USB-A to USB-B cable from the monitor's USB port to an available USB port on your computer.
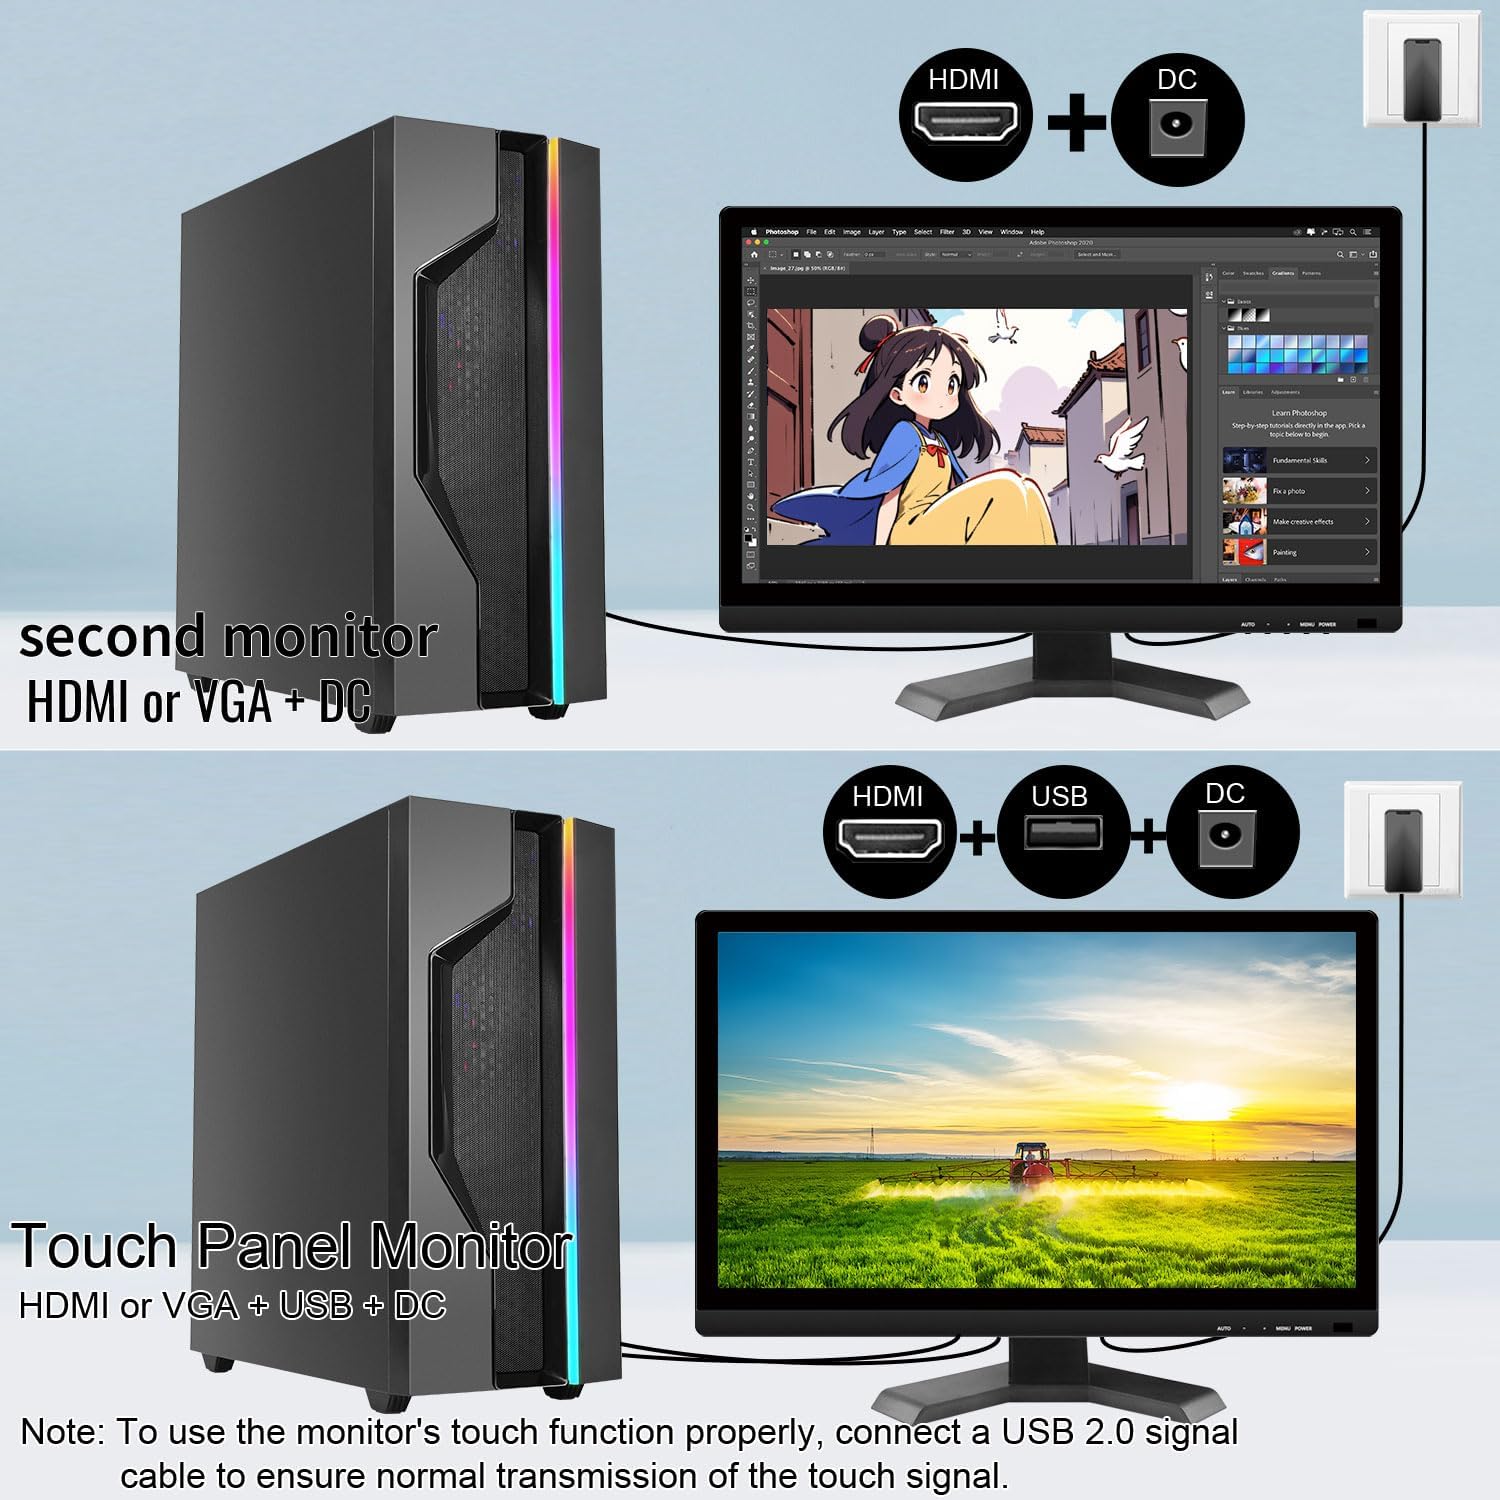
This diagram illustrates the required cable connections for the monitor. It shows the HDMI, VGA, USB, and DC power ports, and how they connect to a computer to enable both display and touch functions.

This image highlights the different input and output ports available on the monitor, including HDMI, VGA, DC power input, and a USB port for touch functionality.
Operating Instructions
1. Power On/Off
Press the POWER button located on the bottom right of the monitor to turn it on or off. The power indicator light will illuminate when the monitor is active.
2. On-Screen Display (OSD) Menu
Use the buttons on the bottom right of the monitor to navigate and adjust settings:
- MENU: Opens the OSD menu.
- +: Navigates up or increases values.
- -: Navigates down or decreases values.
- AUTO: Automatically adjusts image settings (for VGA input).
Common OSD settings include brightness, contrast, color temperature, and input source selection.
3. Touch Functionality
Once the USB cable is connected to your computer, the monitor's 10-point multi-touch function will be active. This allows for gestures such as tapping, swiping, pinching to zoom, and two-handed operations, similar to a tablet or smartphone.

This image demonstrates the monitor's multi-touch capability, showing two individuals simultaneously interacting with the screen, highlighting its responsiveness and support for multiple touch signals.
This image illustrates the convenience of the touchscreen, showing a user interacting directly with the display for tasks like zooming, eliminating the need for a traditional mouse and keyboard in certain applications.
4. Built-in Speakers
The monitor includes built-in speakers for audio output. Audio will be routed through HDMI or VGA (if supported by your system) and can be controlled via your computer's volume settings or the monitor's OSD menu.
Applications and Use Cases
The Pisichen touchscreen monitor is designed for various environments and applications:
- Retail & Catering Systems: Ideal for point-of-sale (POS) systems and ordering machines, enabling fast and interactive transactions.
- Vertical Screen Office: Suitable for displaying code, documents, or data in a vertical orientation, reducing the need for scrolling.
- Self-service Terminals: Perfect for bank ATMs, hospital registration, and airport check-in, allowing users to complete tasks independently.
- Warehousing and Logistics Management: Facilitates inventory inquiry and goods sorting with quick touch responses.
- Production Line Console: Used for real-time monitoring and adjusting production parameters directly on the screen.

This image depicts the monitor being used as a POS system in a retail setting, demonstrating its utility for interactive ordering and checkout processes.

This image shows the monitor configured in a vertical orientation, suitable for tasks like programming or document review, allowing more content to be viewed without scrolling.
Maintenance
To ensure the longevity and optimal performance of your monitor, follow these maintenance guidelines:
- Cleaning the Screen: Gently wipe the screen with a soft, lint-free cloth. For stubborn smudges, slightly dampen the cloth with water or a screen-safe cleaning solution. Avoid harsh chemicals or abrasive materials.
- Cleaning the Casing: Use a soft, dry cloth to clean the monitor casing.
- Ventilation: Ensure the monitor's ventilation openings are clear and not obstructed to prevent overheating.
- Storage: When not in use for extended periods, store the monitor in a cool, dry place, away from direct sunlight and extreme temperatures.
Troubleshooting
If you encounter issues with your Pisichen touchscreen monitor, refer to the following common solutions:
No Display / Power Issue
- Ensure the power adapter is securely connected to both the monitor and a working power outlet.
- Check if the power indicator light on the monitor is on. If not, press the POWER button.
- Verify that the video cable (HDMI or VGA) is correctly connected to both the monitor and your computer.
- Try connecting the monitor to a different power outlet or using a different power cable if available.
Touch Function Not Working
- USB Connection: Ensure the USB-A to USB-B cable is securely connected from the monitor's USB port to your computer's USB port. The touch function requires this dedicated USB connection in addition to the video cable.
- Driver Installation: For Windows operating systems, the touch functionality is typically plug-and-play. If issues persist, check your computer's Device Manager for any unrecognized devices or update USB drivers.
- Windows Calibration: If touching the display moves the cursor incorrectly, go to Control Panel > Hardware and Sound > Tablet PC Settings. Select this touchscreen monitor when prompted and follow the calibration instructions.
- macOS Compatibility: Due to macOS system restrictions, the touch function of this monitor will not work after connecting to a MacBook or other Apple devices.
- Unsupported Devices: Some devices, including PS3/4/5, Switch, Xbox, Steam Deck, TV stick, TV cube, and certain Apple products, do not support touch functionality with this monitor due to platform-specific restrictions.

This image presents a list of frequently asked questions, providing quick answers to common concerns regarding touch connectivity, cursor behavior, stand adjustability, and compatibility with macOS.

This image visually lists devices such as PlayStation consoles, Xbox, Nintendo Switch, and Steam Deck, indicating that their platforms do not support the touch functionality of this monitor.
Wobbly Stand
- Ensure the monitor is placed on a completely flat and stable surface.
- While the stand is designed for stability, excessive force during touch interaction may cause slight movement. Use gentle and controlled touches.
- If wobbling is significant, consider VESA mounting the monitor to a more rigid arm or wall mount.
Specifications
| Feature | Specification |
|---|---|
| Brand | Pisichen |
| Model Number | HD-22INTS-NEW |
| Screen Size | 22 Inches |
| Resolution | FHD 1080p (1920 x 1080 Pixels) |
| Aspect Ratio | 16:9 |
| Screen Finish | Glossy |
| Contrast Ratio | 800:1 |
| Refresh Rate | 60 Hz |
| Display Type | LED |
| Brightness | 250 Lux |
| Response Time | 5 Milliseconds |
| Connectivity Technology | HDMI, VGA, USB (for touch) |
| Hardware Connectivity | HDMI, USB 2.0 Type B, VGA |
| Additional Features | Built-In Speakers, Frameless, Touchscreen |
| Product Dimensions (D x W x H) | 2 x 52 x 38 Centimetres (approx. 1.98 x 51.82 x 37.85 cm) |
| Item Weight | 4.08 kg |
| VESA Compatibility | 75x75mm |
| Country of Origin | China |
Warranty Information
This product comes with a limited warranty. For specific details regarding the warranty period and coverage, please refer to the warranty card included in your product packaging or contact customer support. The warranty description in the product specifications indicates a period of "1", which typically refers to one year from the date of purchase.
Customer Support
If you experience any problems that are not listed in this manual or require further assistance, please contact our customer service team. When contacting support, please provide a detailed description of the issue, including any relevant pictures or videos, to help our technical team identify and resolve the problem efficiently.
Customer Service Email: support_2308@163.com
You may also contact us via the Amazon platform for support.
Ask a question about this manual
Ask about setup, troubleshooting, compatibility, parts, safety, or missing instructions. Manuals+ will review the question and use this page’s manual context to help answer it.