WAVLINK XQAMJP-39PD1-US
WAVLINK 13-In-1 USB C Universal Docking Station User Manual
Model: XQAMJP-39PD1-US
Introduction
The WAVLINK 13-In-1 USB C Universal Docking Station is designed to expand the connectivity of your laptop or desktop computer, providing a comprehensive solution for multiple displays, power delivery, and various peripheral connections. This docking station is compatible with both Windows and Mac OS systems, offering versatility for your workspace.
Key features include triple display support (up to 4K HDMI, 2K HDMI, and 2K DVI), 65W upstream power delivery to your host device, multiple high-speed USB-A and USB-C ports, Gigabit Ethernet, and audio/microphone jacks. It aims to streamline your setup and enhance productivity.
Package Contents
Please verify that all items are present in your package:
- 1 x Universal Docking Station
- 1 x 20V/5A 100W Power Adapter
- 1 x USB C-C Cable
- 1 x USB-A Cable
- 1 x DVI-VGA Adapter
- 1 x Quick Start Guide
- 1 x Driver Download Link Card

The image displays the WAVLINK docking station along with its power adapter, USB-C to C cable, USB-A to C cable, and a DVI to VGA adapter, which are all included in the package.
Product Overview (Ports)
The docking station features a variety of ports to connect your devices. Familiarize yourself with the port layout for optimal use.

This diagram illustrates the front and rear ports of the WAVLINK docking station, including USB-C, USB-A, RJ45 Ethernet, HDMI, DisplayPort, DVI, 4-pole audio jack, DC power input, and a lock hole.
- Front Panel:
- LED Indicator (Blue): Indicates power status.
- 2x USB-C 3.0 (5Gbps): For connecting USB-C peripherals.
- 1x USB-A 3.0 (5Gbps): For connecting USB-A peripherals.
- 4-Pole Audio Jack: For headphones or headsets with microphone functionality.
- Rear Panel:
- 2x USB-A 3.0 (5Gbps): For connecting USB-A peripherals.
- RJ45 Ethernet (1000/100/10Mbps): For wired network connection.
- Display 1 (HDMI/DP): Video output port.
- Display 2 (HDMI/DP): Video output port.
- DVI Port: Video output port.
- USB-C Host (PD100W): Connects to your laptop for data and power delivery.
- DC IN (20V): Power input for the docking station.
- Lock Hole: For security locking mechanisms.
Setup Instructions
Follow these steps to set up your WAVLINK Universal Docking Station:
- Connect Power: Connect the included 100W power adapter to the 'DC IN' port on the docking station and then plug it into a power outlet. The blue LED indicator on the front will light up.
- Connect to Host Device: Use the provided USB C-C cable or USB-A cable to connect the 'USB-C Host' port on the docking station to a compatible USB-C or USB-A port on your laptop or desktop computer.
- Install Drivers: For optimal performance and multi-display functionality, especially for DisplayLink-enabled displays, you may need to install the latest DisplayLink drivers. Refer to the 'Driver Download Link Card' included in your package or visit the official WAVLINK support website to download the appropriate drivers for your operating system (Windows or Mac OS).

This image highlights the universal compatibility of the docking station with systems like Android, Ubuntu, Chrome OS, Mac OS, and Windows, and lists compatible devices such as MacBook Pro/Air, Lenovo Yoga, Windows XPS, HP Spectre, Asus ZenBook, and Microsoft Surface. It also emphasizes the importance of installing the latest DisplayLink driver for optimal performance.
- Connect Displays: Connect your external monitors to the HDMI, DisplayPort, or DVI ports on the docking station using appropriate cables. If using a VGA monitor, utilize the included DVI-VGA adapter.
- Connect Peripherals: Plug in your USB devices (keyboard, mouse, external hard drives, etc.) into the available USB-A and USB-C ports. Connect an Ethernet cable to the RJ45 port for a wired network connection. Connect headphones or speakers to the 4-pole audio jack.
Operating Instructions
Display Modes
The docking station supports various display configurations, including extended and mirror modes across multiple monitors.
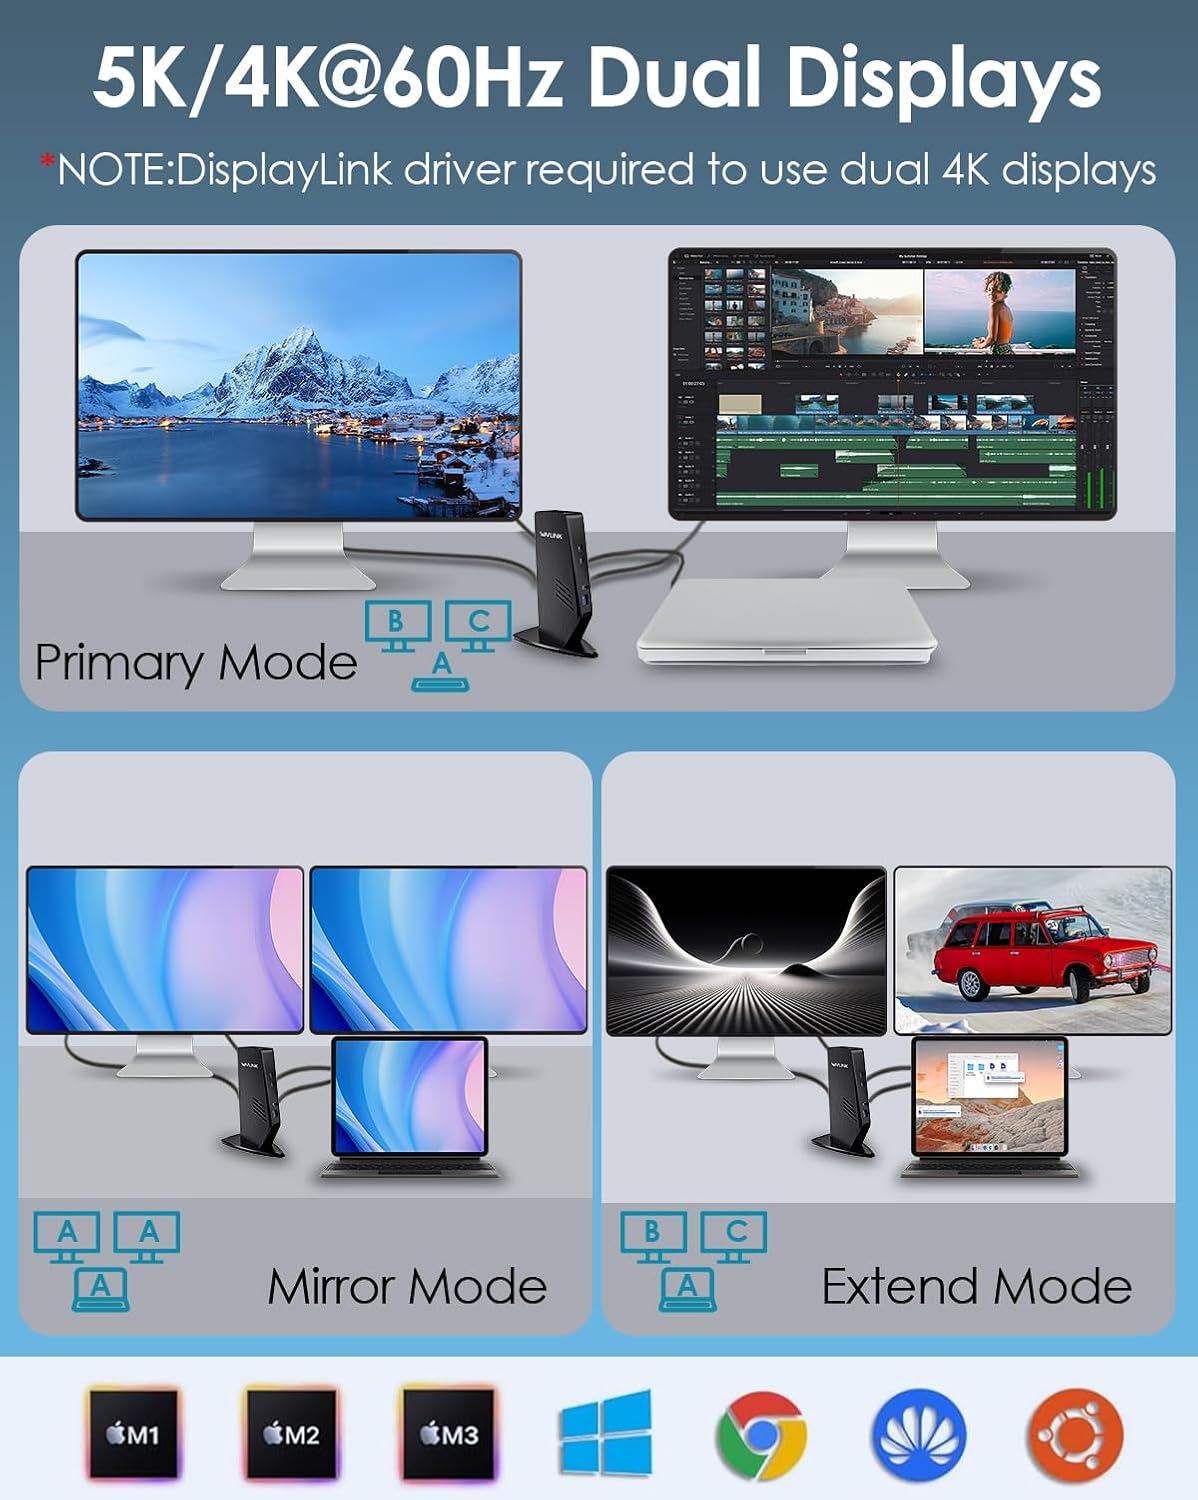
This image demonstrates how to configure your displays in Primary, Mirror, and Extend modes using the docking station, showing a laptop connected to one or more external monitors.
- Triple Display: Connect up to three external monitors simultaneously. One HDMI output via USB-C Alt Mode supports up to 3840x2160@30Hz. The other HDMI and DVI outputs via DisplayLink support up to 2560x1440@50Hz and 2048x1152@60Hz respectively.
- Extended Mode: Each connected monitor can display different content, expanding your desktop workspace.
- Mirror Mode: All connected monitors display the same content as your primary screen.
For 4K dual display setups, ensure the DisplayLink driver is installed.
Power Delivery
The docking station provides power to your host laptop while connected.

This image illustrates the power delivery capability of the docking station, showing a laptop receiving up to 65W of power from the docking station, which is powered by a 100W adapter.
- The included 100W power adapter allows the docking station to deliver up to 65W of power to your connected laptop via the USB-C host port. This ensures your laptop remains charged while in use.
- Ensure your laptop's USB-C port supports Power Delivery (PD) for this feature to function.
Data Transfer
Utilize the high-speed USB ports for quick data transfers.
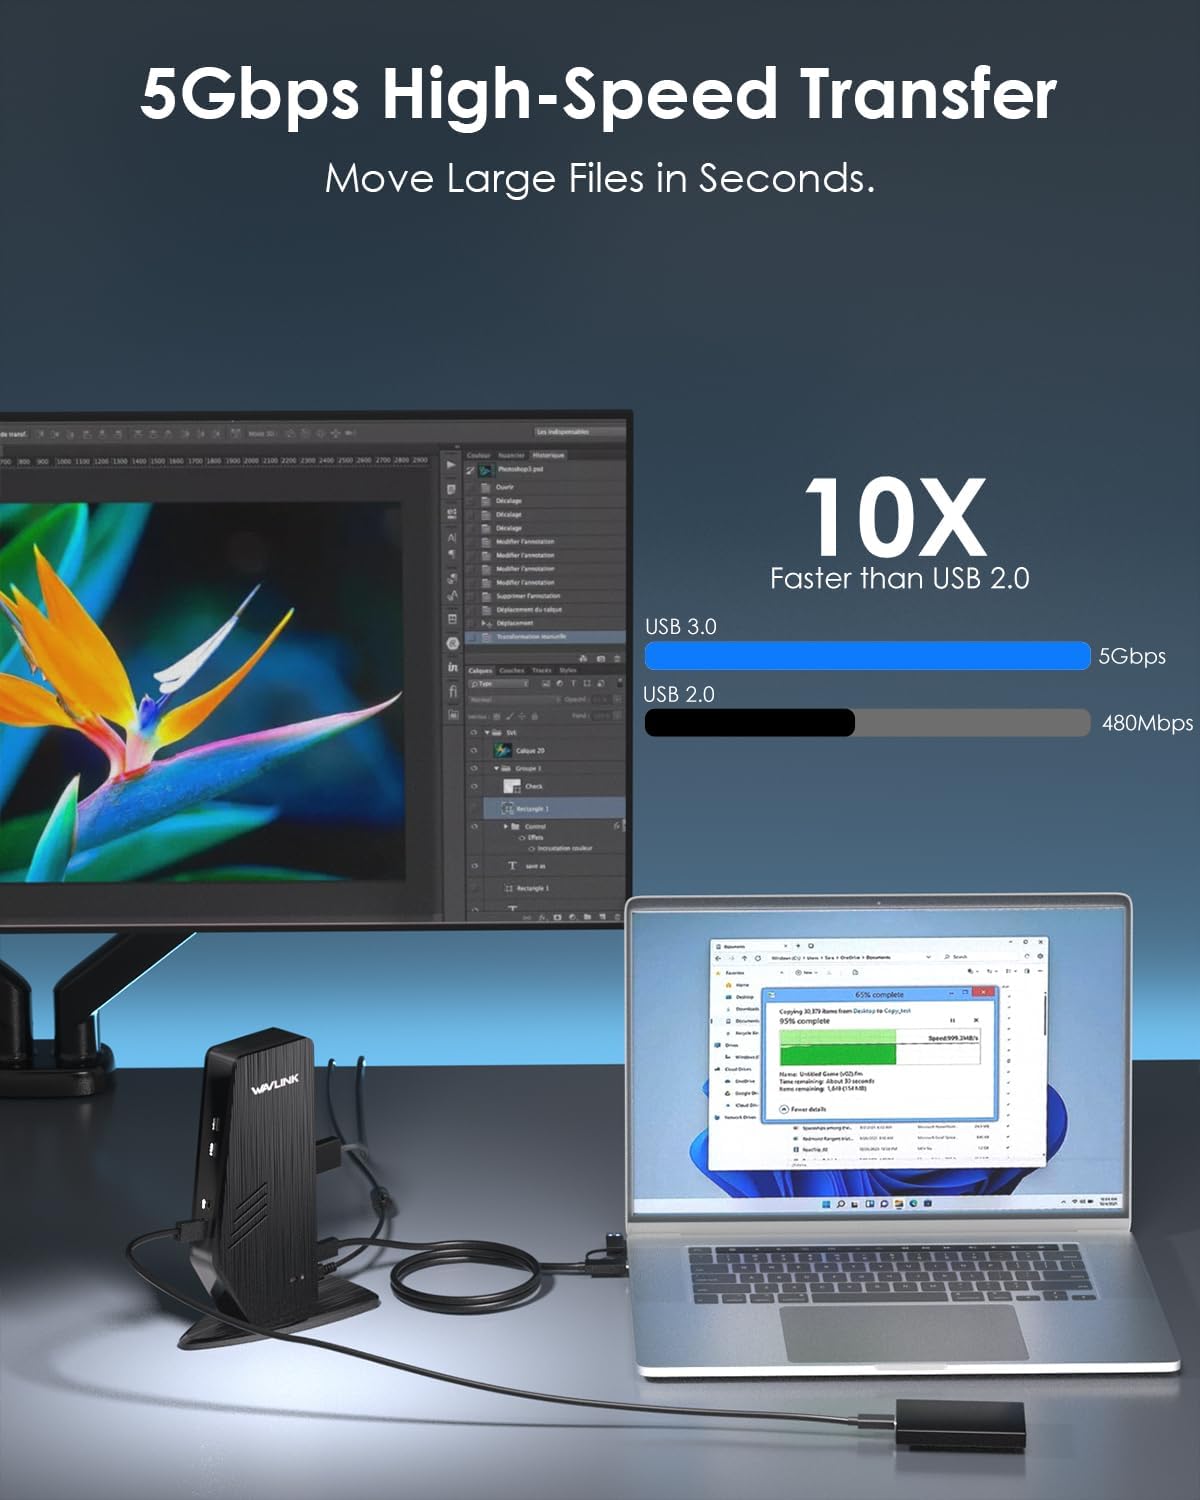
This image visually represents the high-speed data transfer capabilities of the docking station, comparing USB 3.0 (5Gbps) which is 10 times faster than USB 2.0 (480Mbps), and shows a file transfer in progress.
- The 4x USB-A 3.0 ports and 2x USB-C 3.0 ports support data transfer speeds of up to 5Gbps, allowing for rapid transfer of large files.
- One of the USB 3.0 ports also supports BC 1.2 for fast charging of smartphones and other compatible devices.
Network Connection
The Gigabit Ethernet port provides a stable and fast wired internet connection.
- Connect an Ethernet cable from your router or modem to the RJ45 port on the docking station for speeds up to 1000Mbps.
Audio Connection
Use the 4-pole audio jack for audio input and output.
- Plug in your headphones, speakers, or headset (with microphone) into the 4-pole audio jack for integrated audio functionality.
Maintenance
To ensure the longevity and optimal performance of your docking station, follow these maintenance guidelines:
- Cleaning: Use a soft, dry cloth to clean the exterior of the docking station. Avoid using liquid cleaners, aerosols, or solvents.
- Environment: Keep the docking station in a cool, dry place away from direct sunlight, heat sources, and excessive moisture.
- Handling: Avoid dropping or subjecting the device to strong impacts. Do not attempt to disassemble or repair the unit yourself, as this will void the warranty.
- Cable Management: Ensure cables are not kinked or strained, which can lead to damage over time.
Troubleshooting
If you encounter issues with your docking station, refer to the following common problems and solutions:
| Problem | Possible Solution |
|---|---|
| No display on external monitor(s) |
|
| Laptop is not charging |
|
| USB devices are not recognized |
|
| No internet connection via Ethernet |
|
| Audio is not working |
|
Specifications
| Brand | WAVLINK |
| Model | XQAMJP-39PD1-US |
| Color | Black |
| Hardware Interface | USB |
| Compatible Devices | PC (Windows, Mac OS, Chrome OS, Ubuntu, Android) |
| Total Ports | 13 |
| USB Ports | 4x USB-A 3.0 (5Gbps), 2x USB-C 3.0 (5Gbps) |
| Video Output | 1x HDMI (4K@30Hz via USB-C Alt Mode), 1x HDMI (2K@50Hz via DisplayLink), 1x DVI (2K@60Hz via DisplayLink) |
| Ethernet | Gigabit (10/100/1000Mbps) |
| Audio | 1x 4-Pole Audio Jack (Audio In/Out) |
| Power Delivery | Up to 65W to host laptop (via USB-C Host port) |
| Power Adapter | 20V/5A (100W) |
| Product Dimensions (L x W x H) | 14.7 x 8 x 19 cm |
| Product Weight | 1.32 kg |
Warranty Information
This WAVLINK product comes with a one-year warranty from the date of purchase. Please retain your proof of purchase for warranty claims.
Support
For technical support, troubleshooting assistance, or any inquiries regarding your WAVLINK 13-In-1 USB C Universal Docking Station, please contact WAVLINK customer service. Refer to the contact information provided in your Quick Start Guide or visit the official WAVLINK support website.