Introduction
This manual provides comprehensive instructions for the assembly, operation, and maintenance of your CubiCubi 75-inch Computer Desk. Please read this manual thoroughly before assembly and use to ensure proper setup and safe operation. Keep this manual for future reference.
Safety Information
- Ensure all parts are present and undamaged before beginning assembly.
- Assemble the desk on a soft, clean surface to prevent scratches.
- Do not overtighten screws during assembly to avoid damaging components.
- Keep small parts and packaging materials away from children and pets.
- Do not exceed the maximum weight capacity of the desk surfaces and shelves.
- Ensure the desk is placed on a level surface to prevent instability.
- For electrical components (LED lights, power outlet), ensure proper grounding and avoid liquid contact.
Package Contents
Before assembly, verify that all components listed below are included in your package:
- Desk Panels (Main desktop, monitor shelf, side shelves, drawer panels)
- Metal Frame Components (Legs, support bars)
- Hardware Kit (Screws, bolts, nuts, Allen wrench)
- Power Outlet Unit with LED Light Strip
- Fabric Drawers (1 regular, 1 large file cabinet)
- Adjustable Shelf Pegs
- Instruction Manual (This document)

Figure 1: Detailed size map of the CubiCubi 75-inch Computer Desk, showing overall dimensions and component measurements for planning your space.
Assembly Instructions
Follow these steps carefully for proper assembly. It is recommended to have two people for certain steps.
Step 1: Frame Assembly
- Unpack all components and lay them out on a clean, soft surface.
- Identify the main desk frame components (legs and horizontal bars).
- Attach the horizontal support bars to the vertical legs using the provided screws. Do not fully tighten yet.
- Assemble the L-shaped frame, ensuring all connections are aligned.

Figure 2: Illustration of the initial frame assembly, showing the connection points for the metal legs and support bars.
Step 2: Attaching Desk Panels
- Carefully place the main desktop panels onto the assembled frame.
- Secure the desktop panels to the frame using the designated screws. Now, fully tighten all screws from Step 1 and Step 2.
- Attach the monitor shelf to its designated position on the main desktop.

Figure 3: Overview of the fully assembled desk, illustrating the placement of the main desktop, monitor shelf, and side storage units.
Step 3: Installing Storage Shelves and Drawers
- Assemble the side storage units according to the diagrams.
- Insert the adjustable shelf pegs into the desired holes for the side shelves. Place the shelves onto the pegs.
- Assemble the fabric drawers. The desk includes one regular storage drawer and one large file cabinet drawer.
- Slide the assembled drawers into their respective compartments.

Figure 4: Close-up view of the two fabric storage drawers, including one large file cabinet, demonstrating their capacity for various document sizes.
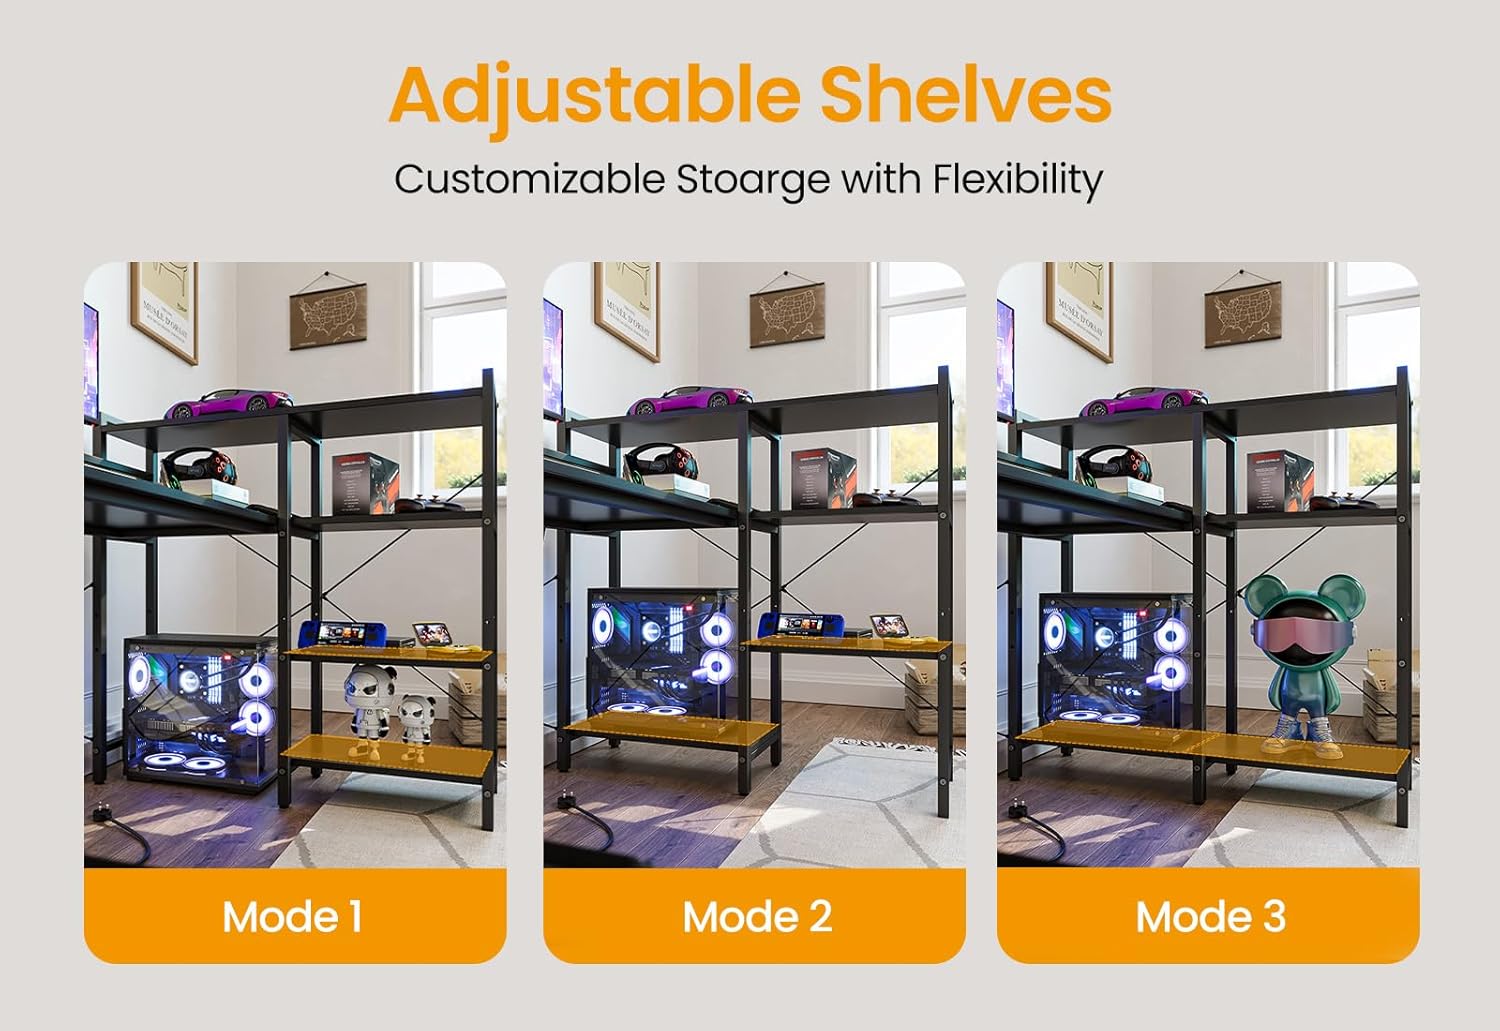
Figure 5: Depiction of the adjustable shelves, illustrating three different height configurations (Mode 1, Mode 2, Mode 3) for customizable storage.
Step 4: Power Outlet and LED Light Installation
- Carefully insert the integrated power outlet unit into the designated cutout on the desktop.
- Connect the LED light strip to the power outlet unit, ensuring it is securely attached under the monitor shelf.
- Plug the desk's power cord into a standard wall outlet.

Figure 6: Detailed view of the integrated power outlets, including 3 AC outlets and 2 USB ports, with a phone and smartwatch charging.

Figure 7: The desk illuminated by RGB LED lights, showcasing a purple hue and highlighting the ambient lighting feature.
Reversible Design
The CubiCubi 75-inch Computer Desk features a reversible design, allowing you to configure the L-shape with the longer side on either the left or right, adapting to your room layout. This flexibility is determined during the initial frame assembly (Step 1).

Figure 8: Illustration of the reversible design, showing two possible configurations of the L-shaped desk to fit different room layouts.
Operating Instructions
Using the Power Outlet
The integrated power outlet provides convenient access to power for your devices. It includes:
- 3 AC Outlets: 125V/12A for standard electronics.
- 2 USB Ports: 5V/2.1A for charging mobile devices.
Simply plug your devices into the appropriate outlets. Ensure the desk's main power cord is connected to a live wall outlet.
Controlling the LED Lights
The LED light strip offers customizable lighting for your workspace. Control options typically include:
- Color Selection: Choose from 7 color variations.
- Color Modes: Select from 7 different lighting modes, including a music sync mode.
- Brightness Adjustment: Adjust the intensity of the lights.
- Control Methods: Typically controlled via a remote control or a dedicated mobile application. Refer to the specific LED light controller instructions for detailed usage.
Adjusting Shelves
The side storage unit features adjustable shelves. To change the shelf height:
- Remove any items from the shelf.
- Lift the shelf to remove it from the pegs.
- Relocate the shelf pegs to the desired height holes.
- Place the shelf back onto the pegs, ensuring it is level and secure.
Maintenance
Regular maintenance will help prolong the life and appearance of your desk.
- Cleaning: Wipe surfaces with a soft, damp cloth. Avoid harsh chemicals or abrasive cleaners. For stubborn marks, a mild soap solution can be used, followed by drying with a clean cloth.
- Dusting: Regularly dust all surfaces to prevent buildup.
- Hardware Check: Periodically check all screws and bolts to ensure they remain tight. Retighten if necessary, but do not overtighten.
- Liquid Spills: Immediately wipe up any liquid spills to prevent damage to the desk surface or electrical components.
- LED Lights: The LED strip is designed for long-term use. If issues arise, check the power connection. Do not attempt to repair the LED strip or power outlet unit yourself.
Troubleshooting
| Problem | Possible Cause | Solution |
|---|---|---|
| Desk is wobbly/unstable. | Loose screws; uneven floor. | Ensure all assembly screws are tightened. Adjust the leveling feet on the desk legs if present, or place shims under legs on an uneven floor. |
| LED lights not turning on. | Power cord unplugged; loose connection; faulty unit. | Check if the desk's main power cord is securely plugged into a live outlet. Ensure the LED strip is properly connected to the power outlet unit. If issues persist, contact customer support. |
| Power outlets not working. | Main power cord unplugged; circuit breaker tripped. | Verify the desk's main power cord is plugged in. Check your home's circuit breaker. Test with another device to confirm the outlet is live. |
| Drawers are stiff or not sliding smoothly. | Improper assembly; obstruction. | Ensure the fabric drawers are assembled correctly and not overloaded. Check for any obstructions in the drawer slides. |
Specifications
| Feature | Detail |
|---|---|
| Brand | CubiCubi |
| Model Number | INUC-CD0135-190BWG-01 |
| Dimensions (D x W x H) | 38.5"D x 74"W x 43.25"H |
| Color | Black |
| Material | Engineered Wood (Top), Alloy Steel (Base/Frame) |
| Weight | 65 Pounds |
| Power Outlets | 3 AC Outlets (125V/12A), 2 USB Ports (5V/2.1A) |
| LED Lights | RGB, 7 Color Variations, 7 Color Modes (including Music Mode) |
| Storage | Adjustable Shelves, 2 Fabric Drawers (1 regular, 1 large file cabinet) |
| Special Features | Reversible Design, Monitor Shelf |
Warranty and Support
CubiCubi products are designed for durability and performance. For specific warranty details, please refer to the warranty card included with your purchase or visit the official CubiCubi website. If you encounter any issues or require assistance with assembly or operation, please contact CubiCubi customer support.
Customer Support: Refer to your purchase documentation or the manufacturer's website for contact information.