1. Product Overview
This manual provides instructions for the Drfeify Electric Scooter Brushless Motor Controller, designed for electric scooters and bicycles. This controller is compatible with both 36V and 48V systems and supports 1000W to 1500W brushless motors. Its aluminum alloy housing features a groove design for efficient heat dissipation, protecting the internal circuitry from thermal overload. The controller ensures stable speed, sensitive braking, and precise direction changes for an optimized riding experience.

Figure 1: Drfeify Electric Scooter Brushless Motor Controller with various wire connections.
2. Key Features
- Versatile Compatibility: Supports both 36V and 48V systems, suitable for 1000W and 1500W brushless motors.
- Protective Design: Aluminum alloy housing with a grooved design ensures excellent heat dissipation, preventing thermal overload and protecting internal components.
- Stable Performance: Provides consistent speed regulation and responsive control for braking and direction changes.
- Durable Construction: Features robust wiring interfaces and a sturdy aluminum build to minimize malfunctions and extend product lifespan.
- Easy Installation: Wires are color-coded for straightforward connection, with specific mounting openings for front (100mm) and rear (135mm) drives.
3. Product Specifications
| Attribute | Value |
|---|---|
| Model | B0FFKX3TW6 |
| Rated Voltage | 36V / 48V Universal |
| Compatible Motor Wattage | 1000W / 1500W |
| Housing Material | Aluminum Alloy |
| Package Dimensions | 8.66 x 4.33 x 2.76 inches |
| Item Weight | 1.26 pounds |
| Front Drive Opening | 100mm |
| Rear Drive Opening | 135mm |
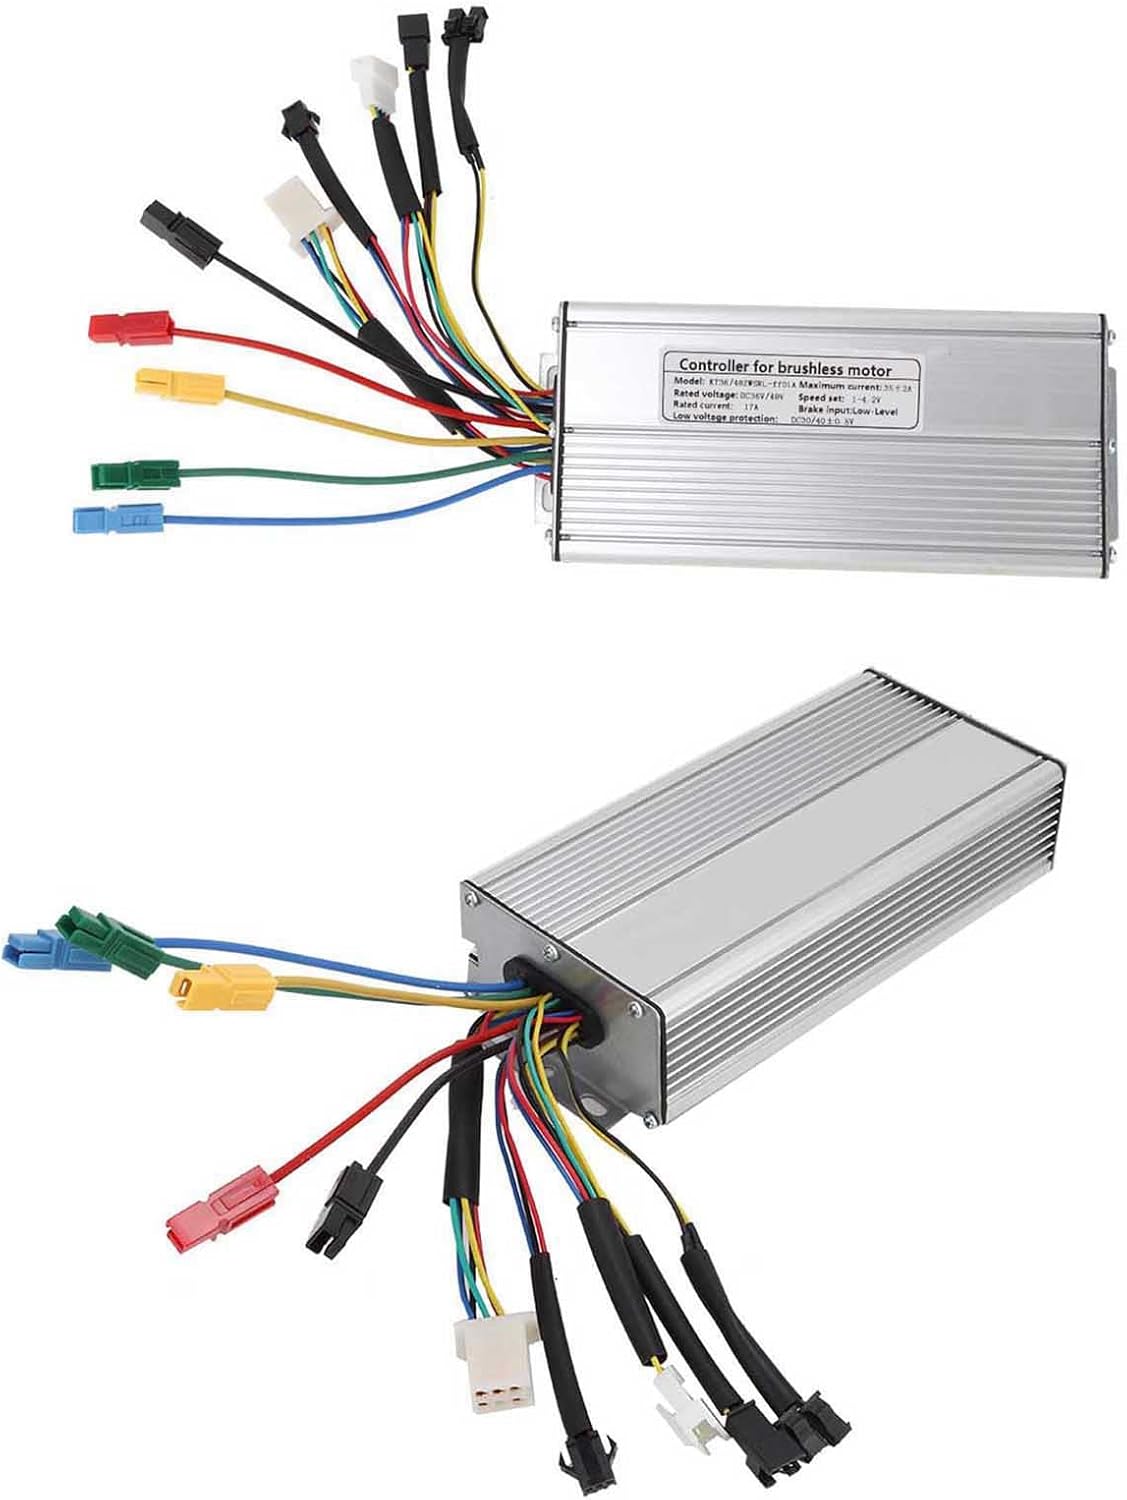
Figure 2: Controller label displaying technical specifications.
4. Safety Information
Please read and understand all safety instructions before installation and operation.
- Professional Installation: Installation of this motor controller requires knowledge of electrical systems. If you are unsure, seek assistance from a qualified professional.
- Power Disconnection: Always disconnect the power source from the battery before performing any installation, maintenance, or wiring adjustments.
- Voltage Compatibility: Ensure the controller's voltage (36V/48V) matches your battery and motor system. Incorrect voltage can cause damage.
- Wiring Integrity: Verify all connections are secure and properly insulated to prevent short circuits.
- Environmental Conditions: Avoid exposing the controller to water, excessive moisture, or extreme temperatures.
- Heat Management: Do not obstruct the controller's cooling fins. Ensure adequate airflow to prevent overheating.
5. Setup and Installation
Proper installation is crucial for the controller's performance and longevity. Follow these steps carefully:
5.1 Preparation
- Ensure the electric scooter or bicycle is powered off and the battery is disconnected.
- Gather necessary tools (e.g., screwdrivers, wire strippers, electrical tape).
- Identify a suitable mounting location for the controller, ensuring good airflow for heat dissipation.
5.2 Mounting the Controller
Securely mount the controller to the frame of your electric scooter or bicycle. The aluminum alloy housing is designed for durability and heat management.
5.3 Wiring Connections
Refer to the wiring diagram below and the color-coded cables for correct connections. Each cable is designed for a specific function.

Figure 3: Detailed wiring diagram showing various connectors and their functions.
- Power Cables: Connect the main power cables (typically red for positive, black for negative) to your battery. Ensure polarity is correct.
- Motor Phase Cables: Connect the three thick motor phase cables (usually yellow, green, blue) to the corresponding motor phase wires.
- Hall Sensor Cables: Connect the smaller Hall sensor wires (typically a multi-pin connector) to the motor's Hall sensor port.
- Throttle Cable: Connect the throttle cable to your scooter's throttle mechanism.
- E-Brake Cables: Connect the electronic brake cables to your brake levers.
- PAS (Pedal Assist System) Cable: If your system includes a PAS, connect the corresponding cable.
- Display Cable: Connect the display unit cable if your system uses one.
- Other Cables: Connect any other auxiliary cables (e.g., speed limit, cruise control) as per your system's requirements.
Ensure all connections are firm and insulated. Double-check all wiring before reconnecting the battery.

Figure 4: Close-up view of the various connectors on the controller, highlighting their distinct shapes and colors for identification.
6. Operating Instructions
Once the controller is correctly installed and all connections are verified, you can begin operation:
- Power On: Reconnect the battery and turn on your electric scooter or bicycle's main power switch.
- Initial Check: Observe any display indicators for error codes or unusual behavior.
- Throttle Control: Gently apply the throttle. The motor should engage smoothly, providing steady speed.
- Braking: Test the brakes. The controller is designed to provide sensitive and effective braking.
- Direction Changes: Ensure the motor responds correctly to direction changes (if applicable to your system).
Always operate your electric vehicle responsibly and in accordance with local regulations.
7. Maintenance
Regular maintenance helps ensure the longevity and optimal performance of your Drfeify motor controller:
- Keep Clean: Periodically clean the exterior of the controller to remove dust and debris. Use a dry, soft cloth.
- Inspect Connections: Regularly check all wiring connections for looseness, corrosion, or damage. Tighten any loose connections.
- Environmental Protection: Ensure the controller remains protected from direct water exposure and excessive humidity.
- Heat Dissipation: Verify that the cooling fins on the aluminum housing are not blocked, allowing for proper heat dissipation.
- Avoid Impact: Protect the controller from physical impacts or drops, which can damage internal components.
8. Troubleshooting
If you encounter issues with your motor controller, refer to the following common problems and solutions:
| Problem | Possible Cause | Solution |
|---|---|---|
| Motor does not run | No power to controller; Loose or incorrect wiring; Faulty motor or throttle. | Check battery connection and charge level. Verify all wiring connections (power, motor, Hall sensor, throttle). Test motor and throttle independently if possible. |
| Erratic motor behavior | Loose Hall sensor wires; Damaged motor phase wires; Interference. | Inspect Hall sensor and motor phase wire connections. Ensure wires are not pinched or damaged. |
| Controller overheating | Insufficient airflow; Overload on motor; Internal fault. | Ensure controller is mounted in a location with good ventilation. Reduce load on the motor. If problem persists, contact support. |
| Brakes not working | E-brake wires disconnected or faulty; Mechanical brake issue. | Check E-brake wire connections. Inspect mechanical brake system. |
If the problem persists after attempting these solutions, please contact customer support.
9. Warranty and Customer Support
The Drfeify Electric Scooter Brushless Motor Controller is manufactured with quality and durability in mind. For specific warranty details, please refer to the product's purchase documentation or contact the seller directly.
For technical assistance, troubleshooting beyond this manual, or warranty inquiries, please visit the official Drfeify store on Amazon or contact their customer service:
Drfeify Store: https://www.amazon.com/stores/Drfeify/