Introduction
This instruction manual provides detailed guidance for the installation, operation, and maintenance of your Bstrip 2FT 144W T8 Full Spectrum LED Grow Light. Designed for indoor plants, greenhouses, and seeding, this grow light offers a full spectrum with 660nm red LEDs to support all stages of plant growth. Please read this manual thoroughly before use to ensure proper function and safety.
Package Contents
Verify that all components are present in your package:
- 6 x LED Grow Light bars
- 3 x 59 inch Power Cords
- 5 x 23 inch Connecting Wires
- 1 x Installation Manual (this document)
- Mounting accessories (clips, screws, chains, cable ties, double-sided tapes)
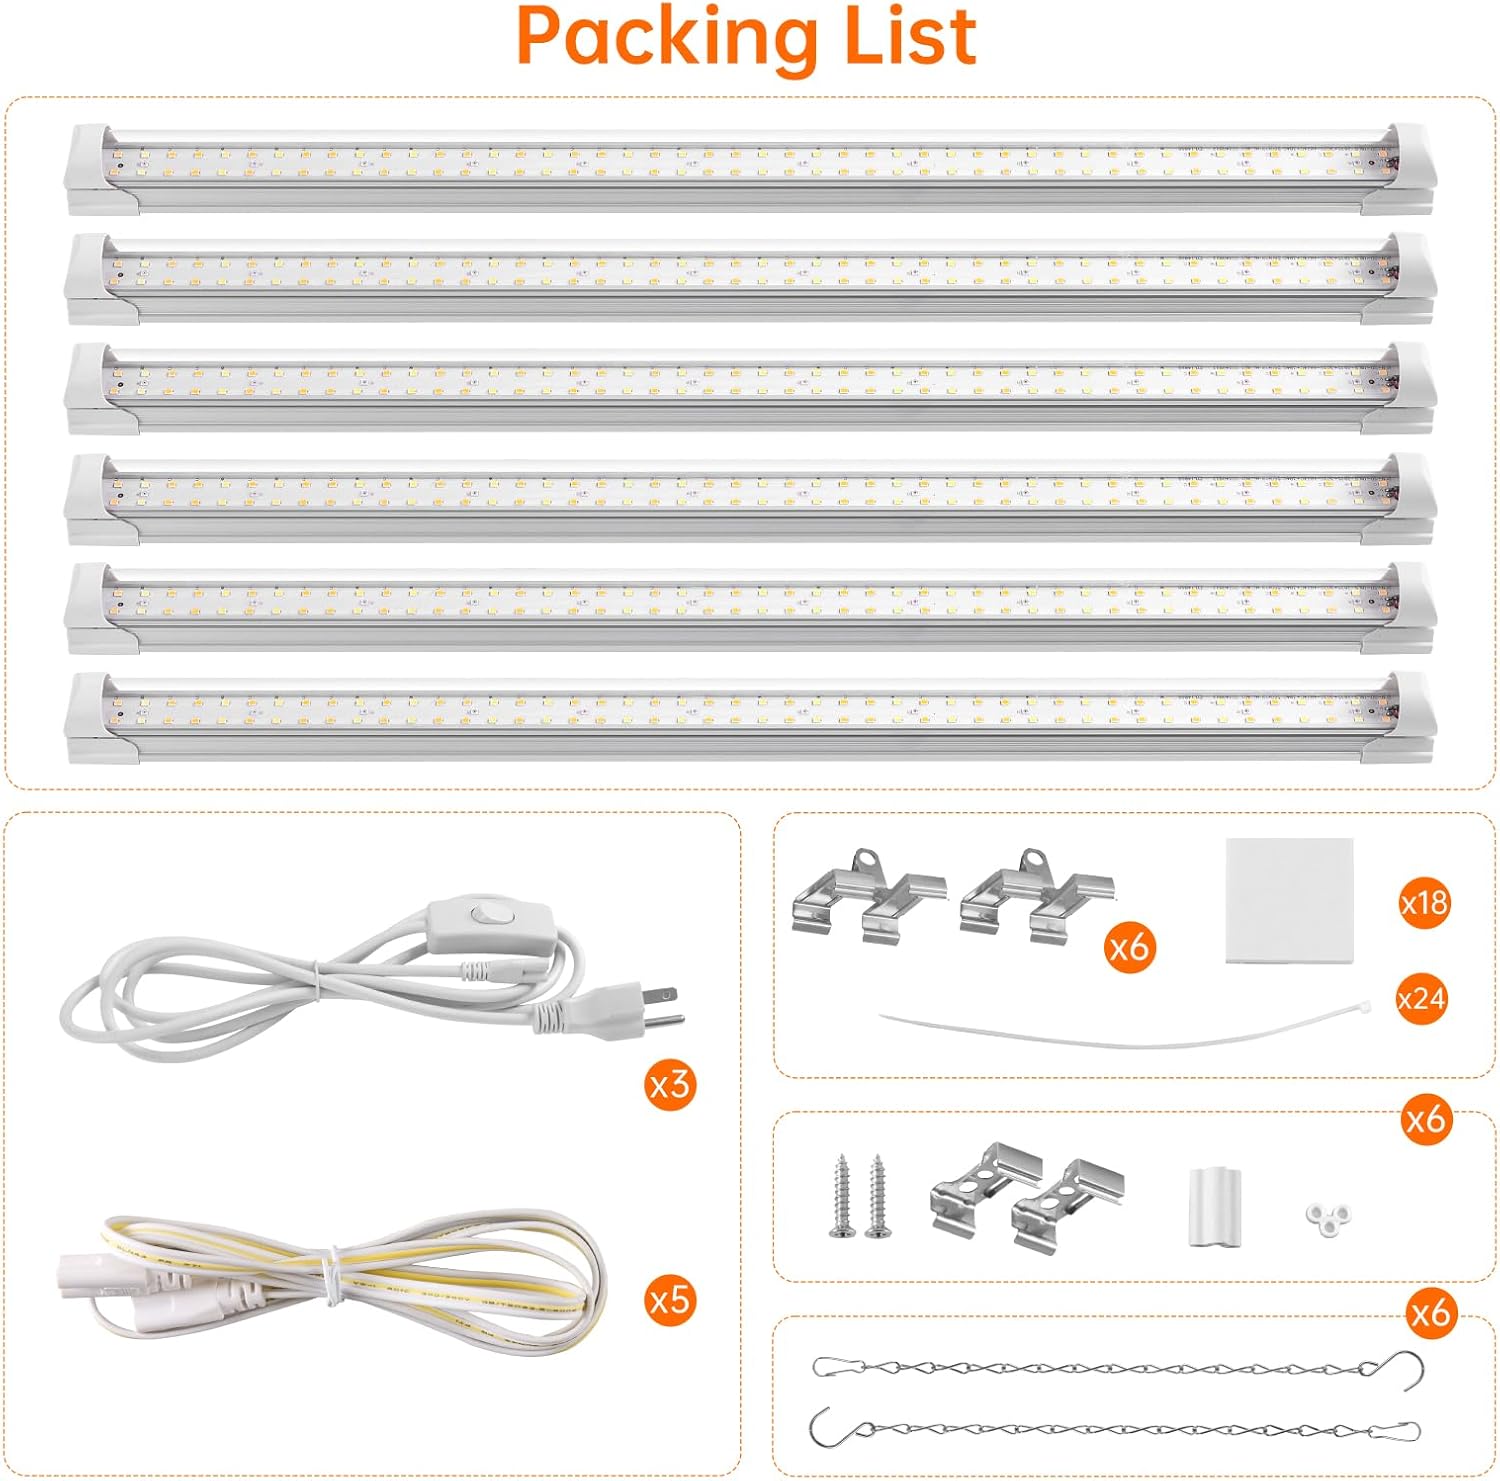
Figure 1: Package Contents
Product Features
- Full Spectrum with 660nm Red LEDs: Provides comprehensive light for all plant growth stages, from germination to flowering. Optimized 660nm red wavelengths enhance plant absorption. Features 2901 lumens and 91+ CRI for optimal growth and natural color display.
- Energy Efficient & High PPFD: Each 24W LED grow light bar, equipped with 108 LEDs, replaces traditional 133W fixtures. Delivers 343.7 µmol/m²/s PPFD at a 4-inch distance, promoting enhanced photosynthesis.
- Linkable Design: Connect up to 6 light bars using the included 23.6-inch cables for expanded coverage in large setups, multi-tier shelves, and indoor gardens.
- Flexible & Easy Installation: Supports both hanging and surface mounting. Includes all necessary accessories for quick setup and flexible adjustment.
- Effective Cooling & Wide Compatibility: Aluminum housing ensures exceptional heat dissipation for sustained performance and extended LED life. Suitable for grow tents, greenhouses, hydroponic systems, and various plant types including seedlings, succulents, and flowering varieties.

Figure 2: Full Spectrum Light Technology

Figure 3: Guidance for Plant Growth Stages
Setup & Installation
The Bstrip Grow Light offers flexible installation options to suit your growing environment. Ensure the power is disconnected before installation.
Mounting Options
Choose from several methods to mount your grow lights:
- Surface Mount: Use the provided mounting clips and screws to attach the light bars directly to a flat surface.
- Double-sided Tapes Mount: For lighter applications or temporary setups, use the included double-sided adhesive tapes to secure the light bars.
- Cable Tie Mount: Secure the light bars to poles or frames using cable ties.
- Chain Mount: Attach the hanging chains to the light bars and suspend them from a ceiling or shelf. This allows for easy height adjustment.

Figure 4: Four Installation Methods
Linking Multiple Lights
You can link up to 6 light bars together to create a continuous lighting system:
- Direct Connection: Use the short connectors to directly link light bars end-to-end.
- Cable Connection: Use the 23.6-inch connecting cables to space out light bars while maintaining a linked power source.
Connect the first light bar to a power cord, then link subsequent light bars using either method. Ensure all connections are secure.
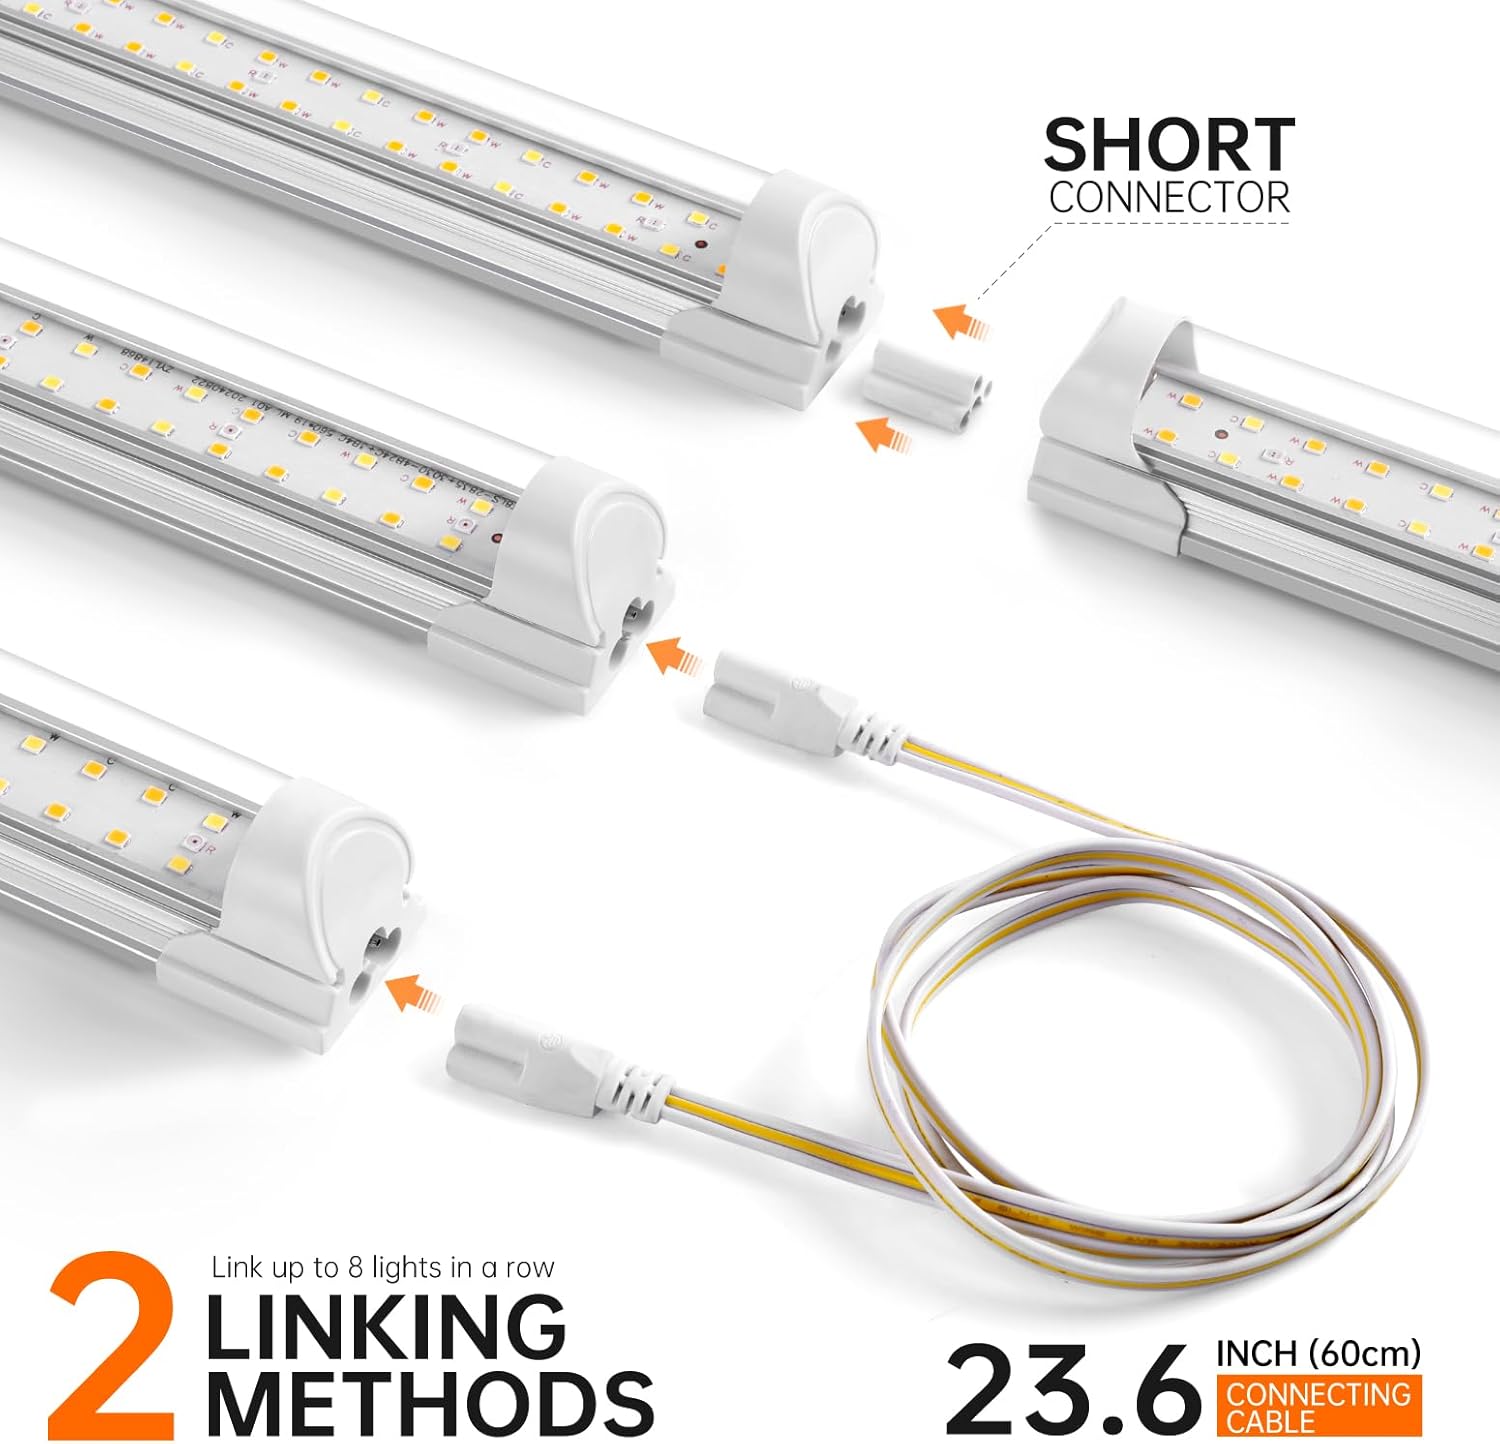
Figure 5: Linking Methods for Grow Lights
Video Guide: Installation and Linking
Video 1: T8 Grow Light Strip Installation and Linking. This video demonstrates the daisy-chaining capability and various mounting options for the Bstrip T8 Grow Light. Note: This specific product variant (6-pack) includes a standard on/off switch, not a timer switch as shown in parts of the video.
Operation
Once installed, operating your Bstrip Grow Light is straightforward.
Powering On/Off
This 6-pack variant of the Bstrip Grow Light comes with a standard on/off switch integrated into the power cord. Simply toggle the switch to turn the lights on or off. For automated operation, an external timer (not included) can be used.

Figure 6: Grow Light in Operation
Optimizing Light Distance
The optimal distance between the grow light and your plants depends on the plant's growth stage and light requirements. Refer to Figure 3 for general guidance. For high-light plants, a closer distance (e.g., 4-8 inches) may be beneficial, while lower-light plants might prefer 12-20 inches. Monitor your plants for signs of stress (e.g., bleaching from too much light, stretching from too little light) and adjust accordingly.

Figure 7: High-PPFD & Full-Spectrum Performance at Various Distances
Specifications
| Feature | Detail |
|---|---|
| Model Number | BSi-256 |
| Brand | Bstrip |
| Light Source Type | LED (Light Emitting Diode) |
| Light Source Wattage | 24 Watts per bar |
| Color Temperature | 3686 Kelvin |
| Special Features | Full Spectrum with 660nm Red LEDs, Effective Cooling |
| Number of Light Sources | 6 (in this pack) |
| Material | Aluminum |
| Finish Type | Metallic |
| Item Dimensions (L x W x H) | 23.6"L x 1.3"W x 1.38"H |
| Mounting Type | Ceiling Mount, Surface Mount |
| Power Source | Corded Electric |
| Unit Count | 6.0 Count |
Maintenance
Proper maintenance ensures the longevity and optimal performance of your Bstrip Grow Light.
- Cleaning: Regularly wipe the light bars with a soft, dry cloth to remove dust and debris. Ensure the lights are unplugged and cool before cleaning. Do not use abrasive cleaners or solvents.
- Inspection: Periodically check all connections (power cords, connecting wires, mounting hardware) to ensure they are secure and free from damage.
- Ventilation: Ensure adequate airflow around the light bars to facilitate heat dissipation, especially if mounted in enclosed spaces.
Troubleshooting
If you encounter issues with your Bstrip Grow Light, refer to the following common problems and solutions:
| Problem | Possible Cause | Solution |
|---|---|---|
| Light does not turn on | No power, loose connection, faulty switch. |
|
| Some light bars are off in a linked setup | Loose connection between light bars, faulty light bar. |
|
| Lights are dim or flickering | Insufficient power, loose connection, environmental factors. |
|
| Plants are stretching (etiolation) | Insufficient light intensity or duration. |
|
| Plants show signs of light burn (bleaching, crisping) | Too much light intensity. |
|
Warranty & Support
Your Bstrip Grow Light is covered by a 2-year manufacturer warranty. This warranty covers defects in materials and workmanship under normal use.
For warranty claims, technical support, or any questions regarding your product, please contact Bstrip customer service through the retailer where the product was purchased or visit the official Bstrip website for contact information.
Please retain your proof of purchase for warranty purposes.


