1. Important Safety Instructions
Please read all instructions carefully before using the appliance. Retain this manual for future reference.
- Ensure the ice maker is connected to a grounded power outlet. Do not use extension cords unless absolutely necessary and ensure they are rated for the appliance's power requirements.
- Do not immerse the power cord, plug, or any part of the appliance in water or other liquids.
- Unplug the ice maker from the power outlet before cleaning, servicing, or when not in use.
- Do not operate the appliance with a damaged cord or plug, or after the appliance malfunctions or has been damaged in any manner. Contact customer support for assistance.
- Place the ice maker on a flat, stable surface with adequate ventilation around it. Maintain at least 4 inches (10 cm) of space on all sides for proper air circulation.
- Use only potable water in the ice maker.
- This appliance is not intended for use by persons (including children) with reduced physical, sensory, or mental capabilities, or lack of experience and knowledge, unless they have been given supervision or instruction concerning use of the appliance by a person responsible for their safety.
- Do not use the appliance outdoors or in direct sunlight.
- Keep fingers and hands away from the ice discharge area to prevent injury.
2. Product Overview
The Kreiaoer Portable Ice Maker Machine JD9MI8-0 is designed for convenient ice production at home, in the office, or on the go. Featuring advanced semiconductor dual-core technology, it produces ice quickly and efficiently.
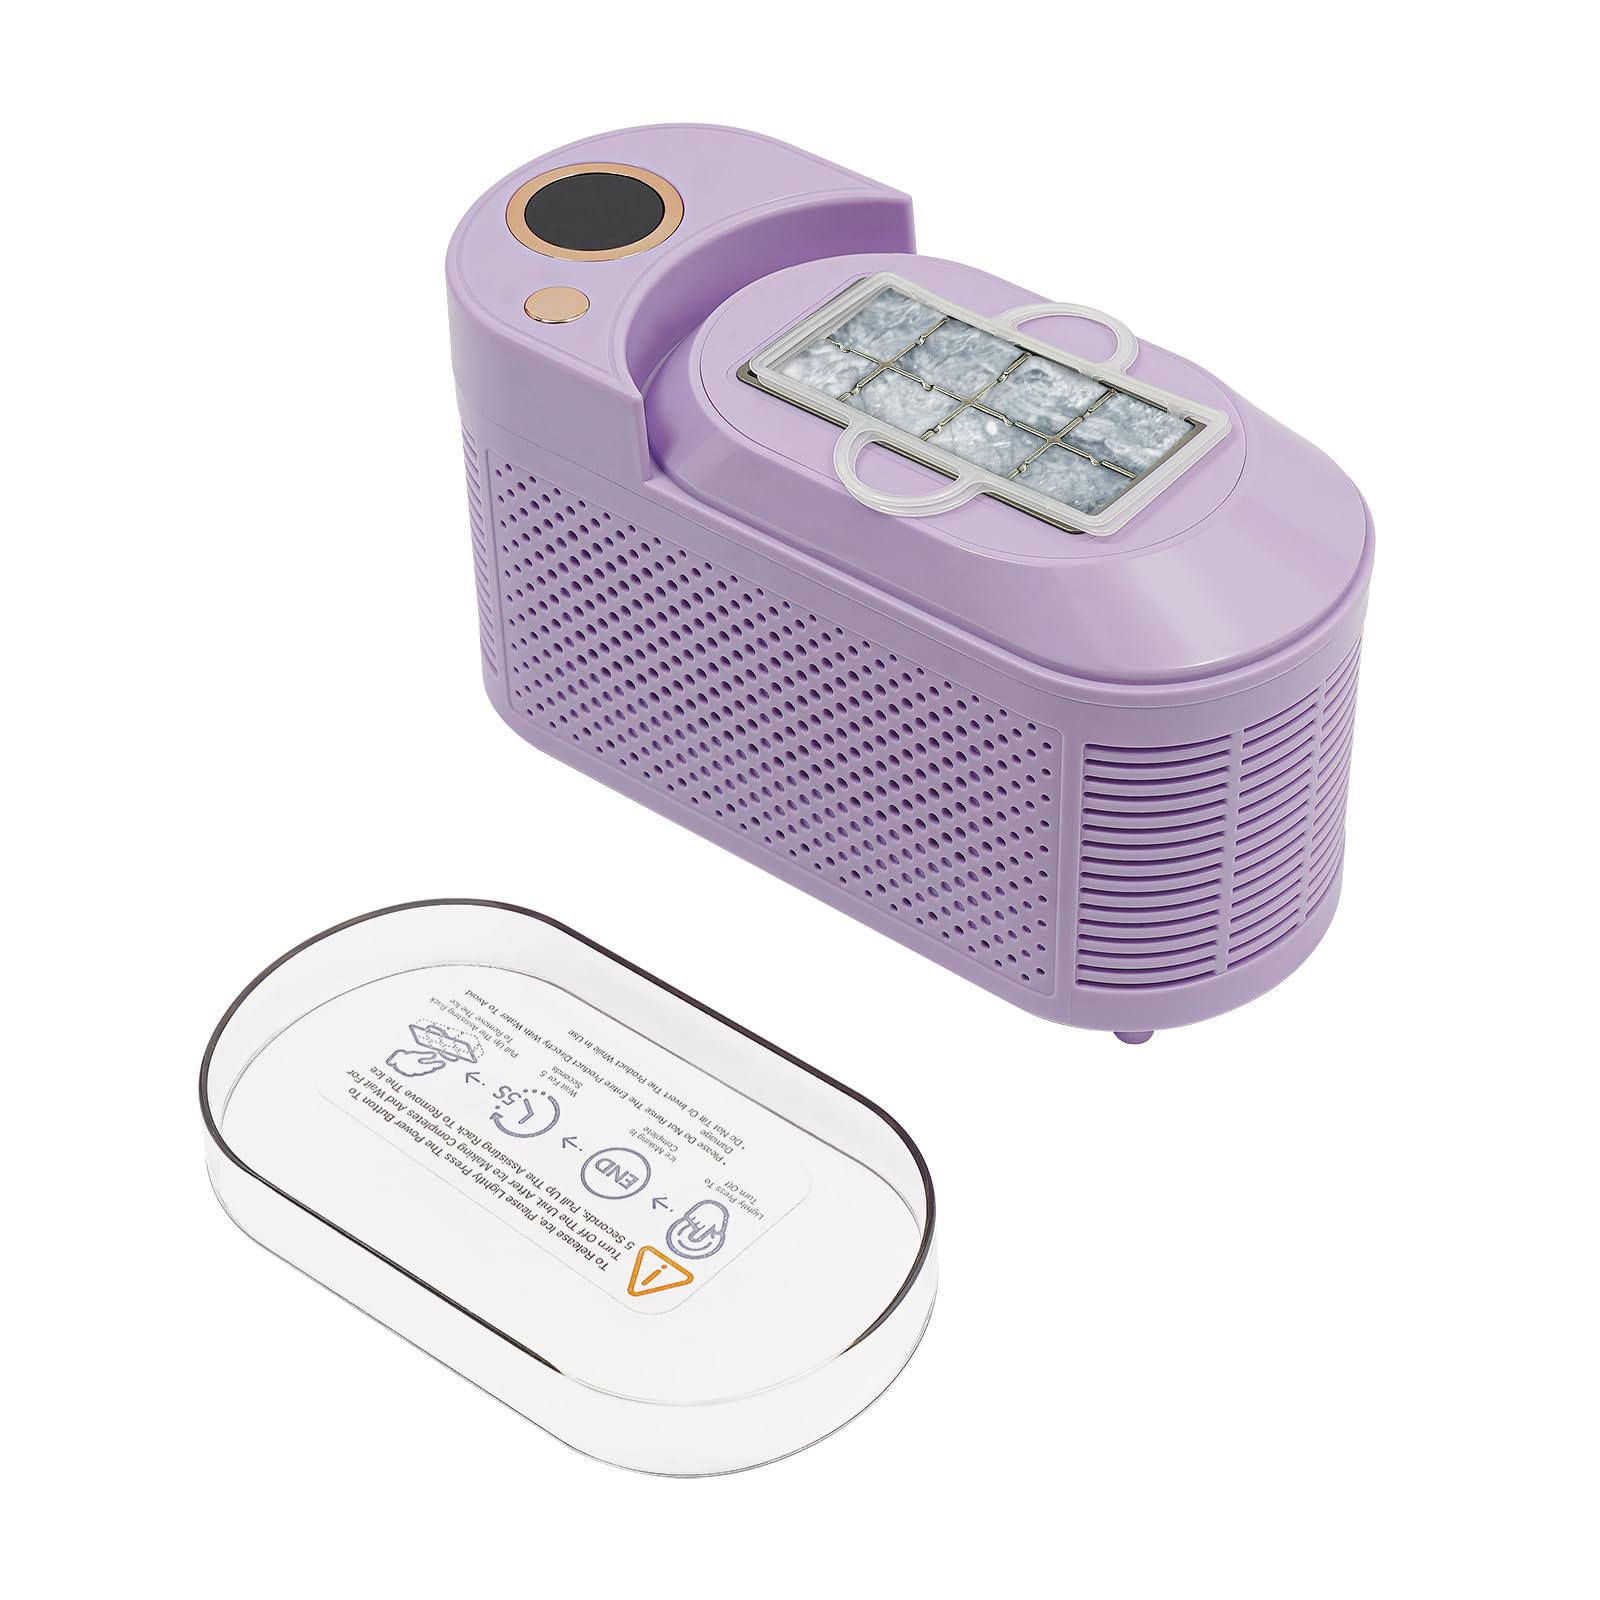
Image: The Kreiaoer Portable Ice Maker Machine (Purple) ready for use.
Key Features:
- Fast Ice Production: Produces 8 hollow ice cubes in approximately 10 minutes or solid cubes in 15 minutes.
- Dual Power Compatibility: Operates with both standard AC power (110V) and 12V DC car power, making it suitable for various environments including road trips and camping.
- Durable Construction: Made from food-grade aluminum alloy and high-quality plastic, ensuring impact and scratch resistance for long-term use.
- Low Noise Operation: Operates at approximately 60dB, minimizing disturbance.
- Compact and Portable: Lightweight design for easy storage and transport.
- Easy to Use: Simple plug-and-play operation with minimal setup.
3. What's in the Box
Upon unpacking, please ensure all the following items are present:
- 1 x Kreiaoer Portable Ice Maker Machine
- 1 x 12V Car Power Cable
- 1 x AC Power Adapter
- 1 x Ice Scoop/Clip
- 1 x English User Manual

Image: All components included in the product packaging.
4. Setup
4.1 Unpacking
- Carefully remove the ice maker and all accessories from the packaging.
- Remove any protective film or tape from the unit.
- Inspect the appliance for any shipping damage. If damage is found, do not operate and contact customer support.
4.2 Placement
- Place the ice maker on a firm, level surface away from direct sunlight and heat sources (e.g., stoves, furnaces, radiators).
- Ensure there is at least 4 inches (10 cm) of clear space around the unit for proper ventilation. Do not block any ventilation openings.
- Avoid placing the ice maker in areas where the ambient temperature is below 50°F (10°C) or above 90°F (32°C), as this can affect ice production efficiency.
4.3 Before First Use
- Clean the interior of the ice maker with a soft cloth and mild detergent. Rinse thoroughly with clean water and wipe dry.
- For optimal performance, allow the unit to stand upright for at least 2 hours before plugging it in, especially if it was transported horizontally.
- Perform 2-3 ice making cycles and discard the ice produced during these initial cycles to ensure cleanliness and proper functioning.
5. Operating Instructions
5.1 Adding Water
- Open the top cover of the ice maker.
- Fill the water reservoir with potable water up to the MAX fill line. Do not overfill.
- Close the top cover securely.
5.2 Powering On and Making Ice
- Connect the appropriate power cable (AC adapter for home/office or 12V car cable for vehicle use) to the ice maker and then to the power source.
- Press the Power button (usually indicated by a circular button with a light) to turn on the unit. The indicator light will illuminate.

Image: Close-up of the power button on the ice maker.
- The ice making process will begin automatically. The unit will cycle through freezing and releasing ice cubes.
- The first batch of ice may take slightly longer. Subsequent batches will be produced faster.
- When the ice basket is full, the ice maker will automatically stop. Remove ice to resume production.
- When the water level is low, the unit will stop and an indicator light (if available) will signal to add water.

Image: Ice cubes being produced by the machine.
5.3 Dual Power Operation (AC/DC)
- For home or office use, connect the AC power adapter to a standard 110V wall outlet.
- For car, RV, or camping use, connect the 12V car power cable to your vehicle's 12V accessory outlet. Ensure the vehicle engine is running to prevent draining the car battery.
- Do not attempt to use both power sources simultaneously.
6. Maintenance
6.1 Cleaning the Ice Maker
Regular cleaning helps maintain ice quality and extends the life of your appliance.
- Unplug the ice maker from the power source.
- Drain any remaining water from the reservoir by removing the drain plug (if applicable) or tilting the unit carefully over a sink.
- Clean the interior with a soft cloth dampened with a mild detergent solution. For stubborn stains, a mixture of water and vinegar can be used.
- Rinse the interior thoroughly with clean water.
- Wipe all surfaces dry with a clean, soft cloth.
- Clean the exterior with a soft, damp cloth.
6.2 Storage
If the ice maker will not be used for an extended period:
- Ensure the unit is thoroughly cleaned and dried.
- Store the ice maker in a cool, dry place, away from direct sunlight and extreme temperatures.
- Keep the top cover slightly ajar to allow for air circulation and prevent odors.
7. Troubleshooting
Before contacting customer support, please refer to the following troubleshooting guide for common issues:
| Problem | Possible Cause | Solution |
|---|---|---|
| Ice maker not turning on | No power supply; Power button not pressed | Check power connection; Press the Power button firmly. |
| No ice production | No water in reservoir; Water pump malfunction; Ambient temperature too high | Add water; Contact customer support; Ensure unit is in a cool environment. |
| Ice cubes are too small or soft | Water temperature too high; Ambient temperature too high; First few cycles | Use colder water; Ensure proper ventilation; Discard first few batches. |
| "Add Water" indicator light is on | Water level is low | Add potable water to the reservoir up to the MAX line. |
| Unusual noise during operation | Unit not level; Fan obstruction; Normal operation sounds | Ensure unit is on a flat surface; Check for obstructions around fan; Some operational noise is normal. |
8. Specifications
Technical specifications for the Kreiaoer Portable Ice Maker Machine JD9MI8-0:
| Specification | Detail |
|---|---|
| Model Name | JD9MI8-0 |
| Product Dimensions (D x W x H) | 3.66" x 8.5" x 5.04" (9.3cm x 21.6cm x 12.8cm) |
| Capacity | 2.2 Pounds (Ice) |
| Wattage | 120 watts |
| Voltage | 110 Volts (AC), 12 Volts (DC) |
| Refrigerant | R600a |
| Material | Aluminum, Plastic |
| Item Weight | 2.82 pounds |

Image: Product dimensions diagram.
9. Warranty and Support
This Kreiaoer Portable Ice Maker Machine is covered by a manufacturer's warranty. For specific warranty details, please refer to the warranty card included with your purchase or contact Kreiaoer customer support.
If you encounter any issues or have questions regarding your product, please contact our customer support team. Provide your model number (JD9MI8-0) and purchase date for faster service.
Contact Information: Please refer to the contact details provided on the product packaging or the official Kreiaoer website.