
Introduction
Thank you for choosing the Milduall Wireless PIR Infrared Motion Detector Socket. This device is designed to provide automatic control of lighting and other appliances based on motion detection, enhancing convenience and energy efficiency in your home or office. This manual provides detailed instructions for installation, operation, maintenance, and troubleshooting to ensure optimal performance and safe use of your product.
The system consists of a battery-powered PIR motion sensor and a radio-controlled socket. They are pre-paired for immediate use.
Safety Information
- Read all instructions carefully before use.
- Do not expose the device to moisture or extreme temperatures.
- Ensure the socket is properly grounded.
- Do not exceed the maximum load capacity of 3600 Watts (2000W / 16A is also mentioned, please refer to the product label for the exact rating).
- Keep out of reach of children.
- Only use specified battery types for the motion sensor.
- Do not attempt to disassemble or repair the device yourself. Contact qualified personnel for service.
Package Contents
Please check the package for the following items:
- 1 x Milduall Wireless PIR Motion Detector
- 1 x Milduall Radio Controlled Socket
- 1 x User Manual (this document)
- 1 x Fixing Material (for wall mounting)
Note: 2 AA batteries for the motion sensor are not included and must be purchased separately.
Setup Instructions
1. Battery Installation for Motion Sensor
The motion sensor requires 2 AA alkaline batteries (not included). To install:
- Gently twist the cover of the motion sensor counter-clockwise to open it.
- Insert 2 AA alkaline batteries, ensuring correct polarity (+/-).
- Important: Remove any insulating film from the battery compartment before first use.
- Replace the cover by twisting it clockwise until it clicks securely into place.

Image: Exploded view of the Milduall motion sensor, illustrating the battery (CR123A type shown, but product specifies AA) and internal components, along with the smart plug. It also shows a rotating dial for delay time.

Image: Diagram illustrating how to open the motion sensor by rotating the cover to insert batteries and access the settings for environmental luminosity, detection area, and delay time. A note reminds to remove the battery insulating film.
2. Initial Pairing (Plug and Play)
The motion sensor and radio-controlled socket are pre-paired at the factory. No manual pairing is typically required for initial setup.
- Plug the radio-controlled socket into a standard wall outlet.
- Ensure batteries are correctly installed in the motion sensor.
- The system should now be ready for use.

Image: An illustration demonstrating the 'Plug and Play' functionality, showing the motion sensor and smart plug wirelessly communicating, indicating no preliminary wiring is needed and simple pairing for immediate use.
3. Placement of the Motion Sensor
The motion sensor can be placed on a flat surface like a windowsill or bookshelf, or mounted to a wall using the provided fixing materials. Consider the following for optimal performance:
- Detection Area: The sensor has a maximum detection range of 12 meters and a 120° angle. Position it to cover the desired area.
- RF Transmission: The radio signal can transmit up to 40 meters, even through doors and walls, allowing flexible placement of the sensor relative to the socket.
- Avoid placing the sensor near heat sources, direct sunlight, or areas with strong air currents, as these can cause false triggers.
- For wider coverage in closer areas, a wider angle is recommended. For longer distances, a narrower angle may be more effective.

Image: A technical diagram illustrating the motion sensor's detection range, showing a maximum range of 12 meters and a 120-degree angle. It also depicts the RF signal transmission capability of up to 40 meters, even through doors and walls, with notes on angle adjustments for different distances.
Operating Instructions
Adjusting Sensor Settings
The motion sensor features adjustable settings for environmental luminosity, detection area, and delay time. These settings are typically adjusted by rotating dials or switches located on the sensor itself (often under the cover).
- Environmental Luminosity: Adjust this setting to determine at what ambient light level the sensor should activate. Options may include:
- Dimly Lit: Activates only when it's dark or very dim.
- Dark: Activates only in complete darkness.
- All Day: Activates regardless of ambient light.
- Detection Area (Range): Adjust the sensitivity or range of the motion detection. Common settings might include:
- 0-4m (Close Range): For small areas or specific spots.
- 0-8m (Medium Range): For average-sized rooms or hallways.
- 0-12m (Long Range): For larger spaces or open areas.
- Delay Time: This setting determines how long the connected appliance remains on after motion is no longer detected. Options typically range from a few seconds to several minutes or even an hour. Common settings include:
- 3s / 10s / 30s
- 1 min / 3 min / 5 min / 10 min / 30 min
- 1 hour
Typical Applications
The Milduall motion detector socket is versatile and can be used in various indoor and outdoor scenarios:
- Automatic Lighting: Ideal for corridors, staircases, bathrooms, cellars, or entrance areas to automatically switch on lights when motion is detected.
- Appliance Control: Can control fans, small heaters, or other appliances that benefit from motion-activated operation.
- Security/Monitoring: Can be integrated into a basic security or monitoring system to detect presence.
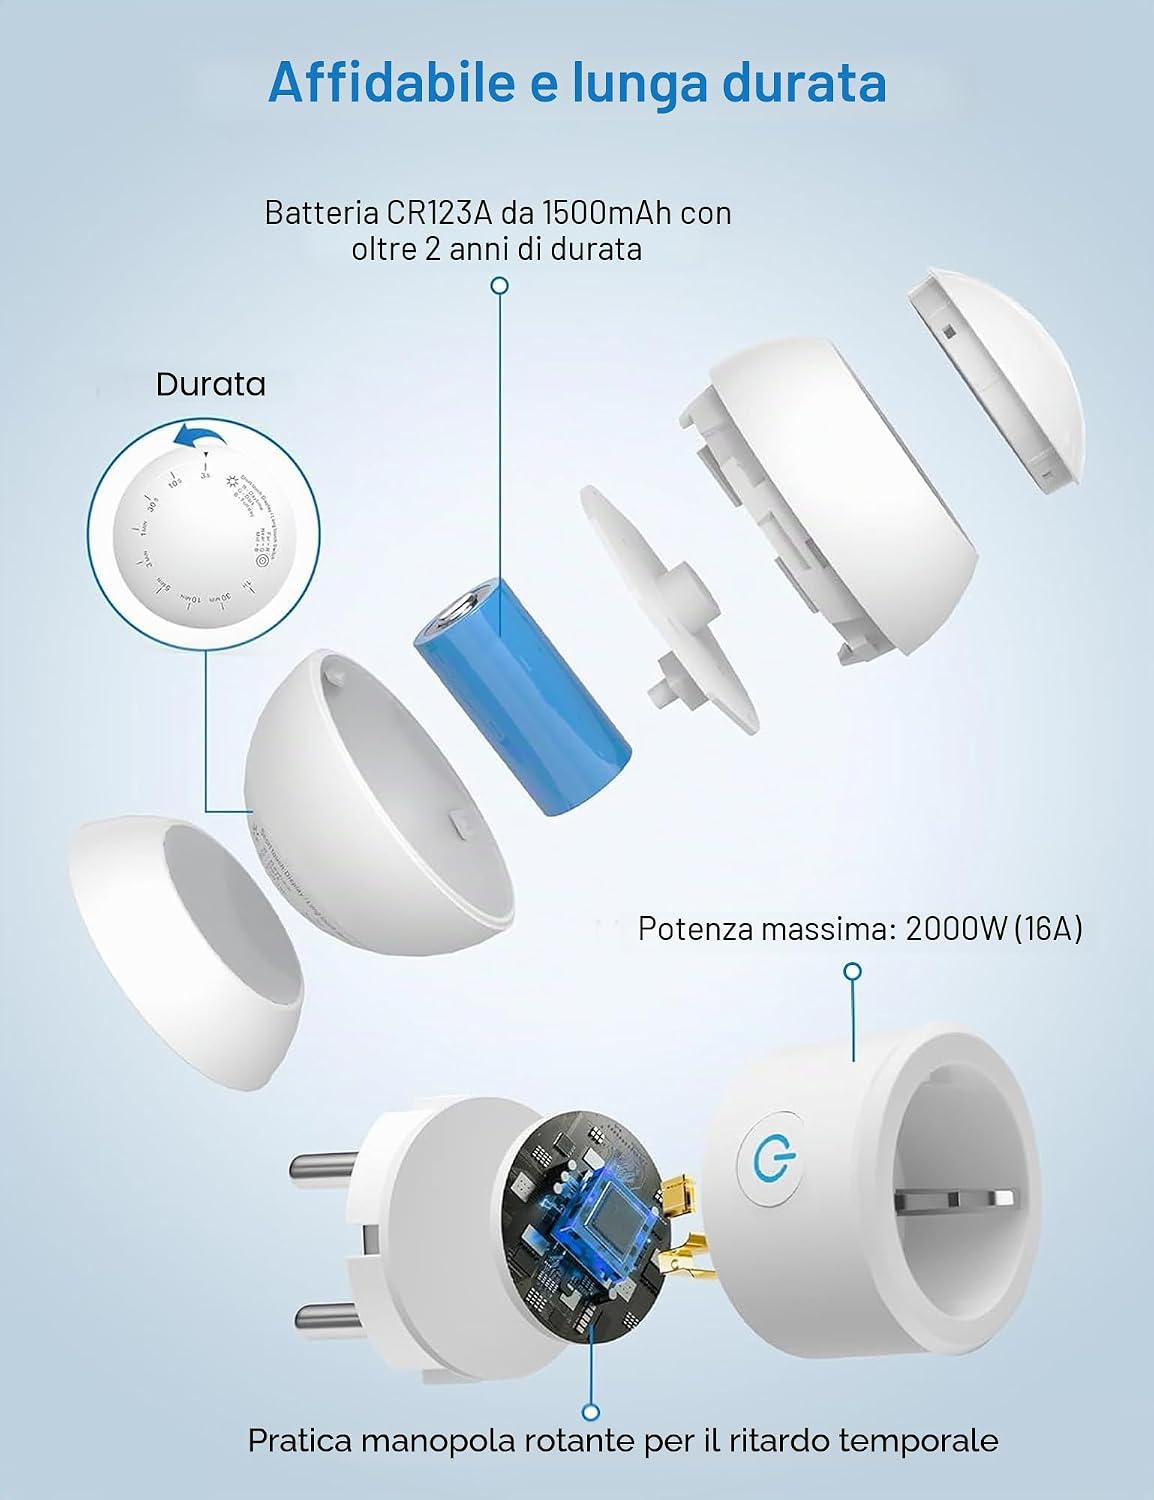
Image: A man entering a room, triggering the motion sensor to activate a light. Recommended settings for this scenario are Long Range (0-12m), Dark ambient light, and a 30-minute delay.
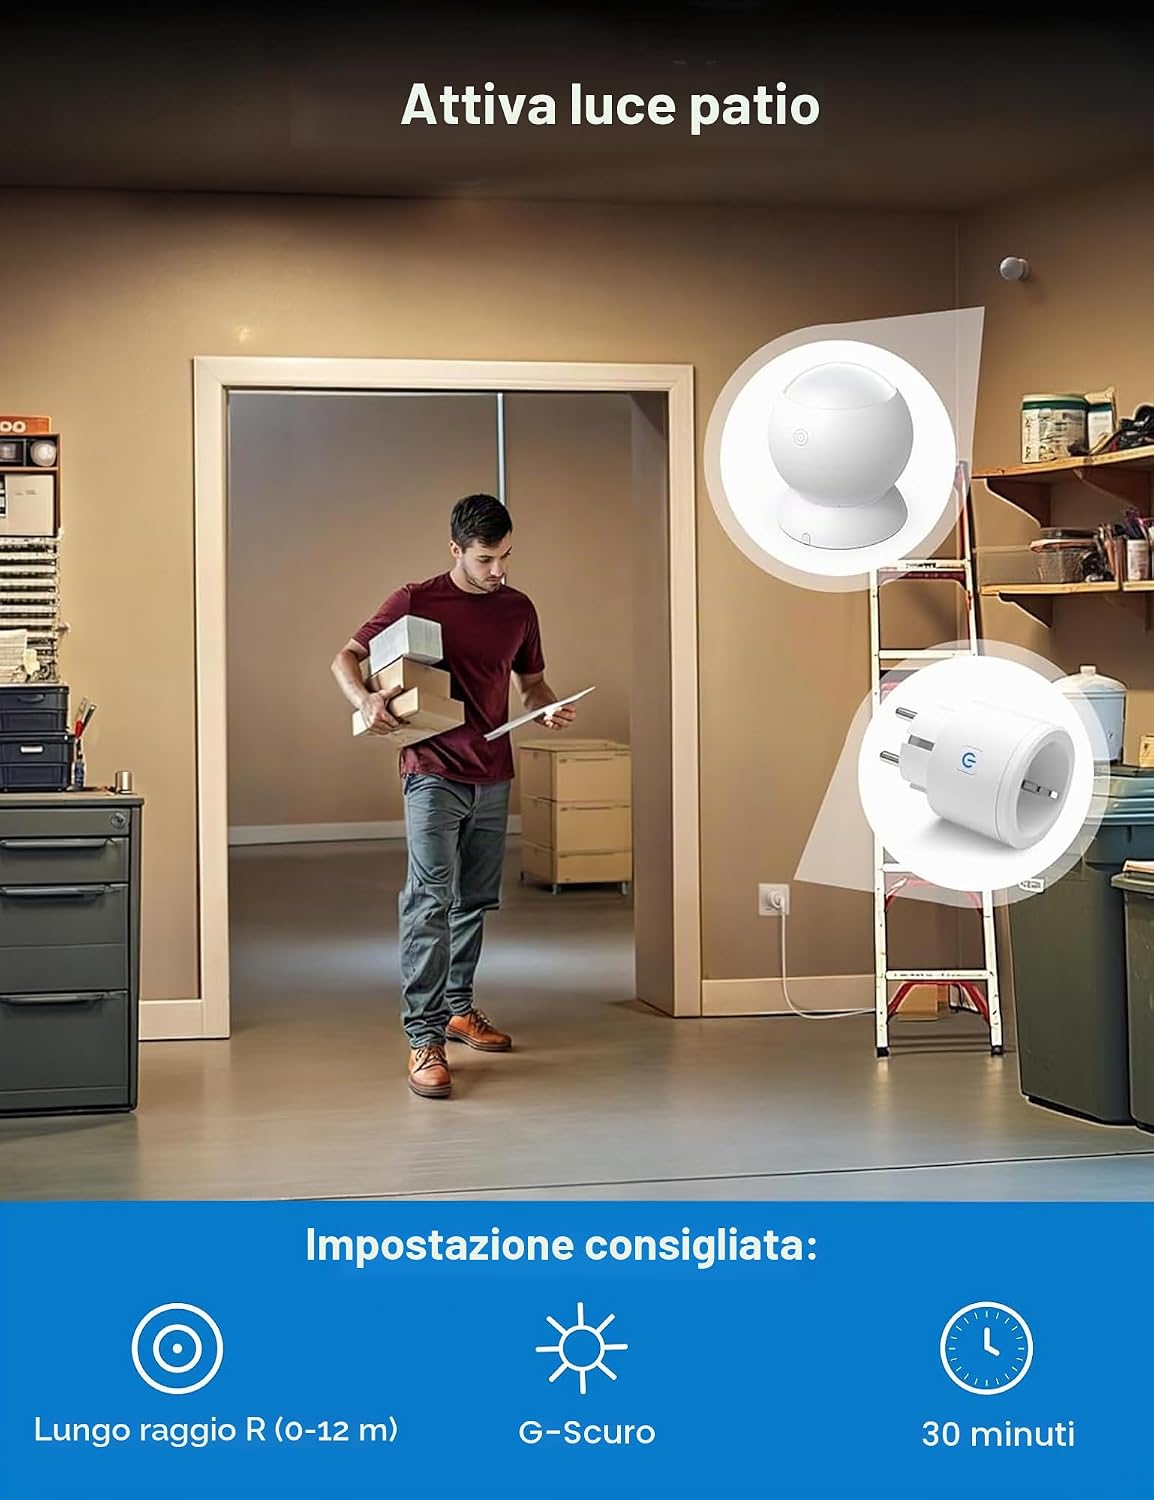
Image: A woman in a bathroom, where a fan is controlled by the motion sensor and smart plug. Recommended settings for this application are Close Range (0-4m), Dark ambient light, and a 1-minute delay.
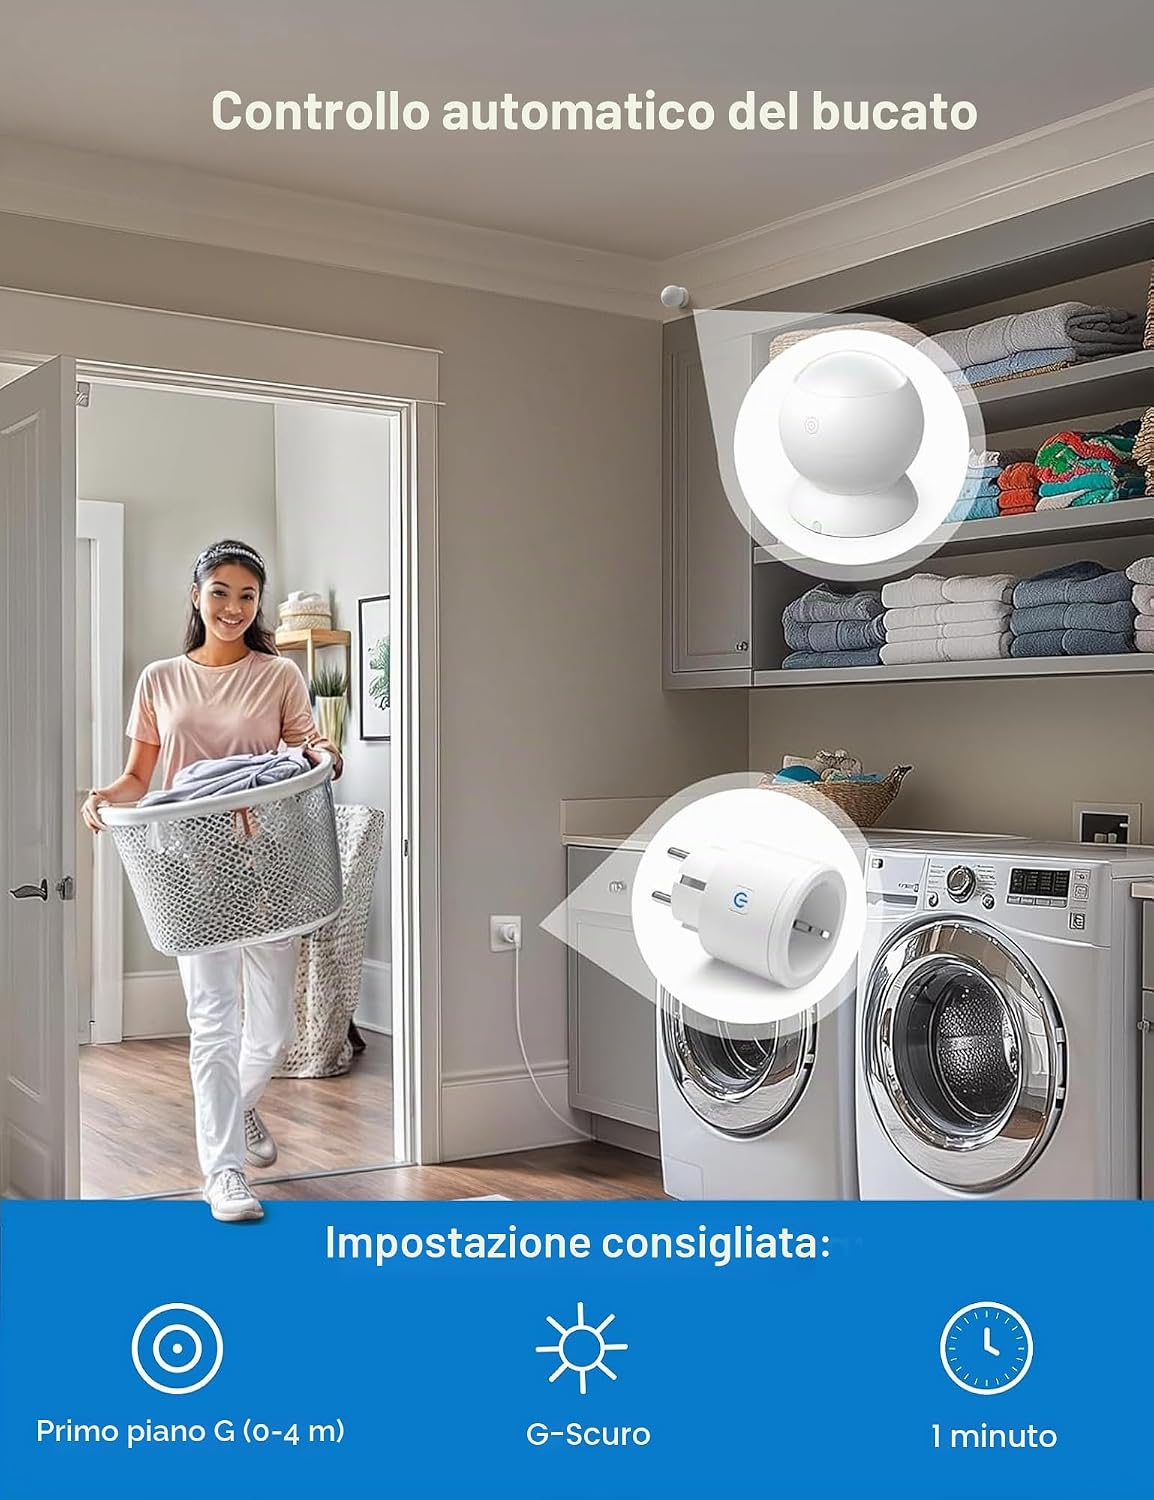
Image: A child ascending an illuminated staircase, demonstrating the motion sensor's use for stair safety. Recommended settings are Medium Range (0-8m), Continuous operation (light always on when motion is detected), and a 30-second delay.

Image: An outdoor patio scene at dusk with lights activated by the motion sensor. Recommended settings for this outdoor application are Long Range (0-12m), Dark ambient light, and a 30-minute delay.

Image: A collage of three application scenarios: illuminated stairs for improved safety, a workshop/basement for energy saving, and an entrance door for hands-free comfort, all benefiting from motion-activated lighting.
Maintenance
Battery Replacement
When the motion sensor's battery is low, its performance may degrade. Replace the batteries as follows:
- Open the motion sensor cover by twisting it counter-clockwise.
- Remove the old AA batteries.
- Insert new 2 AA alkaline batteries, observing correct polarity.
- Close the cover securely.
Cleaning
To clean the device, use a soft, dry cloth. Do not use abrasive cleaners, solvents, or immerse the device in water. Ensure the sensor lens is clean for accurate detection.
Troubleshooting
| Problem | Possible Cause | Solution |
|---|---|---|
| Device not turning on/off with motion. | 1. Batteries in sensor are dead or incorrectly installed. 2. Insulating film not removed from batteries. 3. Sensor settings (luminosity, range) are incorrect. 4. Sensor or socket is out of range. 5. Obstruction in detection path. | 1. Replace batteries, check polarity. 2. Remove insulating film. 3. Adjust luminosity, range, and delay settings. 4. Move sensor closer to the socket or within detection range. 5. Clear any obstructions. |
| False triggers (device turns on without motion). | 1. Sensor placed near heat sources (radiators, direct sunlight). 2. Strong air currents (fans, open windows). 3. Sensor sensitivity too high. | 1. Relocate sensor away from heat sources. 2. Relocate sensor away from air currents. 3. Reduce the detection range/sensitivity setting. |
| Device turns off too quickly or stays on too long. | Delay time setting is incorrect. | Adjust the delay time setting on the sensor. |
| Socket not receiving signal from sensor. | 1. Sensor batteries low/dead. 2. Sensor and socket are too far apart. 3. Strong interference. | 1. Replace sensor batteries. 2. Move sensor closer to the socket. 3. Try relocating devices to minimize interference. |
Product Specifications
| Feature | Specification |
|---|---|
| Brand | Milduall |
| Model Number | 2354876 |
| Product Type | Wireless PIR Infrared Motion Detector Socket |
| Color | White |
| Power Source (Sensor) | Battery powered (2 x AA Alkaline, not included) |
| Power Source (Socket) | Plug-in (100-240V) |
| Max Load Capacity | 3600 Watts (16A / 2000W also mentioned, refer to product label) |
| Motion Detection Range | Up to 12 meters |
| Detection Angle | 120 degrees |
| RF Transmission Range | Up to 40 meters (through doors/walls) |
| Mounting Type (Sensor) | Wall mount or surface placement |
| Item Dimensions (DxWxH) | 100P x 40l x 80H mm (approximate) |
| Compatible Devices | Lights, Home Appliances, Security Systems |
| Recommended Uses | Residential security, automation, energy management |
| Safety Features | Anti-overvoltage, Fire resistant |
| UPC / GTIN | 760646645590 |
Warranty Information
This Milduall product comes with a 2-year manufacturer's warranty from the date of purchase. This warranty covers defects in materials and workmanship under normal use. It does not cover damage caused by misuse, accidents, unauthorized modifications, or improper installation.
Please retain your proof of purchase for warranty claims. For service under warranty, please contact customer support.
Customer Support
If you have any questions, require technical assistance, or need to make a warranty claim, please contact Milduall customer support through the retailer's platform where you purchased the product or visit the official Milduall website for contact information.
Please have your product model number (2354876) and proof of purchase ready when contacting support.