
1. Introduction
The PUIBERS 46-piece digital torque screwdriver set is engineered for precision fastening, offering accurate torque control for a wide range of applications. This comprehensive kit includes a digital display precision torque screwdriver, various high-strength alloy steel bits, and essential accessories, all designed to ensure optimal performance and prevent over-tightening.
Package Contents:
- Digital Display Precision Torque Screwdriver
- 40 High-Strength Alloy Steel Screwdriver Bits (Slotted, Phillips, Pozi-Drive, Hex Socket, Torx)
- 1/4'' Extension Bar
- Quick-Release Chuck
- Spring-Loaded Socket
- Standard Screwdriver Handle
- Durable Plastic Storage Case

Detailed view of the PUIBERS digital torque screwdriver set components, including the digital screwdriver, various bits, screwdriver handle, extension bar, and elastic bit holder.
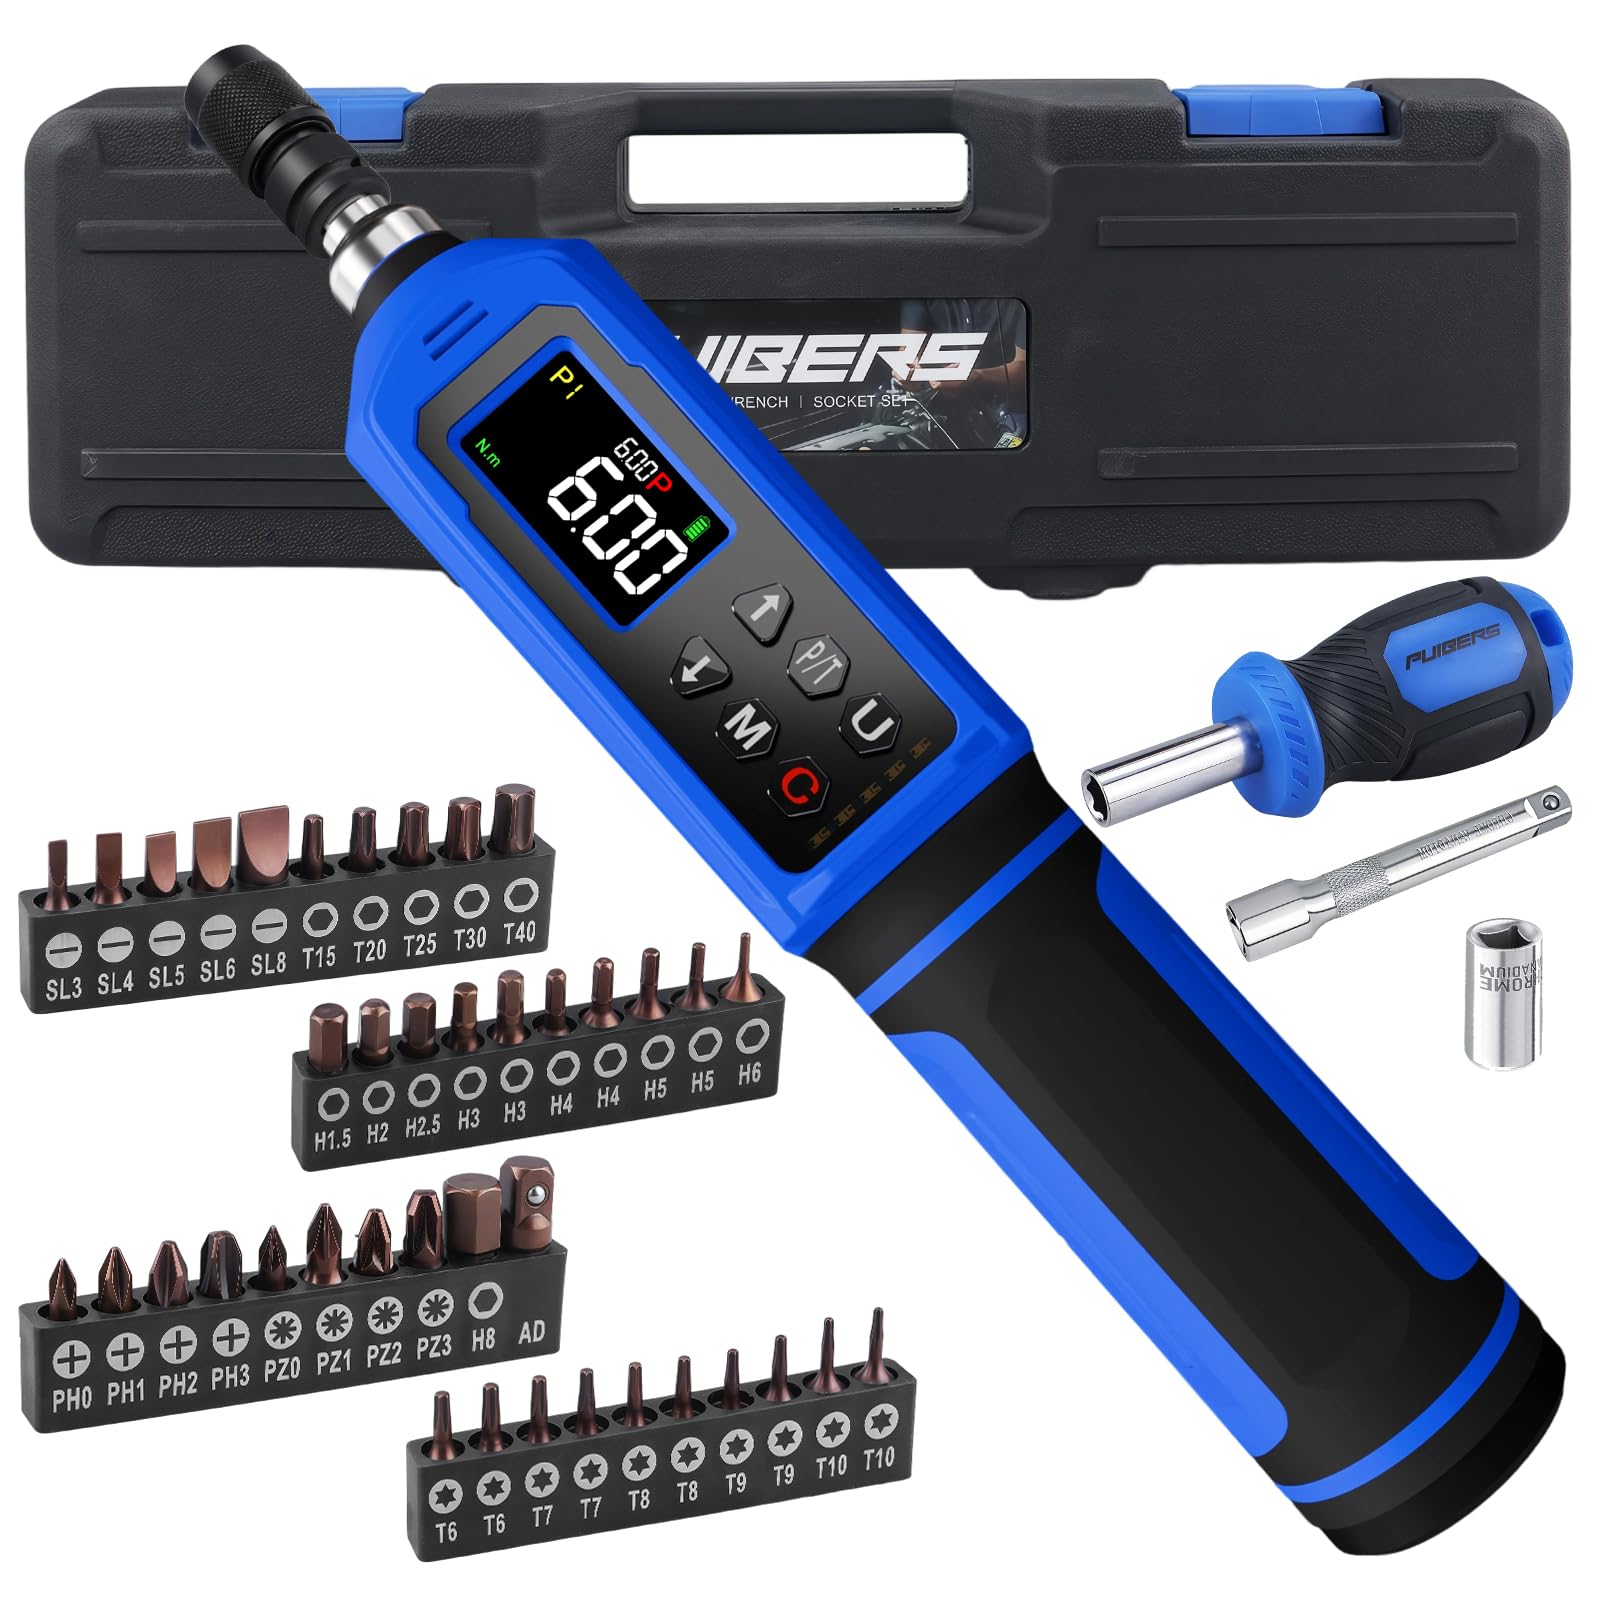
An overview of the PUIBERS 46-piece digital torque screwdriver set, displaying the main digital torque screwdriver, various screwdriver bits, an extension bar, quick-release chuck, spring-loaded socket, and a standard screwdriver handle.
2. Setup
2.1 Battery Installation
The digital torque screwdriver requires batteries for operation. Locate the battery compartment, typically at the base of the handle. Insert the specified battery type (e.g., AAA batteries) according to the polarity markings. Securely close the battery compartment cover.
2.2 Bit Installation
To install a screwdriver bit:
- Pull back on the quick-release mechanism at the tip of the digital torque screwdriver.
- Insert the desired screwdriver bit into the chuck.
- Release the quick-release mechanism to securely lock the bit in place. Ensure the bit is firmly seated before use.

Demonstration of how to easily insert a screwdriver bit into the elastic bit holder of the digital torque screwdriver. The image also shows the separate screwdriver handle for manual pre-tightening or loosening.
2.3 Powering On/Off
To power on the device, short-press the 'C' button. To power off, long-press the 'C' button.
2.4 Initial Settings
Upon powering on, you may need to set your preferred measurement unit and operating mode. Refer to the 'Operating Instructions' section for detailed guidance on these settings.
This video demonstrates the process of setting up and configuring the digital torque screwdriver, including adjusting torque values and selecting measurement units.
3. Operating Instructions
3.1 Button Functions
- C Button: Short-press to power on, long-press to power off.
- P/T Button: Toggles between Peak mode and Tracking mode.
- U Button: Switches between measurement units (in·lb, ft·lb, N·m, kg·cm, kg·m).
- ▲/▼ Buttons: Used to adjust torque values and select presets P1-P9.
- M Button: Confirms settings, saves data during operation, and manages memory.

The digital display of the PUIBERS torque screwdriver, illustrating the three operational modes: Track mode for real-time display, Peak mode for target torque alerts, and Torque memory for storing values. Key features like the buzzer, LCD screen, and LED indicators are highlighted.
3.2 Setting Torque Values and Presets
- Use the ▲ or ▼ buttons to select a preset (P1-P9).
- Press the M button to confirm the preset selection.
- Adjust the desired torque value using the ▲ or ▼ buttons.
- Press the M button again to save the set torque value to the selected preset.

A close-up of the digital LCD screen on the PUIBERS torque screwdriver, displaying a preset torque value (P1 6.00 N·m). This illustrates the clear and instant torque reading capability.
3.3 Measurement Units
The screwdriver supports five measurement units: in·lb, ft·lb, N·m, kg·cm, and kg·m. Press the U button to cycle through and select your desired unit.

The PUIBERS digital torque screwdriver set neatly organized in its durable plastic case. Below, examples of the five selectable measurement units (N·m, lb·ft, lb·in, kg·cm, kg·m) are shown on the display.
3.4 Intelligent Torque Alert System
The device provides visual and auditory feedback to prevent over-tightening. When the applied torque reaches 80%, 90%, and 100% of the target value, the LED lights will flash in sequence, and distinct beeping sounds will be emitted.
3.5 Data Storage and Management
The screwdriver can store up to 500 torque values. During operation, press the M button to instantly store the current data. To manage stored data, long-press the M button. Then, use the U button to select either "Delete All" or "Delete Single" and confirm your choice with the M button.
A practical guide on how to effectively use the digital torque screwdriver for various applications, showcasing proper handling and operation.
4. Maintenance
4.1 Cleaning
Regularly clean the exterior of the digital torque screwdriver with a soft, dry cloth. Avoid using abrasive cleaners or solvents, as these can damage the display or housing. Ensure no moisture enters the electronic components.
4.2 Storage
Store the screwdriver set in its durable plastic case when not in use. This protects the components from dust, moisture, and physical damage. Store in a cool, dry place away from direct sunlight and extreme temperatures.
4.3 Calibration
The digital torque screwdriver is factory calibrated to ±1% accuracy. For continued precision, it is recommended to verify the torque wrench after 12 months or 5000 uses. Refer to the included Inspection Certificate for calibration details.

The PUIBERS digital torque screwdriver alongside its Inspection Certificate, highlighting its ±1% accuracy and calibration details, including model, serial number, range, and instrument precision.
5. Troubleshooting
5.1 Device Not Powering On
- Check battery installation: Ensure batteries are correctly inserted with proper polarity.
- Replace batteries: If batteries are low or depleted, replace them with new ones.
- Clean battery contacts: Ensure battery contacts are clean and free from corrosion.
5.2 Inaccurate Torque Readings
- Recalibrate: If readings appear consistently inaccurate, consider professional recalibration.
- Ensure proper bit seating: A loosely fitted bit can affect accuracy.
- Avoid extreme conditions: Operate the device within its specified temperature and humidity ranges.
5.3 Alerts Not Functioning
- Check settings: Verify that the alert system is enabled in the device settings.
- Battery level: Low battery can sometimes affect alert functionality. Replace batteries if needed.
5.4 Display Issues
- Low battery: A dim or flickering display often indicates low battery power.
- Extreme temperatures: Operating outside recommended temperature ranges can affect LCD performance. Allow the device to return to room temperature.
6. Specifications
| Feature | Detail |
|---|---|
| Brand | PUIBERS |
| Model Number | PBSTS06N |
| Material | Chrome Vanadium Steel |
| Item Weight | 1 Kilogram |
| Torque Range | 0.09-6 Nm (0.07-4.43 ft-lb) |
| Accuracy | ±1% |
| Measurement Units | in·lb, ft·lb, N·m, kg·cm, kg·m |
| Data Storage | Up to 500 torque values |
| Alert System | Buzzer & LED Indicators |
| Number of Items in Set | 46 Pcs |
7. Warranty and Support
7.1 Warranty Information
PUIBERS products are manufactured to high-quality standards and are warranted against defects in materials and workmanship. Please retain your proof of purchase for warranty claims. Specific warranty duration and terms may vary; refer to the product packaging or contact customer support for details.
7.2 Customer Support
For technical assistance, troubleshooting, or any inquiries regarding your PUIBERS Digital Torque Screwdriver Set, please contact our customer support team. Contact information can typically be found on the product packaging or the official PUIBERS website.