1. Introduction
This manual provides essential information for the safe and effective operation, maintenance, and troubleshooting of your ANDELI MCT-416P 5-in-1 Multi-function Welder. Please read this manual thoroughly before using the product and keep it for future reference.
2. Safety Information
Always prioritize safety when operating welding and plasma cutting equipment. Failure to follow safety guidelines can result in serious injury or death.
- Wear appropriate personal protective equipment (PPE), including welding helmet, gloves, protective clothing, and safety shoes.
- Ensure adequate ventilation to avoid inhaling fumes and gases.
- Do not operate the machine in wet conditions or near flammable materials.
- Ensure proper grounding of the equipment.
- Disconnect power before performing any maintenance or changing accessories.
- Keep children and unauthorized personnel away from the work area.
- This product is CE certified, indicating compliance with European safety standards.
3. Product Overview
3.1 Key Features
- 5-in-1 Multi-functionality: Supports Plasma Cutting, Gas & Gasless Semi-automatic Welding (MIG/MAG with CO2 / MIX / FLUX), HF TIG Welding, Pulse Semi-automatic Welding (Aluminum capable), and Stick Welding (MMA).
- Dual Voltage Compatibility: Operates on both 100V and 200V power supplies, offering flexibility for various work environments.
- Synergy Function: Automatically sets optimal welding parameters based on selected wire diameter and plate thickness. Allows for fine adjustment of voltage and current.
- Wide Application: Suitable for welding aluminum, iron, stainless steel, and low carbon steel. Ideal for household use, maintenance, automotive sheet metal, construction, and DIY projects.
- LED Display: Large 5-inch LED screen for clear visibility of settings and operational status.
3.2 Components and Accessories
The ANDELI MCT-416P comes with the following standard accessories:
- MCT-416P Main Unit
- Semi-automatic Welding Torch
- Plasma Cutting Torch
- HF TIG Welding Torch (WP-17)
- Welding Gloves (2 pairs)
- Welding Machine Dust Cover
- Ground Clamp
- Gas Hose (3m)
- Air Regulator
- Semi-automatic Torch Consumables Set
- Cutting Torch Consumables Set
- TIG Torch Consumables Set
- Welding Holder


4. Setup
4.1 Power Connection
The MCT-416P supports both 100V and 200V power inputs. Use the appropriate power cable and adapter for your local power supply. Ensure the power source meets the machine's requirements.

4.2 Torch and Ground Clamp Connection
Connect the desired torch (MIG, TIG, or Plasma) to its corresponding port on the front panel. Connect the ground clamp to the appropriate terminal and securely attach it to the workpiece or metal workbench to ensure proper grounding.
For gas-shielded welding processes (Gas MIG, TIG), connect the gas hose from your gas cylinder to the machine's gas inlet and ensure the air regulator is properly installed and adjusted.
For MIG welding, install the appropriate wire spool (1kg or 5kg compatible) and thread the welding wire through the wire feeder mechanism. Ensure the wire feeder tension is correctly set to prevent slippage.
5. Operating Instructions
The MCT-416P offers multiple welding and cutting modes. Select the desired mode using the control panel.
5.1 Plasma Cutting
- Connect the plasma cutting torch and ensure an air compressor is connected to the machine's air inlet via the air regulator.
- Select "CUT" mode on the control panel.
- Adjust cutting current based on material type and thickness.
- The machine uses a touch-start method for smooth cutting.
- Maximum cutting thickness: 12mm (100V) / 15mm (200V).

5.2 MIG/MAG Welding (Gas & Gasless)
- Select "MIG" or "PULSE MIG" mode.
- Choose between Gas (CO2/MIX) or Gasless (FLUX) operation.
- Utilize the synergy function by selecting wire diameter and plate thickness for automatic parameter setting. Fine-tune voltage and current as needed.
- Pulse MIG mode is suitable for aluminum welding.
- Weldable plate thickness: 0.8-4.5mm (100V) / 0.8-6.5mm (200V).
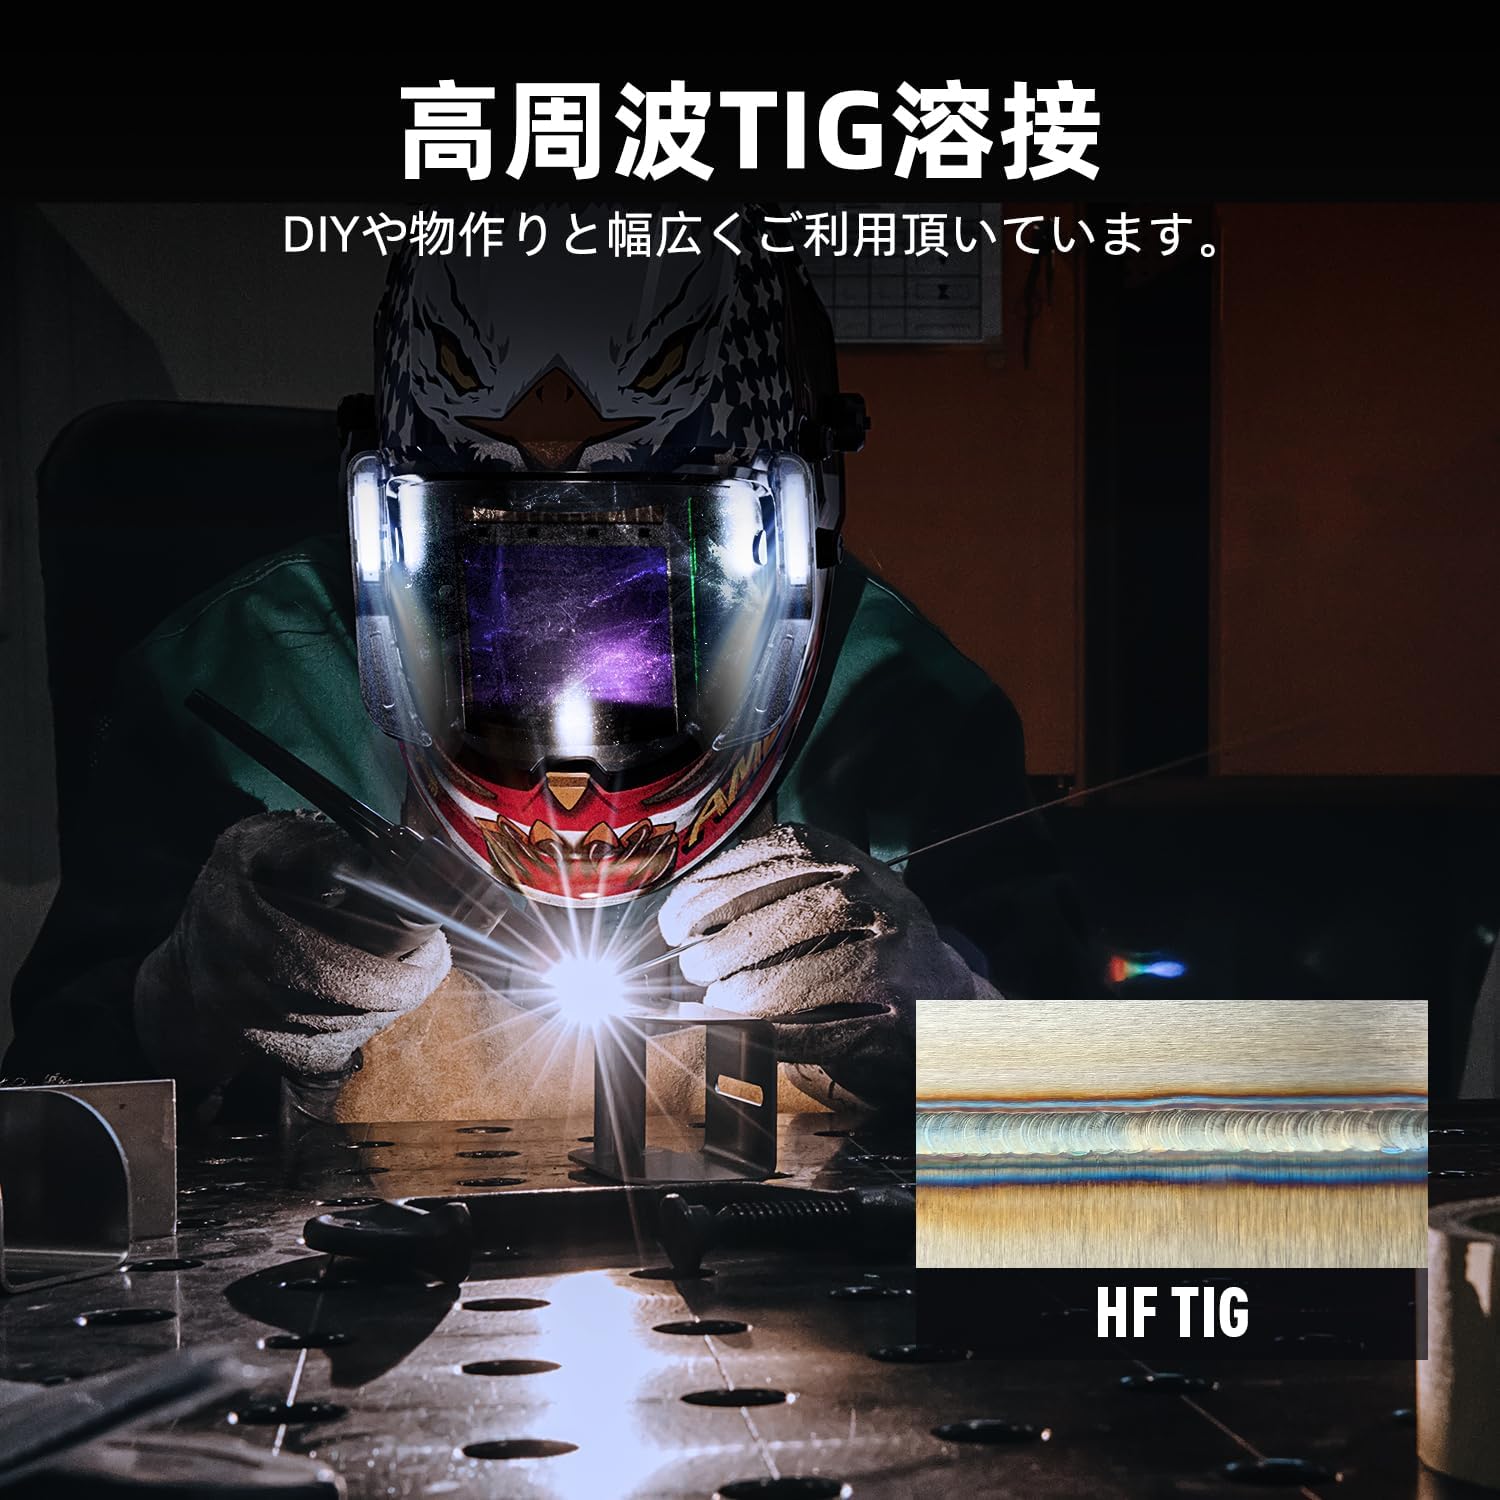
5.3 HF TIG Welding
- Connect the HF TIG torch and gas supply (Argon).
- Select "TIG" mode.
- Adjust welding current and gas flow.
- HF (High Frequency) start provides a clean arc initiation without touching the workpiece.
- Especially effective for thin plate welding.
5.4 Stick Welding (MMA)
- Connect the welding holder and ground clamp.
- Select "MMA" mode.
- Insert the appropriate welding electrode into the holder.
- Adjust welding current based on electrode type and material thickness.
- Suitable for outdoor work and thick plate welding.

5.5 Welding Modes (2T, 4T, Spot)
The machine offers different trigger modes for various welding applications:
- 2T Mode: Press and hold the trigger to weld. Release to stop welding.
- 4T Mode: Press and release the trigger to start welding. Press and release again to stop welding.
- Spot Welding: Press the trigger to initiate welding. Welding automatically stops after a set time.

6. Maintenance
Regular maintenance ensures the longevity and optimal performance of your welding machine.
- Cleaning: Regularly clean the machine's exterior and ventilation openings to prevent dust buildup. Use the provided dust cover when not in use.
- Torch Maintenance: Inspect torches for wear and tear. Replace consumables (nozzles, contact tips, electrodes) as needed.
- Wire Feeder: Keep the wire feeder mechanism clean and ensure proper tension.
- Cables and Connections: Check all cables and connections for damage or looseness. Repair or replace as necessary.
- Air Regulator: Ensure the air regulator for plasma cutting is functioning correctly and free of moisture.

7. Troubleshooting
This section provides solutions to common issues. For problems not listed here, contact customer support.
| Problem | Possible Cause | Solution |
|---|---|---|
| No power | Power cable disconnected, circuit breaker tripped, incorrect voltage. | Check power connections, reset breaker, ensure correct 100V/200V input. |
| Poor weld quality | Incorrect settings (current/voltage), improper wire feed speed, contaminated workpiece, worn consumables. | Adjust settings, clean workpiece, replace consumables. Use synergy function for optimal settings. |
| Arc unstable or difficult to start | Poor ground connection, incorrect gas flow, dirty contact tip/electrode. | Ensure solid ground, check gas supply, clean or replace torch consumables. |
| Plasma cutter not cutting | No air supply, low air pressure, worn plasma consumables, incorrect current. | Check air compressor and regulator, replace plasma torch consumables, adjust current. |
8. Specifications
| Feature | Detail |
|---|---|
| Brand | ANDELI |
| Model Number | MCT-416P |
| Product Dimensions | 46 x 17 x 29 cm |
| Item Weight | 18 kg |
| Input Voltage | 100V / 200V (Dual Voltage) |
| Max Welding Current | 160 AMP |
| Weldable Plate Thickness (100V) | 0.8 - 4.5 mm |
| Weldable Plate Thickness (200V) | 0.8 - 6.5 mm |
| Cuttable Plate Thickness (100V) | Up to 12 mm |
| Cuttable Plate Thickness (200V) | Up to 15 mm |
| Welding Modes | MIG (Gas/Gasless), Pulse MIG, HF TIG, MMA (Stick), Plasma Cut |
| Certifications | CE Certified |
9. Warranty and Support
For warranty information, please refer to the warranty card included with your product or contact ANDELI customer service. ANDELI is committed to providing efficient customer service and support for its products.
For technical assistance, troubleshooting beyond this manual, or to inquire about replacement parts, please contact the ANDELI Official Store JP through the platform where you purchased the product or visit their official website.
First Available Date: 2025/06/24