Lyngins PLFX-SDZMM8MM4876CH
Lyngins 44-48"W x 76"H Frameless Shower Door User Manual
Model: PLFX-SDZMM8MM4876CH
1. Introduction
This user manual provides comprehensive instructions for the installation, operation, maintenance, and troubleshooting of your Lyngins 44-48"W x 76"H Frameless Shower Door. Please read this manual thoroughly before beginning installation or use to ensure proper function and safety.
Important Safety Information
- Always wear safety glasses during installation.
- Handle glass panels with extreme care. Tempered glass, while strong, can shatter if struck at the edges.
- Ensure the installation surface is level and structurally sound.
- It is recommended to have at least two people for installation due to the weight and size of the glass panels.
- Do not use power tools on glass.
- Follow all local building codes and regulations.
2. Package Contents
Verify that all components listed below are present and undamaged before beginning installation. If any parts are missing or damaged, please contact customer support.
- Frameless Tempered Glass Panels (Fixed and Sliding)
- Stainless Steel Sliding Rail
- High-Precision Rollers
- Wall Profiles and Brackets
- Ergonomic Round Handle
- Towel Bar
- Waterproof Strips and Seals
- Low-Profile Sliding Guide
- Installation Hardware (screws, anchors, washers)
- Installation Instructions

Image: Overview of the Lyngins Frameless Shower Door and its main components.
3. Setup and Installation
Careful preparation and adherence to these steps are crucial for a successful and safe installation.
3.1 Pre-Installation Checklist
- Verify shower opening dimensions (44-48 inches wide, 76 inches high).
- Ensure the shower base or curb is level and plumb.
- Confirm wall studs are present and suitable for mounting.
- Clear the installation area of any obstructions.
3.2 Tools Required
- Tape Measure
- Pencil
- Level
- Drill with appropriate drill bits (for tile/masonry and wood)
- Screwdriver Set (Phillips and Flathead)
- Caulk Gun
- Silicone Sealant (mildew-resistant, clear)
- Utility Knife
- Rubber Mallet (optional)
3.3 Step-by-Step Installation Guide
- Measure and Mark: Carefully measure the shower opening width and height. Use a level and pencil to mark the positions for the wall profiles on both sides of the shower opening. Ensure these lines are plumb.
Image: Model dimensions indicating 76" shower door height, 73" walk-through opening height, 21 1/2" walk-in width, and 48" shower door width with 5/16" glass thickness.
- Install Wall Profiles: Drill pilot holes at the marked positions. Secure the wall profiles to the wall using the provided screws and anchors. Ensure they are firmly attached and plumb.
- Install Fixed Glass Panel: Carefully place the fixed glass panel into the installed wall profile. Ensure it is properly seated and level. Secure the fixed panel using the provided fasteners.
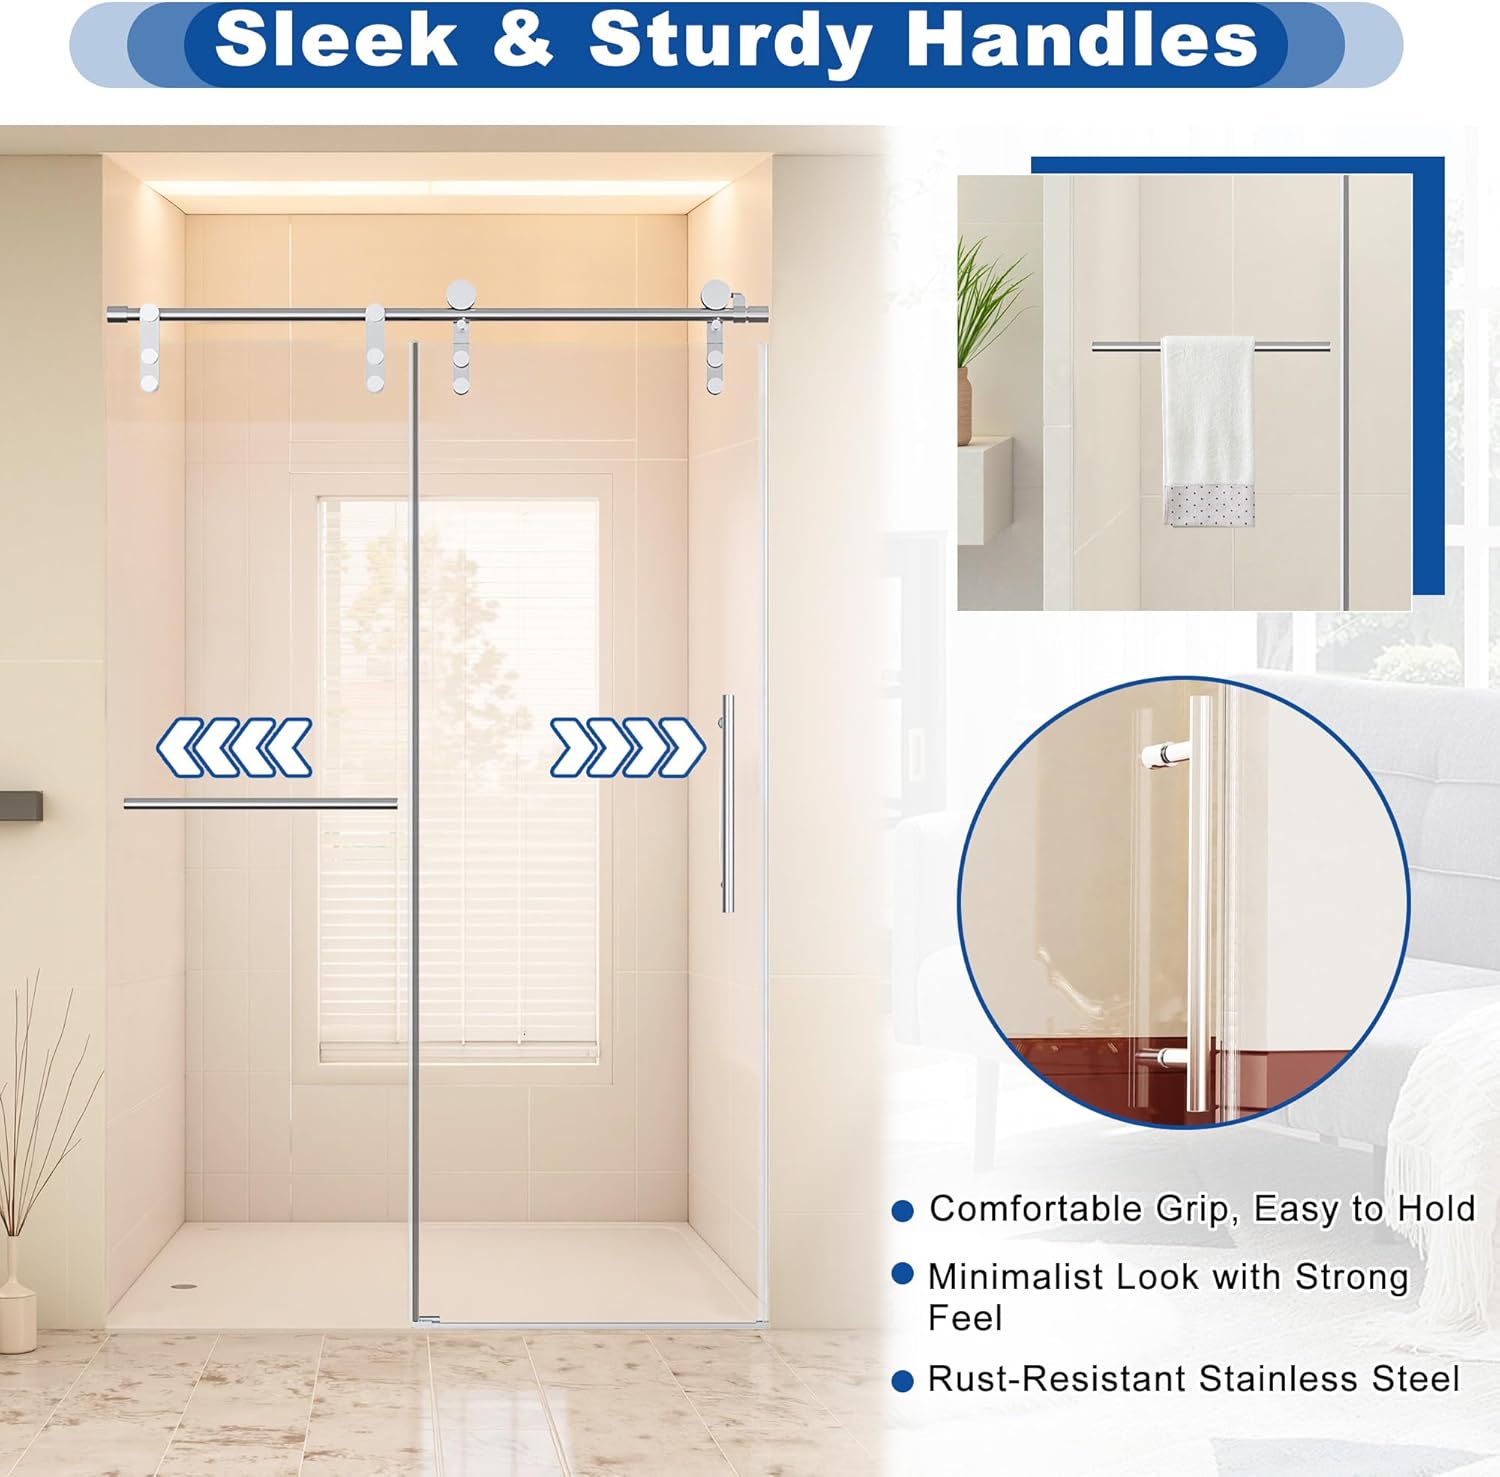
Image: ANSI-Certified Tempered Glass features, highlighting impact resistance, smooth edges, and crystal clarity.
- Install Sliding Rail: Attach the stainless steel sliding rail to the top of the fixed glass panel and the opposing wall profile. Ensure the rail is level and securely fastened.
- Attach Rollers to Sliding Glass Panel: Install the high-precision rollers onto the top edge of the sliding glass panel. Ensure they are securely tightened.

Image: Exquisite Rollers Design, showing quiet rubber-coated wheels, ultra-smooth sliding action, and long-lasting durable bearings.
- Hang Sliding Glass Panel: Carefully lift the sliding glass panel and hang its rollers onto the sliding rail. Guide the bottom edge of the sliding panel into the low-profile sliding guide installed on the shower curb.

Image: Low-Profile Sliding Guide, illustrating its precision-cast metal base, wear-resistant rubber for smooth glide, and ability to keep glass aligned without deviation.
- Install Handles and Towel Bar: Attach the ergonomic round handle and the towel bar to the sliding glass panel as per the instructions.
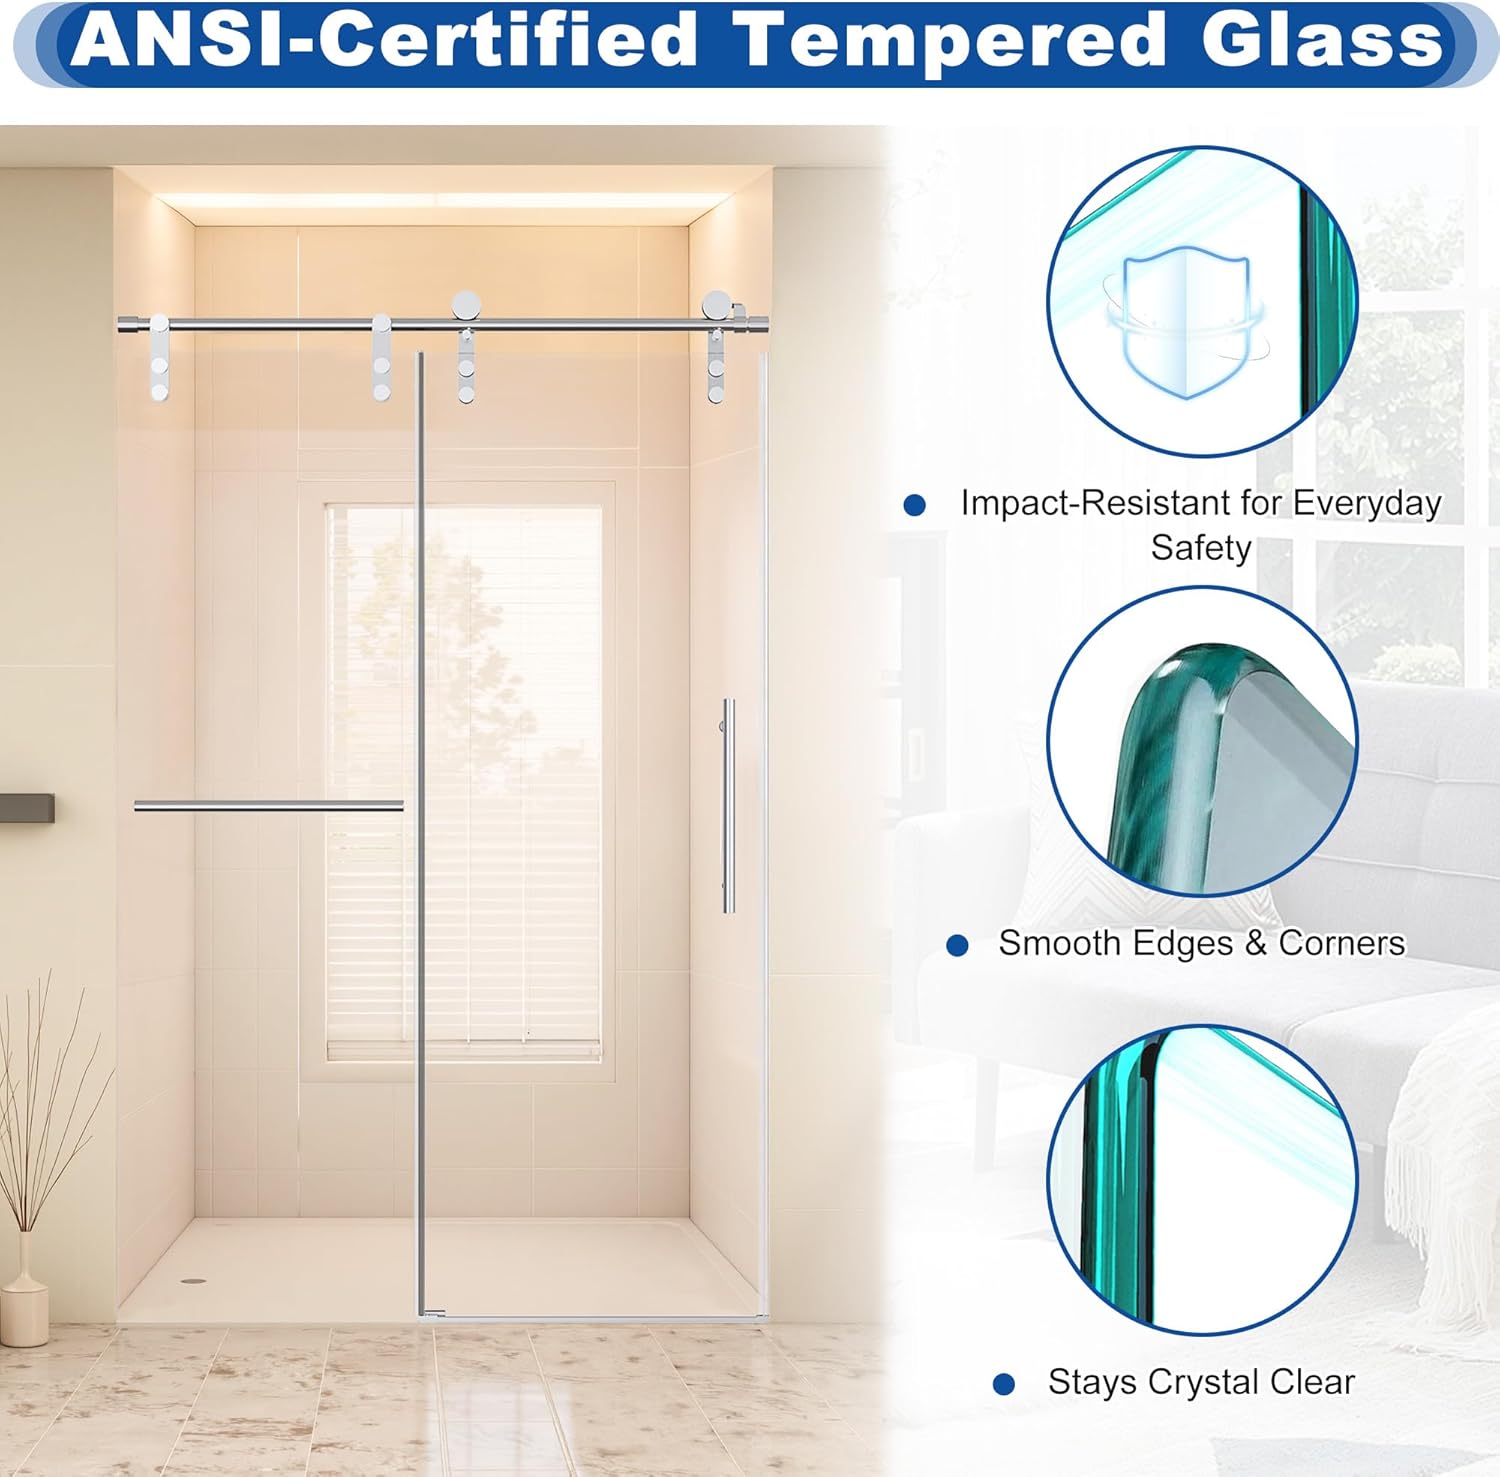
Image: Sleek & Sturdy Handles, emphasizing comfortable grip, minimalist look, and rust-resistant stainless steel construction.
- Apply Silicone Sealant: Apply a continuous bead of clear, mildew-resistant silicone sealant along all exterior seams where the wall profiles meet the wall and the fixed glass panel meets the curb. Allow adequate drying time before use.

Image: Triple Waterproof Protection, showing magnetic seals for leak-free closure, bottom shield blocking splash, and nano-coated glass repelling water and stains.
- Test Operation: Once the silicone has cured, gently test the sliding action of the door to ensure smooth and quiet movement. Check for any leaks during the first few uses.
4. Operating Instructions
Your Lyngins Frameless Shower Door is designed for smooth and effortless operation.
- To open the door, gently grasp the handle and slide the panel along the top rail.
- To close the door, slide the panel back until it meets the fixed panel and the magnetic seals engage, ensuring a secure and watertight closure.
- Avoid forcing the door or applying excessive pressure, as this can damage the rollers or track.
5. Care and Maintenance
Regular cleaning and maintenance will ensure the longevity and pristine appearance of your shower door.
5.1 Glass Cleaning
- The glass features a Nano Self-Clean Surface, which repels water and stains.
- For daily cleaning, simply wipe down the glass with a soft cloth or squeegee after each use to prevent water spots.
- For deeper cleaning, use a mild, non-abrasive glass cleaner. Avoid cleaners containing harsh chemicals, abrasives, or scouring pads, as these can damage the glass coating.
5.2 Hardware Cleaning
- Clean stainless steel hardware with a soft, damp cloth and mild soap.
- Do not use abrasive cleaners, steel wool, or cleaners containing ammonia, bleach, or acid, as these can corrode the finish.
- Periodically check all screws and fasteners for tightness and re-tighten if necessary.
5.3 Seals and Rollers
- Inspect the waterproof seals regularly for wear or damage. Replace if necessary to prevent leaks.
- Keep the sliding rail and rollers free of debris and soap scum to ensure smooth operation. Clean with a soft brush or cloth.
6. Troubleshooting
This section addresses common issues you might encounter with your shower door.
| Problem | Possible Cause | Solution |
|---|---|---|
| Door does not slide smoothly. | Debris in the track or on rollers; loose rollers; misaligned track. | Clean the track and rollers. Check if rollers are securely attached. Verify the top rail and bottom guide are level and aligned. |
| Water leaks from the door. | Damaged or improperly installed seals; insufficient silicone sealant; door not closing completely. | Inspect all seals and replace if damaged. Reapply silicone sealant where needed. Ensure the door closes fully and magnetic strips engage. |
| Glass appears cloudy or stained. | Hard water spots; improper cleaning agents. | Use a mild glass cleaner designed for shower doors. Avoid abrasive cleaners. Wipe down glass after each use. |
| Hardware feels loose. | Screws have loosened over time. | Gently re-tighten all visible screws on handles, towel bar, and wall profiles. Do not overtighten. |
7. Product Specifications
| Feature | Detail |
|---|---|
| Brand | Lyngins |
| Model Number | PLFX-SDZMM8MM4876CH |
| Color | Chrome |
| Material | Glass, Stainless Steel |
| Dimensions (W x H) | 44-48 inches x 76 inches |
| Glass Thickness | 5/16" (8mm) SGCC Tempered Glass |
| Item Weight | 113 Pounds |
| Assembly Required | Yes |
| UPC | 725380805129 |
| Included Components | Accessories, Handle, Installation Instructions, Tools, Towel Rail |
| Date First Available | June 25, 2025 |
8. Warranty and Support
While specific warranty details are not provided in this manual, Lyngins products are designed for durability and performance. For any product-related inquiries, technical assistance, or to report missing/damaged parts, please contact Lyngins customer support through the retailer where the product was purchased.
Please retain your proof of purchase for any warranty claims or support requests. Refer to the retailer's return policy for information on returns and exchanges, typically within 30 days of purchase.
For the most up-to-date information, please visit the official Lyngins website or contact their customer service directly.
Ask a question about this manual
Ask about setup, troubleshooting, compatibility, parts, safety, or missing instructions. Manuals+ will review the question and use this page’s manual context to help answer it.