
DWVO MADWV03dyc
DWVO 70 Inch Farmhouse TV Stand with LED Lighting (Grey Oak) - Instruction Manual
Introduction
This manual provides detailed instructions for the assembly, operation, and maintenance of your DWVO 70 Inch Farmhouse TV Stand with LED Lighting. Please read all instructions carefully before beginning assembly and retain this manual for future reference.

Image: The assembled DWVO 70 Inch Farmhouse TV Stand, showcasing its grey oak finish, open storage compartments with blue LED lighting, and two lower drawers with barn door style fronts. A television is placed on top, and various media devices and decorative items are arranged within the compartments.
Safety Information
WARNING: Failure to follow these safety instructions could result in injury or damage to the product.
- Always assemble according to the provided instructions.
- Ensure the cabinet is stable and secure before placing heavy items on it.
- Do not exceed the weight limit of the cabinet to prevent accidents.
- Keep small parts and packaging materials away from children.
- Use on a level surface to prevent tipping.
Package Contents
Before beginning assembly, verify that all components listed below are present and undamaged. If any parts are missing or damaged, please contact customer support.
- TV Stand components (Engineered Wood panels, shelves, drawers)
- Assembly Hardware (screws, dowels, cam locks, etc.)
- LED Light Strip with Remote Control
- Instruction Manual
Specifications
| Brand | DWVO |
| Model Name | TV Stand |
| Model Number | MADWV03dyc |
| Color | Grey Oak |
| Material | Engineered Wood |
| Product Dimensions (L x W x H) | 70.7" x 15.7" x 24.8" (179.8cm x 40cm x 63cm) |
| Item Weight | 82.9 Pounds |
| TV Size Compatibility | Up to 80 Inches |
| Number of Shelves | 3 (Adjustable) |
| Number of Compartments | 4 (Open slots) |
| Special Feature | RGB LED Light Strip with Remote Control |
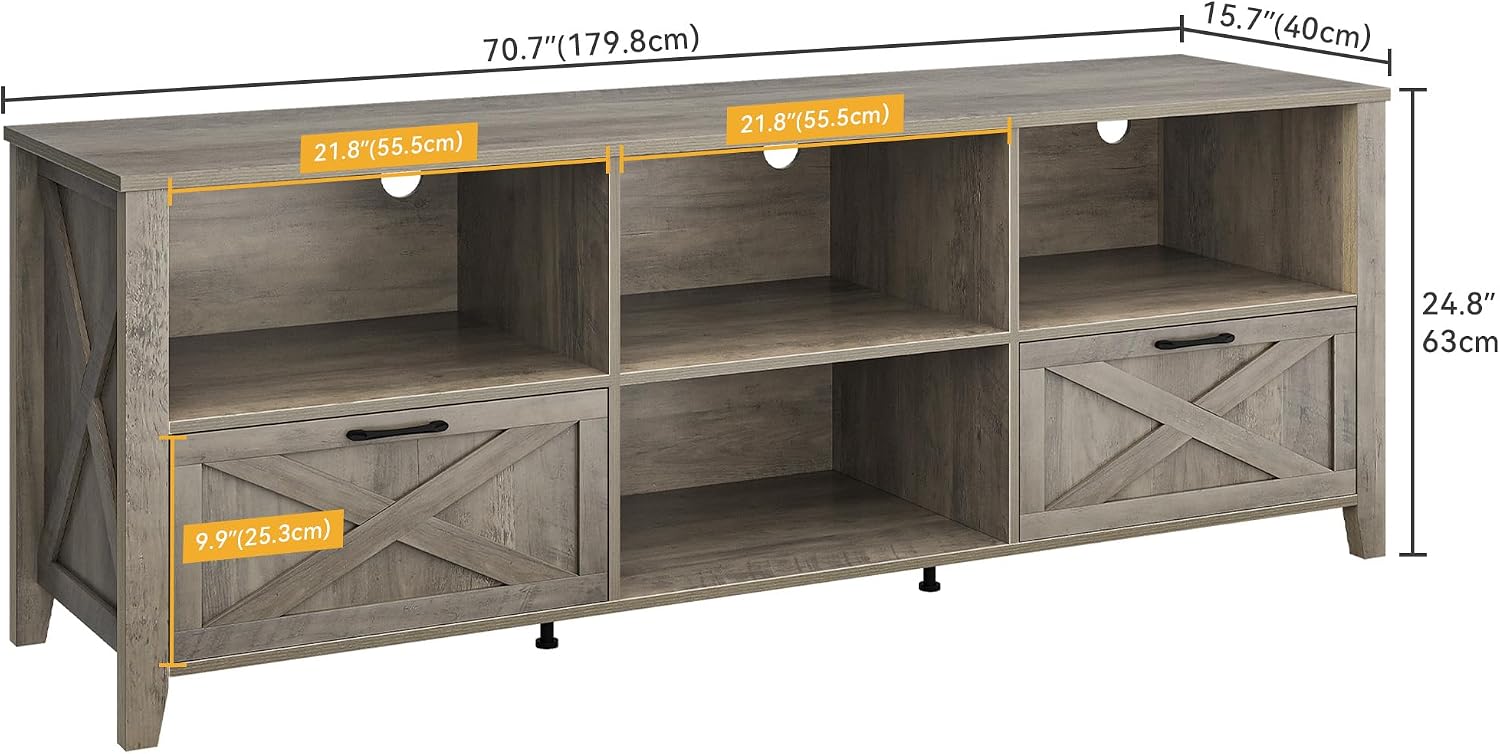
Image: A detailed diagram illustrating the overall dimensions of the TV stand: 70.7 inches (179.8 cm) in length, 15.7 inches (40 cm) in depth, and 24.8 inches (63 cm) in height. It also shows the internal dimensions of the compartments and drawers.
Assembly Instructions
Assembly is required for this product. It is recommended to have two people for assembly. Please follow these steps carefully.
Step 1: Unpack and Identify Components
Carefully unpack all parts and hardware. Lay them out on a clean, soft surface to prevent scratches. Refer to the parts list (usually included in the package) to identify each component.

Image: A close-up view of the TV stand's leg and the lower frame, demonstrating the sturdy construction of the base.
Step 2: Assemble the Base Frame
Begin by connecting the side panels to the bottom panel using the provided hardware (e.g., dowels and cam locks). Ensure all connections are secure and flush.
Step 3: Install Internal Dividers and Shelves
Insert the vertical dividers into their designated slots. The central shelves are adjustable. Position them according to your storage needs. Secure them with the appropriate shelf pins or hardware.

Image: A diagram illustrating the adjustable shelf feature, showing how the height of the inner partitions can be freely adjusted to accommodate different item sizes.
Step 4: Assemble and Install Drawers
Assemble the two drawers following the specific instructions for drawer construction. Attach the handles to the drawer fronts. Slide the assembled drawers into their respective compartments.

Image: A close-up view of one of the black metal handles on a drawer, highlighting the farmhouse-style X-pattern on the drawer front.
Step 5: Attach the Top Panel
Carefully place the top panel onto the assembled frame, aligning it with the pre-drilled holes. Secure it using the remaining hardware.
Step 6: Install LED Lighting
Adhere the LED light strip to the designated areas within the open compartments. Connect the power cable and ensure it is routed neatly. Refer to the LED light kit instructions for specific placement and connection details.

Image: A close-up of a circular LED puck light installed in the ceiling of an open compartment, with its power cable connected.
Step 7: Final Placement
Position the assembled TV stand in your desired location. Ensure it is stable and level. The stand is designed to support TVs up to 80 inches.
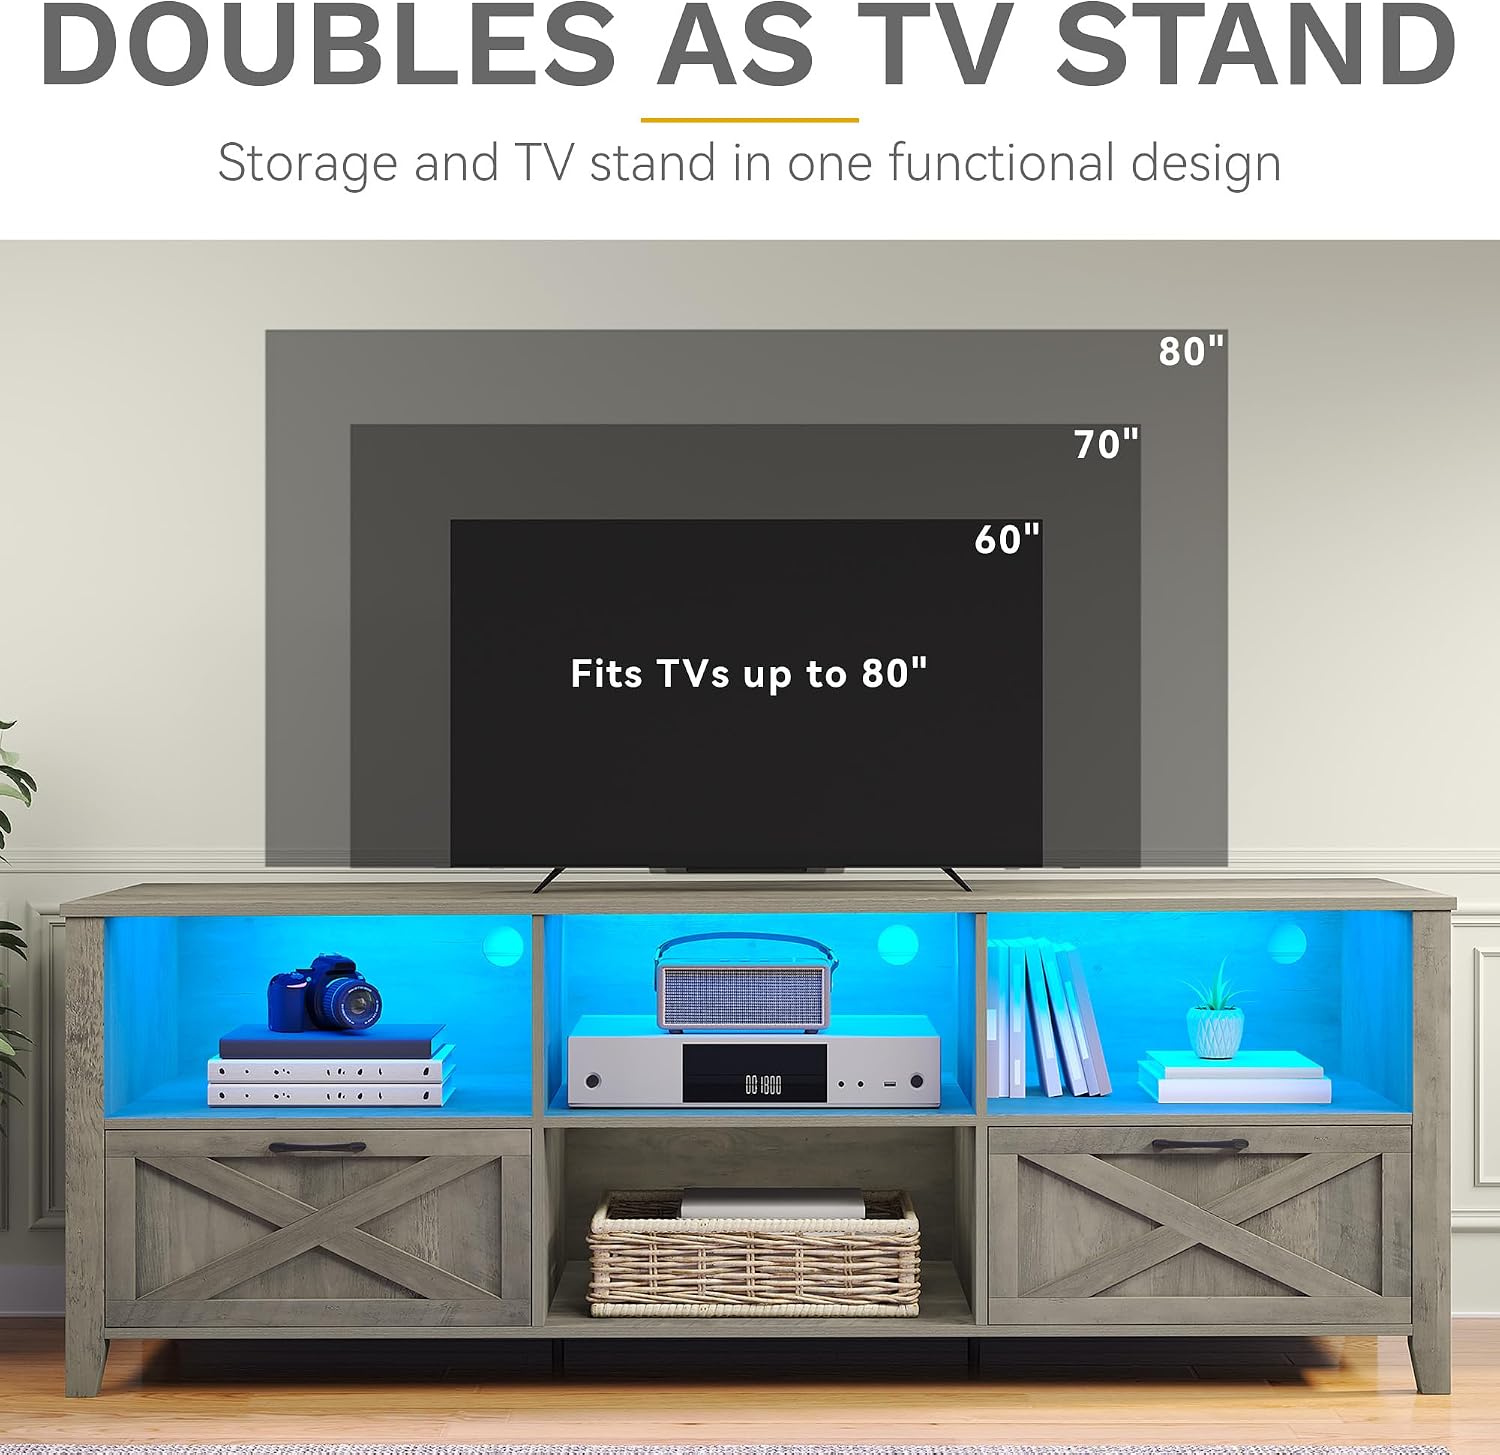
Image: The DWVO TV stand shown with a large television placed on top, demonstrating its capacity to accommodate TVs up to 80 inches. The image also highlights the spacious design for media storage.
Operating Instructions (LED Lighting)
The integrated RGB LED light strip can be controlled via the included remote control or a compatible smartphone application.

Image: The DWVO TV stand with its LED lights illuminated in blue, accompanied by graphics of the remote control and a smartphone app interface, indicating various control options like 24 light colors, music mode, timing function, and dynamic modes.
Using the Remote Control:
- Power On/Off: Press the power button to turn the lights on or off.
- Color Selection: Use the color buttons to choose from 24 static colors.
- Brightness Adjustment: Use the brightness up/down buttons to adjust light intensity.
- Dynamic Modes: Select from various pre-programmed dynamic lighting effects (e.g., flash, strobe, fade).
- Music Mode: Activate music mode for lights to react to sound.
- Timing Function: Set a timer for the lights to turn off automatically.
Using the Smartphone Application:
Download the recommended application (refer to the LED light kit instructions for app name and QR code). Pair your device with the LED lights via Bluetooth. The app offers extended control options, including custom color mixing and advanced dynamic modes.
Maintenance
- Cleaning: Wipe surfaces with a soft, damp cloth. Avoid harsh chemicals or abrasive cleaners that may damage the finish.
- Dusting: Regularly dust the stand to prevent buildup.
- LED Lights: The LED lights are designed for long-term use. If a light strip malfunctions, contact customer support for replacement options. Do not attempt to repair the LED strip yourself.
- Stability Check: Periodically check all screws and connections to ensure they remain tight and secure.
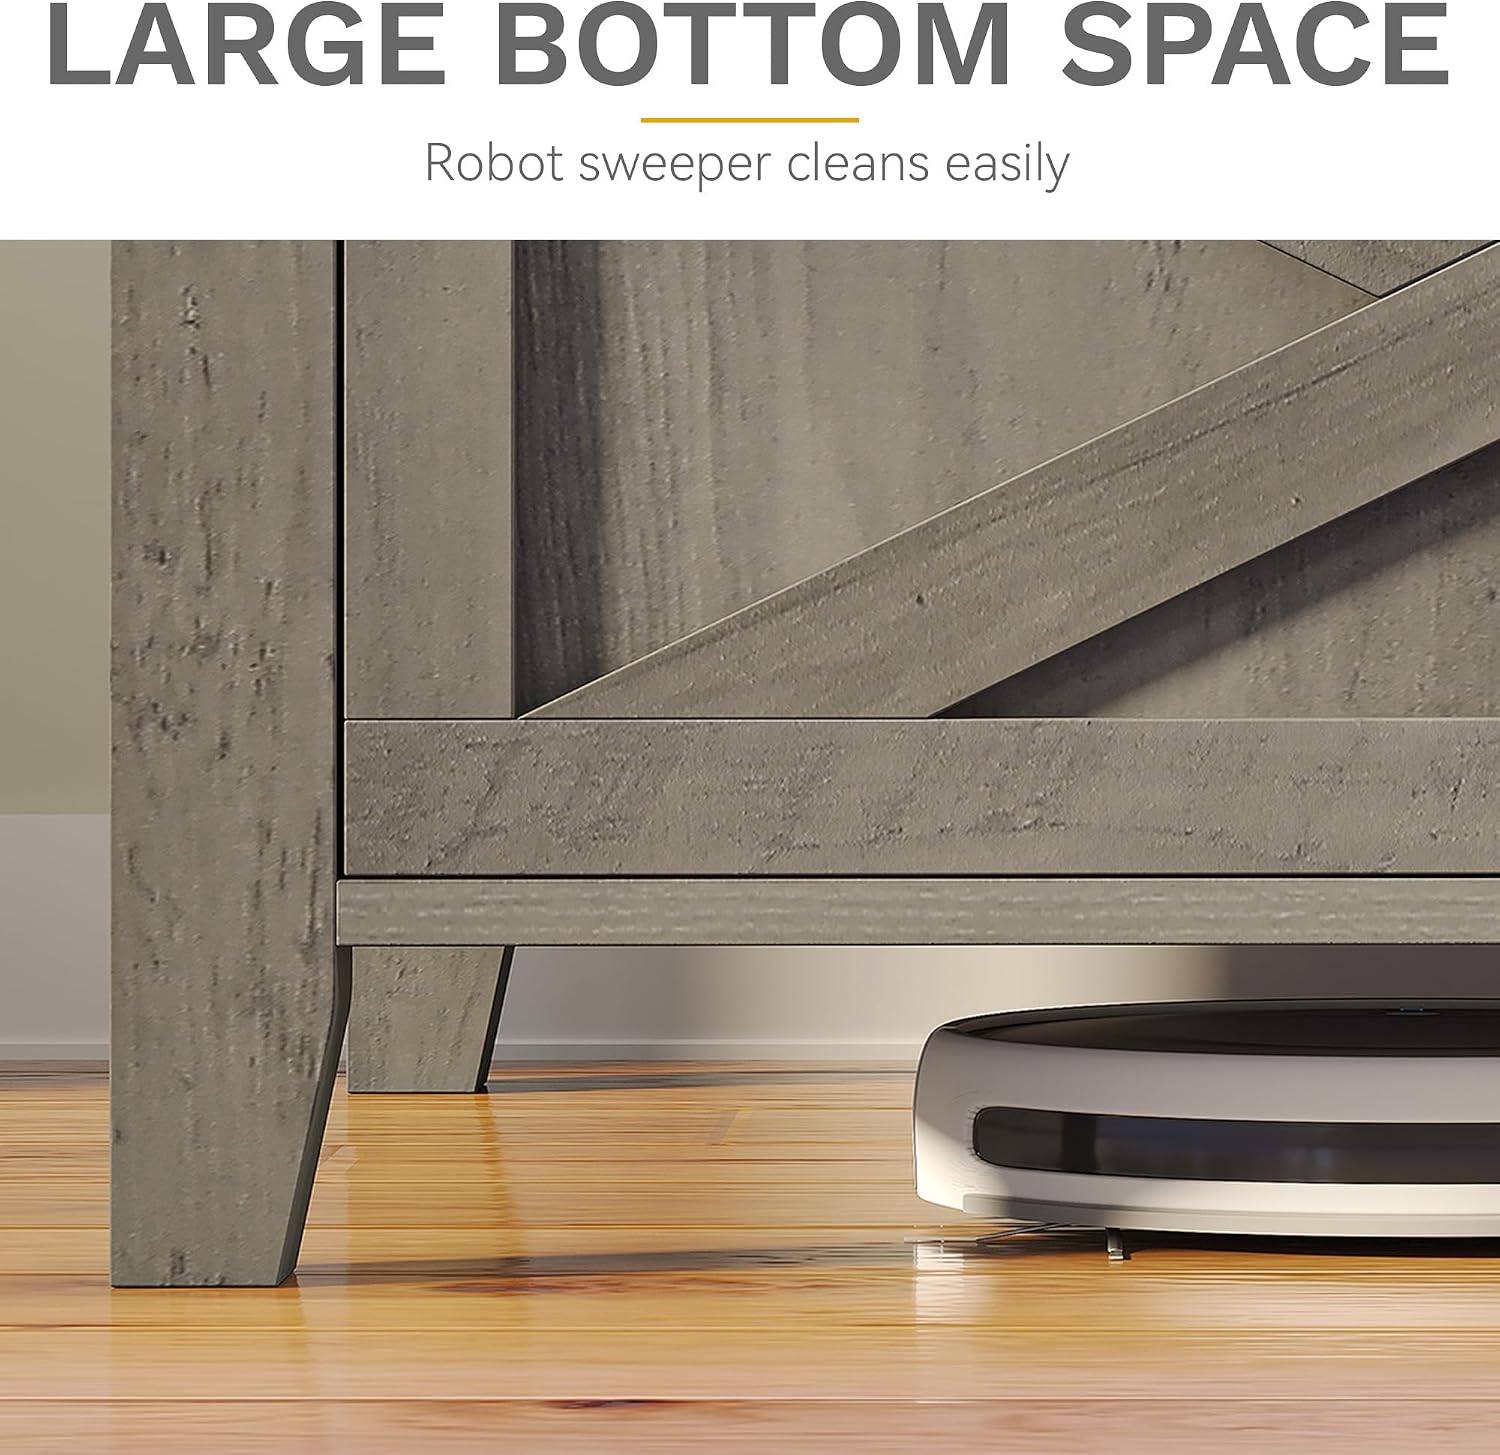
Image: A robot vacuum cleaner operating underneath the TV stand, demonstrating the ample clearance provided by the stand's legs for easy cleaning.
Troubleshooting
| Problem | Possible Cause | Solution |
|---|---|---|
| Stand is wobbly or unstable. | Loose connections or uneven floor. | Ensure all screws and cam locks are tightened. Move the stand to a level surface or use shims if necessary. |
| LED lights do not turn on. | Power cable not connected, remote battery dead, or light strip malfunction. | Check if the power cable is securely plugged into an outlet and the light strip. Replace remote control batteries. If the issue persists, contact customer support. |
| Drawers do not slide smoothly. | Improper installation of drawer slides or obstruction. | Recheck drawer slide installation according to assembly instructions. Ensure no objects are obstructing the drawer's path. |
Warranty and Support
DWVO products are manufactured with quality and care. For any questions, missing parts, or assistance with assembly, please contact DWVO customer support. Please have your model number (MADWV03dyc) and purchase information ready when contacting support.
For specific warranty details, please refer to the warranty card included with your product or visit the official DWVO website.
Related documentsMADWV03dyc


Ask a question about this manual
Ask about setup, troubleshooting, compatibility, parts, safety, or missing instructions. Manuals+ will review the question and use this page’s manual context to help answer it.