Introduction
This manual provides detailed instructions for the safe installation, operation, and maintenance of your WAC Lighting Ion 2in LED Round Recessed Light. Please read this manual thoroughly before installation and retain it for future reference.
Important Safety Information
- WARNING: Risk of electric shock. Disconnect power at the fuse or circuit breaker before installing or servicing.
- WARNING: Risk of fire. Use only with specified dimmers.
- Installation must be performed by a qualified electrician in accordance with the National Electrical Code and local codes.
- Ensure all electrical connections are secure and properly insulated.
- Do not modify the fixture. Any modifications may void the warranty and create safety hazards.
- Suitable for wet locations, IC-Rated for direct contact with insulation, and Airtight.
- Operating voltage: 120V-277V AC.
Package Contents
Confirm all components are present before beginning installation.
- LED Light and Trim
- LED Driver and Cable
- Housing or Frame-in Kit (New Construction)
- Mounting Hardware Pack
- Instruction Manual (this document)
Setup and Installation
This section outlines the steps for installing your WAC Lighting Ion recessed light. A frame-in kit is included for new construction installations.
1. Prepare the Installation Area
Ensure power is disconnected at the circuit breaker. Identify the desired location for the fixture. This fixture requires a 3-inch round ceiling cutout. The ceiling thickness should be between 0.5 inches and 1.5 inches.

This image displays a technical diagram with dimensions for the frame-in kit and the driver box. It shows the overall length of the frame-in kit, the cutout size, and the dimensions of the external driver box, including its height and width.
2. Install the Frame-in Kit (New Construction)
Position the frame-in kit in the ceiling joists. Secure the frame-in kit using appropriate mounting hardware. The adjustable bars allow for flexible positioning between joists.

This image illustrates the main components of the WAC Lighting Ion recessed light: the metal frame-in kit, the separate driver box with wiring, and the round LED light engine with retention clips. It shows how the driver box connects to the light engine and how the frame-in kit supports the entire assembly.
3. Electrical Connection
The driver box includes 5 knockouts for electrical connections. Connect the universal input driver (120V-277V) to the main power supply according to local electrical codes. Use the male-to-female quick connect locking cable to join the light engine to the driver box.
4. Install the Light Engine
Once the frame-in kit is secured and electrical connections are made, insert the LED light engine into the 3-inch ceiling cutout. The retention clips on the light engine will hold it securely in place.
Operating Instructions
1. Power On
Restore power at the circuit breaker. The light should illuminate.
2. 5-CCT Selectable Color Temperature
The Ion fixture features a 5-CCT selectable switch located on the driver box. Before final installation of the light engine, select your desired color temperature from the following options: 2700K, 3000K, 3500K, 4000K, or 5000K. Adjust the switch to the preferred setting.
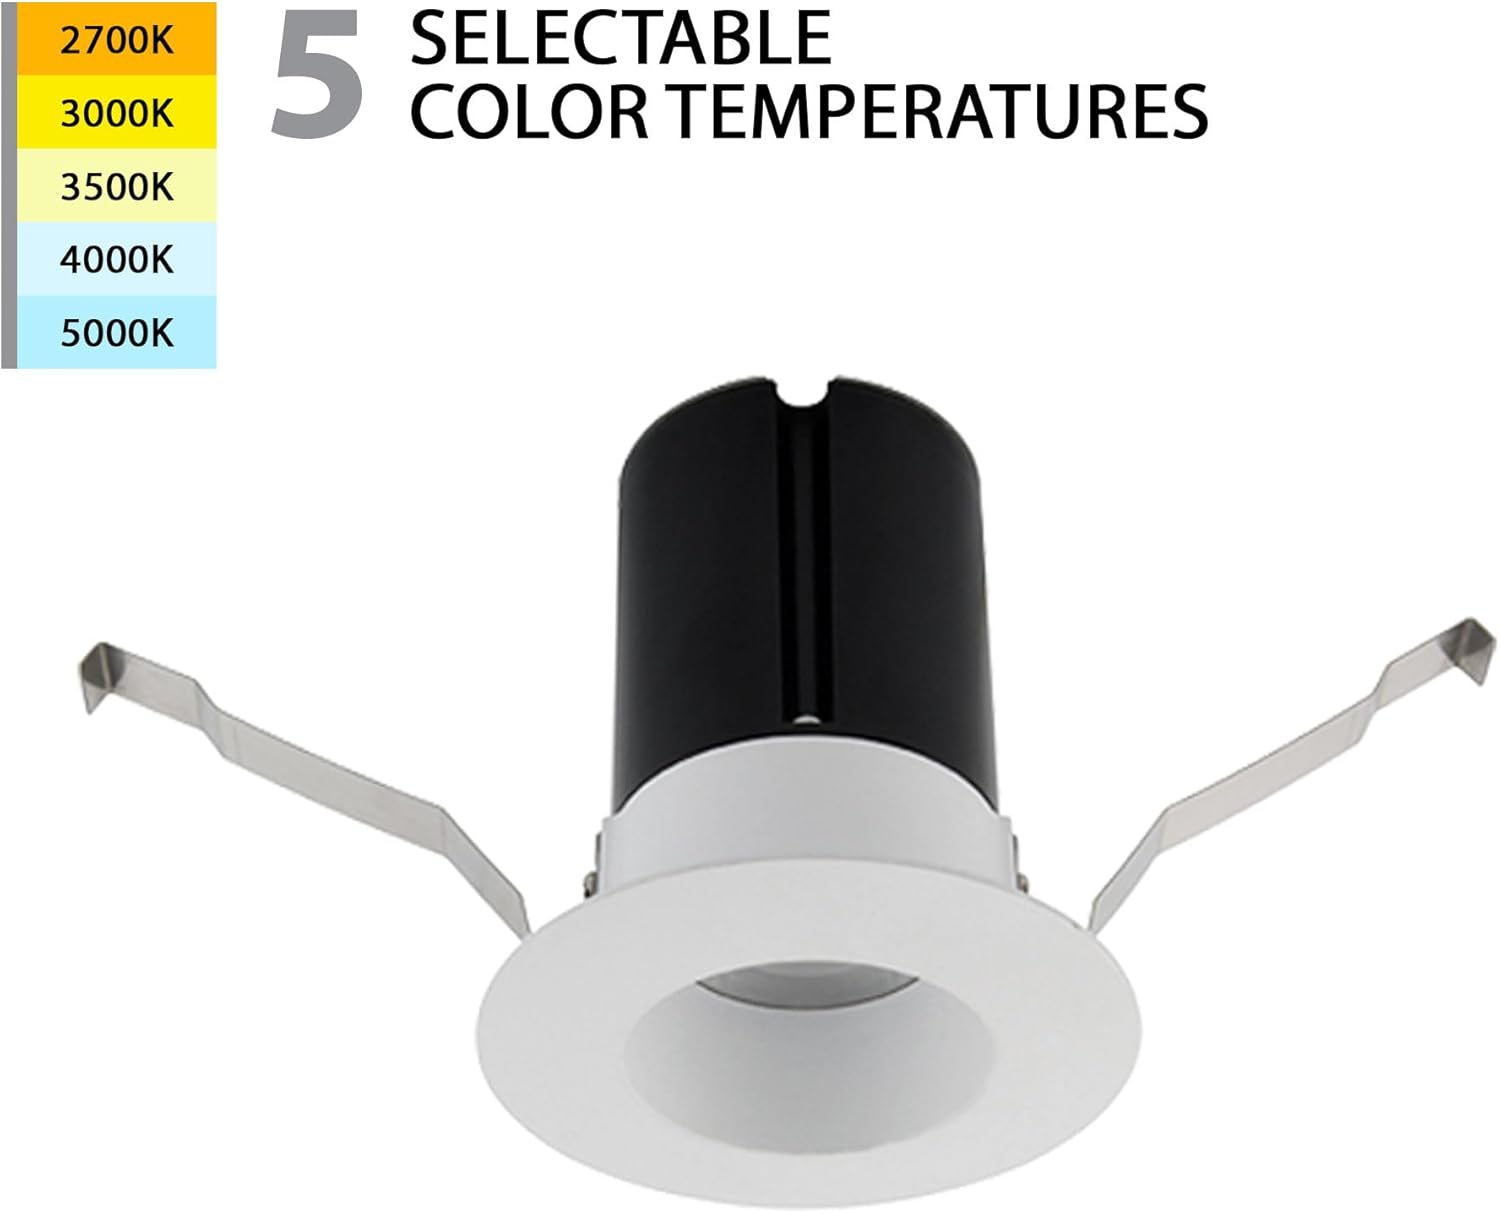
This image highlights the 5-CCT (Correlated Color Temperature) selectable switch, typically found on the driver box. It shows the different Kelvin temperature options (2700K, 3000K, 3500K, 4000K, 5000K) that can be chosen by sliding the switch.
3. Dimming Functionality
This fixture is compatible with electronic low voltage (ELV) or TRIAC dimmers. It provides smooth and continuous dimming. With ELV dimmers, it dims down to 10%, and with TRIAC dimmers, it dims down to 5%.
Maintenance
- Ensure power is off before performing any maintenance.
- Clean the fixture with a soft, dry cloth. Do not use abrasive cleaners or solvents.
- The LED module is replaceable, with a rated life of 50,000 hours. Contact WAC Lighting for replacement parts if needed.
Troubleshooting
| Problem | Possible Cause | Solution |
|---|---|---|
| Light does not turn on. | No power supply. Loose wiring connection. Faulty switch or dimmer. |
Check circuit breaker and wall switch. Verify all wire connections are secure. Test with a known working switch or bypass the switch temporarily. |
| Light flickers or dims inconsistently. | Incompatible dimmer. Loose wiring. Overloaded circuit. |
Ensure dimmer is ELV or TRIAC compatible. Check all wiring connections. Reduce load on the circuit or consult an electrician. |
| Incorrect color temperature. | CCT switch set incorrectly. | Turn off power, access the driver box, and adjust the 5-CCT selectable switch to the desired setting. |
Specifications
- Model: R2DRDN-F9CS-WT
- Brand: WAC Lighting
- Type: 2in LED Round Recessed Light
- Power: 9W
- Delivered Lumens: 725lm
- CRI: 90
- Rated Hours: 50,000
- Color Temperature: 5-CCT Selectable (2700K, 3000K, 3500K, 4000K, 5000K)
- Voltage: 120V-277V Universal
- Dimming: ELV (to 10%), TRIAC (to 5%)
- Cutout Size: 3 inches (round)
- Ceiling Thickness: 0.5in to 1.5in
- Material: Die-cast aluminum with 20-gauge steel driver box
- Certifications: ETL & cETL UL #1598, IC-Rated, Airtight, CEC Title 24 Compliant, Energy Star 2.0 Certified, Title 24 JA8-2016
- Indoor/Outdoor Usage: Indoor, Outdoor (Wet Location Listed)
- Product Dimensions: 12.4"L x 10.43"W x 4.25"H (Frame-in kit and driver box)
Warranty and Support
This WAC Lighting product is covered by a 5-year manufacturer's warranty. For warranty claims or technical support, please contact WAC Lighting customer service. Retain your proof of purchase for warranty validation.
For additional information or support, visit the official WAC Lighting website or contact their customer service department.
WAC Lighting is a registered trademark. All rights reserved.


