
1. Introduction
Thank you for choosing the Ocikry Wireless Ear Otoscope Q10. This device is designed to provide a clear view of the ear canal, nasal passages, oral cavity, and skin, assisting in personal health monitoring and earwax removal. Featuring a 1080P HD camera and a 1.38-inch IPS display, it offers a convenient and effective way to observe internal body areas. Please read this manual thoroughly before use to ensure proper operation and safety.
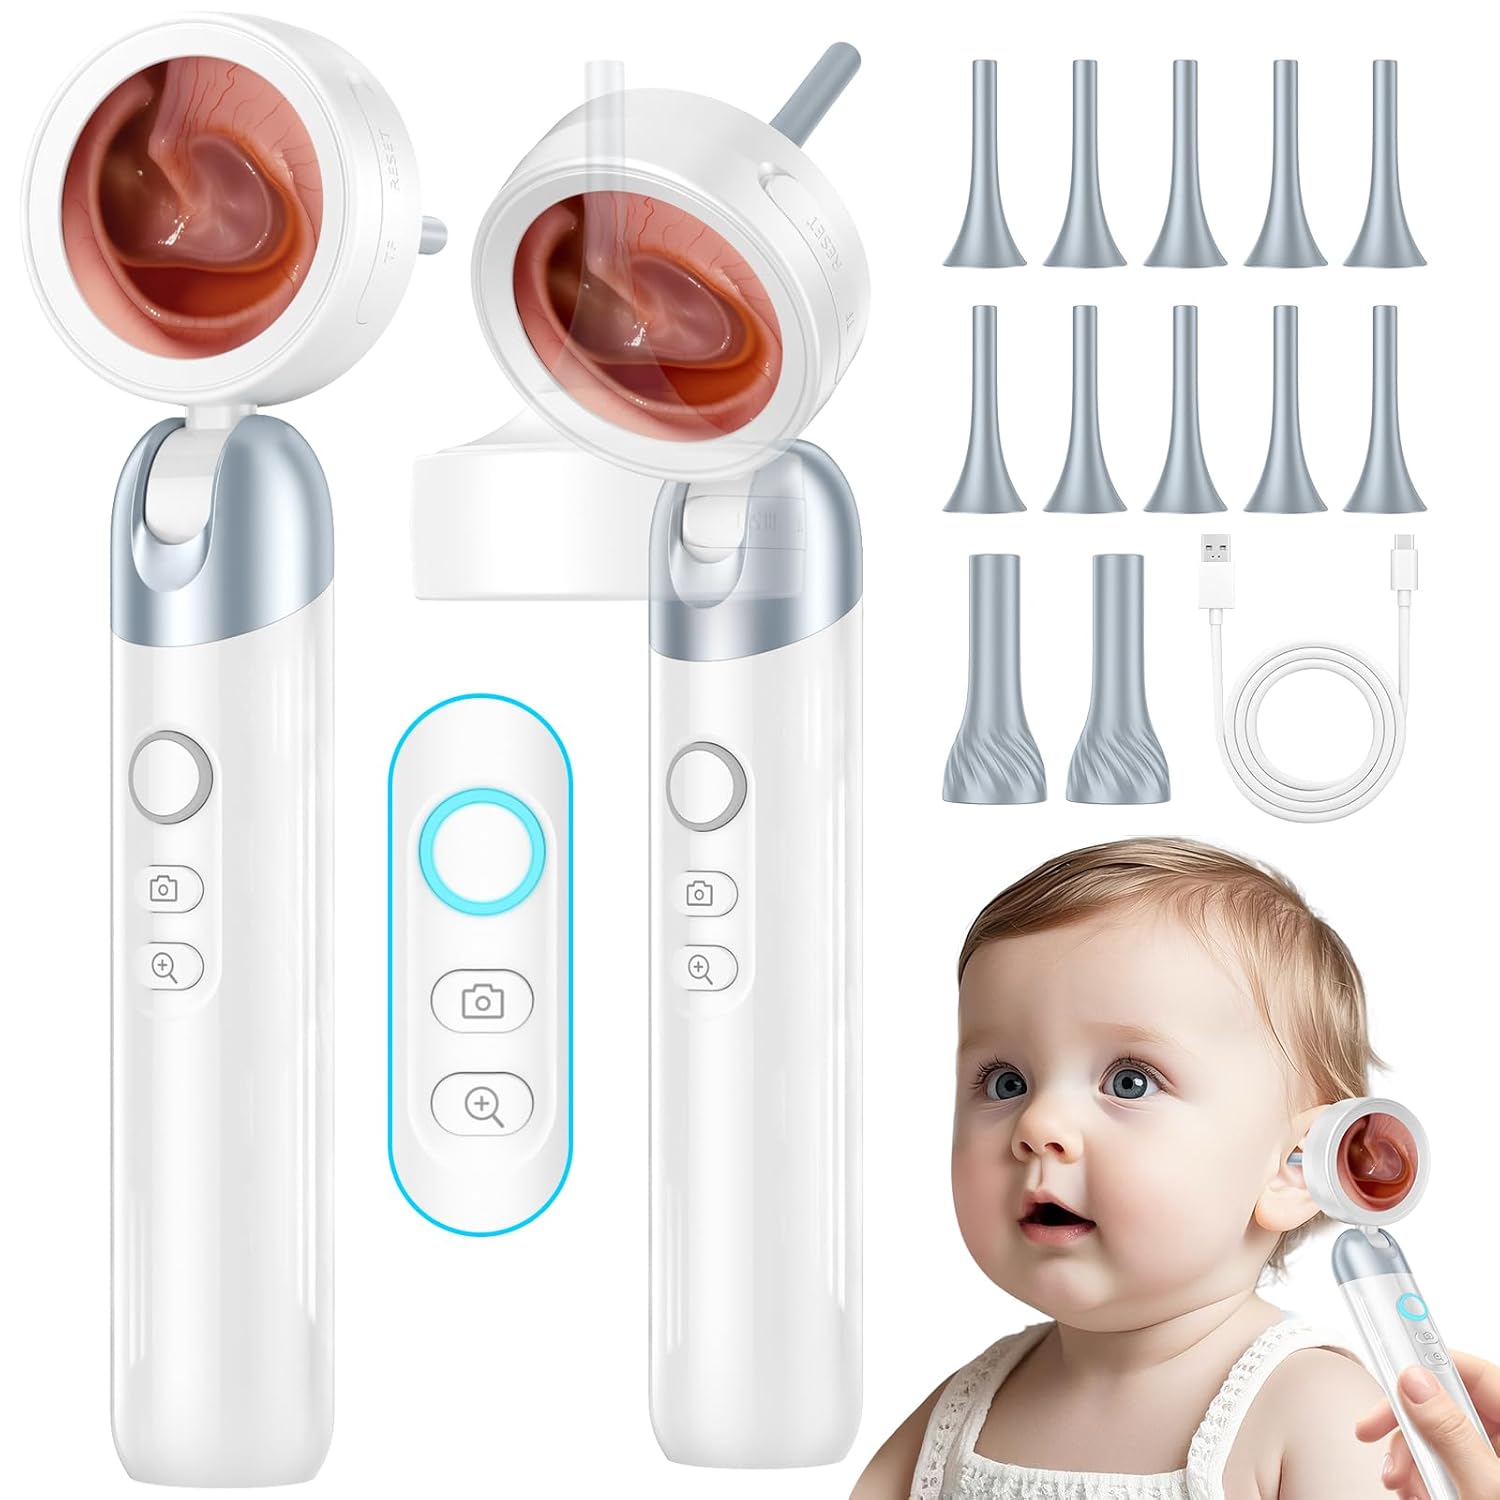
The Ocikry Wireless Ear Otoscope Q10, its various components including different sizes of ear speculums, cotton swabs for cleaning, and a USB-C charging cable. A child is shown interacting with the otoscope, demonstrating its intended use.
2. Safety Information
- Do not insert the otoscope too deeply into the ear canal to avoid injury.
- Always use the appropriate silicone inspection tip for the intended area of examination.
- Clean the inspection tips thoroughly before and after each use to prevent cross-contamination.
- Keep the device out of reach of children when not in use. Adult supervision is recommended when used on children or pets.
- Avoid using the device if you experience pain or discomfort. Consult a medical professional if symptoms persist.
- Do not attempt to disassemble or modify the device.
- Charge the device using the provided USB-C cable and a compatible power adapter.
3. Package Contents

This image presents a clear view of all items included in the product package.
- Ocikry Wireless Ear Otoscope Q10 (1 unit)
- Ear Speculums Cover (10 units)
- Skin Speculums Cover (2 units)
- Cotton Swabs (10 units)
- USB-C Charging Cable (1 unit)
- User Manual (1 unit)
4. Product Features
The Ocikry Q10 Otoscope is equipped with advanced features for comprehensive and safe examinations:
- 1.38" IPS Display with 1080P HD Clarity: Features a high-quality IPS display and a 2MP CMOS sensor for clear, detailed images, aiding in precise examination and earwax removal.
- Compact and Safe Design: Equipped with 4 LED lights and a slim 3.9mm lens for easy navigation. A 90° foldable head enhances flexibility for hard-to-reach areas.
- Adjustable Brightness and Magnification: Offers 4 adjustable brightness levels and magnification options for a comfortable and effective experience.
- Photo and Video Recording: Capture images and videos. The device can store up to 300 photos internally. Video recording requires a TF card (up to 128GB, not included).
- Versatile Accessory Set: Includes 10 small-hole covers for detailed checks and 2 large-hole covers for broader areas, along with 10 cleaning swabs.
- Long Battery Life: Built-in rechargeable battery provides up to 8 hours of use on a 3-hour charge.
- PC Connectivity: Connects to a PC for viewing images and videos on a larger screen.

This image illustrates the key features of the Ocikry Q10 Otoscope, such as its 1.38-inch IPS display, 1080P HD camera, photo and video recording capabilities, 90-degree rotating inspection head, 1-4x image zoom, support for TF cards, and playback function.

The image highlights the 90-degree foldable inspection head for enhanced flexibility and the four magnification levels available for detailed viewing.
5. Setup
5.1. Charging the Device
- Connect the provided USB-C charging cable to the charging port on the otoscope.
- Plug the other end of the cable into a compatible USB power adapter (not included) or a computer's USB port.
- The charging indicator light will illuminate during charging and turn off when fully charged. A full charge typically takes about 3 hours.
5.2. Attaching Inspection Tips
The otoscope comes with two types of replaceable silicone tips: small-hole covers for detailed checks (ears, nose, mouth) and large-hole covers for broader areas (skin).

This image displays the two distinct types of replaceable silicone inspection tips provided with the otoscope: a narrow, elongated tip designed for ear, nose, and mouth examinations, and a broader, textured tip suitable for skin inspections.
- Select the appropriate silicone inspection tip for your intended use.
- Gently push the chosen tip onto the camera lens until it is securely in place.
- Ensure the tip is firmly attached before use.
6. Operating Instructions
6.1. Power On/Off
- Power On: Long press the power button (usually the central button) until the screen illuminates.
- Power Off: Long press the power button again until the screen turns off.
6.2. Adjusting Brightness and Magnification
- Brightness: Short press the brightness adjustment button (often indicated by a light icon) to cycle through 4 levels of LED light brightness.
- Magnification: Short press the zoom button (often indicated by a magnifying glass icon) to adjust the image magnification (1x to 4x).

The image demonstrates the four adjustable brightness levels of the LED lights and indicates the buttons for taking photos and recording videos.
6.3. Taking Photos and Recording Videos
- Taking Photos: Short press the photo button (camera icon) to capture an image. The device can store up to 300 photos internally.
- Recording Videos: Long press the video button (video camera icon) to start recording. Long press again to stop. A TF card (not included) is required for video storage.
- Playback: Long press the playback button to access recorded photos and videos.

The image focuses on the otoscope's compact 3.9mm diameter camera and the accessible TF card slot, indicating its readiness for use and expandable storage capabilities.
6.4. Connecting to a PC
The otoscope can be connected to a computer for viewing images/videos on a larger screen or for transferring files.

The image demonstrates the process of connecting the Ocikry Q10 Otoscope to a computer using a USB-C cable, enabling users to view images and videos on a larger screen or transfer files.
- Ensure the otoscope is powered on.
- Connect the otoscope to your PC using the USB-C cable.
- The device should appear as a removable storage device or a webcam, depending on your operating system and selected mode.
- You can then access the stored photos and videos or use the device as a live camera feed.
7. Maintenance
7.1. Cleaning
- Always remove the silicone inspection tip before cleaning.
- Clean the silicone tips with soap and water or an alcohol wipe. Ensure they are completely dry before reattaching.
- Wipe the camera lens gently with a soft, dry cloth or a lens cleaning wipe. Avoid abrasive materials.
- Clean the main body of the otoscope with a soft, damp cloth. Do not immerse the device in water.
7.2. Storage
- Store the otoscope in a cool, dry place away from direct sunlight and extreme temperatures.
- Keep the device and accessories in their original packaging or a protective case to prevent damage.
- Ensure the device is fully charged before long-term storage to maintain battery health.
8. Troubleshooting
| Problem | Possible Cause | Solution |
|---|---|---|
| Device does not power on | Low battery; Device malfunction | Charge the device fully. If problem persists, contact support. |
| Image is blurry or unclear | Camera lens dirty; Incorrect focal distance; Tip not properly attached | Clean the camera lens and inspection tip. Adjust the distance to the area being viewed. Ensure tip is secure. |
| Cannot take photos or record videos | No TF card inserted (for video); Internal memory full (for photos); Incorrect button press | Insert a TF card for video recording. Delete old photos or transfer them to a PC. Ensure correct button is pressed (short press for photo, long press for video). |
| Device not recognized by PC | Faulty USB cable; Driver issue; Incorrect connection mode | Try a different USB-C cable or PC port. Ensure the device is powered on. Check PC settings for new hardware. |
| Short battery life | Battery not fully charged; Old battery | Ensure the device is charged for the recommended 3 hours. Battery degradation over time is normal; contact support if significantly reduced. |
9. Specifications
| Feature | Detail |
|---|---|
| Model Number | Q10 |
| Display Size | 1.38 inches IPS |
| Camera Resolution | 1080P HD (2MP CMOS sensor) |
| Lens Diameter | 3.9mm |
| LED Lights | 4 (with 4 adjustable brightness levels) |
| Battery Type | Lithium Ion (included) |
| Battery Life | Up to 8 hours of use |
| Charging Time | Approximately 3 hours |
| Internal Photo Storage | Up to 300 photos |
| External Storage | Supports TF card up to 128GB (not included) |
| Connectivity | USB-C for charging and PC connection |
| Foldable Head | 90° rotation |
| Package Dimensions | 8.94 x 5.12 x 2.36 inches |
| Weight | 13.44 ounces |
10. Warranty and Support
Ocikry is committed to providing reliable and high-quality products. This product is backed by a manufacturer's warranty against defects in materials and workmanship under normal use. For specific warranty details, please refer to the warranty card included in your package or contact Ocikry customer support.
If you encounter any issues or have questions regarding your Ocikry Wireless Ear Otoscope Q10, please do not hesitate to contact our customer support team. We are dedicated to ensuring your satisfaction.
Contact Information:
Please refer to the contact details provided on the product packaging or the official Ocikry website for the most up-to-date support information.