
1. Product Overview
This instruction manual provides guidance for assembling and preparing your Games Workshop Warhammer 40,000 Space Wolves: Wolf Guard Terminators plastic model kit. This kit contains 5 highly detailed plastic miniatures designed for the Warhammer 40,000 tabletop game. The models offer extensive customization options, including various weapons and interchangeable parts such as heads and shoulder pads, allowing for unique representations of your Wolf Guard Terminators.
The Wolf Guard Terminators are elite heavy infantry units for your Space Wolves army, known for their resilience and devastating firepower. Proper assembly and painting will enhance their appearance on the battlefield.
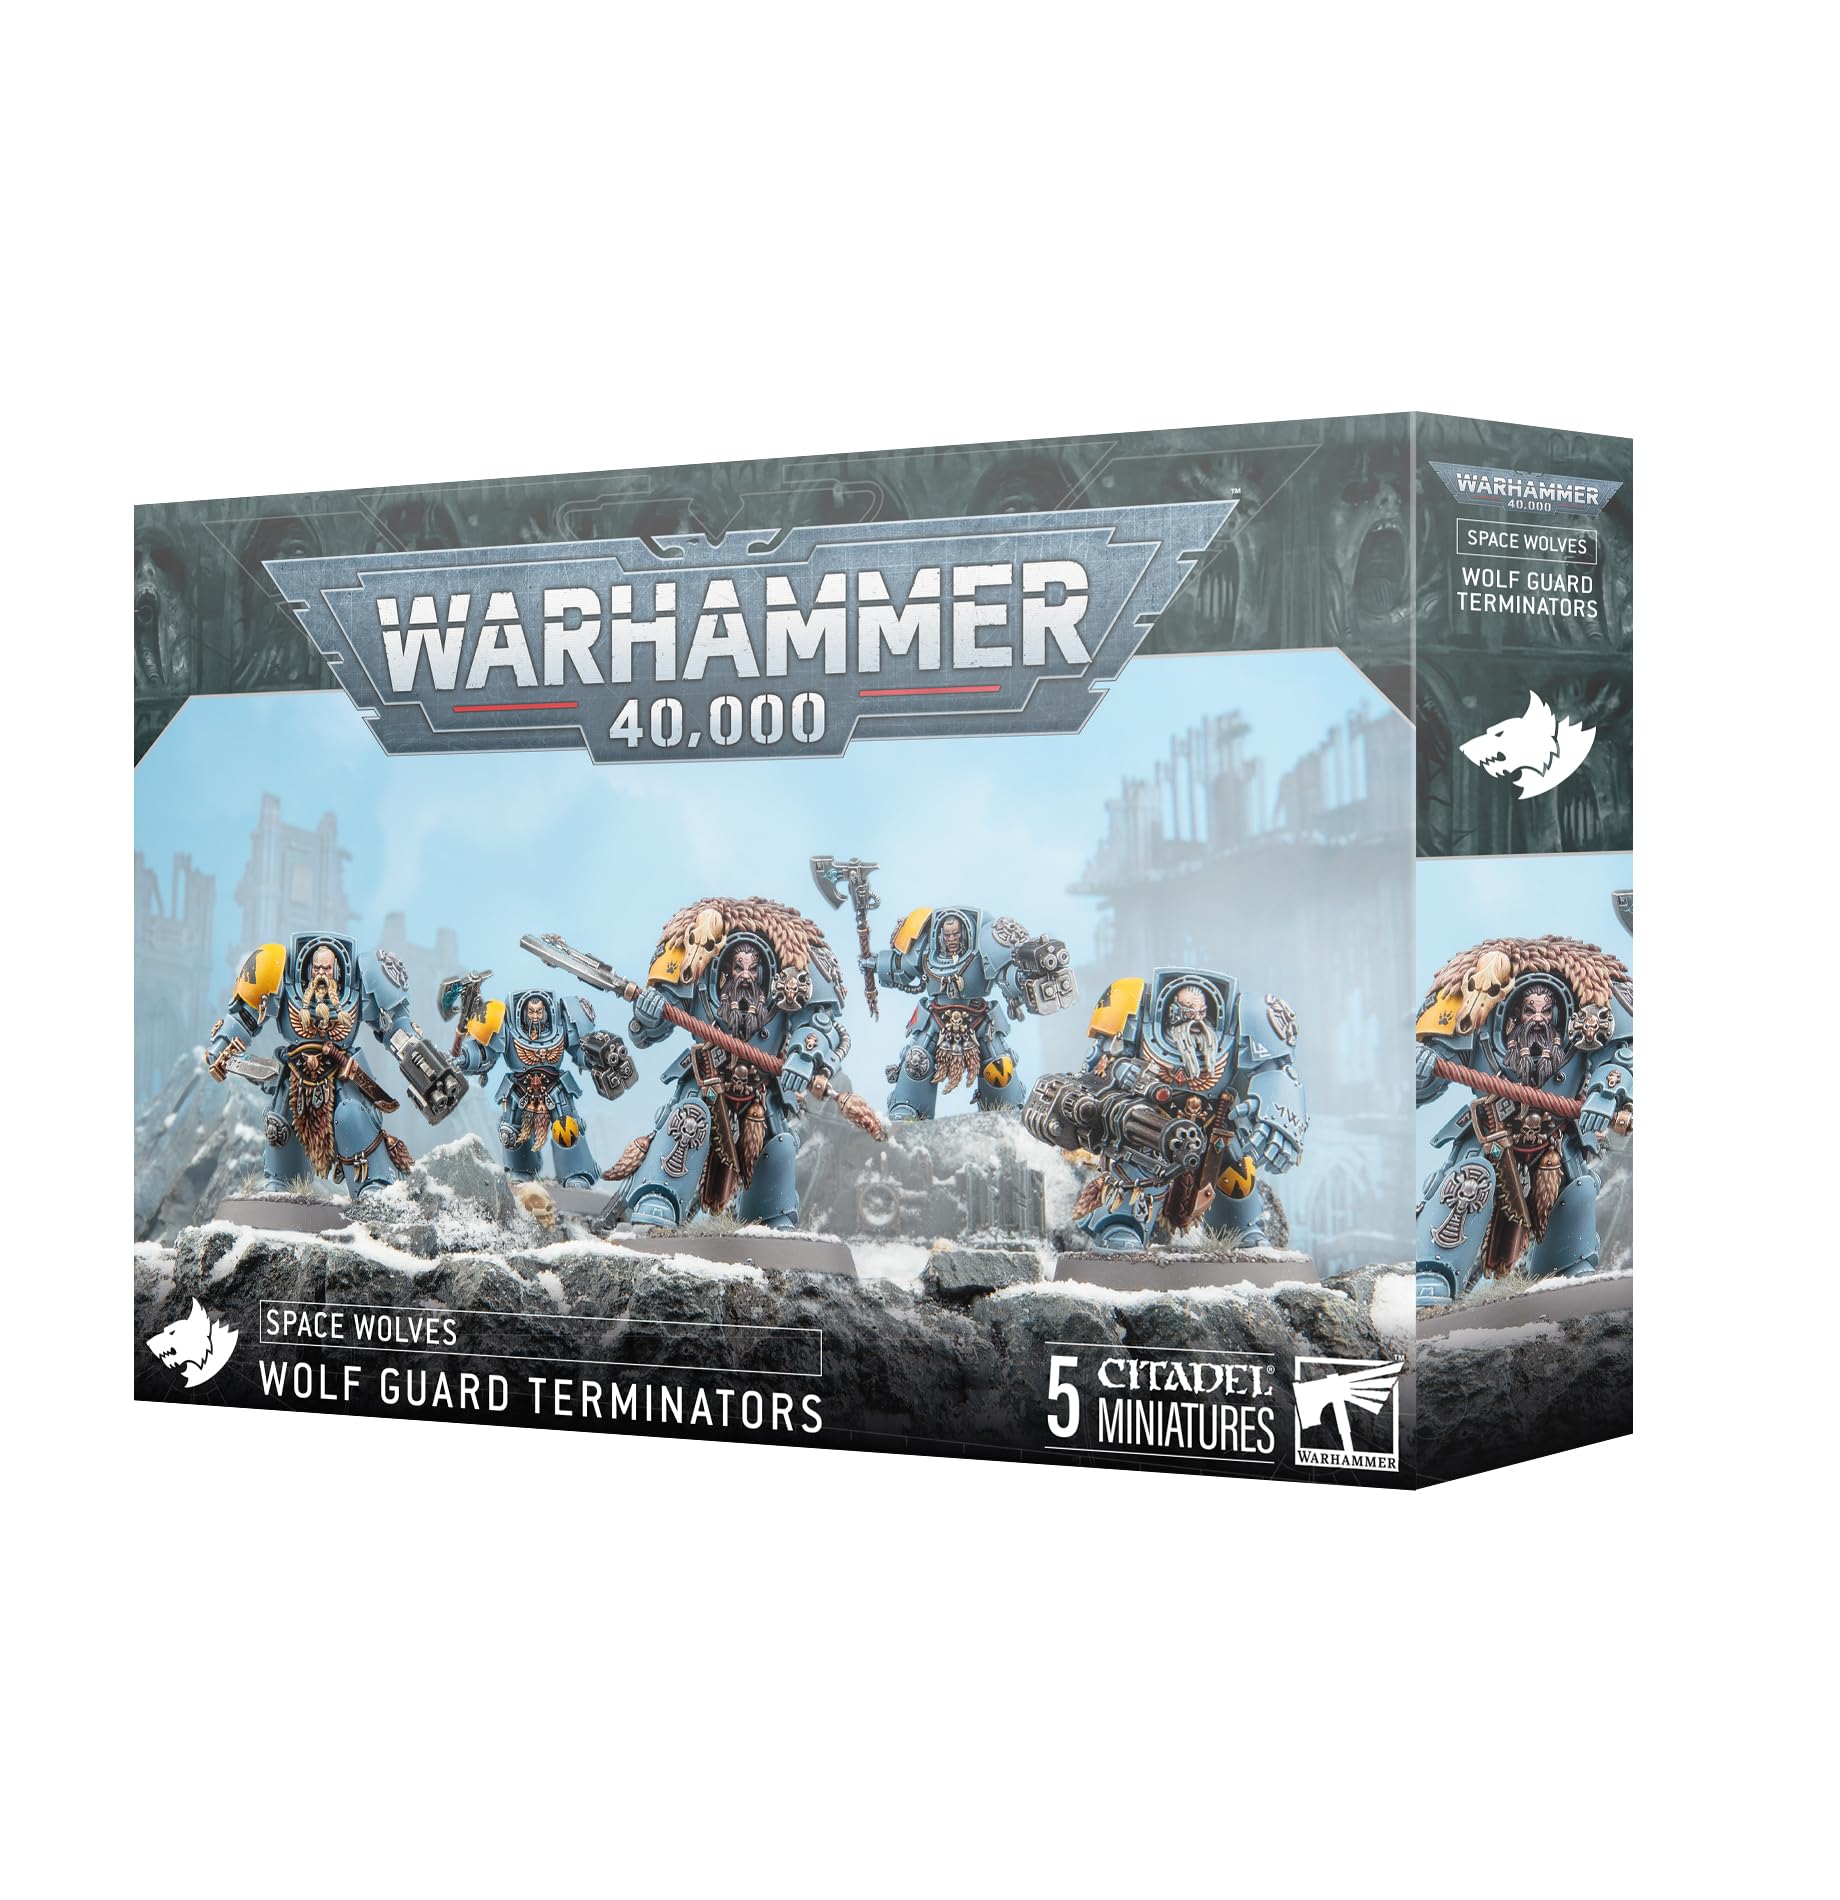
Figure 1: The product box displaying the Wolf Guard Terminators miniatures. This image provides a visual reference for the assembled models and their potential appearance.
2. Safety Information
Please read all safety warnings before beginning assembly. This product is a plastic model kit and contains small parts. It is recommended for ages 14 and up.
- Choking Hazard: Small parts are included. Keep out of reach of young children.
- Sharp Tools: Assembly may require hobby knives, clippers, and files. Use with caution and adult supervision if necessary.
- Adhesives: Plastic glues and paints may contain chemicals. Use in a well-ventilated area. Avoid contact with skin and eyes. Refer to the specific glue and paint product instructions for detailed safety information.
- Age Recommendation: This product is intended for individuals aged 14 years and older.
3. Assembly Instructions
Follow these steps for optimal assembly of your Wolf Guard Terminators. Refer to the diagrams provided on the sprue or in the included leaflet for specific part identification and placement.
- Preparation: Carefully remove all plastic components from the sprues using hobby clippers. Use a hobby knife or file to clean any mold lines or excess plastic (flash) from the parts. Ensure all surfaces to be glued are clean and smooth.
- Dry Fit: Before applying glue, dry fit parts together to ensure a proper fit. This helps prevent errors and ensures components align correctly.
- Torso Assembly: Begin by assembling the main torso sections for each Terminator. Apply a small amount of plastic glue to the joining surfaces and hold firmly until the glue sets.
- Legs and Base: Attach the leg components to the torso. Once the main body is assembled, glue the miniature to its designated base. Ensure the model is stable and balanced.
- Arms and Weapons: Select the desired weapon options for each Terminator. The kit provides various choices such as power fists, lightning claws, storm bolters, thunder hammers, and storm shields. Attach the arms and weapons to the torso, paying attention to pose and alignment.
- Heads and Shoulder Pads: Choose from the interchangeable head options (helmeted or bare-headed) and shoulder pads. Glue these components into place. The shoulder pads often feature Space Wolves iconography.
- Details and Accessories: Attach any additional decorative elements or accessories, such as wolf pelts, pouches, or purity seals, to further personalize your miniatures.
- Curing Time: Allow sufficient time for all glue joints to fully cure before handling the models extensively or proceeding to the painting stage.
4. Painting Guide
Painting your Wolf Guard Terminators brings them to life. Here is a basic guide to achieve a high-quality finish.
- Preparation (Priming): Before painting, apply a thin, even coat of primer to all assembled miniatures. This provides a consistent surface for paint adhesion. A grey or black primer is often suitable for Space Wolves.
- Basecoats: Apply thin, even coats of your chosen base colors. For Space Wolves, a light grey-blue (e.g., Fenrisian Grey or The Fang) is typical for the main armor. Use yellow for the shoulder pad trim and metallic colors for weapons. Apply multiple thin coats rather than one thick coat to preserve detail.
- Shading: Once basecoats are dry, apply a wash (e.g., Nuln Oil or Agrax Earthshade) into the recesses of the armor and other details. This adds depth and definition.
- Layering and Highlighting: Reapply your base colors to raised areas, avoiding the shaded recesses. Then, apply lighter shades of your base colors to the most prominent edges and raised details to create highlights. For example, a lighter grey-blue for armor edges.
- Detailing: Paint smaller details such as eyes, purity seals, wolf pelts, and weapon details. Use fine brushes for precision.
- Basing: Once the miniature is painted, decorate the base. This can involve applying texture paints, flock, or small rocks to create a thematic environment (e.g., snowy terrain as depicted on the box art).
- Varnishing (Optional): Apply a clear matte or satin varnish to protect your painted miniatures from wear and tear.
5. Maintenance
Proper care will ensure the longevity and appearance of your Wolf Guard Terminators.
- Cleaning: Dust miniatures regularly using a soft brush (e.g., a makeup brush) or a can of compressed air. Avoid using water or harsh cleaning agents, as these can damage paintwork.
- Storage: Store miniatures in a cool, dry place away from direct sunlight to prevent paint fading or plastic warping. Use foam-lined cases or display cabinets to protect them from physical damage during transport or storage.
- Handling: Handle miniatures by their bases whenever possible to avoid touching painted surfaces, which can cause oils from your skin to degrade the paint over time.
6. Specifications
| Product Name | Warhammer 40,000 - Space Wolves: Wolf Guard Terminators |
| Brand | Games Workshop |
| Model Number | 53-36 |
| Material | Plastic |
| Number of Miniatures | 5 |
| Product Dimensions | 4 x 0.5 x 3 inches (packaging) |
| Item Weight | 7.1 ounces |
| Recommended Age | 14 years and up |
| Language | English |
7. Troubleshooting
This section addresses common issues encountered during model assembly and painting.
- Parts Not Fitting:
- Ensure all mold lines and flash have been removed from the joining surfaces.
- Verify that you are using the correct parts for the intended connection by referring to the assembly diagrams.
- Dry fit parts before applying glue to identify and correct alignment issues.
- Glue Not Holding:
- Ensure surfaces are clean and free of paint, oil, or dust.
- Use plastic cement specifically designed for polystyrene models. Super glue (cyanoacrylate) can also be used but cures differently.
- Apply a small amount of glue and hold the parts firmly together for the recommended curing time.
- Paint Not Adhering or Peeling:
- Ensure the model was properly primed before painting. Primer creates a surface for paint to grip.
- Clean the model thoroughly before priming to remove any release agents or oils.
- Apply paint in thin coats. Thick coats are more prone to chipping and obscuring detail.
- Paint Appears Lumpy or Textured:
- This often occurs when paint is applied too thickly or has dried too quickly. Thin your paints with a small amount of water or a dedicated thinner.
- Ensure the painting environment is not too hot or dry.
8. Warranty and Support
Games Workshop products are manufactured to high standards. If you encounter any issues with missing or defective components, please contact Games Workshop customer support directly.
For further assistance, assembly guides, painting tutorials, and product information, please visit the official Games Workshop website:
Official Website: www.games-workshop.com
Please retain your proof of purchase for any warranty claims or support inquiries.


